manodeoro Posted June 29, 2017 Report Share Posted June 29, 2017 (edited) Here's another tuto from the "City Dweller Series" Some have already read my «Easiest way to drill vintage case lugs for 2mm bars when you’re a city dweller» but today we will go further. I have never seen a tuto showing how to drill lugs if you live in a city flat and have a dremel but no place for a drill-press (unless you show your girl/boy friend how to open the main door and leave) so I hope this one could be usefull. So ... let's go to the facts. A few days ago I had to drill the lugs of a 16610 case with non pre-drilled lugs (and a sh...y paperclip bezel construction) so I have made some pics all along the process. I have NO drill-press (I know I could show my better half how to open the main door and leave but ... I'm not ready to do that). So what did I use and how did I do ? My tools : - a punch - my 40$ dremel-like - a 50$ little drill stand (got it on sale on Amazon) - an 43 mm adapter (10$ on ebay) - a cheap (but good) vise - 1mm + 1.3mm HSS drill bits - cutting oil - "The Foundation" (Zac Brwon Band) I choosed a 5027000 Wolcraft drill-stand because it had a toothed rack and a return spring, it could be put in parts and in a card box (altogether with vise, drill bits and cutting oil) in less than 5 minutes. That cardbox goes to the cellar when I dont need those tools while my dremel-like stays in a drawer with all the watch parts and ongoing projects. And if you ever wonder why I use 1mm drill bits AND 1.3mm drill bits : - it's easier (IMHO) to center on the hole you punched if you drill 1mm first then 1.3mm - where I leave (Europe) I can buy 10x1mm HSS drill bits for about 5$ and 1.3mm HSS drill bits I bought on cousins.uk are 5$ each so I really take care of them An now the process (took me about 1 hour). 1 - Open the cardbox and build the drill stand You'd better protect your (kitchen) table because you will use a bunch of cutting oil 2 - Put the 43mm adapter and prepare you drill bits Of course you screw you dremel on the adapter and put a 1mm HSS drill bit ... I forgot to take a specific pic 3 - Punch the watch lugs Note that I had already marked the lugs with an extra-fine permanent pen You'd better punch large enough so that the 1mm drill bit can easily find its place in the hole 4 - Place you watch case in the vice I put some painter tape on the vice to protect the case It's better to place some metal pieces under the lugs so that the case dont go down when you push a little with the drill bit 5 - Place the vice on the drill stand and center the drill bit precisely on the punched hole 6 - Put some oil on the punched hole and drill Don't be stingy with the oil ... there is never too much of it About the speed I used I cannot be precise because my dremel-like has a variator marked from 0 to 5. I worked bteween 1 and 3 so the speed was probably between 7000rpm and 18000rpm. From my very short experience in drilling and depending on the drill bits, I would say that the speed is good when the "steel-dust" comes out easily with some oil while you drill. And do not forget to clean the lug and put some new oil every times it looks like the last PIC here ... about 3 times on every lug. 7 - Now you have drilled all 4 lugs with a 1mm bit, so place the 1.3mm bit on the dremel-like and drill again That part is very easy as you process the same as with the 1mm drill bit. But do not forget about beeing "oily" 8 - Now you have an early-oily 16610 case so just wash it and clean it and it will be just "early" You still have to thin the lugs a little, cut nice chamfers, polish the sides and crownguards and do a nice Rolex brush on the upside of the case, but all this is itty-bitty cause you have done the tough part. Hope this helps. And please leave your comments, questions and advices. Edited June 29, 2017 by manodeoro 1 Quote Link to comment Share on other sites More sharing options...
themannier Posted June 29, 2017 Report Share Posted June 29, 2017 This is a very interesting topic bro, thanks for all the pictures and the job ! Quote Link to comment Share on other sites More sharing options...
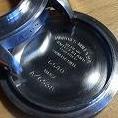
manodeoro Posted June 29, 2017 Author Report Share Posted June 29, 2017 Thanks Now that case is gone back to whom it belongs ... Quote Link to comment Share on other sites More sharing options...
Buddhabar Posted June 29, 2017 Report Share Posted June 29, 2017 Thanks for sharing the your job… very nice.Is the 1mm hss as the same cobalt drill? Thanks. Quote Link to comment Share on other sites More sharing options...
manodeoro Posted June 29, 2017 Author Report Share Posted June 29, 2017 Thanks for sharing the your job… very nice.Is the 1mm hss as the same cobalt drill? Thanks. I really dont know I just bought 1mm drill bits marked HSSEnvoyé de mon XT1068 en utilisant Tapatalk Quote Link to comment Share on other sites More sharing options...
Recommended Posts
Join the conversation
You can post now and register later. If you have an account, sign in now to post with your account.