

jakethemouse
-
Posts
35 -
Joined
-
Last visited
Posts posted by jakethemouse
-
-
19 hours ago, droptopman said:
Good parts list. WSO 580's off eBay match up good with that case set and Mary's 7836.
Here was my Whoopy dialed Franken.
Thanks.
Are these the right endlinks I have to get?
-
4 hours ago, headtube said:
Great build. I am about 12 months behind you as a supernoob! Also inspired by 1680's amaxing blog/post on his build!
How much does the tube/crown combo affect waterproofness? @jakethemouse have you had this one tested / ambition to waterproof ?
I didn't get the tube redone but I can see the gaskets operating in the crown and tube when I close. Haven't test it for waterproofing yet.
10 hours ago, Bart Cordell said:So do you know if it's a 24-600 or 24-603 crown ?

I'm not sure which one he used but I'll can ask.
-
I got JMB to find me a gen crown that fit his existing tube which worked out great.
I'm a fan of your work Bart. Loving your 6200 project
")
-
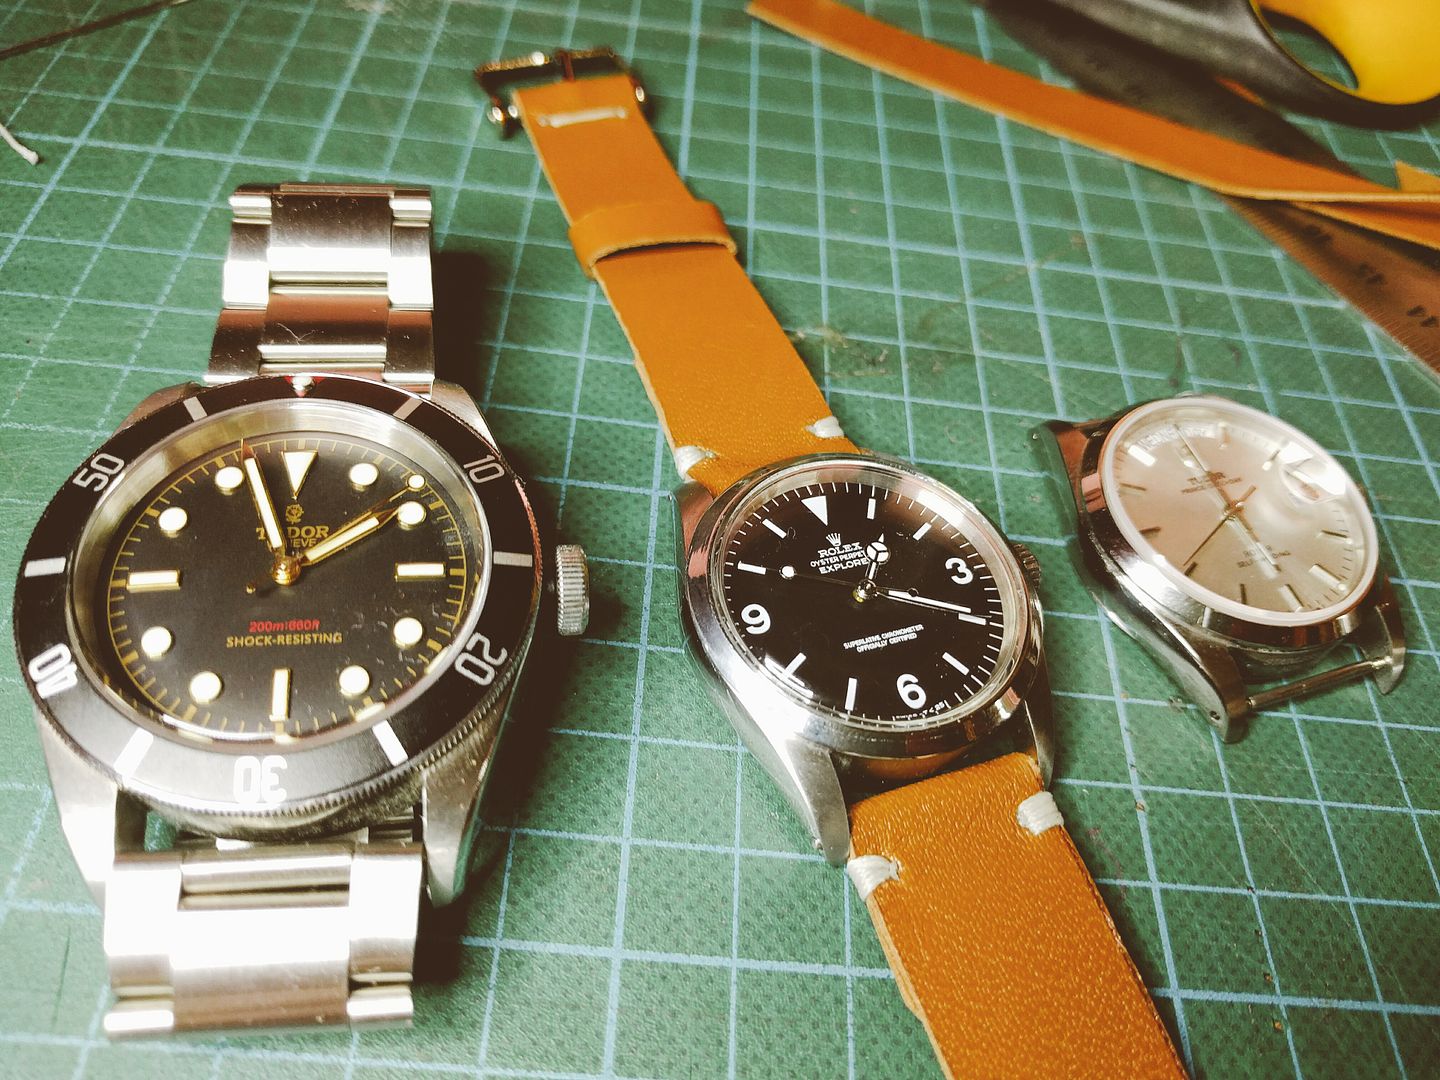
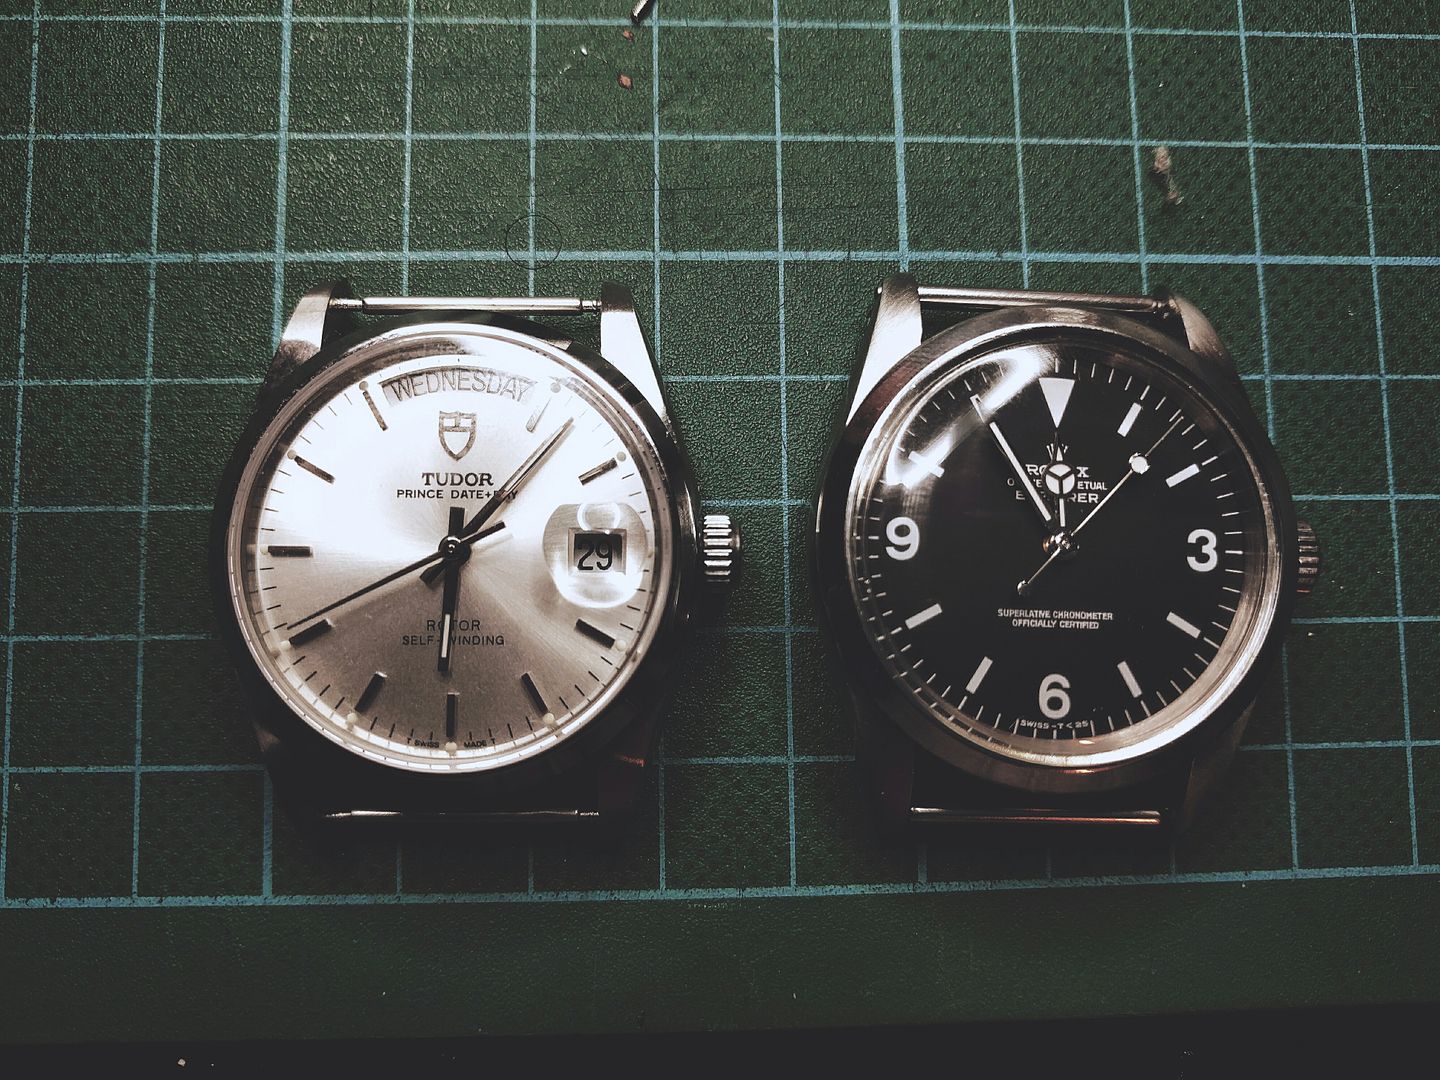
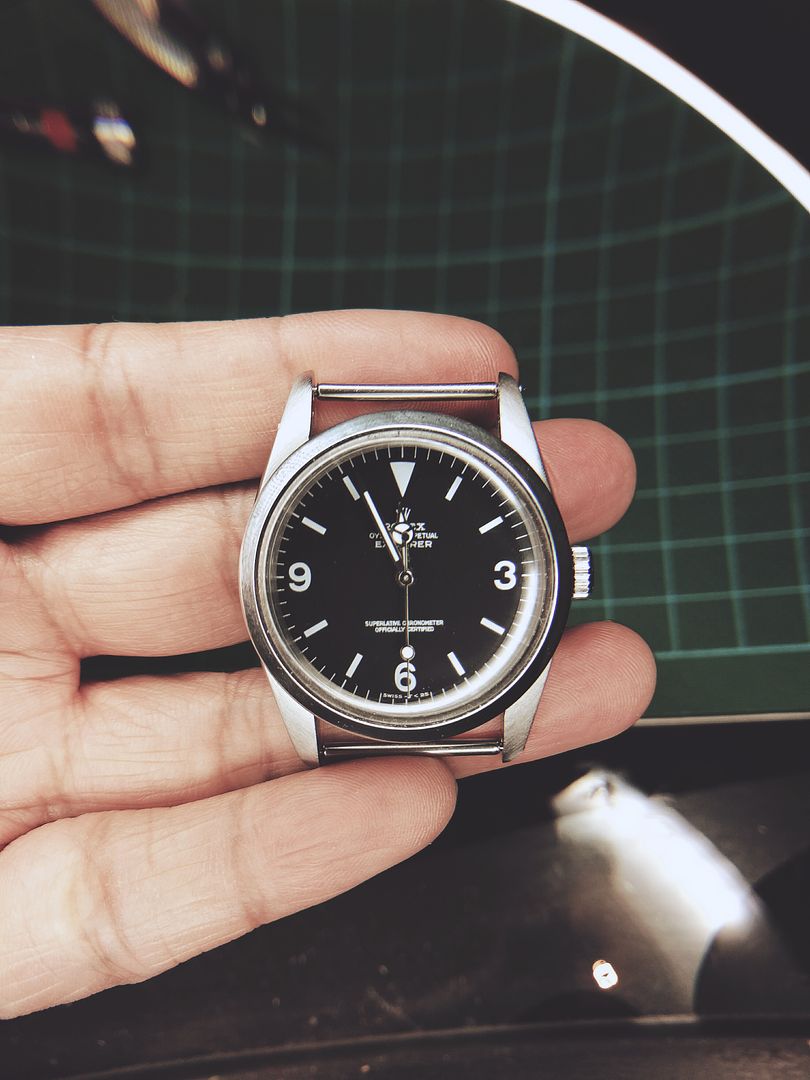
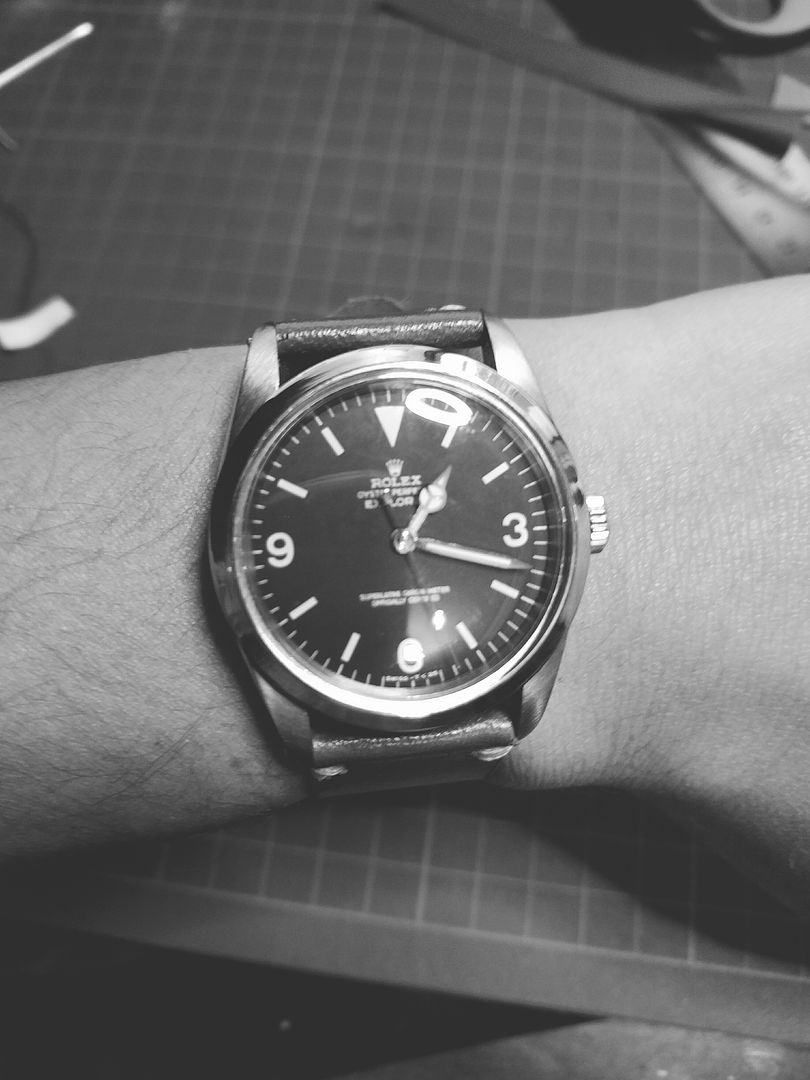
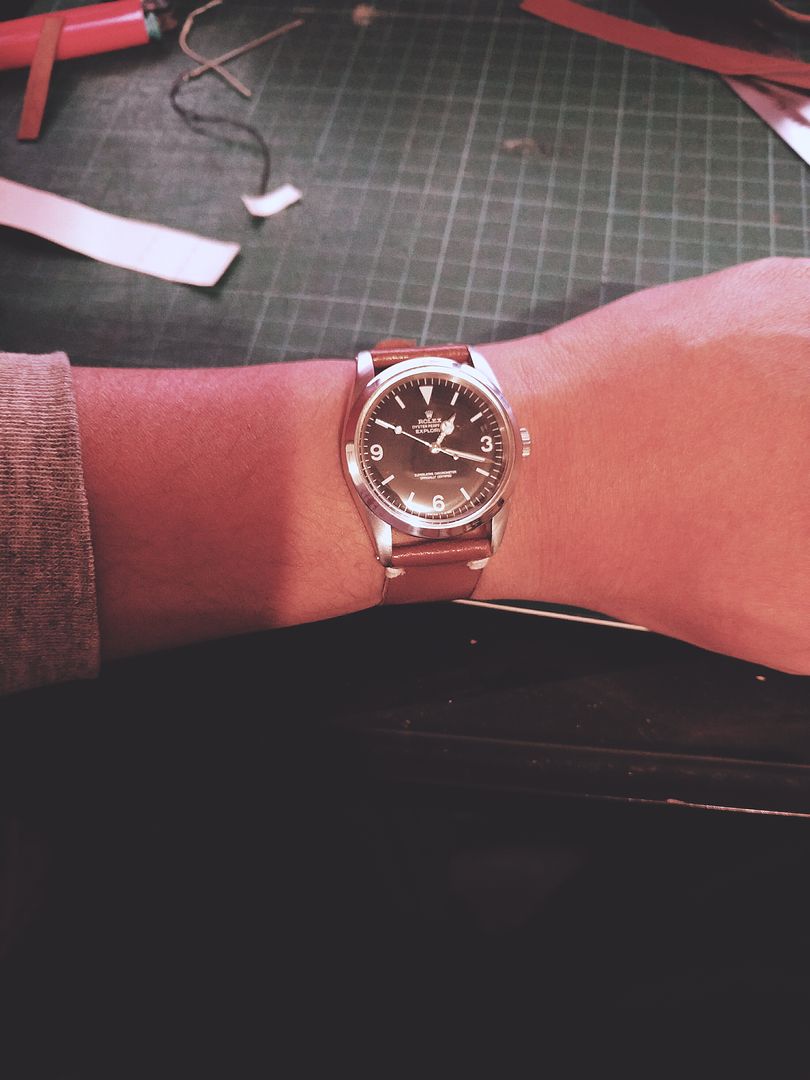
I originally set out to build a Tudor DayDate after being inspired by Jerkstores build-a-long frankenjust guides, But fell in the love with the 1016 after reading the many threads, especially LHOOQ and 1680's Vintage 1016 build projects.
I was lucky enough to snatch up a Whoopy dial which is gorgeous by the way and the catalyst for this build.
I won't say much more cause I'm a noob but would like to thank JMB and anyone else who helped my nooby PMs
Feel free to make any suggestions for improvements. I couldn't wait for the bracelet to come so quickly made a leather strap to wear it before I ship her off to get lumed.
Build details are below.
- JMB V2 - with engravings
- Whoopy 1016 Dial
- JMB Hands (purchased TC Hands on M2M but still not here after 4weeks
 )
)
- Gen crown
- Gen Spring bars
- Mary Oyster 7836 bracelet on the way
- Clark T21
- 2824-2 movement
- endlinks (please recommend)
- to complete the look anyone know where I can get an old Rolex box?
Some Glamour shots
-
 1
1
-
-
so this just got more interesting. The company I am talking to already has a 3D scan of the daytona case. Now Im trying to convince them to sell us the file but because it was done for another customer, they have proprietary right to it. He is going to check and see if the other party is willing to sell it to us.
But again this is for the daytona.

Amazing what can be Done when they community bands together.
Sent from my Nexus 6P using Tapatalk
-
Subscripting. You have peaked my interest.
Sent from my Nexus 6P using Tapatalk
-
2 hours ago, Bart Cordell said:
Didn't see the glitch in "officially" before I take pictures
Will keep it as is until i can't bear it anymore.
Fits the character of the watch.
Keep up the great work. Looking better and better every update.
-
Exciting. Can't wait.
Sent from my Nexus 6P using Tapatalk
-


Come a long way...
Stunning work mate!
Sent from my Nexus 6P using Tapatalk
-
1
-
-
On 6/6/2016 at 8:47 PM, blue. said:
The alignment was done on an old ETA plate, but you could do it also directly on the movement itself.
Of course you should not forget to cover up the rest of the movement with thin nylon or similar to protect the movement from possible spilled out epoxy. As epoxy has a low viscosity (thick and sticky) it should not wander by itself once you had applied sufficient amount on the dial feet.
The feet need to be locked in the movement a bit higher than usual, to allow the dial to sit clear of any other parts while being centred and the epoxy drying.
Thanks Blue.
Great help.
-
1
-
-
On 28/5/2016 at 8:20 AM, blue. said:
I can warmly recommend the following dial feet, as they have a thin wide base. When epoxied they sit very strong on the dial. Already did a couple of disassembly's of the movement, dial ... etc.
Bear in mind they are a bit long and need to be cut. I did so prior to glueing, but it was necessary to shorten even more. Then I started to file down the already glued dial feet. This must be of sufficient proof that they hold enough.
The first time I saw the Bergeon dial feet I immediately saw that the tiny base they have would be of a problem, due to mechanical forces involved.
Here are the dial feet I have a positive experience with. Was a bit tricky to order as back then (2012 they had no online shop running).
https://www.agtshop.co.uk/product/462-gents-dial-feet.html


Interesting indeed.
How did you align the dial feet before epoxy? did you use a template of some sort?
-
Thanks Gentle for posting on my RWG thread.
Used the search box here and your tutorial is exactly what I need
-
Wow great looking build. Where did you get the day wheel?
Sent from my Nexus 6P using Tapatalk
-
Removing the crystal should be the same as installing it but in reverse and using different die sizes.
They have some tutorials on how to use a crystal press. I can't help you with the rest I'll leave that to the experts around here.
-
Awesome I just ordered 2, one spare in case I break one.
Sent from my Nexus 6P using Tapatalk
-
A good way to get rid of fog or moisture from the inside of your watch is to put it in a bag of rice. It will absorb all the moisture from the inside of your watch.
That's what I do anyways.
I'll leave your crystal issues to the pros
Sent from my Nexus 6P using Tapatalk
-
This is a great thread. I've learn so much just reading through everyone's experiences.
-
Hope someone has the files. I would also love to get some of these printed, would help me big time and save a lot of time.
-
I'm making the 1016 into a vector file in Illustrator now. Should be able to squeeze in finishing it up this coming week. I'll post the file for download here once I clean it up and finish it
Awesome work mate
Sent from my Nexus 6P using Tapatalk


Decals print dials
in The Rolex Area
Posted
When are you going to start selling bart. Your builds are looking amazing.
Sent from my SM-G930F using Tapatalk