When you buy through links on our site, we may earn an affiliate commission.
Search the Community
Showing results for tags 'Chronometer'.
-
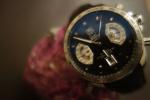
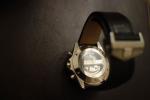
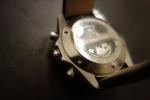
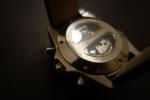
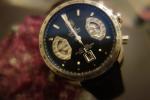
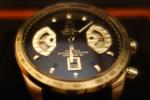
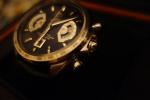
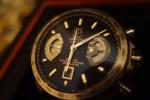
Check out the item posting on Trusty Time at ttw888.com/index.php?main_page=product_info&products_id=3407 Ok, so, onto the review. I unwrapped this beautiful rep today and couldn't have asked for more. It's made from a genuine used as sample (not 100% sure what that means, but assuming the casing is gen?) and it weighs in at just under 150g, so very substantial. It is, without a doubt, flawless. The detail is extraordinary, and the mechanism/complication works without an issues whatsoever. There was a light blue film on the crown and the start/stop, but this came off with my thumbnail, and as it was visible in the QC I have no issues with it. In addition to buying the watch, I also splashed out on a Tag Heuer box, as I feel an item of this quality needs a good home when it's not on my wrist. Again, I wasn't disappointed, and the leather/wood finish was indistinguishable from the real thing. My only little niggle, and it is a little one, is that the strap feels a bit plasticky, but this may resolve when the leather softens over time. Now, I can't finish this review without saying a few words about Andrew and Trusty Time. I have been absolutely BLOWN AWAY by the incredible level of customer service. Every response was dealt with almost immediately, he has been courteous, helpful and efficient. Oh, and the item was delivered within 10 days of being paid for. What more could I ask for? And now, on to the pictures...
- 10 replies
-
- Tag Heuer
- Grand Carrera
-
(and 3 more)
Tagged with:
-
Hello guys ! To start this topic I'm gonna quote Toad and his well known sentence : "What the @#%!$?? Another Omega Seamaster (SMP 300) Chronograph review?" Calm down ! it's not a review, I just wanted to talk about a project I had, a long time ago. (For those who remember, back in 2008, a friend gave me the parts that Omega replaced during the service of his gen SMPC http://www.rwg.cc/to...__fromsearch__1) I took some time to learn, find informations, get tools, parts etc. and a few month ago I started to build my SMPC ! First of all, the title is a joke !... Even the gen springbars don't fit !!! (ok, they fit but the endlinks are not perfectly acurate so the gen springbars are not usable with the rep bracelet. But I will talk about this bracelet later because there is a lot to say !) Let's start for real ! In it's acual stand my project is : - Gen ETA7750 - Gen Dial - Gen Hands - Gen datewheel - Gen rotor - Gen spacer ring, antimagnetic cover etc. - Main other parts are coming from a SMPC rep (from Tony) Assembly is not finished yet, due to a lack of time and because I wanted to waterproof the case before putting the mouvement in it ! So let's talk about waterproofing ! To test my case in the cheapest way, I have build a Nalgene tester as explained in the dedicated RWG topic ! That's what I used to do it : (Nalgene bottle, presto valve, pump with homologated manometer, duck tape, lunetz, ear protection, your empty case, water and white teflon tape) Now a few pictures because I know that's what you're waiting for ! Before testing I greased all the gaskets that are supposed to waterproof the watch. Below you can see the begining of the testing protocol (described on the dedicated topic) For my first attempt I tested up to 3.3 bars (3.1 on the picture) during 8 minutes. Unfortunately, as you can see on the next picture, this case LEAKS !!! Worse than wikileaks... Bubbles coming from under the bezel are normal but those coming from the pusher are not ! And there were bubbles coming from the He valve too... so... (I don't remember about the crown but that wasn't the biggest leak) And this leaking problems needs to be solved. First the He valve, because it's the biggest leak. The easyest way to solve the problem is to seal the fake He with epoxy. But I dont like this solution and I was hoping to find something more "elegant" ! In fact I have a genuine He valve but those b@$£##-$! from Omega screwed up the threads during the disassembly, so it's not usable, but I was expecting to be able to use only the "He crown", but unfortunately the replica is not accurate concerning the He tube... threads are way different. Here you can see a close up look of the two "He crowns" (Gen is on the right side) (note that the rep is already rusty !) (and note that those ******* chinese have forgotten to put a gasket in the rep crown, so I have used the gen's gasket for the waterproof test, but it's too small to be efficient) (Yes, it's the ETA fully Gen equiped that you can see in the background ) Another thing, while I am speaking about "He crowns" : The rep is not accurate ! It's way too high... So I was thinking about threading the gen "He crown" to fit the rep's tube ! But I don't know wich tool I could use to do that, so if somebody knows, HELP is welcome ! Now (if you're not too tired) there is this problem with the pushers : they are leaking and complicated to disassemble for greasing. Once again : I have the genuine parts ! but what is complicated is that I'm not sure that the threads are the same between gen pushers and rep pushers (I'm scared now with this big difference for the He-valve...) Moreover I need a specific omega tool to remove and install pushers without damaging them. (and this tool is expensive at Ofrei, I saw one on the bay, but it was still too expensive for a tool that could be useless if there is a rep/gen difference) (The omega pushers tool) So I tried to make my own tool, with a special plastic glue that melt in hot water and a screwdriver. Protecting the watch with tape and coating the pusher with WD40 to be sure that the plastic doesn't stick. Unfortunately the plastic tool was not strong enough to apply the torque that was needed to unscrew the pushers. (see picture below, gen pusher on the right side ) And the picture above is the occasion to speak about the bracelet, because it's not as accurate as you could think. In fact you can see the shape of each link is wrong, there is a "flat" on every end. And a quick look to compare with the genuine will show you that the links should have be rounded on each side. (Gen pictured below) This is not important if you have big wirsts, but with small wirsts this flaw is very important ! By the way it's usefull to recognize fake bracelets that could be sold on the bay. So I've started to modify the shape of some links with my dremel, but its pretty difficult and I'm not going to make all the bracelet. (I may devellop this part in a future post) A few pictures of the mouvement to end this presentation : I have not taken too much of them (and most were blury ) because there are already beautyfull topics explaining how to install valjoux datewheels on 7750 and how to replace your A7750 with a gen ETA. Here the change of the datewheel. It's very important to note that unlike the A7750, you need to unscrew two retaining plates to remove the datewheel. In Pugwash step by step tutorial, he was working with an A7750 and he could remove the wheel direcly, but if you are working on an ETA, read and trust the official Service Guide ! and remove the two plates. (I have scratched my black DW trying to remove it while it was still attached on the other side But it's not too bad because I will not be using this part) Last but not least a little photo of the gen dial on the ETA (looks like it's not aligned but I think that it's right now !) That's all for today ! Thanks for reading ! and Thanks to the forum that has leared me so much ! Next update in 3 years ! ( ) Comments and Help are welcome
- 11 replies
-
- Seamaster
- Professional
-
(and 6 more)
Tagged with:

