

JoeyB
-
Posts
1,837 -
Joined
-
Last visited
-
Days Won
8
Posts posted by JoeyB
-
-
No, gen style mount bezels will not fit, nor will the insert made for acrylic crystals fit the Tiger V3.
-
-
39 minutes ago, Nanuq said:
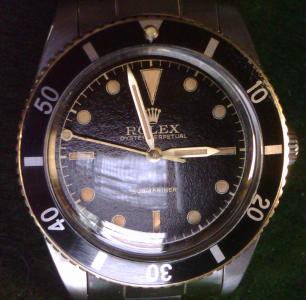
Is it just my lying eyes or is the tip on the small arrow isosceles instead of an equilateral triangle?
That, and the base looks just a tad rounded. It looks just like the one I used a pic of when I worked with Rafflestime to make them. I wonder if Rolex used more than one source, as they did with the inserts and bezels, accounting for the differences we find 60+ tears later.
http://rafflestime.com/small-vintage-gmt-watch-handefor-1675-and-6542-cal-1560-1-7mm-hole/
I mod the tip a bit to tone down the tip which makes it better to my eye.

-
41 minutes ago, jmb said:
...and still bugger it up half the time.
If I ever get to half the time I'll be able to scratch it off my bucket list!

-
I've always removed the stem in the set position, and never had a problem. I was lucky with the only one I had to reset the keyless. I just 'fiddled' with the works using the small screwdriver a bit, didn't even loosen the screw for the keyless cover, and it set. I once removed the back cover. They use a 'U' shaped spring that travels at the speed of sound (I heard the sonic boom) when released never to be found again. I was facing South, so it might be somewhere in Texas. I scavenged another from a broken movement, and installed it after replacing the back cover. There is a long slot it goes through to set. I put the spring on scotch tape so I could see through to where it would slide in. Worked great.
However, I still recommend that to service a Chinese movement like a DG2813 or DG3804B you remove the movement from the case, remove the hands and dial. Place the movement on your workbench.
Hit the thing with a 40 ounce ball peen hammer and sweep the mess into the garbage.
Take the brand new movement and install in reverse order. Under $50 every 5 years or so, versus a service on a Swiss movement. And just as accurate and dependable.
-
 2
2
-
-
On Saturday, April 16, 2016 at 10:11 AM, preacher62 said:
Drilling a lug hole causes me no anxiety whatsoever. I get Justin to do it.
Best part of the whole thread.

-
'Perspex' was a brand name for acrylic plastic, as is Plexi-Glass. Some did yellow, as Plexi-Glass does. But in the thin application like an insert, they usually dried out, becoming brittle and broke into pieces before they had a chance to yellow. Acrylic also scratched up easier. Lexan is a stronger material, resists scratching and breaking, but is more difficult to polish, though it holds the polish much longer. freddy's inserts were painted with the exact same color and brand of paint as all the red/blue inserts I've made.
Yep, the DG movement runs fine, I regulated it to about 2 seconds fast per day, and has a reserve of close to 40 hours. It's almost 3 years old now, almost daily wear.
-
On Monday, March 28, 2016 at 8:15 PM, panerai153 said:
Ghe only thing that I might add would be a darker insert if joeyB has any. Mine is a little too bright red and blue, and the lexan that joeyB uses doesn't age and darken like the old bakelite inserts on the original Rolex 6542's.
JoeyB uses the DG3804 movement which is a slow beat movement. nice thing about it they are about 30-40 bucks, so if one fails, just throw it away and replace it with a new one.
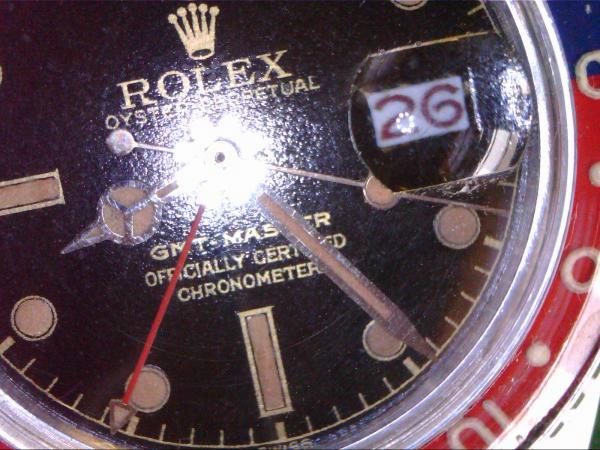
The red and blue colors are what they are spot on to the original insert color for at least one of the 6 sub-contractors Rolex used to supply inserts. The insert, being clear, is translucent. That makes the color vary with the lighting, genuine, 60+ years old, or new. Most people have only seen genuine inserts online, in pictures. They have no idea what the lighting is in the pic, but say the red should be darker, 'almost maroon', etc., which is totally incorrect.
Depending in the light, the blue ranges from a Royal Blue to a Navy blue. The red ranges from a very slight orangish-red to a blood red. This is why the colors vary in the pictures of genuine 6542. Aging only fades the color, not darkens it. The lumed white script will darken with age, exposure to UV.
I have it both ways. I have the DG3804B movement that I wear pretty much every day now. And I have the ETA 2846 movement using the longer 13mm minute hand.
-
As stated in the pinned 'Ultimate Rolex Mercedes Hands Comparison' thread:
I believe that the chapter ring itself measures 26mm in diameter on chapter ring dials. For our purposes, Gen or aftermarket outside diameter of the dial itself doesn't matter to hand size. Only the chapter ring size does.
On the early GMT and Submariners, a 13mm minute hand was used. That put the tip of the minute hand right to the chapter ring. The small arrow GMT hand used on 6542 and 1675 chapter ring dials also measured 13mm, and the tip met the chapter ring.
===========
For accuracy, what matters on a dial is the hand length to the markers, not the outside of the dial you are using to fit a case. The later GMT and Submariners up to the maxi hands used a 12mm minute hand. That is short of the chapter ring.
-
1
-
-
I print the date window portion all back as the dial is, no outline for the window at all. When fully dried it should be tight. I then cut the opening in an 'X', from corner across to opposing corner. That makes 4 little triangles. From the back of the dial, I then use a toothpick dipped in the Micro-Set to wet each triangle, one at a time, and draw it over the bevel and out the back, folding onto the back of the dial. The vinyl decals I use have a little, tiny bit of stretch to them. Using the toothpick I pull the triangle taught on the back of the dial. Then hold it there until it sticks. The decals take the shape of the bevel nicely. Some bit of trim might be needed, and I do that with the same wetted toothpick, smoothing the corners if necessary.

-
5
-
-
There was a guy offering 'new ' 6542 cases on Ebay and on his own website a few years ago. I can't remember his name. I figured they were reps.
-
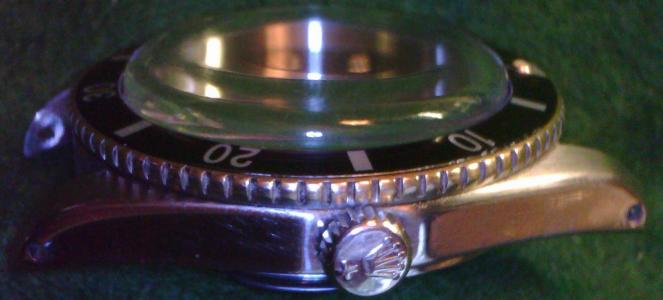
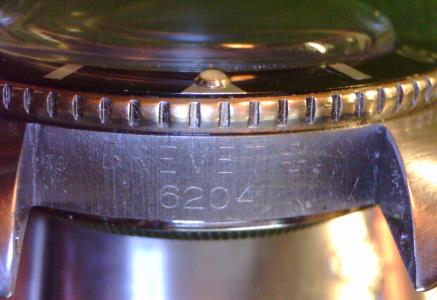
My coin edge bezel is made for the 6542. It is as the original, made from brass and has a light nickel plating. That allows for mods to allow the brass to show through, if desired, for aging. It also allows for a little more modding to have the 6204 look as pictured.
https://rwg.cc/topic/173703-coin-edge-bezel-set-for-rolex-6542#comment-1370145
-
The 6204 case is 38mm. I used a 'Tiger' case and my bezel for the build.


-
1
-
-
It is the insert alone, or the insert and bezel set.
-
'Birth year grail' would be different than my grail watch...es....

I'm so old I fart dust...

-
1 hour ago, Bart Cordell said:
Thank you !
Shrunk is not serious, I can reprint a new dial at will
 . Just lume work take time.
I use Micro Set to place decal on the dial, but as I was impatient, I dry it with an hairdryer. Next time ill let it dry few hours.
The water slide decals are made of vinyl, so the hair dryer is what shrunk them. MicroSet will tighten the decal, but not shrink it. I use a Q-Tip to take out any air bubbles and smooth it. It takes about an hour to dry. I usually wait a day to lume, though you could do it quicker.
-
Very nice work. I've not had any shrinking of the decal. What are you using to wet and set it?
-
Is it my tired, old eyes, or does my bezel come very close to the look of yours? It looks to me that with a bit of modifying could be on target.
-
2 hours ago, jmb said:
The newer ones look very crisp but some of the really vintage stuff looks like it was done by hand with a pantograph or even free-hand!
JMB, you've got that vintage look nailed.
-
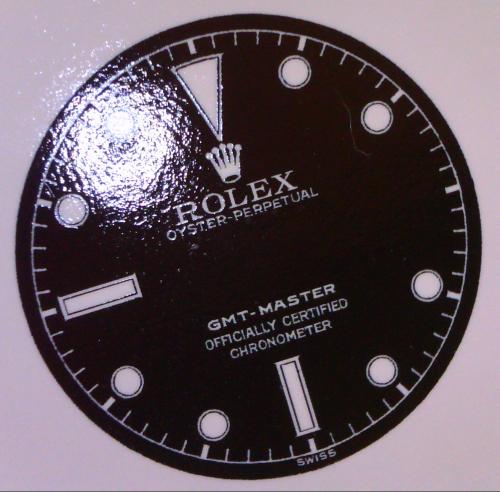
I've sourced dials from any place I could find them. Otto Frei has blank dials that will fit ETA movements, painted but easily sanded down to bare brass. Those with date windows are in the ETA position, so they will not line up correctly with the date magnifier on a Rolex crystal.
The cartel Explorer II can be used to build a 6542 by grinding the crown guards off, or as a 1675 with reshaping the guards. I used the dial that came with the watch and the movement, again sanding the dial to bare brass.
I bought a genuine Rolex Submariner dial on Ebay that was really trashed, and sand that down to bare, soldered on dial feet to fit ETA.
And I've taken bare brass sheet from a hobby store, rough cut a circle, drill the center hole and used a bamboo shish-ka-bob skewer as an axle to spin the dial on a bench grinder to round and size. Using metal, like a drill bit, makes the center hole bigger and ruins it. Then attached dial feet for a DG movement.
Most of my work was with building the 6542. I had a gen dial from a friend of a friend, good price, in my first build. The problem is that Rolex used a 'capped' dial to fit it to their movement. That made for a lot of modifying to fit it to the ETA movement I was using. Eventually, several builds and re-builds later, it was flattened front and back, dial feet and decaled, and is in my ETA 6542.
-
1
-
-
42 minutes ago, mymanmatt said:
Some of you guys have immense talent. My hat is off to you. It's amazing how you figure out how to do things. I guess the old saying, " if you want something done right, do it yourself " applies here.
For me, whether the dial, 6542 insert or coin edge bezel, it all emanates from being cheap.
-
1
-
-
I use a Canon Pixma MG6120 printer, which is now a few years old, that cost me $100 brand new. It is supposed to be capable of printing as high as 9600dpi. At the highest setting printing on decal paper it made ink puddles. I then backed it down until it made the best clear, crisp print. In the area where the script says 'Submariner', the look on gens I've seen is more 'gilty' than the rest of the script. Use a fine scotchpad on the rest of the bare brass dial, and use a coarse sandpaper in a swirling motion just where the script will be. The coarse swirls will have that 'gilty' look through the clear decal paper.
-
1
-
-
That looks like it has the step or bevel on the lower part. I assume it is genuine. I wonder if Rolex used several suppliers as they did with the inserts, and they vary.
-
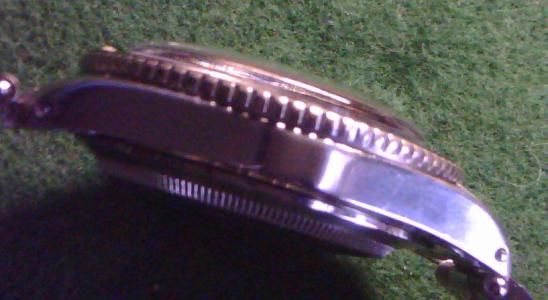
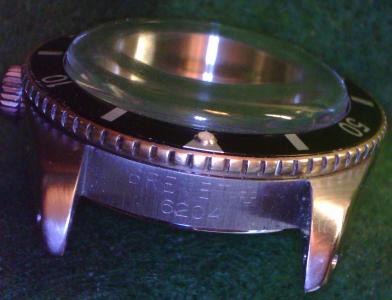
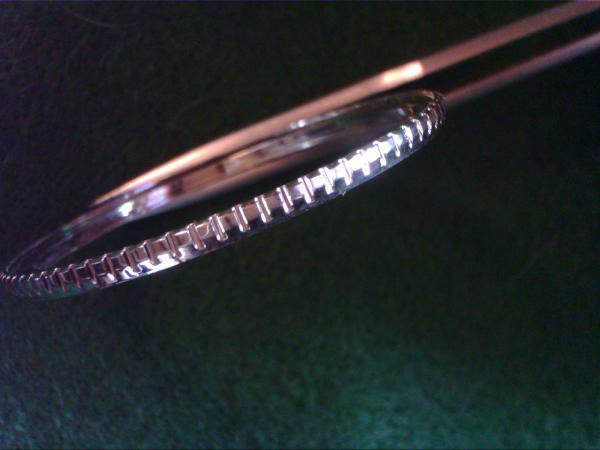
I think the 6536-1/5508 uses a coin edge bezel. 1st pic is a gen. 2nd pic is my 6204. 3rd pic is the new bezel. 4th is JMB's great work.
I used my 6542 bezel on my 6204 build. The GMT coin edge bezel differs from the Sub coin edge bezel by having the lower part of the coin edge, where it sits on the case, tapered or stepped in. Untouched, mine are made with that taper. My bezels are made of brass and lightly nickel plated. I used a bit of elbow grease and a scotchpad to take down the plating to expose the brass for an aged look. That flattened, or at least reduced the step to a more Sub look. Obviously it can be taken down further that I did. This is a clip on, gen styled bezel, with spring and retainer. The inside diameter of the stainless steel retainer is 30.226mm. You might need to make it bigger to work. I don't know if this will help, but it's a thought.
Also, our own JMB did my case engraving.


Rolex 6542 GMT Build List and Advice
in The Rolex Area
Posted
I don't know, never saw one. My inserts and bezels are made to fit the gen style mount and acrylic crystal.