

freddy333
-
Posts
15,704 -
Joined
-
Last visited
-
Days Won
165
Posts posted by freddy333
-
-
Nanuq and all -- You guys are killing me..
If DW makes another appearance, please keep me in mind.
-
Ryan -- Ubiquitous, who is probably the most knowledgeable person here on the subject of Daytonas, is the person that posted those comments. But I would disagree with him on this one point. I think the 116520 I have is nearly indistinguishable from the gen, while the flaws on Ubi's, although not terrible, are more serious & apparent than mine. It is always best to familiarize yourself with the gen model you are interested and then compare that to the various reps that are available for that model. (There are almost always multiple versions of the same model available from different sources. Each rep will get some things right and some things wrong. The more you know about the gen, the better able you are to choose a watch with the least errors, or at least the errors that are the least objectionable to you.)
-
TWS -- Do you mind if I beat this dead horse a bit more and ask what the dremel bit you used was called or if it had a size on it?
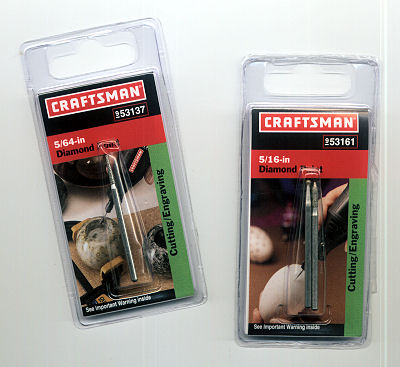
I did not have anything in my Dremel toolbox that looked useful for engraving, so I picked up two Diamond Point 'Cutting/Engraving' bits from Sears. One is 5/16" & the other is 5/64".
But looking at the width of the lettering on the DRSD caseback (very thin), it looks like the points on both tools are alot larger than the width of the letters. For example, I think if I try to run either tip on either of the two " (quote) characters that appear on the caseback (one to the right of the word OYSTER and the other to the left of the word ROLEX), it seems like the bits are so wide that they will merge the two separate lines into one.
So I am just wondering how you did this? Do you just start the dremel and then place the engraving tip into one end of each letter and slowly drag it along the length of the letter to widen the existing lines?
I apologize if this seems silly, but this engraving thing is the first mod I have attempted that has me feeling a complete pratt (butthead).
-
Avitt -- Yes (almost) exactly. I say almost because I would prefer a black dial, but I would easily suffer with that white one. Do you know if those are still available?
-
Beautiful watch and nice work.
I would like to find a non-Oyster (non-screw pushers) myself.
-
I am not sure about the symmetry of the pushers -- they look asymmetrical in one photo, but symmetrical in the others. Impossible to tell from his photos. The subdials also look a bit small and too far apart, but that may be the photos.
-
TheWightStuff -- If you locate that technical sheet, could you post a copy? I would love to see it.
I think you are right about the rep bracelets being inaccurate. I kind of thought it should have the extension, but wanted to be sure.
I want to try to engrave the lettering on the caseback of my DRSD. I think I remember you said you used an engraving tool to do yours. Do you mean an engraving bit for a dremel or did you use a separate engraving tool? I was in Sears yesterday and they have both, but I wondering what you used?
-
El -- This is one of the very few cases where the crystal on a rep is actually taller than the gen. If you reshape the CGs & replace the hands/crown/tube/bracelet buckle with gens, it would be very difficult to tell the difference. As it is, I am sure it would fool any 'civilian'.
-
Hi Nanuq -- Makes sense and thank you.
-
Avitt -- Just what the doctor ordered.
The reference page shows any of 3 end pieces -- 285/580/585, and it also looks like both bracelets were fitted to the 1665. So my remaining question is (and repaustria probably already answered this, but I would not mind a second opinion) did the DRSD bracelet have the diver's extension?
-
Repaustria -- Thank you for the quick reply. Can I also ask what the difference is between the 9315 & 93150 bracelets? I have a box full of rep bracelets and they are all labeled 93150, but some have diver's extensions and some do not. I am wondering which would be correct for the DRSD? I also have a couple of end pieces labeled 501B, but I have a feeling that is wrong for this model. I have seen these with 280, 380, 580 or 585 end pieces. The Patent Pending page of doubleredseadweller shows 380s, but I have seen all of the others fitted to DRSDs on Timezone. Could all of these end pieces be correct (fitted either originally or during servicing)?
-
And did the bracelet on these vintage Sea-Dwellers have the diver's extension?
-
Thank you and I look forward to seeing how successful you are in recreating that sunkin appearance of the lettering. You do good work.
Here is another photo that may better illustrate the sunkin appearance of the lettering on a gen DRSD caseback

As you can see by the way light is reflected around each letter, the surface of the case appears slightly 'pressed in', which I now understand is caused by the stamping process (at the factory, the stamping was probably accomplished with the use of a heavy press machine). The area around the lettering on our rep cases, even when properly sanded and polished, is still noticeably flat in relation to the same area on the gen caseback. But I think that once we can find a way to replicate both the stamped (pressed in) appearance as well as the more rounded, worn look of the lettering on the gen case, we will have a winner.
Edit -- More and more, I am thinking that TheWightStuff had the right idea to use an engraving tool to widen and round each of the original engravings as a first step. Using his procedure prior to whatever tool or procedure we can devise to replicate the sunkin texture, followed by Pete's sanding/polishing should result in a near perfect vintage caseback.
-
PP -- I appreciate the input, and your work looks very good, but still obviously done with modern engraving equipment. The main question I am trying to solve is how to recreate the sunkin appearance of the lettering on the gen caseback, which was originally stamped (not engraved)? I can sand & polish out the sharp edges of the engraving, but no amount of sanding and polishing will duplicate the sunkin appearance of the lettering on the gen caseback. And that is the part I am trying to figure out.
-
Good point. Once I receive the stamp, I will toy around with a vice to see if there is a way to press it into the caseback with that. The factory seemed pretty certain that there would not be a problem with a hammer, but I am going to do some pre-testing on scrap cases and hopefully I will be able to work out a successful scheme.
The stamp numbers I ordered are 1/4" in size. From the sound of it, the tool will resemble a narrow nail tap, but with the numbers in place of the point at the business end of the tap. But I will have a better idea once I receive the tool in a few weeks.
I never built an amp from scratch, but I used to do a bit of rebuilding & modding of old valve (tube) stuff. I guess some of us have modding in our blood.
-
I have never seen a model like that and everything about the posting screams scam.
Not the greatest quality, but you can find some repainted Tudors here.
-
Euno -- hahaha Just my luck - the only reasonably priced Daytona with asymetrical pushers and the guy is a crook. But if it comes to fisticuffs when you find him and any of these 6263s happen to fall out of his pockets, please grab one for me (since he will probably not be in any condition to need it after you finish with him). Oh, and watch your brisket.
-
Tonyp1 -- Yes, I thought your watch looked familiar.
I have been trying to buy one of these 6263s with asymmetrical pushers from Honpo for weeks.


But after answering my initial email asking if he had an English language page (he responded "No, but which watch are you interested in?") he stopped replying altogether. Right after that, I someone said he does not ship to the US and then I started seeing posts like Slays (and others) complaining that orders never arrived, so I pretty much gave up. Still, if he is actually shipping vintage Daytonas (even with 7750s) that have the correct asymmetrical pusher arrangement, I would buy one (or more) if he'd deal with me.
-
I was also going to recommend that you be very careful when stamping the case back. I think that you'll find that the metal is actually quite thin in the middle...It would be very easy to deform the back, which would be unsightly, and difficult or impossible to repair.
Avitt and fx -- Good points all. I will definitely place something form-fitting below the caseback and I will experiment a bit on a scrap part before starting on this one. But, for what it is worth, while I certainly do not want to deform the caseback, I am not really very concerned with the appearance of the text on the inside. I have never quite understood the reason why so many rep owners (at least those who are not building franken watches containing gen Rolex movements) are concerned with the visual accuracy inside the case. After all, no matter how good the lettering on the inside of the caseback is, anyone knowledgeable enough to look inside will know, in an instant, that the watch is a rep. And I will happily screw up the lettering on the inside of the caseback if that will result in an improvement in the lettering on the outside. Does that make sense?
-
Im certain your correct mine is a EE. I couldn't find the value but heck its a fake who really cares about value.
-
Brook - There is a reason for the difference between them -- Ubi's Daytonas are based on the previous model (16520 with secs at 9), while rag9fx's are the current model (116520 with secs at 6). The current Daytonas have the wider index markers.
-
You may very well be right, but I will have a better handle on the stamping possibilities in a few weeks. I just ordered a custom metal stamp designed for use on stainless steel to imprint a serial number on my Comex rep caseback (there is a separate thread about this). I sent the stamp factory photos of the font I want as well as a picture of a gen caseback showing what I am trying to achieve. They said the stamp would produce that type of indented mark with a few knocks from a standard hammer (with the caseback sitting on a wood block). I will be amazed if it turns out to be that easy, but I will know soon enough. Unfortunately, they are unable to replicate a stamp for the entire DRSD caseback with any guarantee of font size/style accuracy. But if the basic process proves successful by hammering a metal stamp into a caseback, I think it will just be a matter of locating the remaining stamps and perfecting the process.
In the meantime, I appreciate all of the input so far (very helpful) and welcome any others.
-
I bought this watch about 2 years ago I cant say what it is (If its a DW or not) I paid something like $580 at the time. It measures 37mm in diameter and 19mm lugs. I have posted pics of this watch on finest rolex forum and I was instantly getting offers to buy the watch for 14 to 18k one guy that lived close even offered to bring a cashiers check!
tonyp1 -- I would love to know the source for that watch. Do you have a link or contact info?
-
Avitt -- As usual, a well thought out answer and one that I have considered as well. But, unfortunately, that option does not address the main issue -- how to replicate the sunkin effect of the characters on the gen casebacks? Somehow, the characters would still need to be hammered or pressed in, and that is the part that I am having trouble with. After that, engraving as you described, followed by a good sanding (the sanding would accelerate a few decades worth of polishing), polishing and antiquing should produce an acceptable result.
But the question remains how to create the sunkin effect?
The First DW 6263
in The Rolex Area
Posted
I will second that.