

madasboot
-
Posts
681 -
Joined
-
Last visited
-
Days Won
43
Posts posted by madasboot
-
-
Sales section updated
-
-
Posted in sales.
-
I can do any vintage no dater (build and lume) and will post later in the sales section the surplus i have for sale
-
 1
1
-
-
58 minutes ago, oldtools said:
Wonderful!
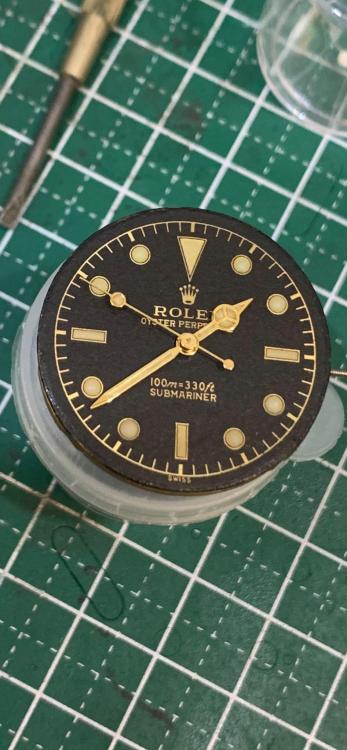
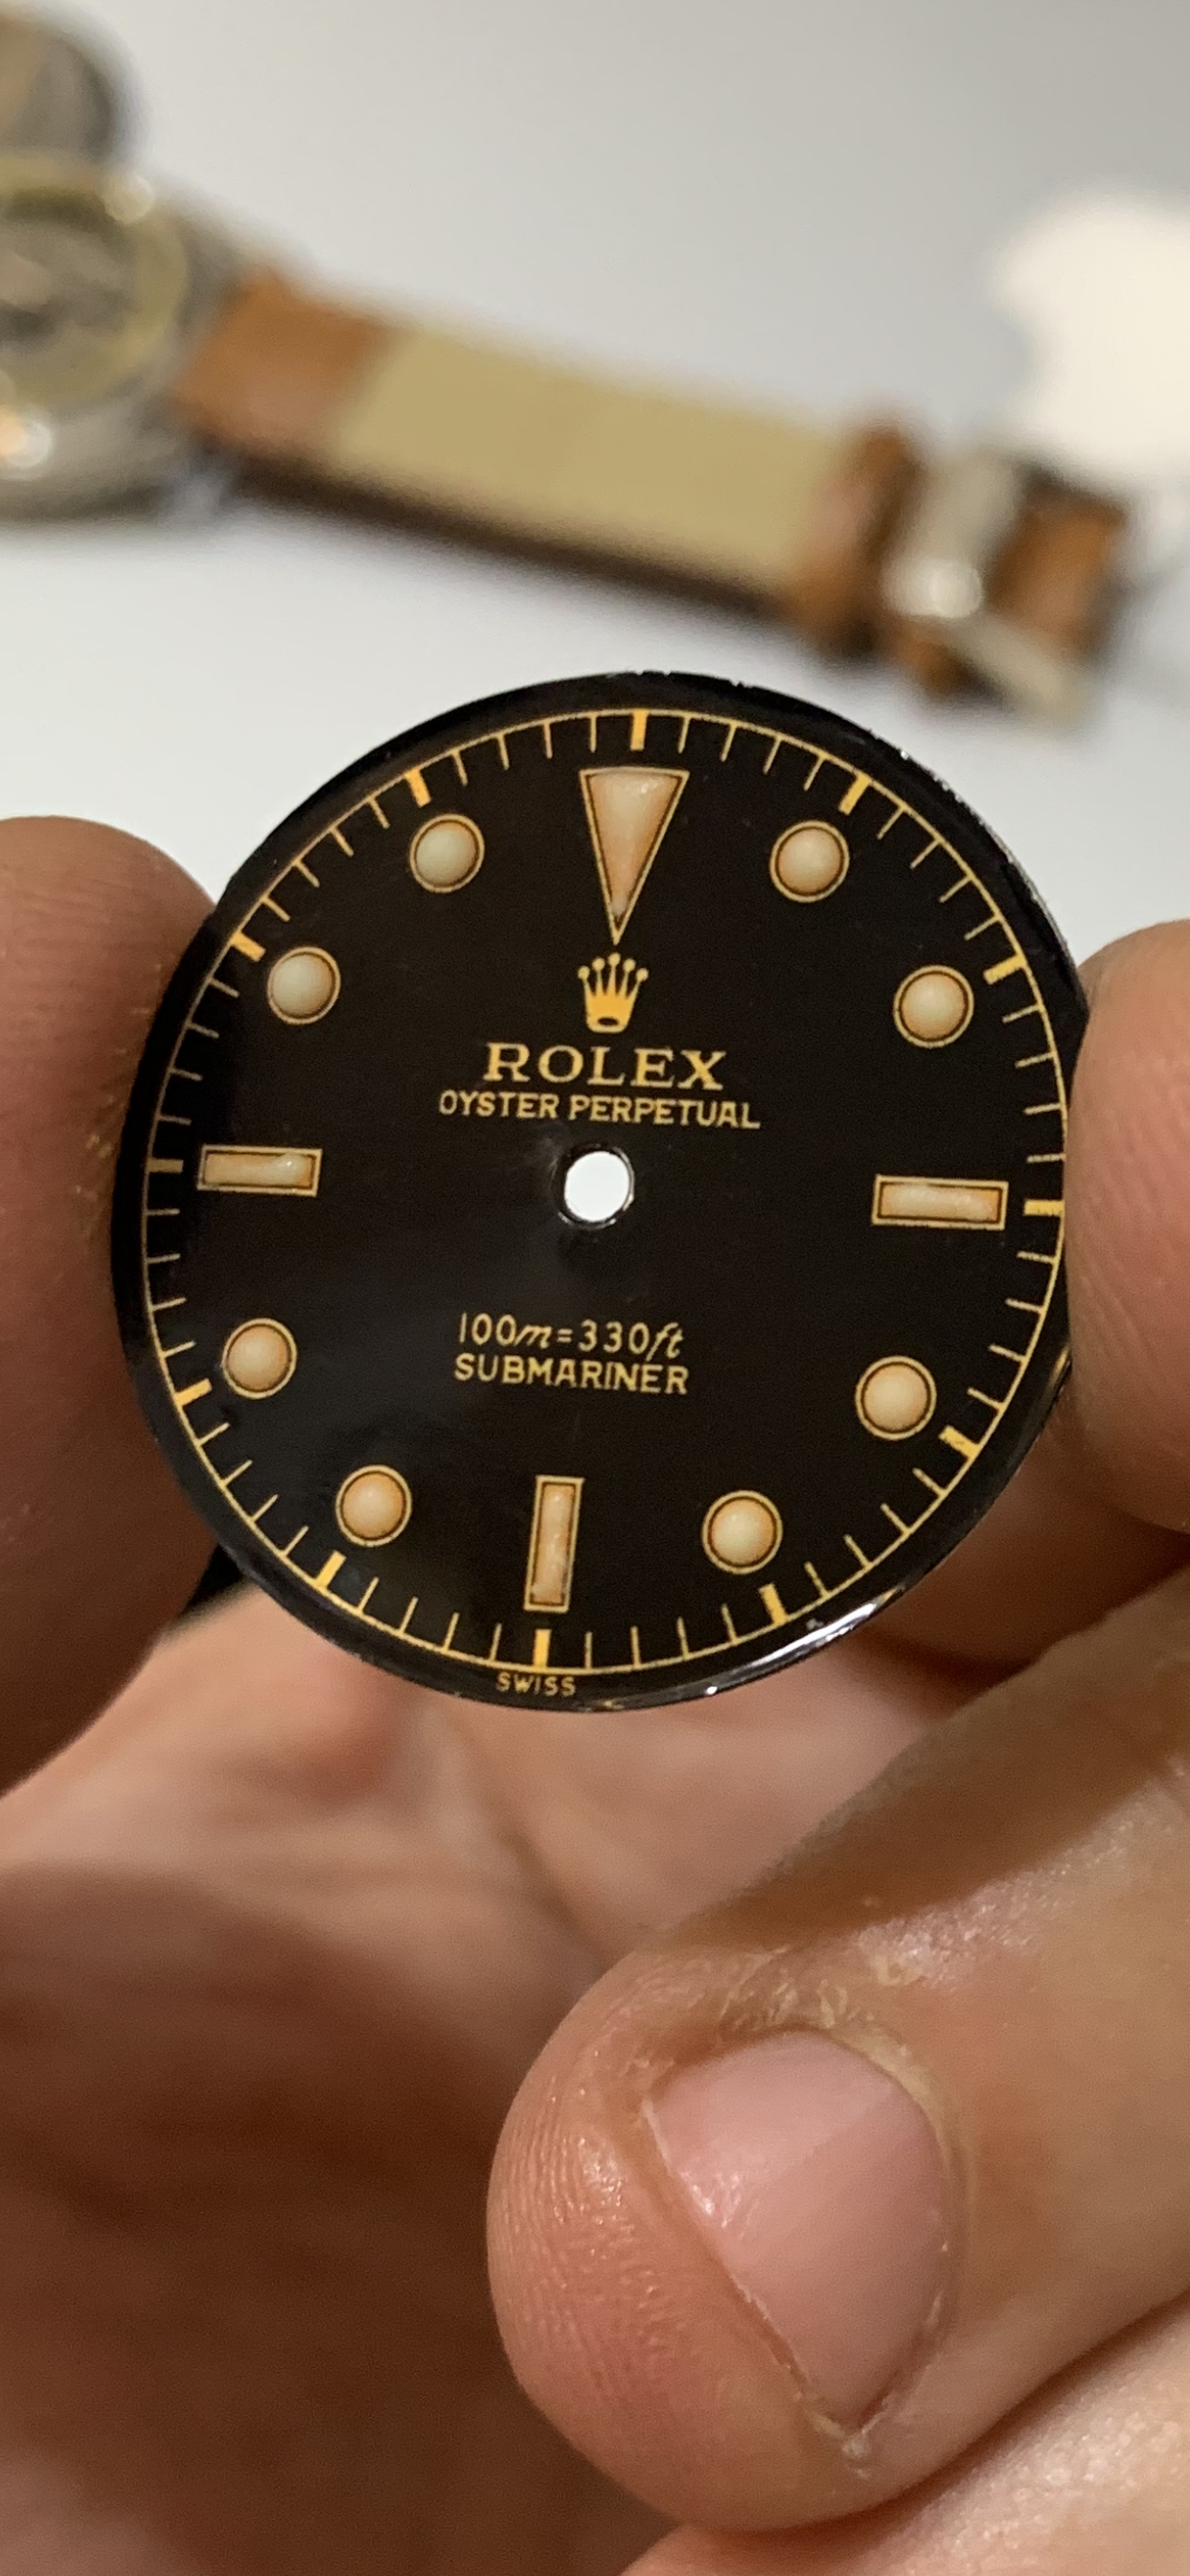
Thank you! It took me a while but results are far better than any aftermarket option available.
unfortunately pictures are limited in showing the surface texture and the gilt effect.
anyway, I am now ready to do any vintage dial as long as it does not have date window
")
will post more examples.
5 minutes ago, madasboot said:Thank you! It took me a while but results are far better than any aftermarket option available.
unfortunately pictures are limited in showing the surface texture and the gilt effect.
anyway, I am now ready to do any vintage dial as long as it does not have date window
will post more examples.
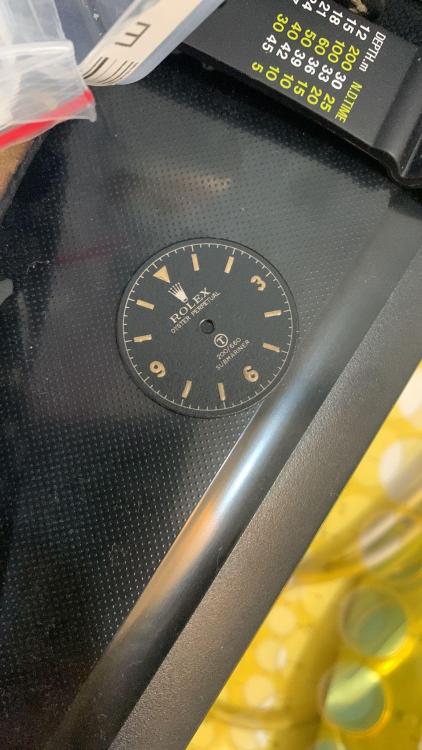

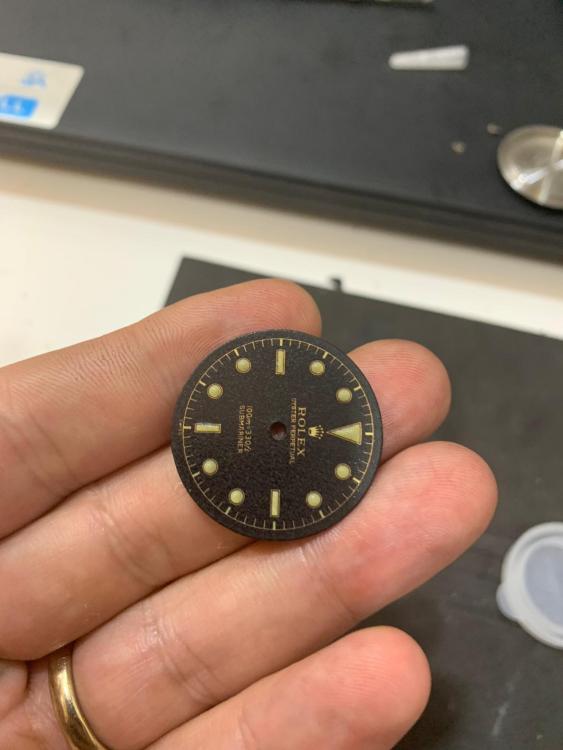

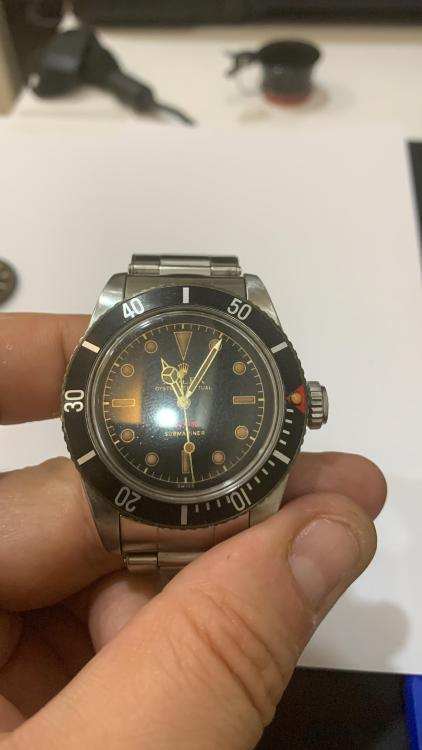
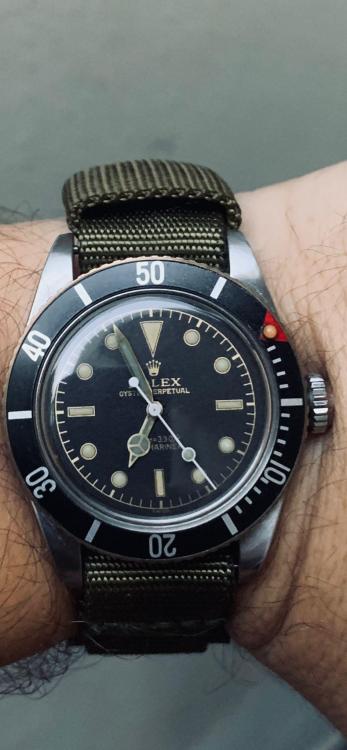
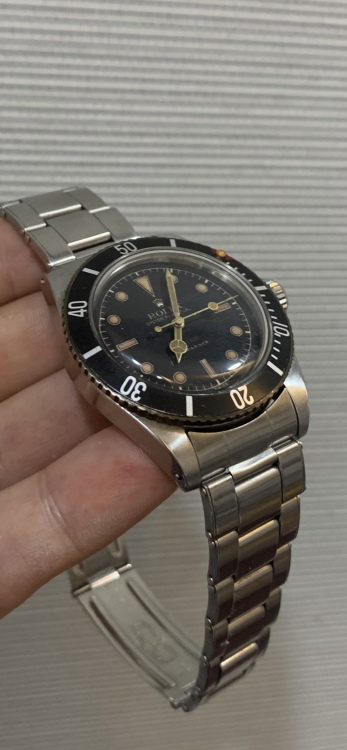
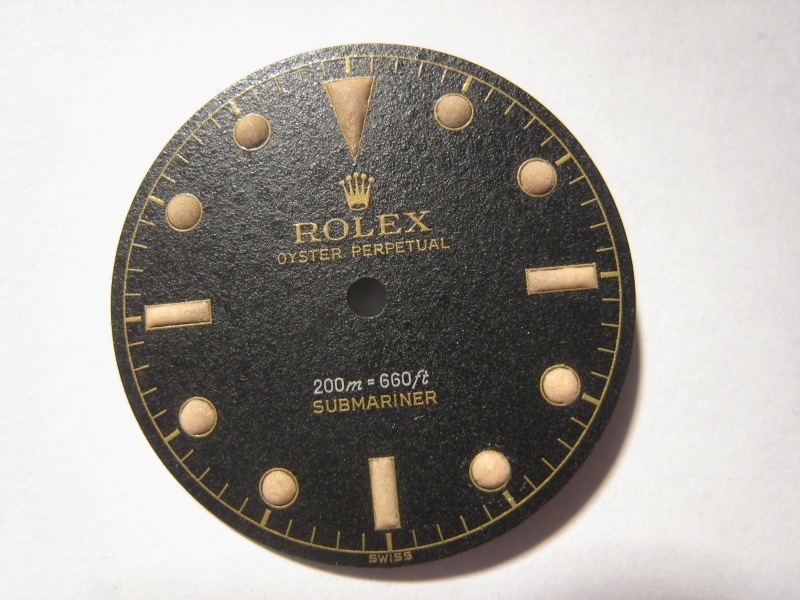
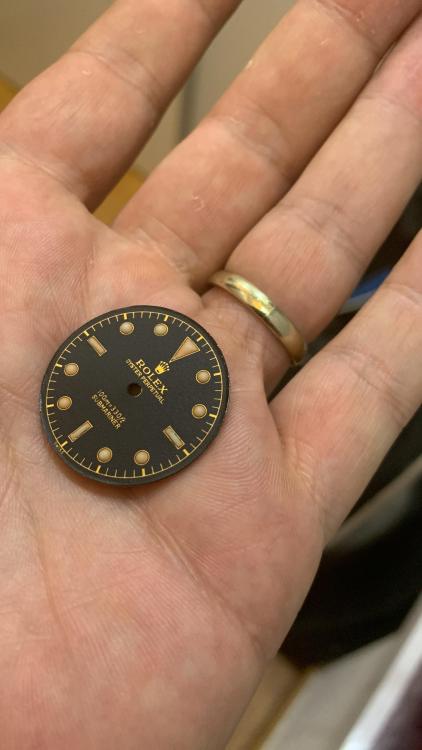
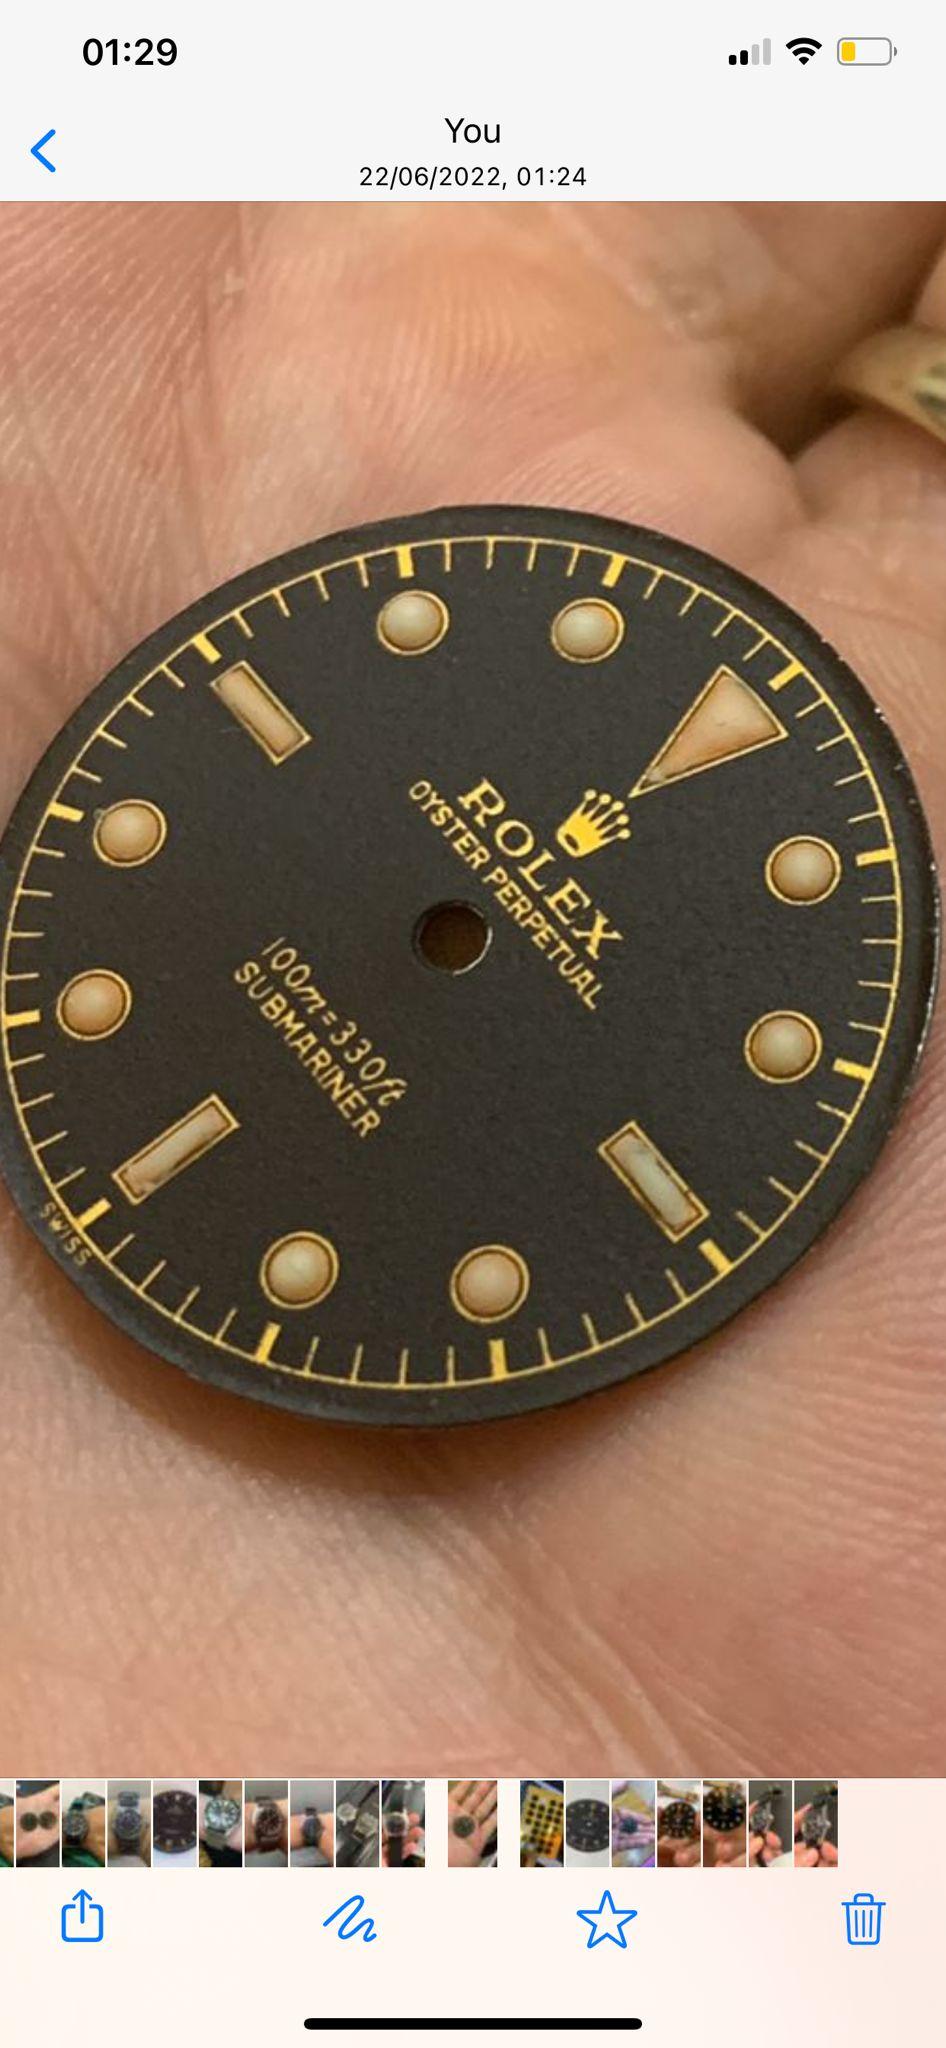
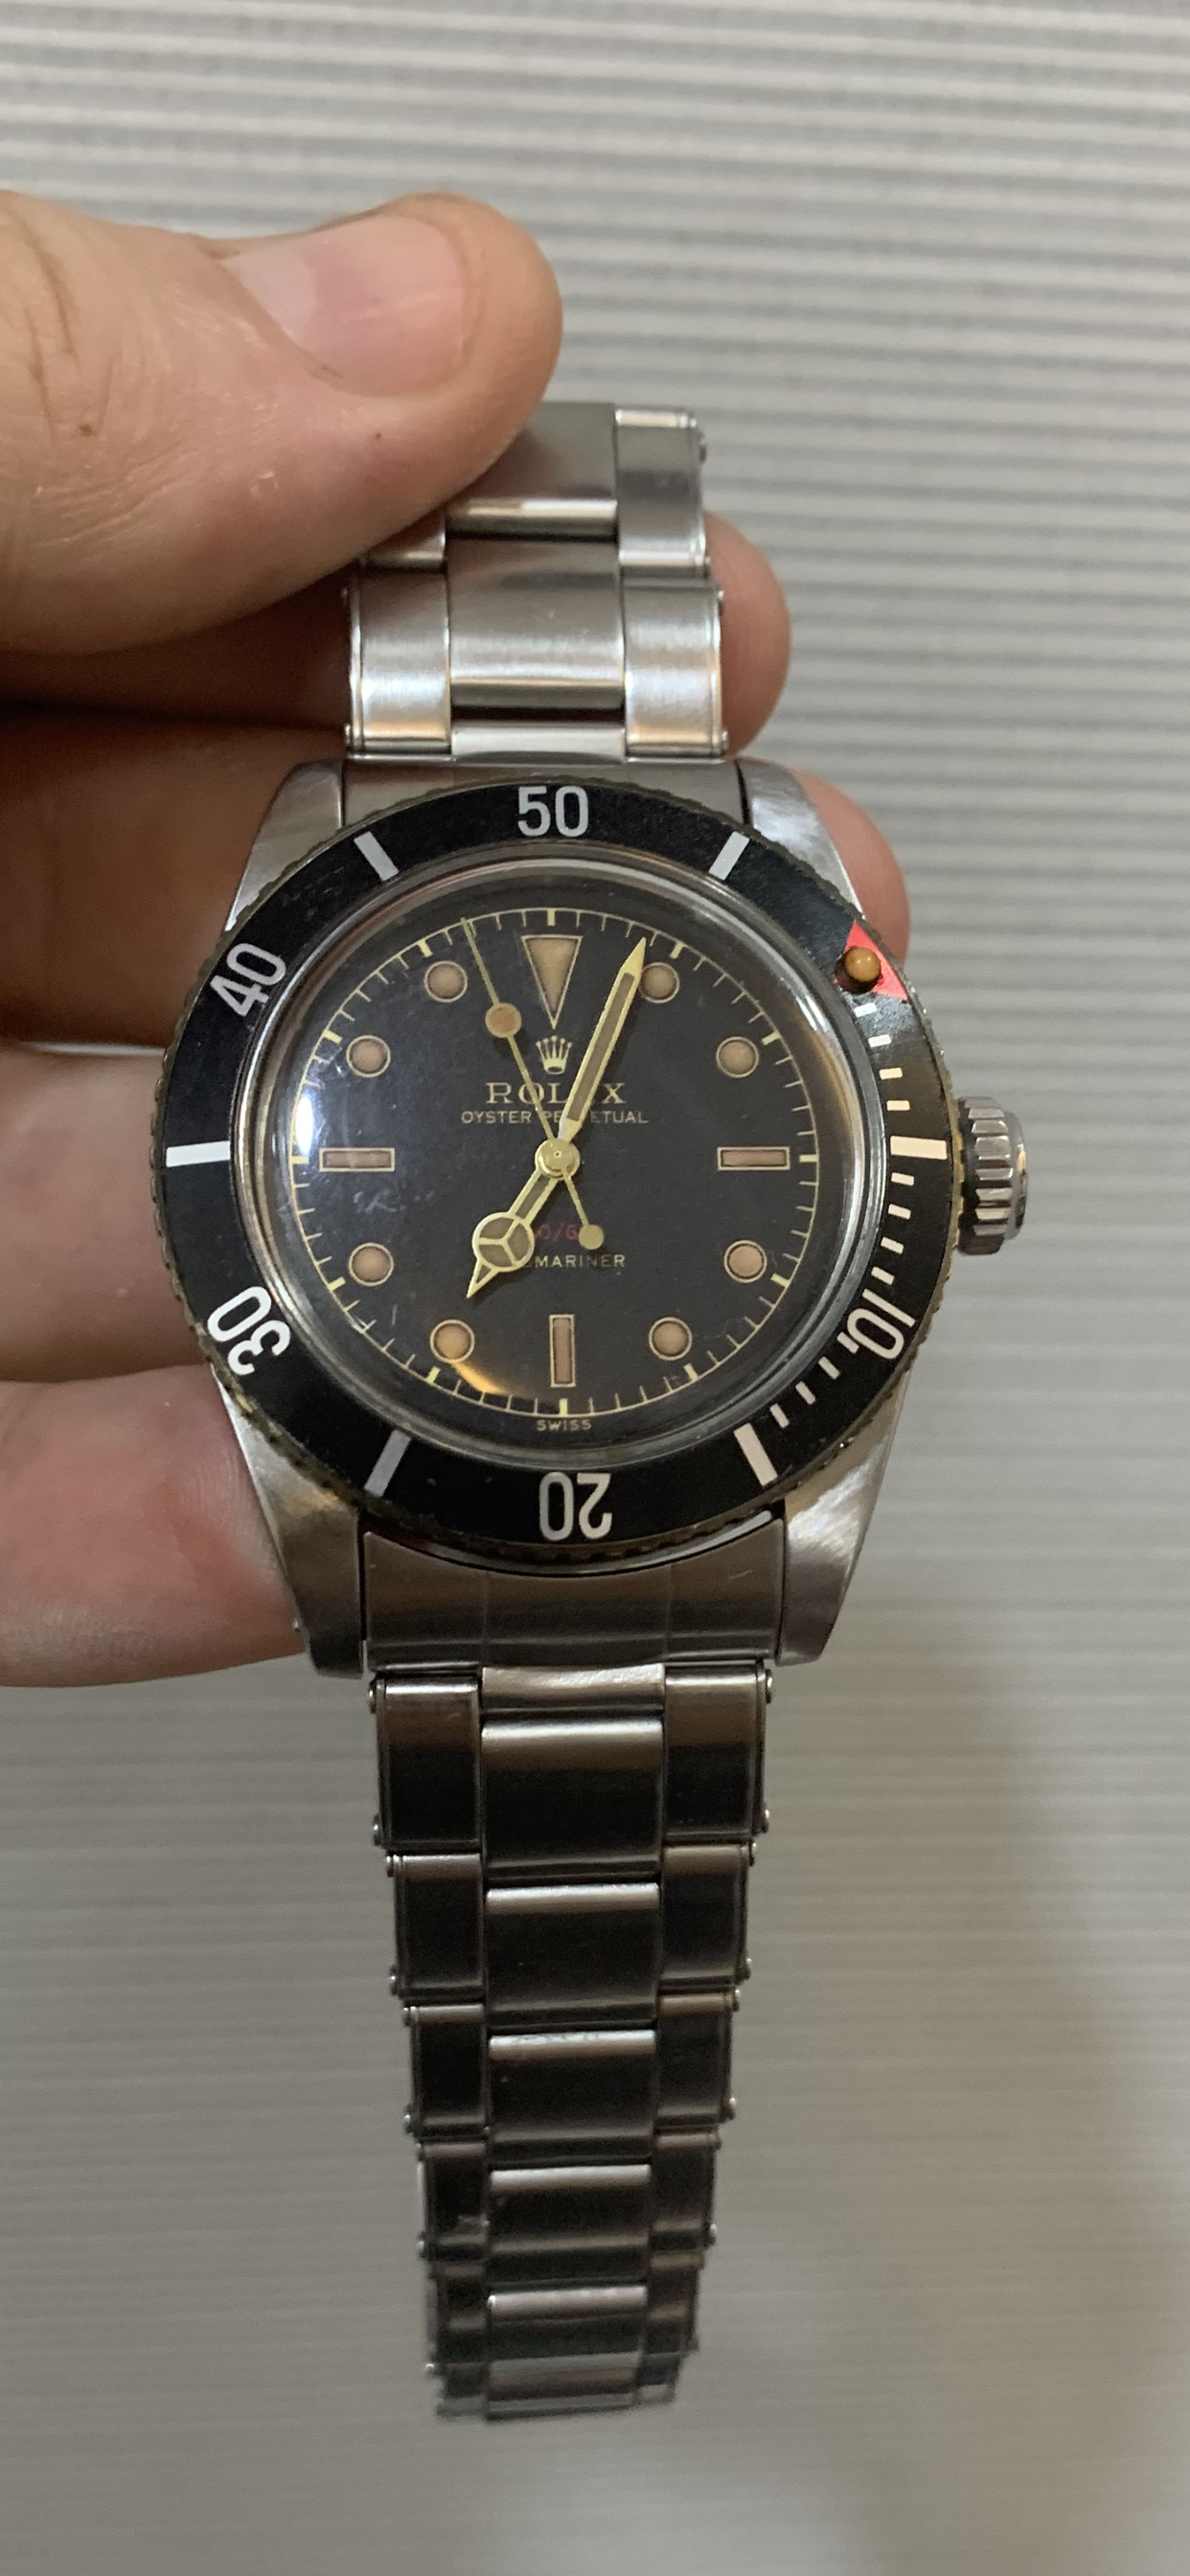
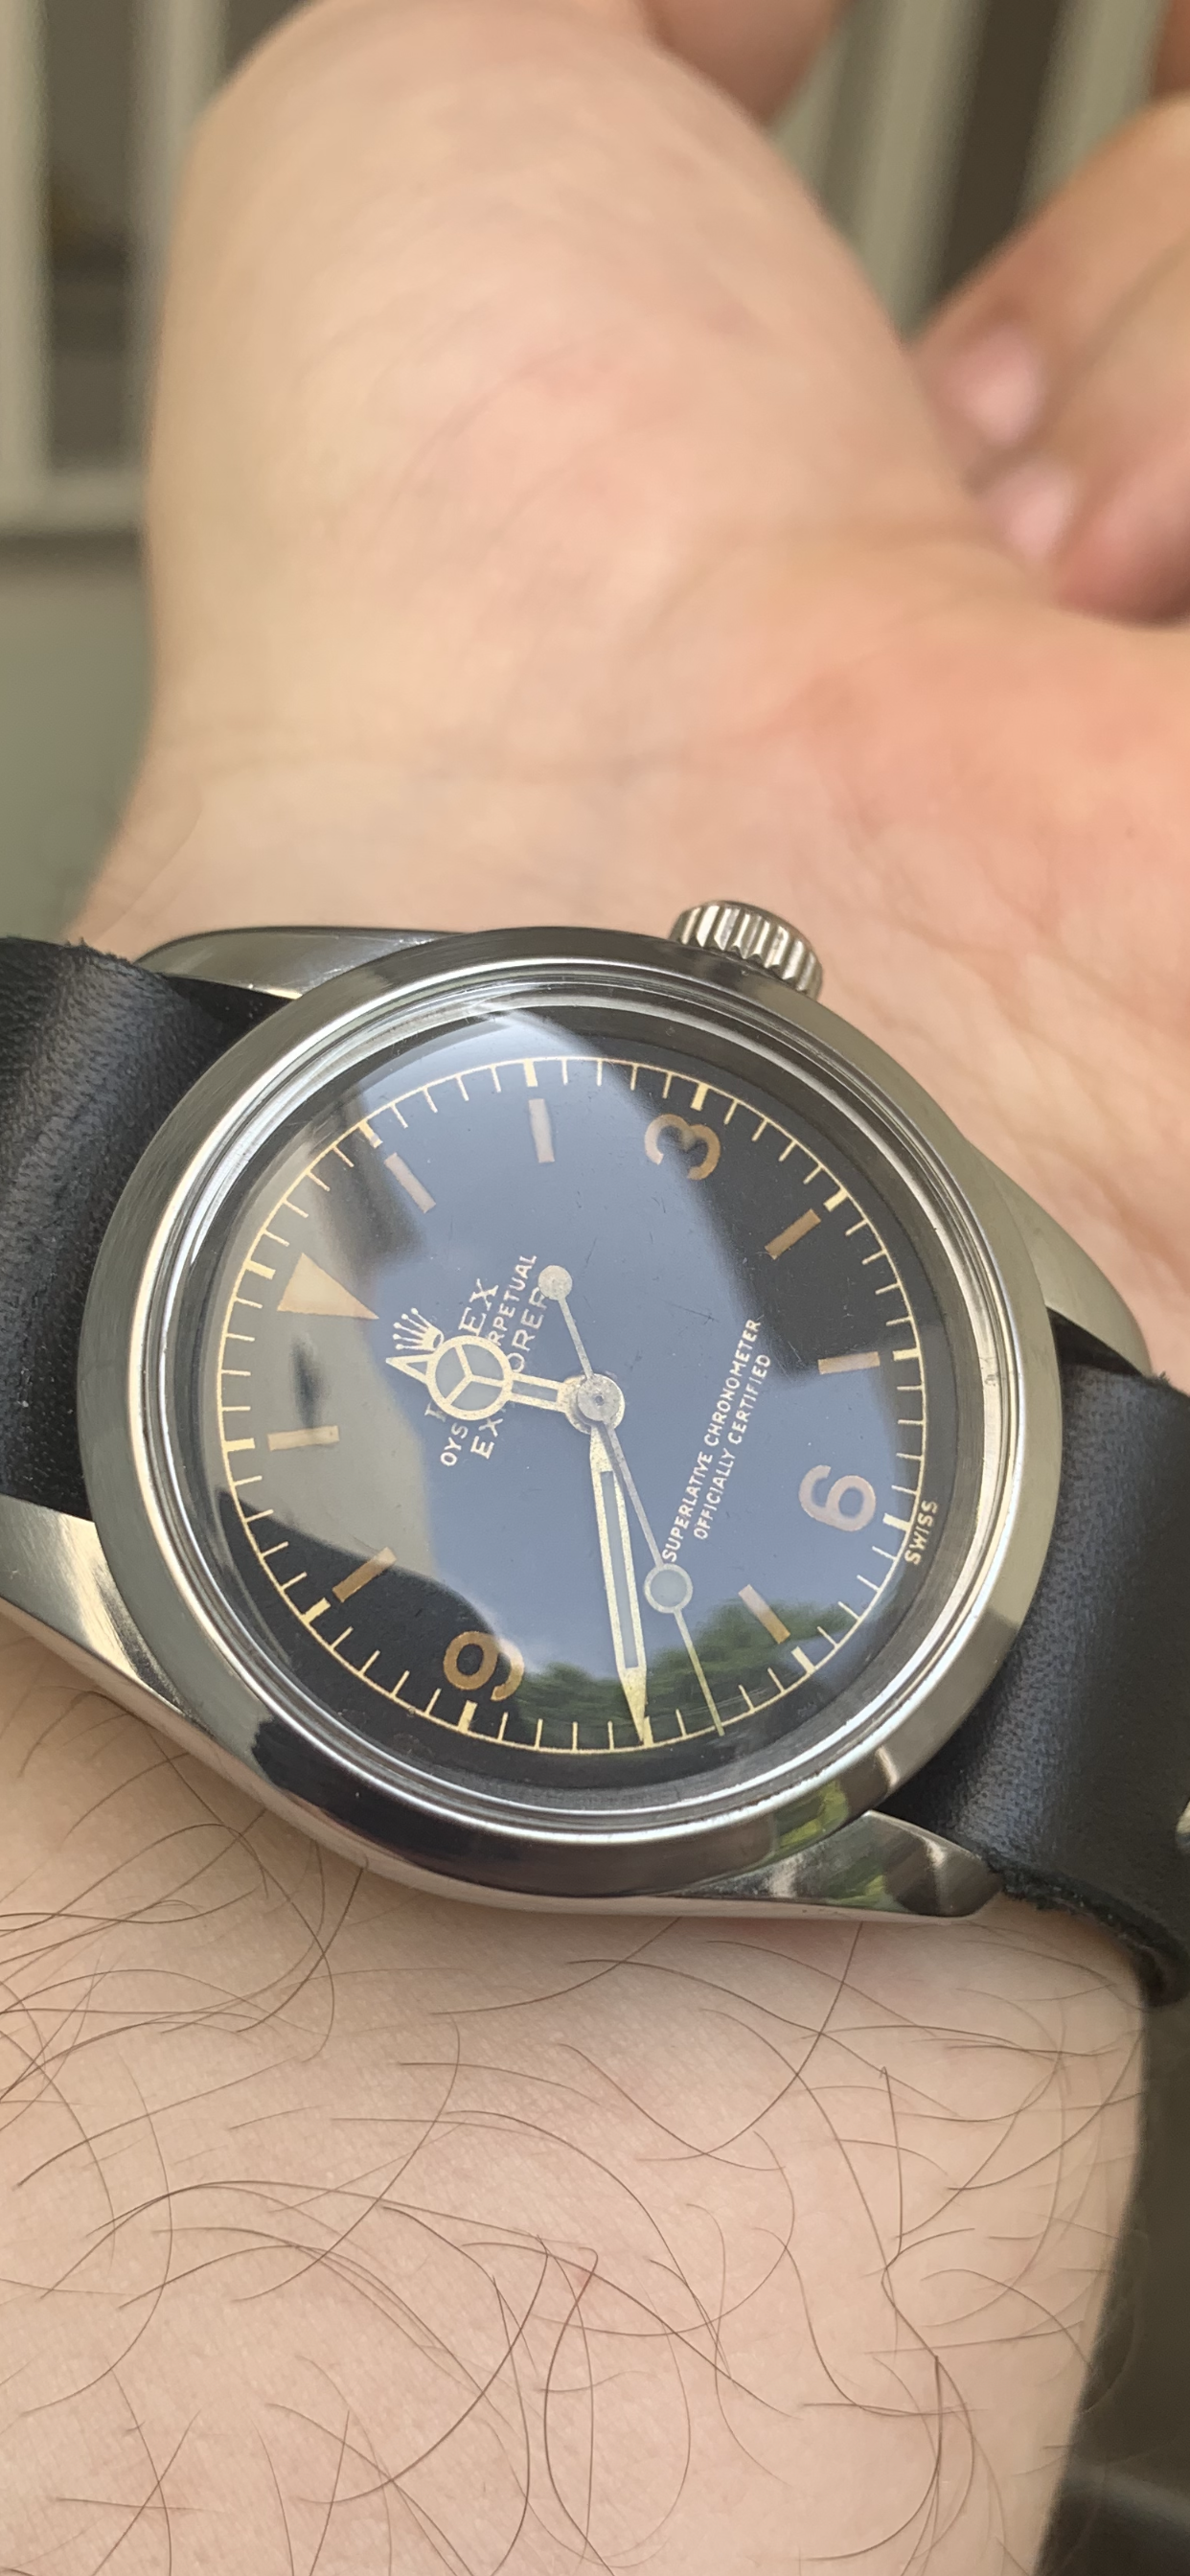
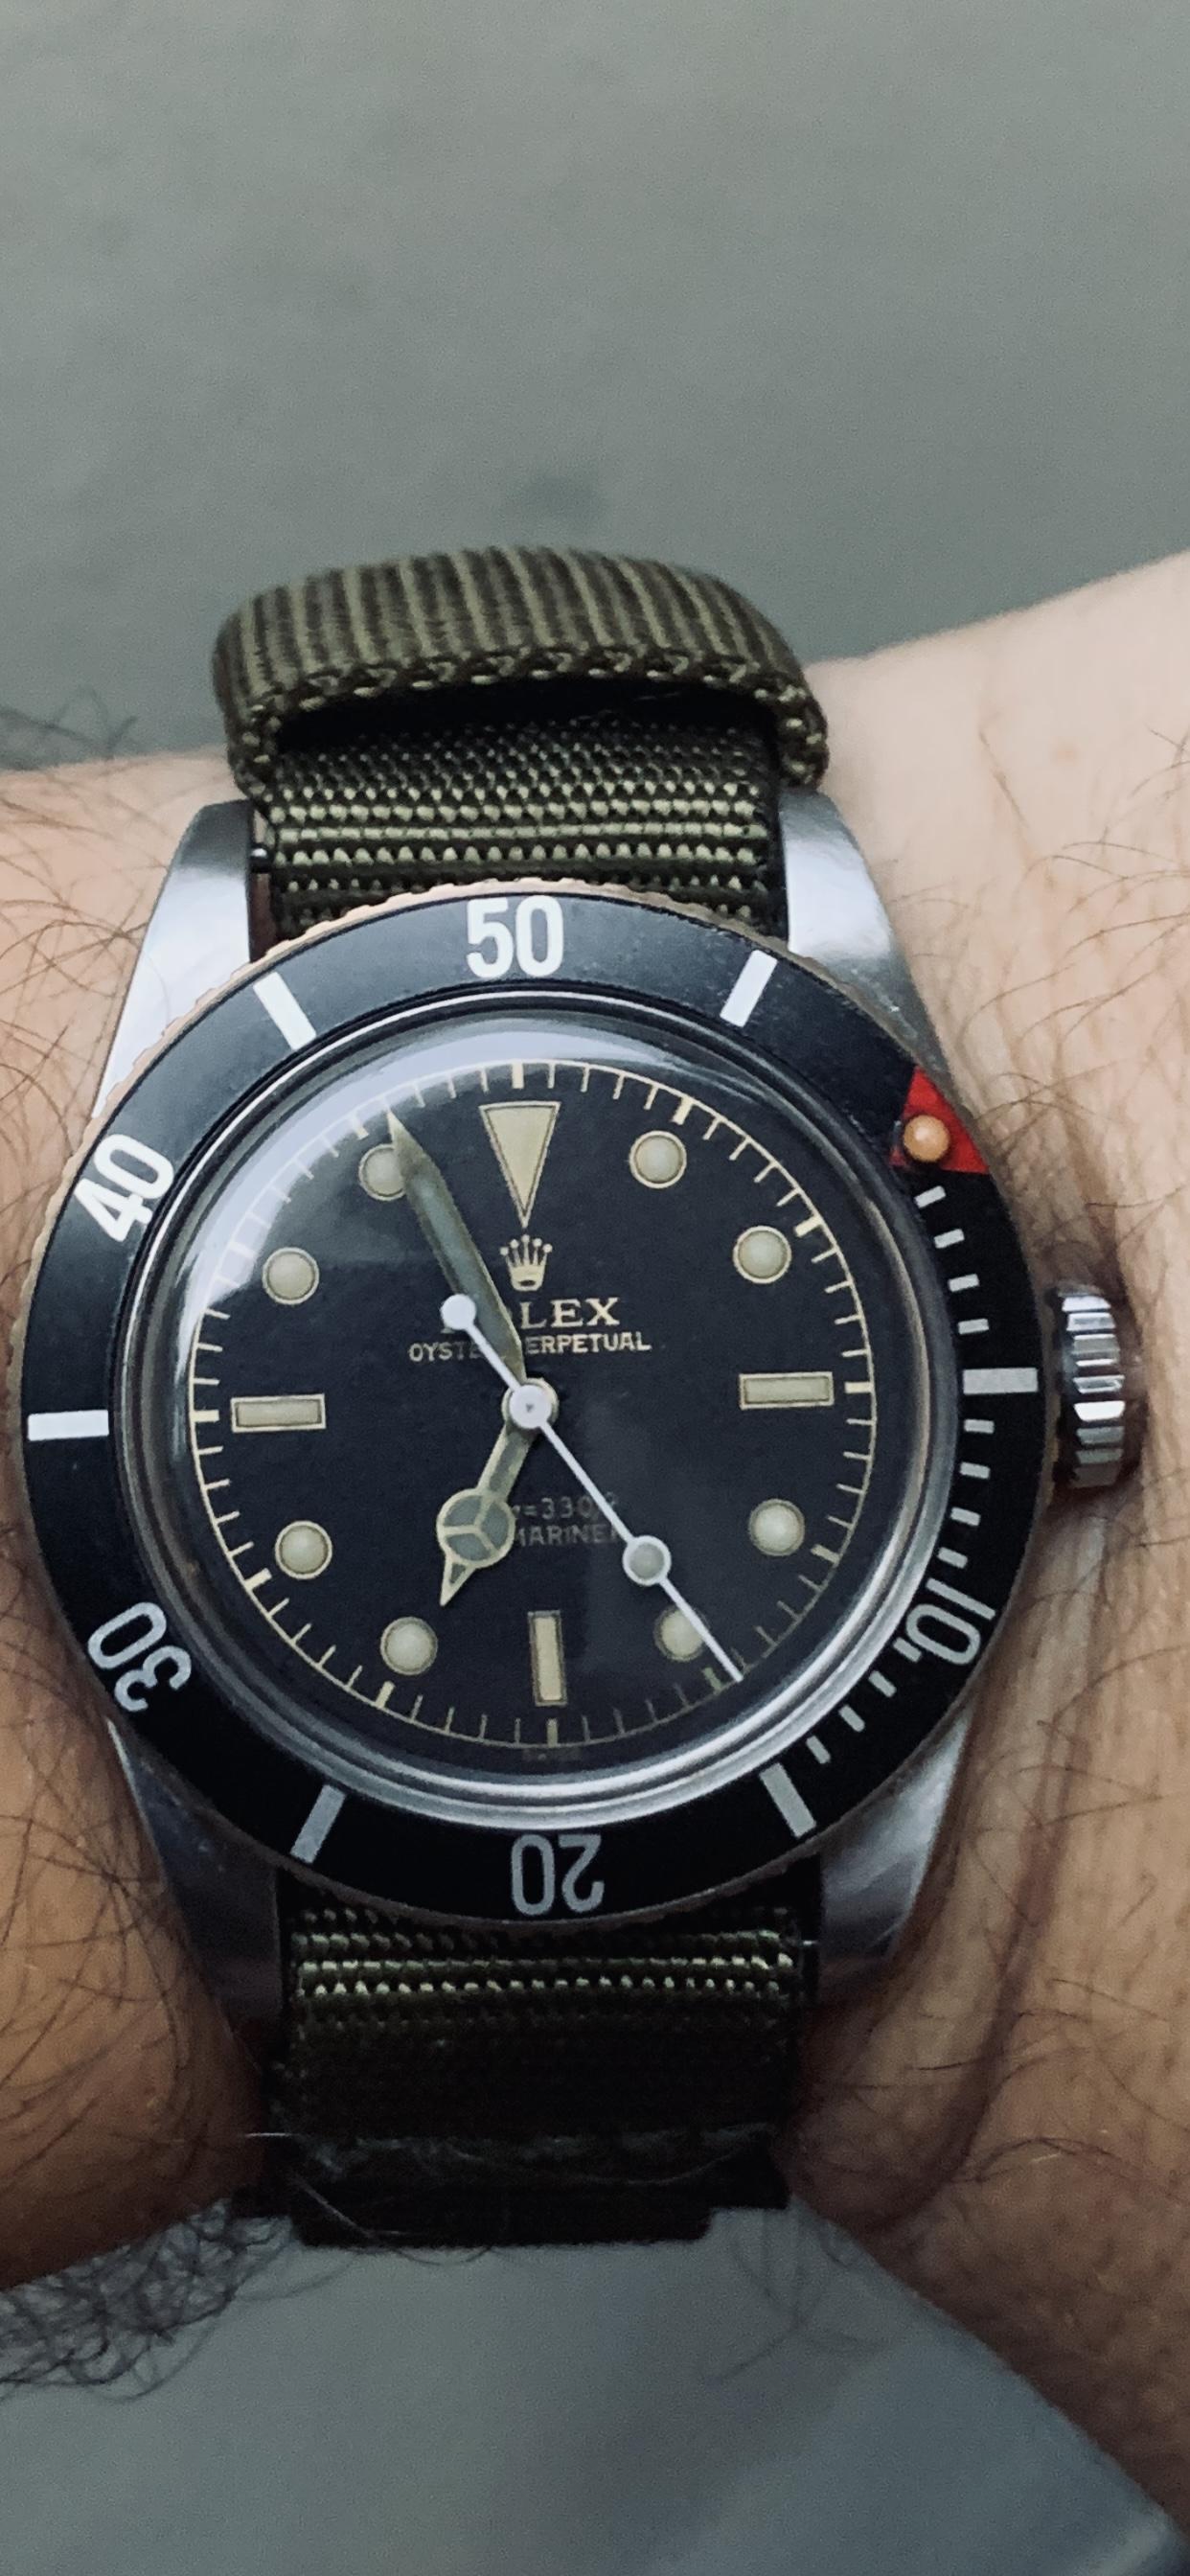
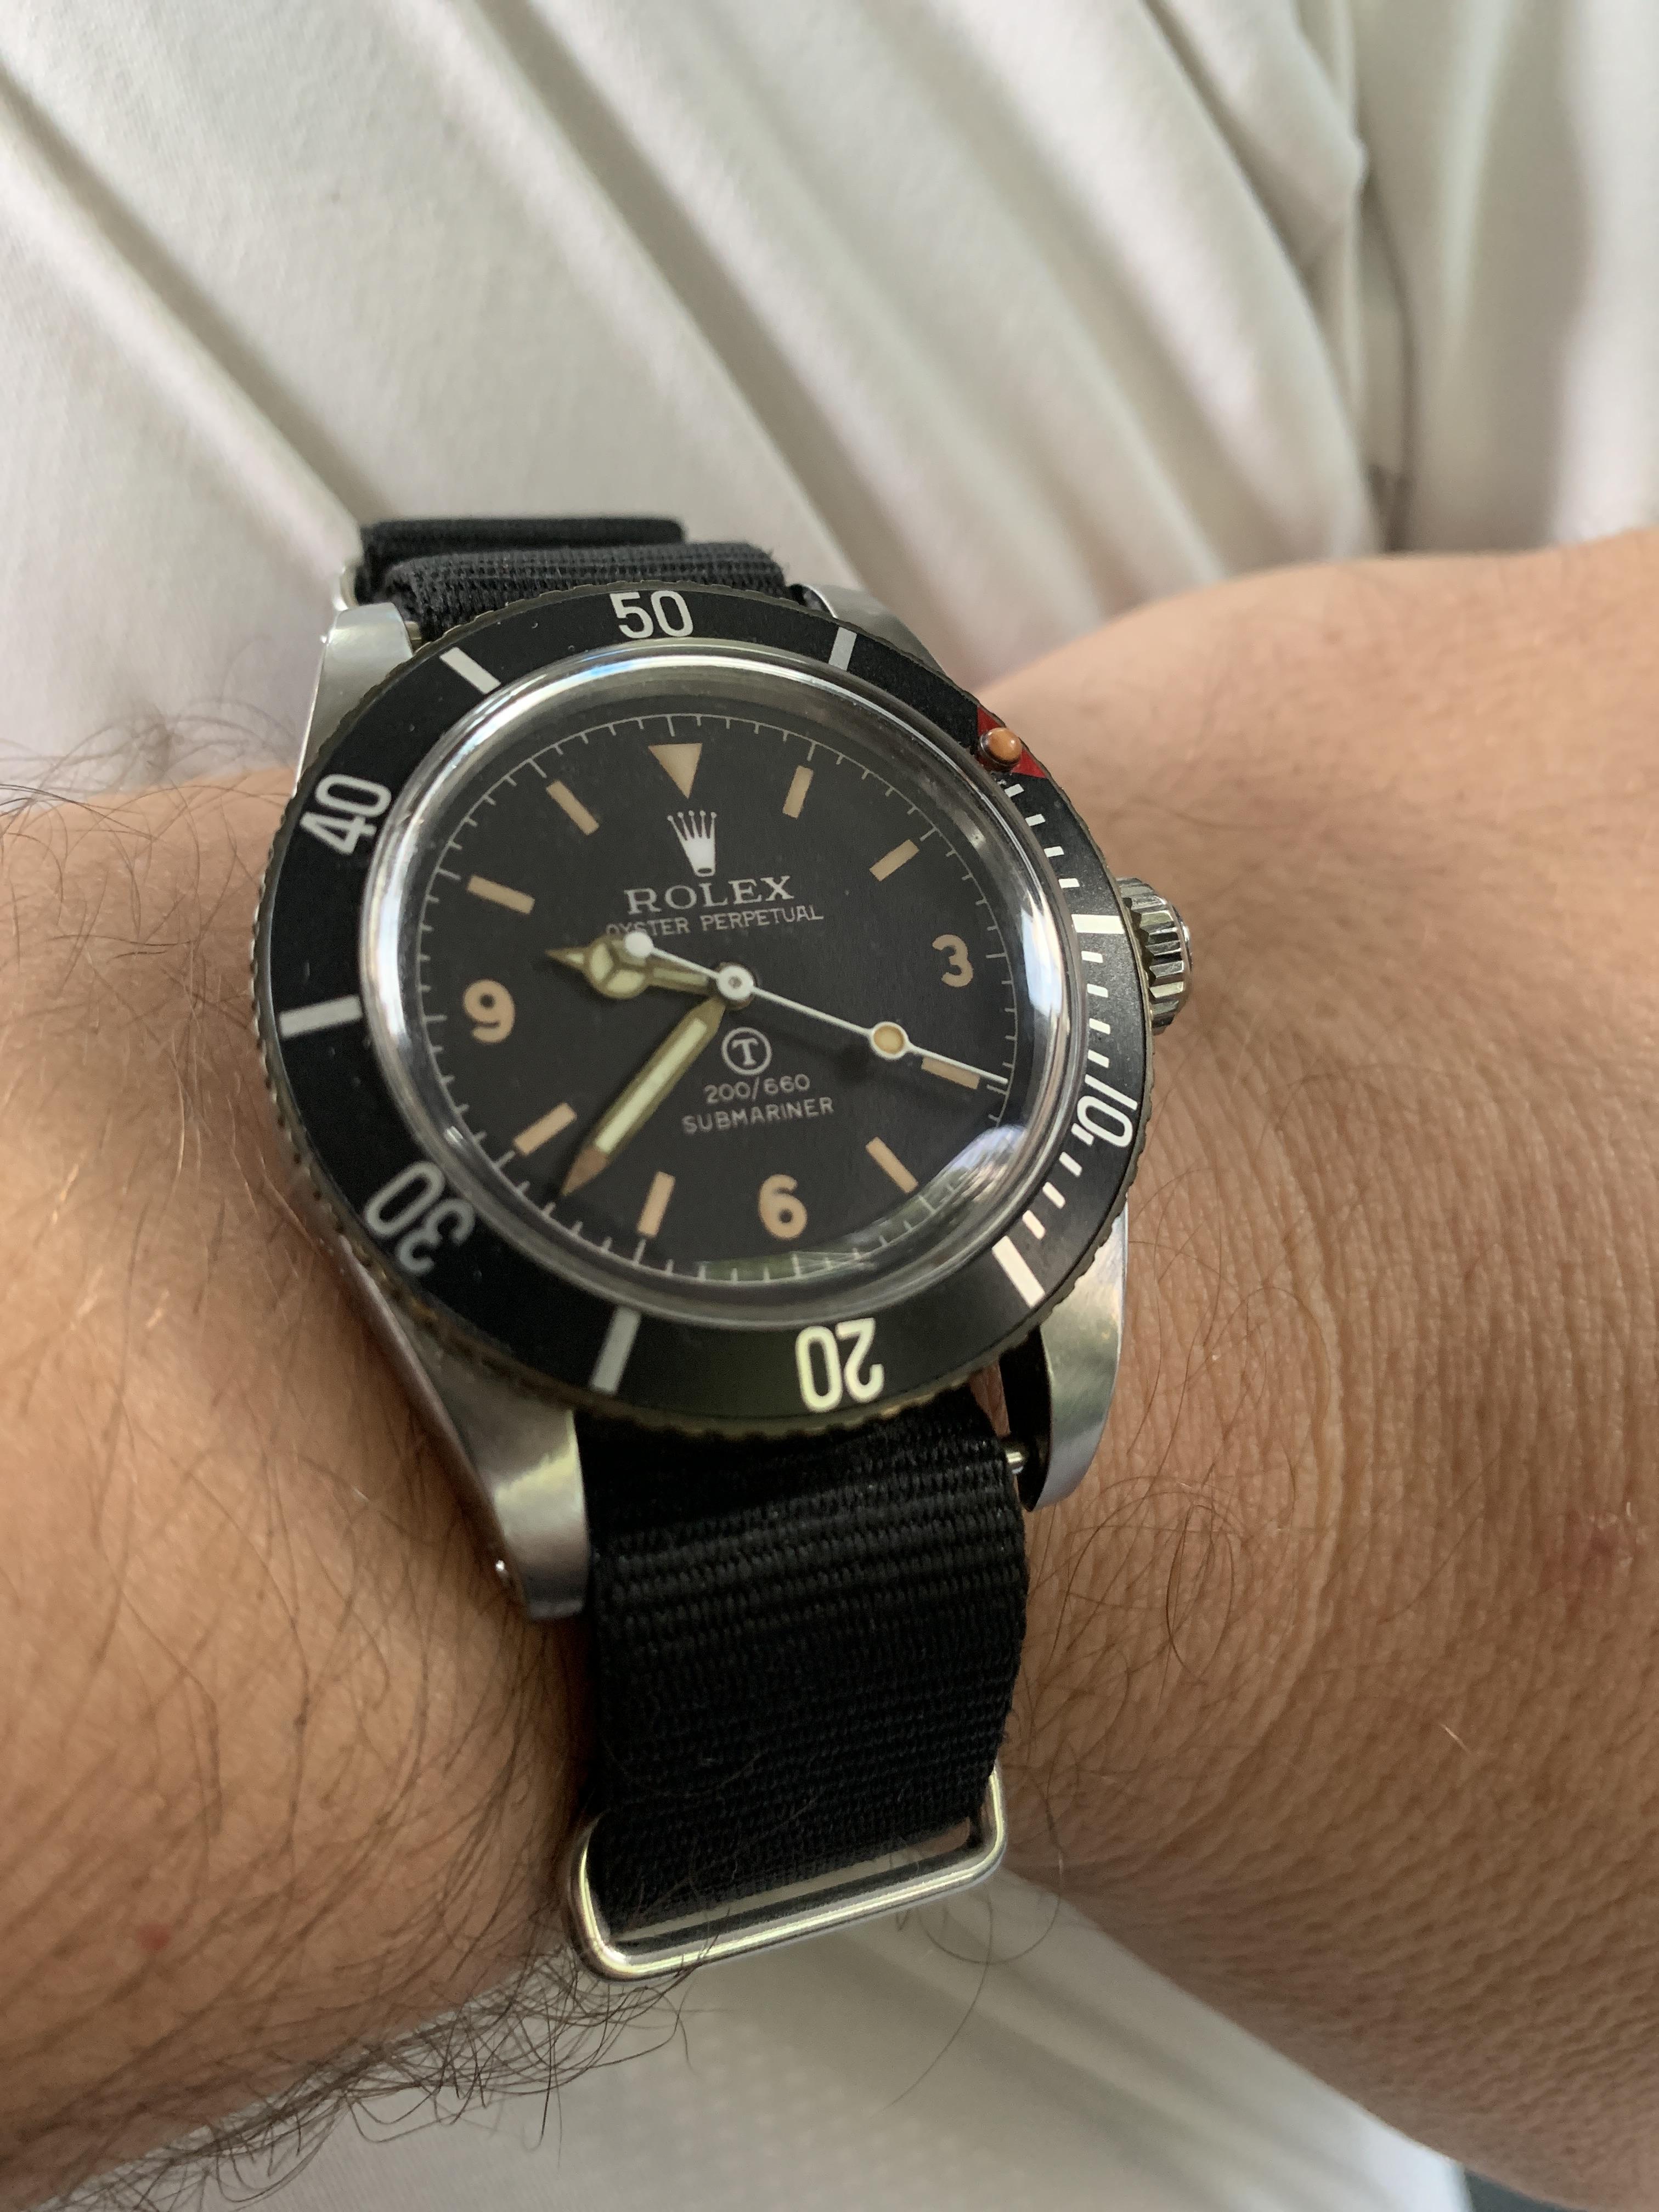
A 5513 gilt exclamation dial

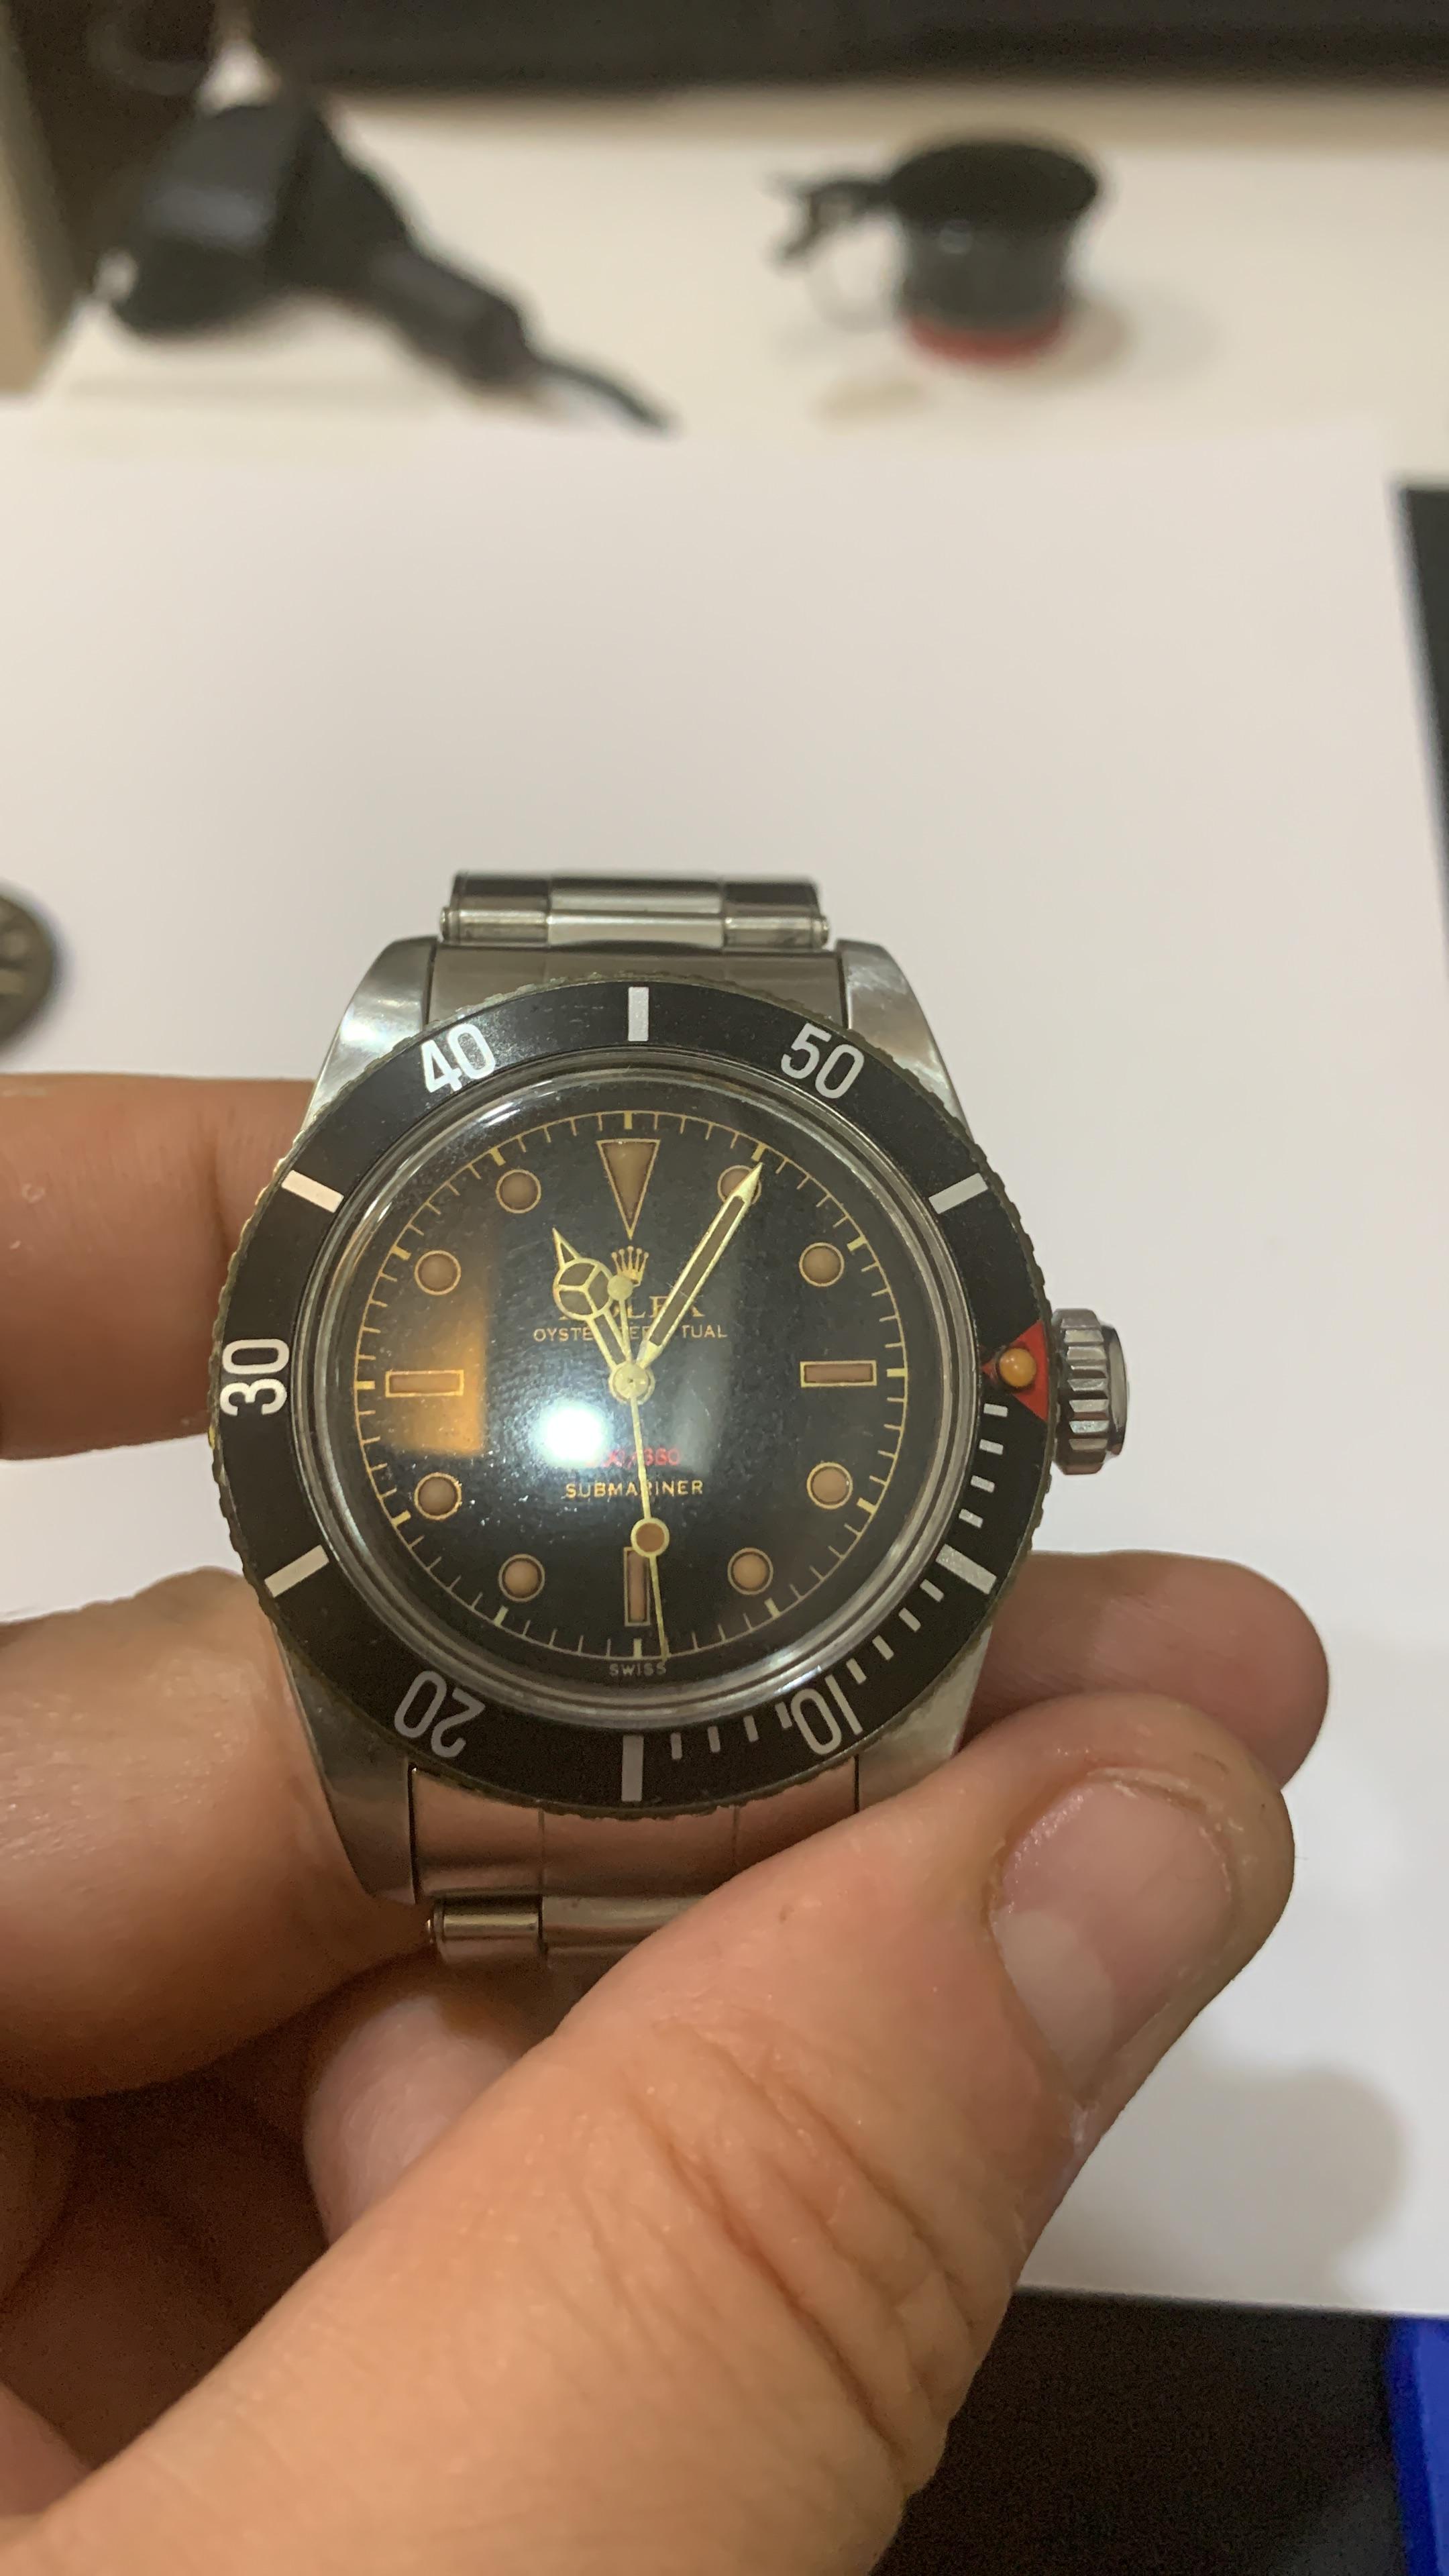
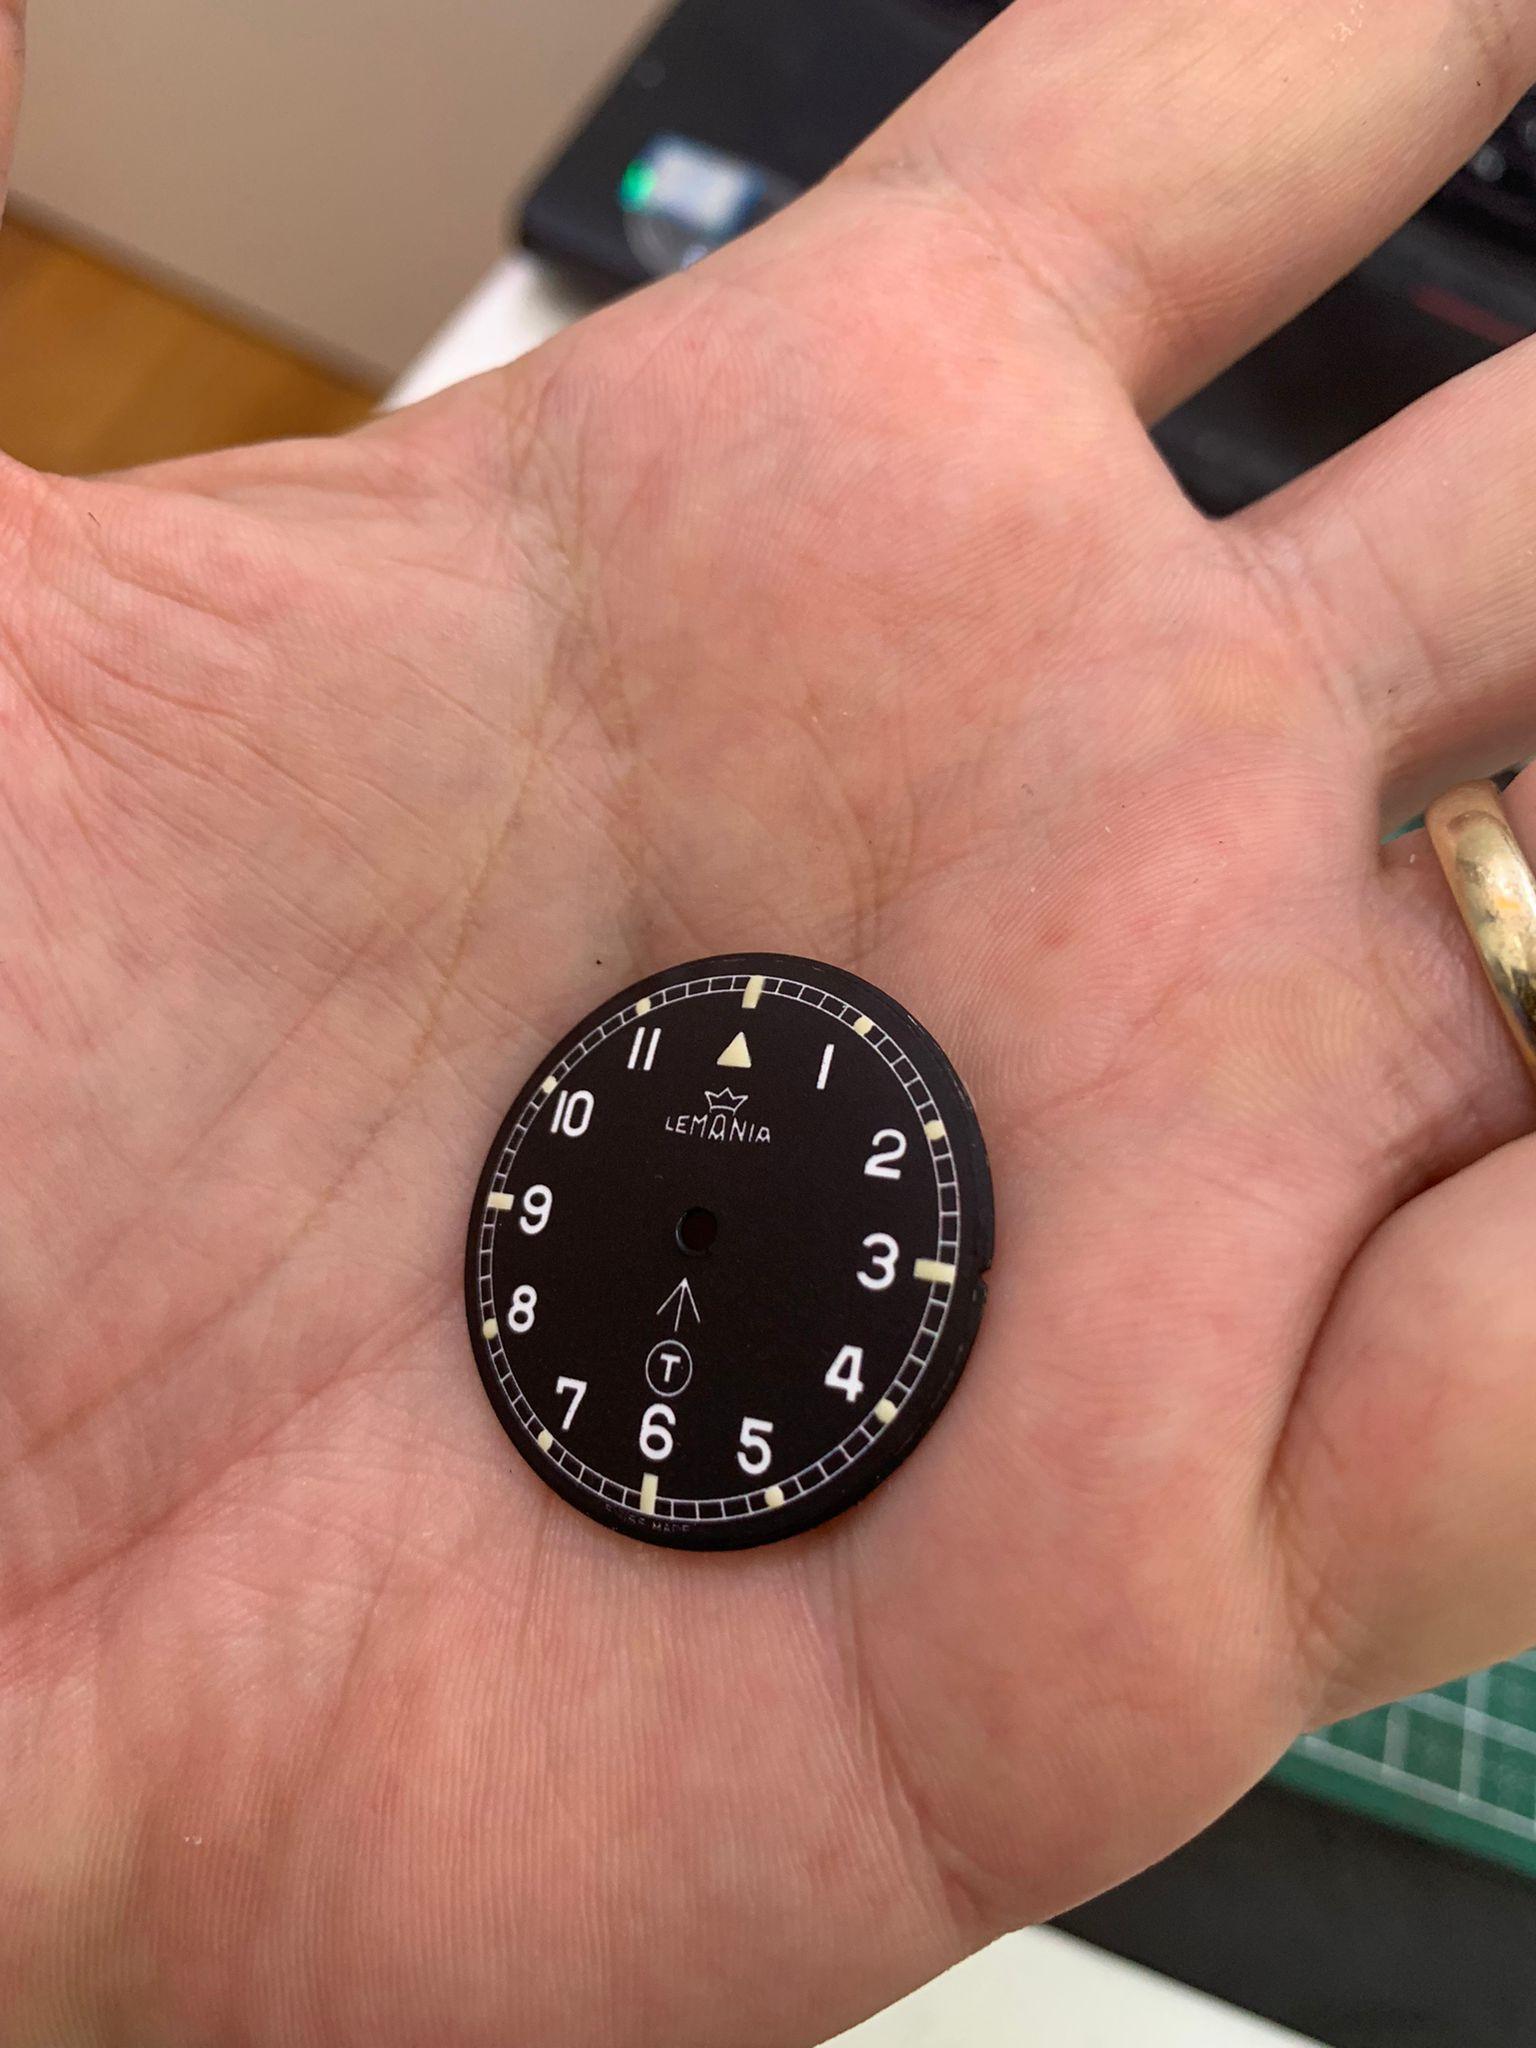
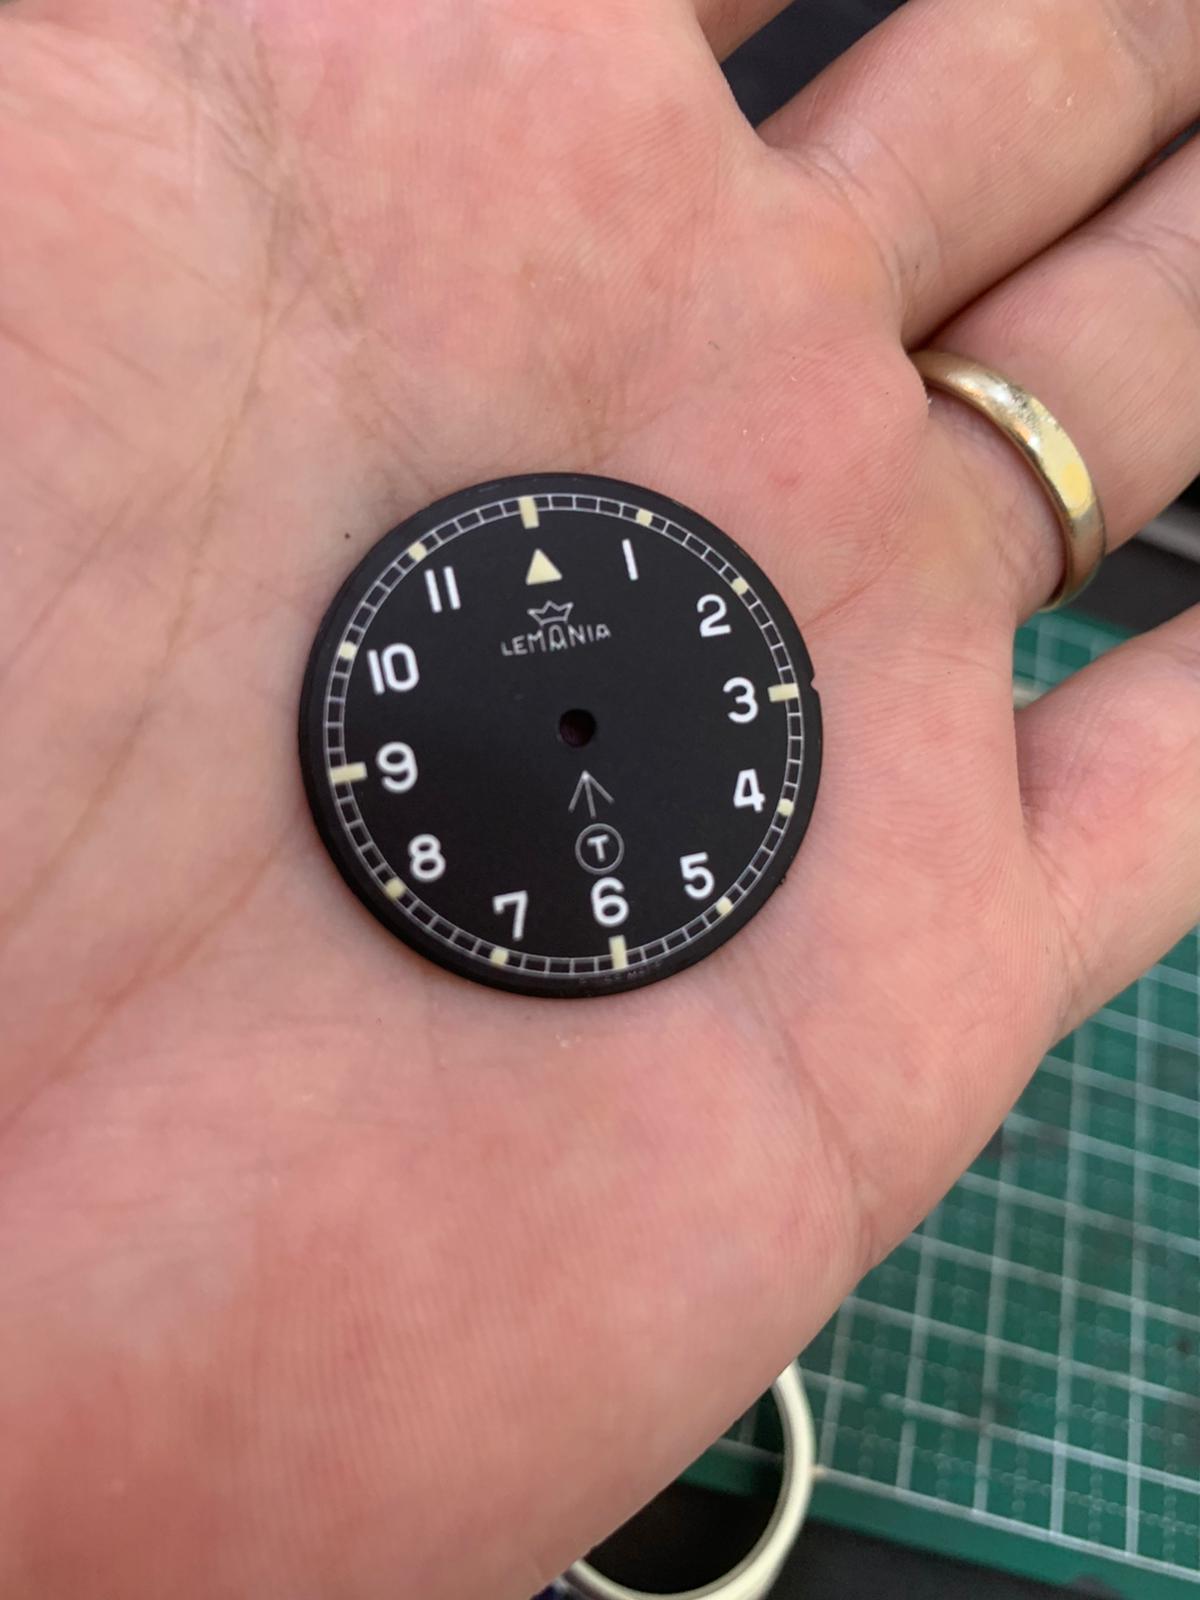
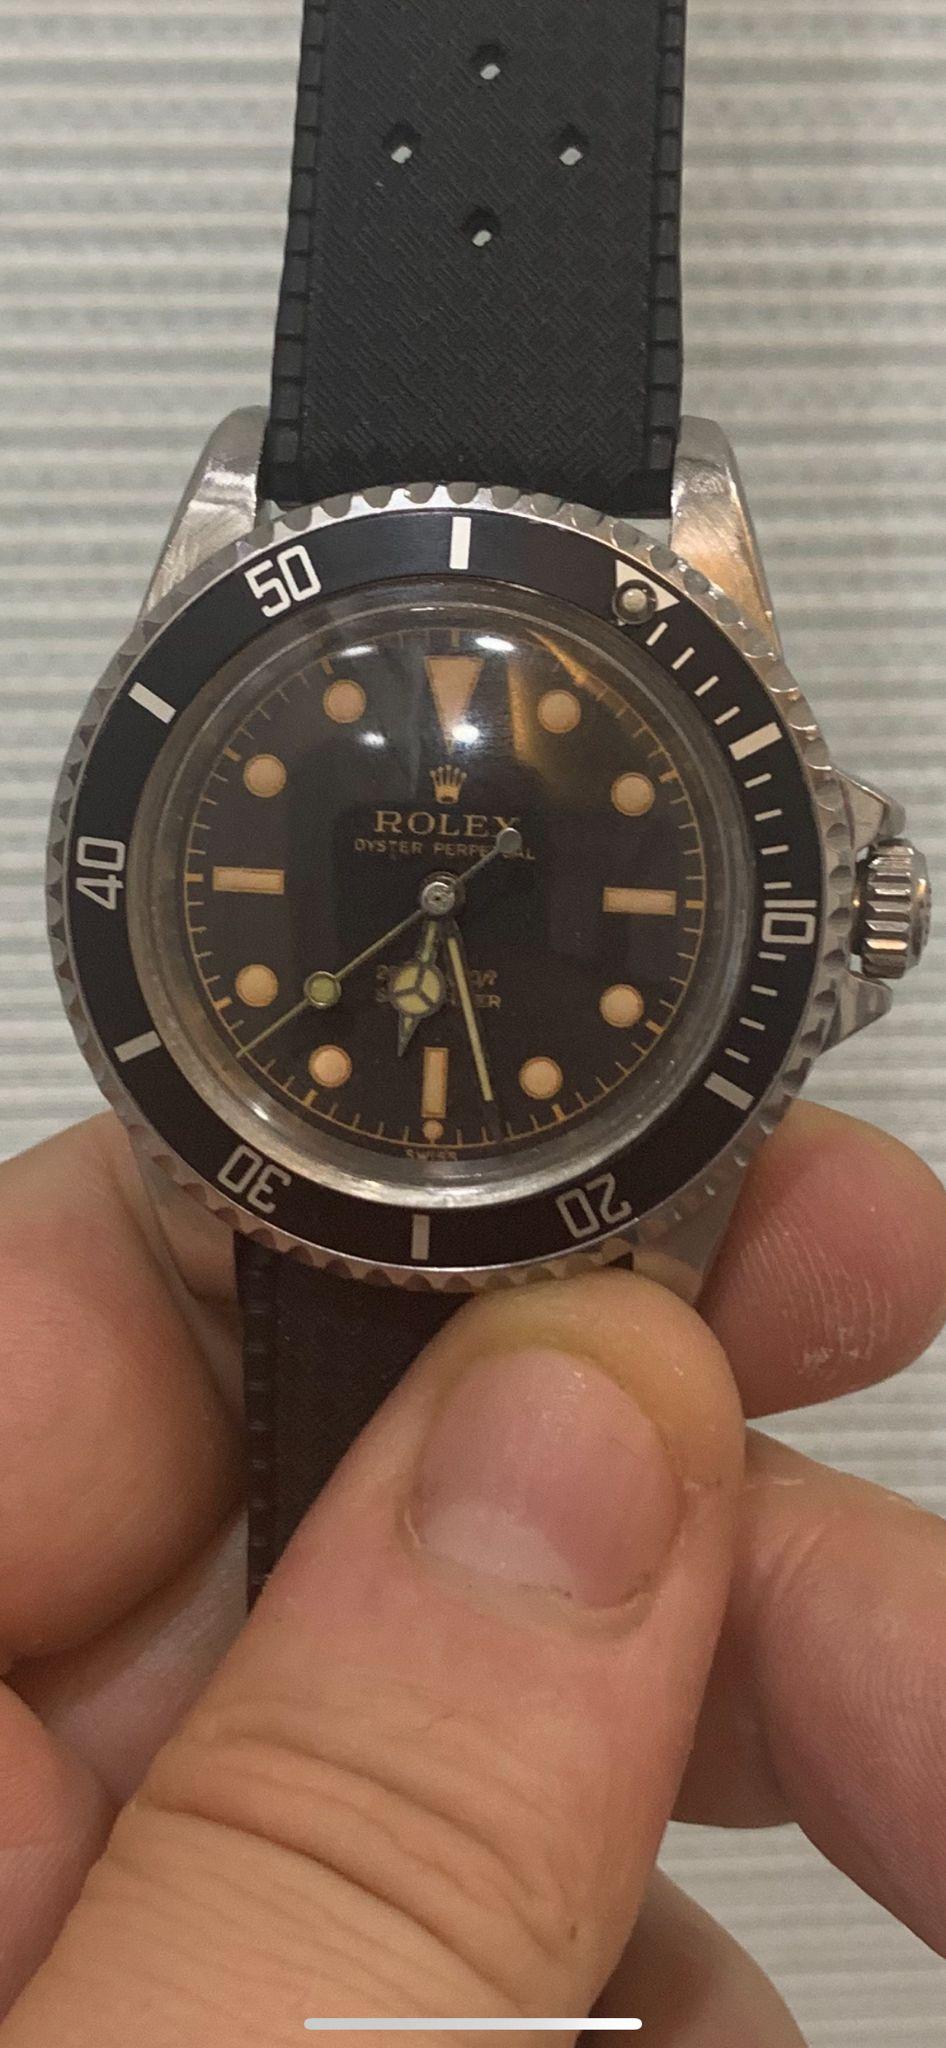
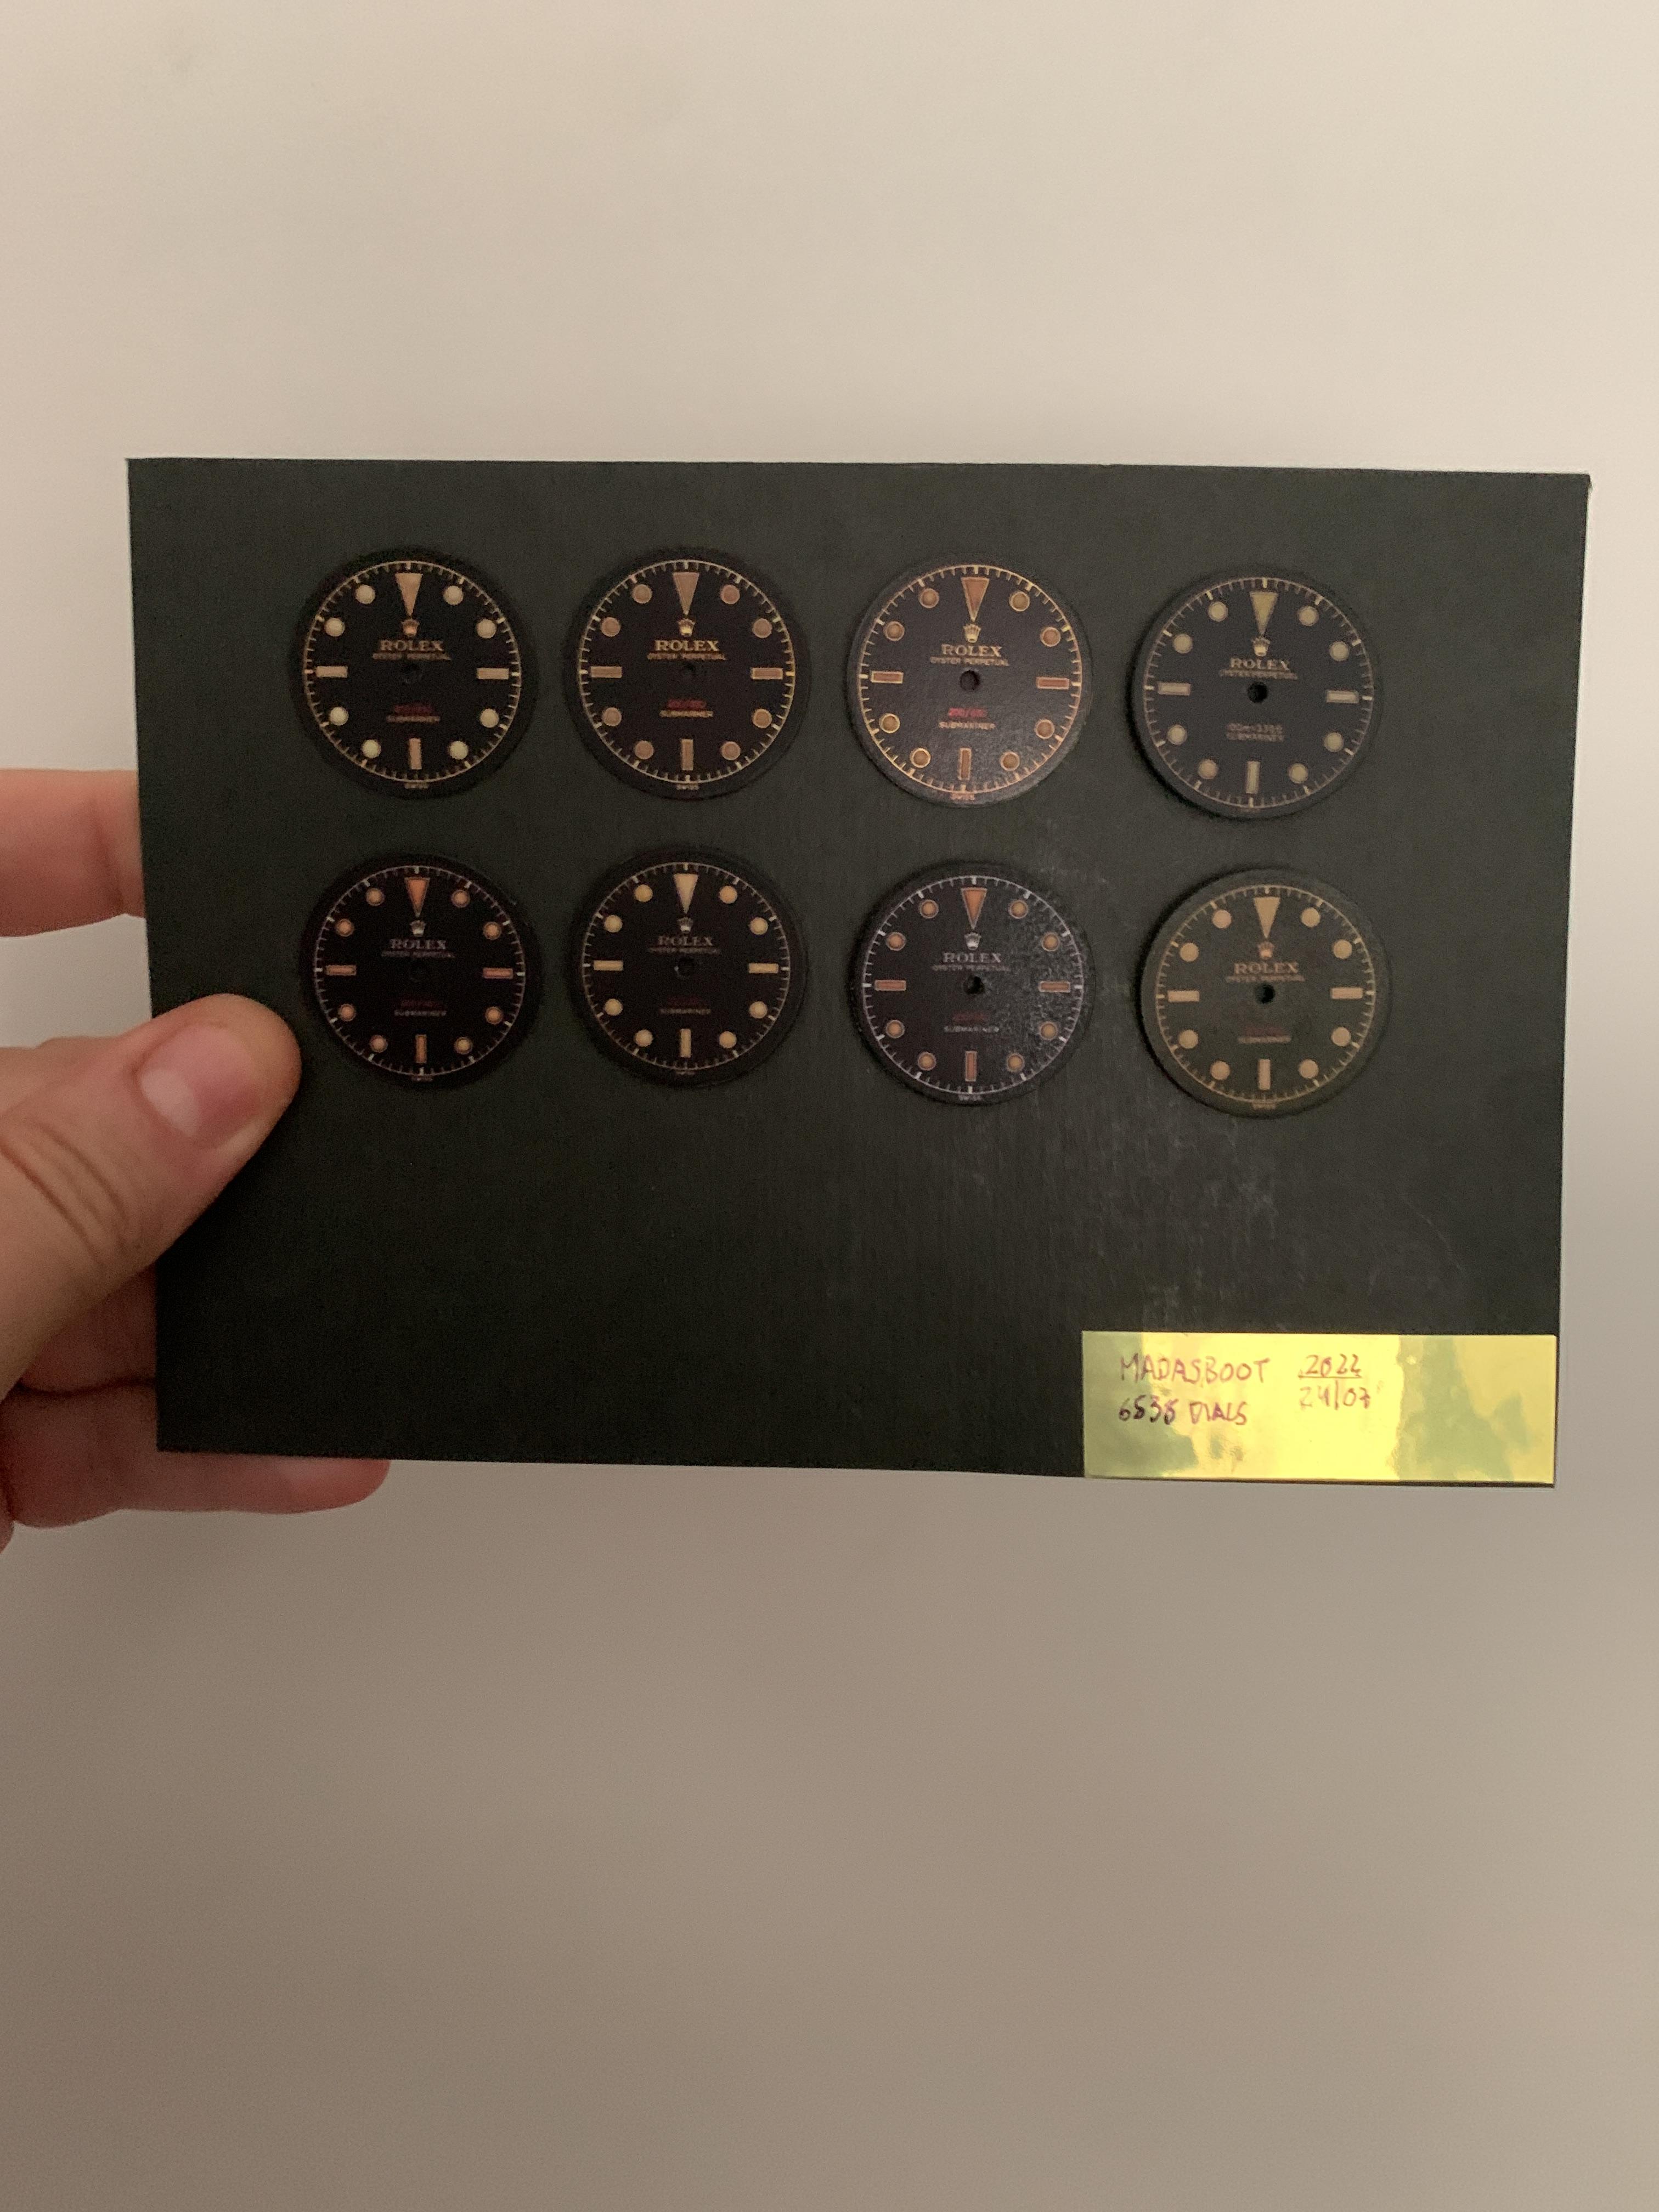
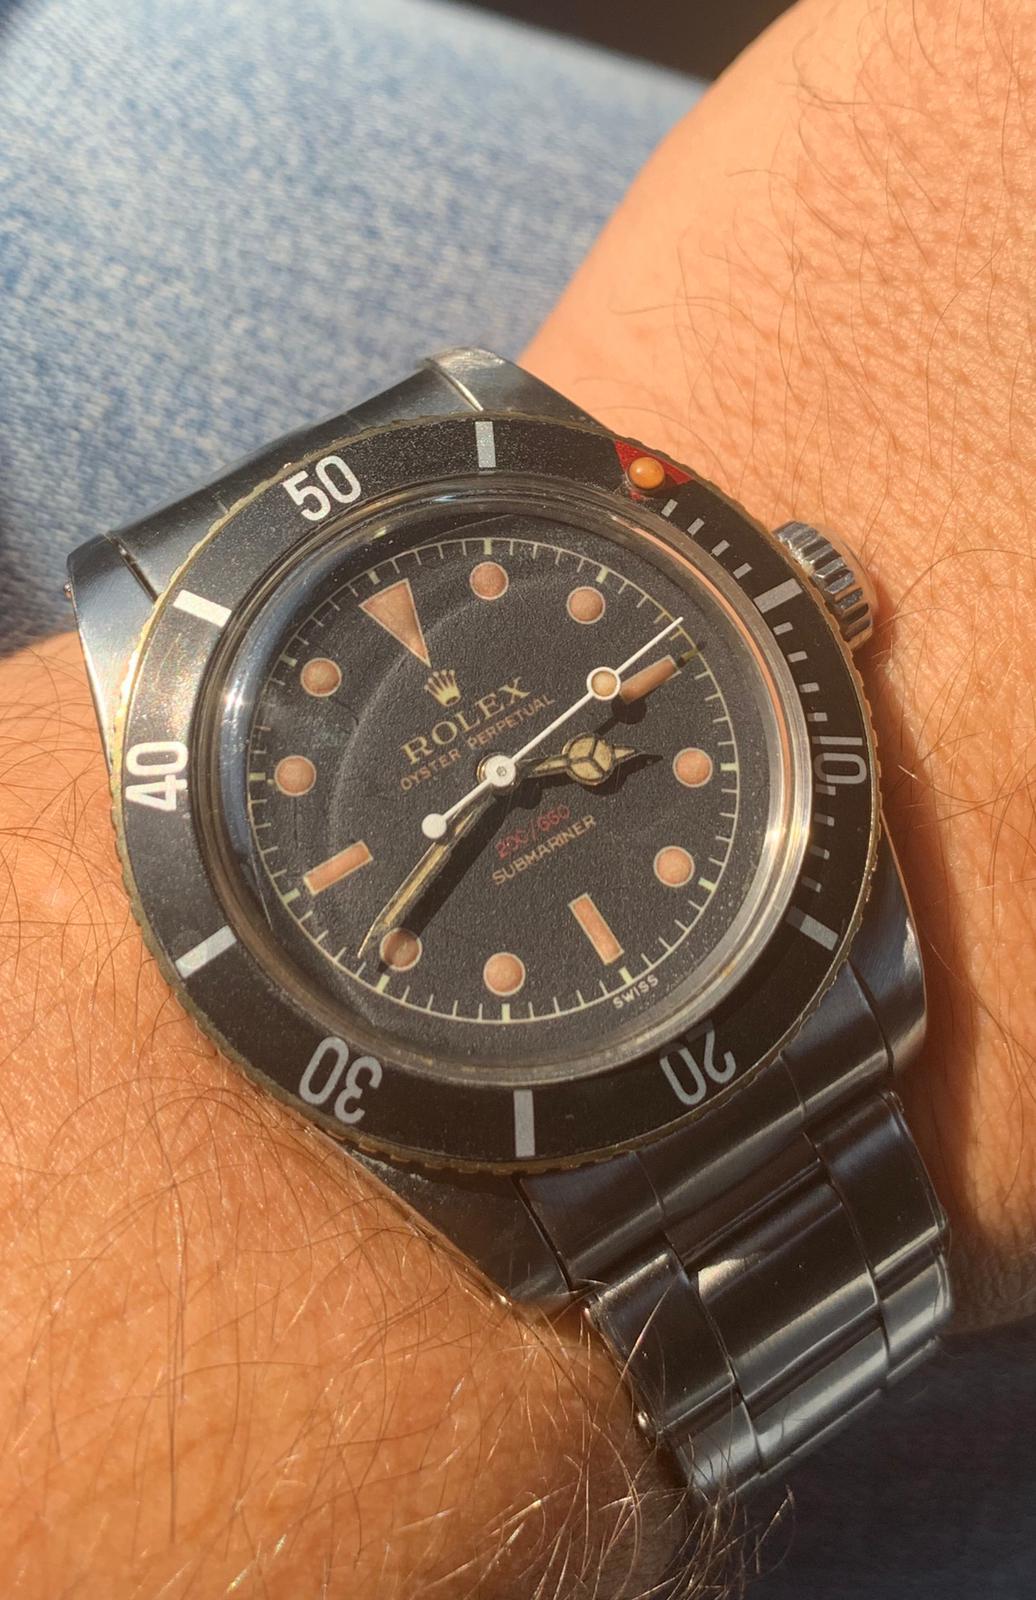
and one of my 6538
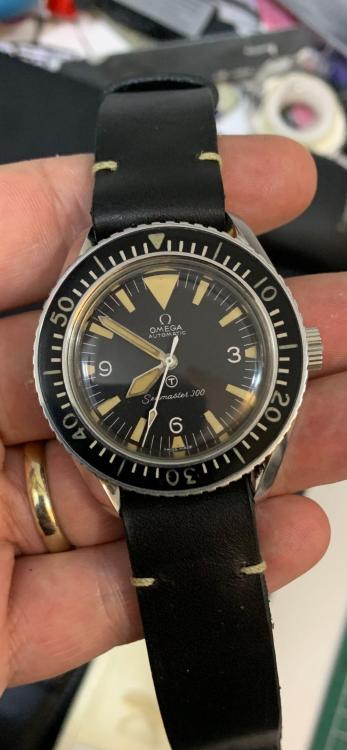
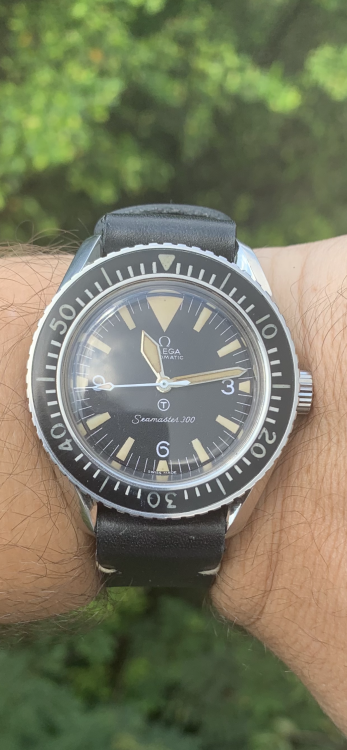
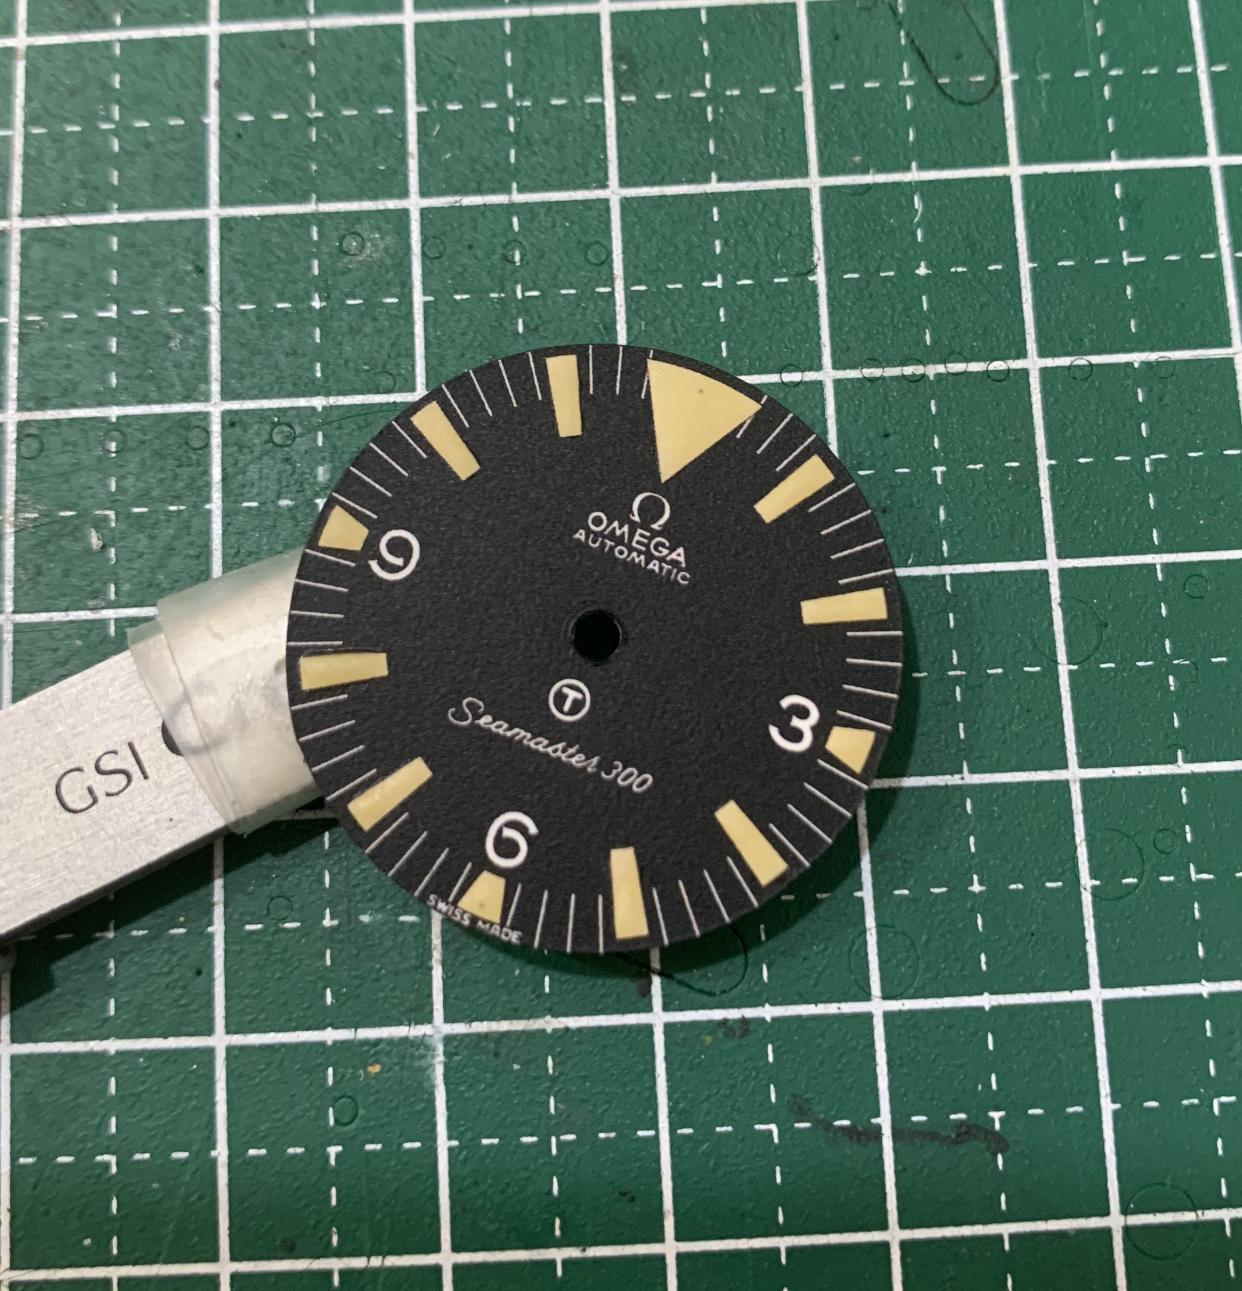
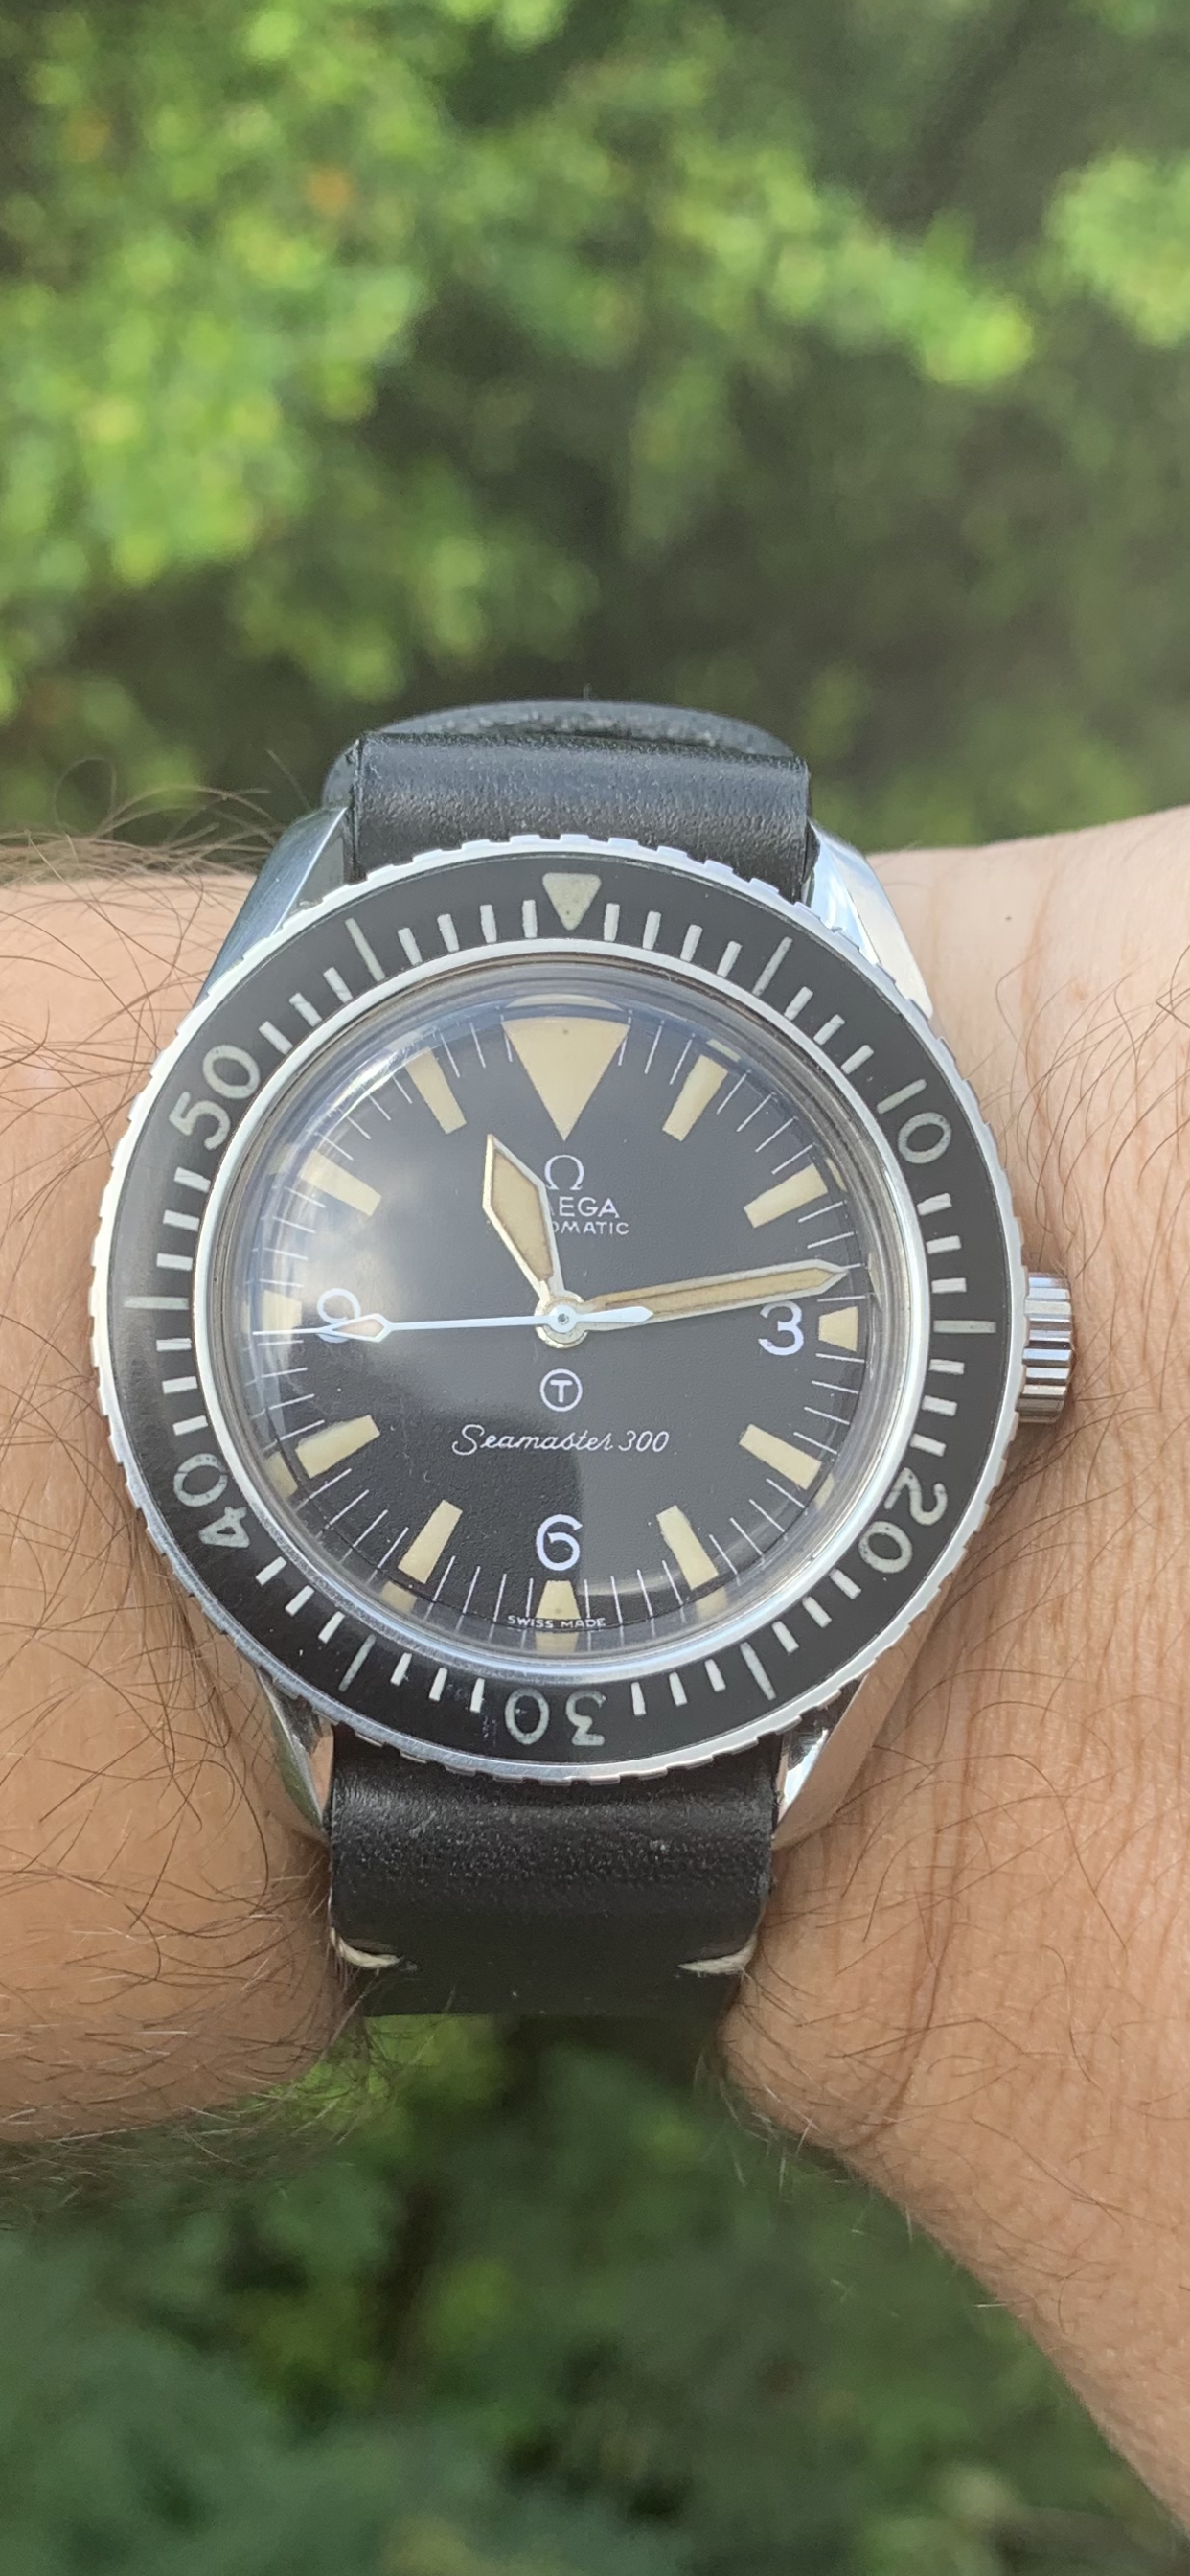
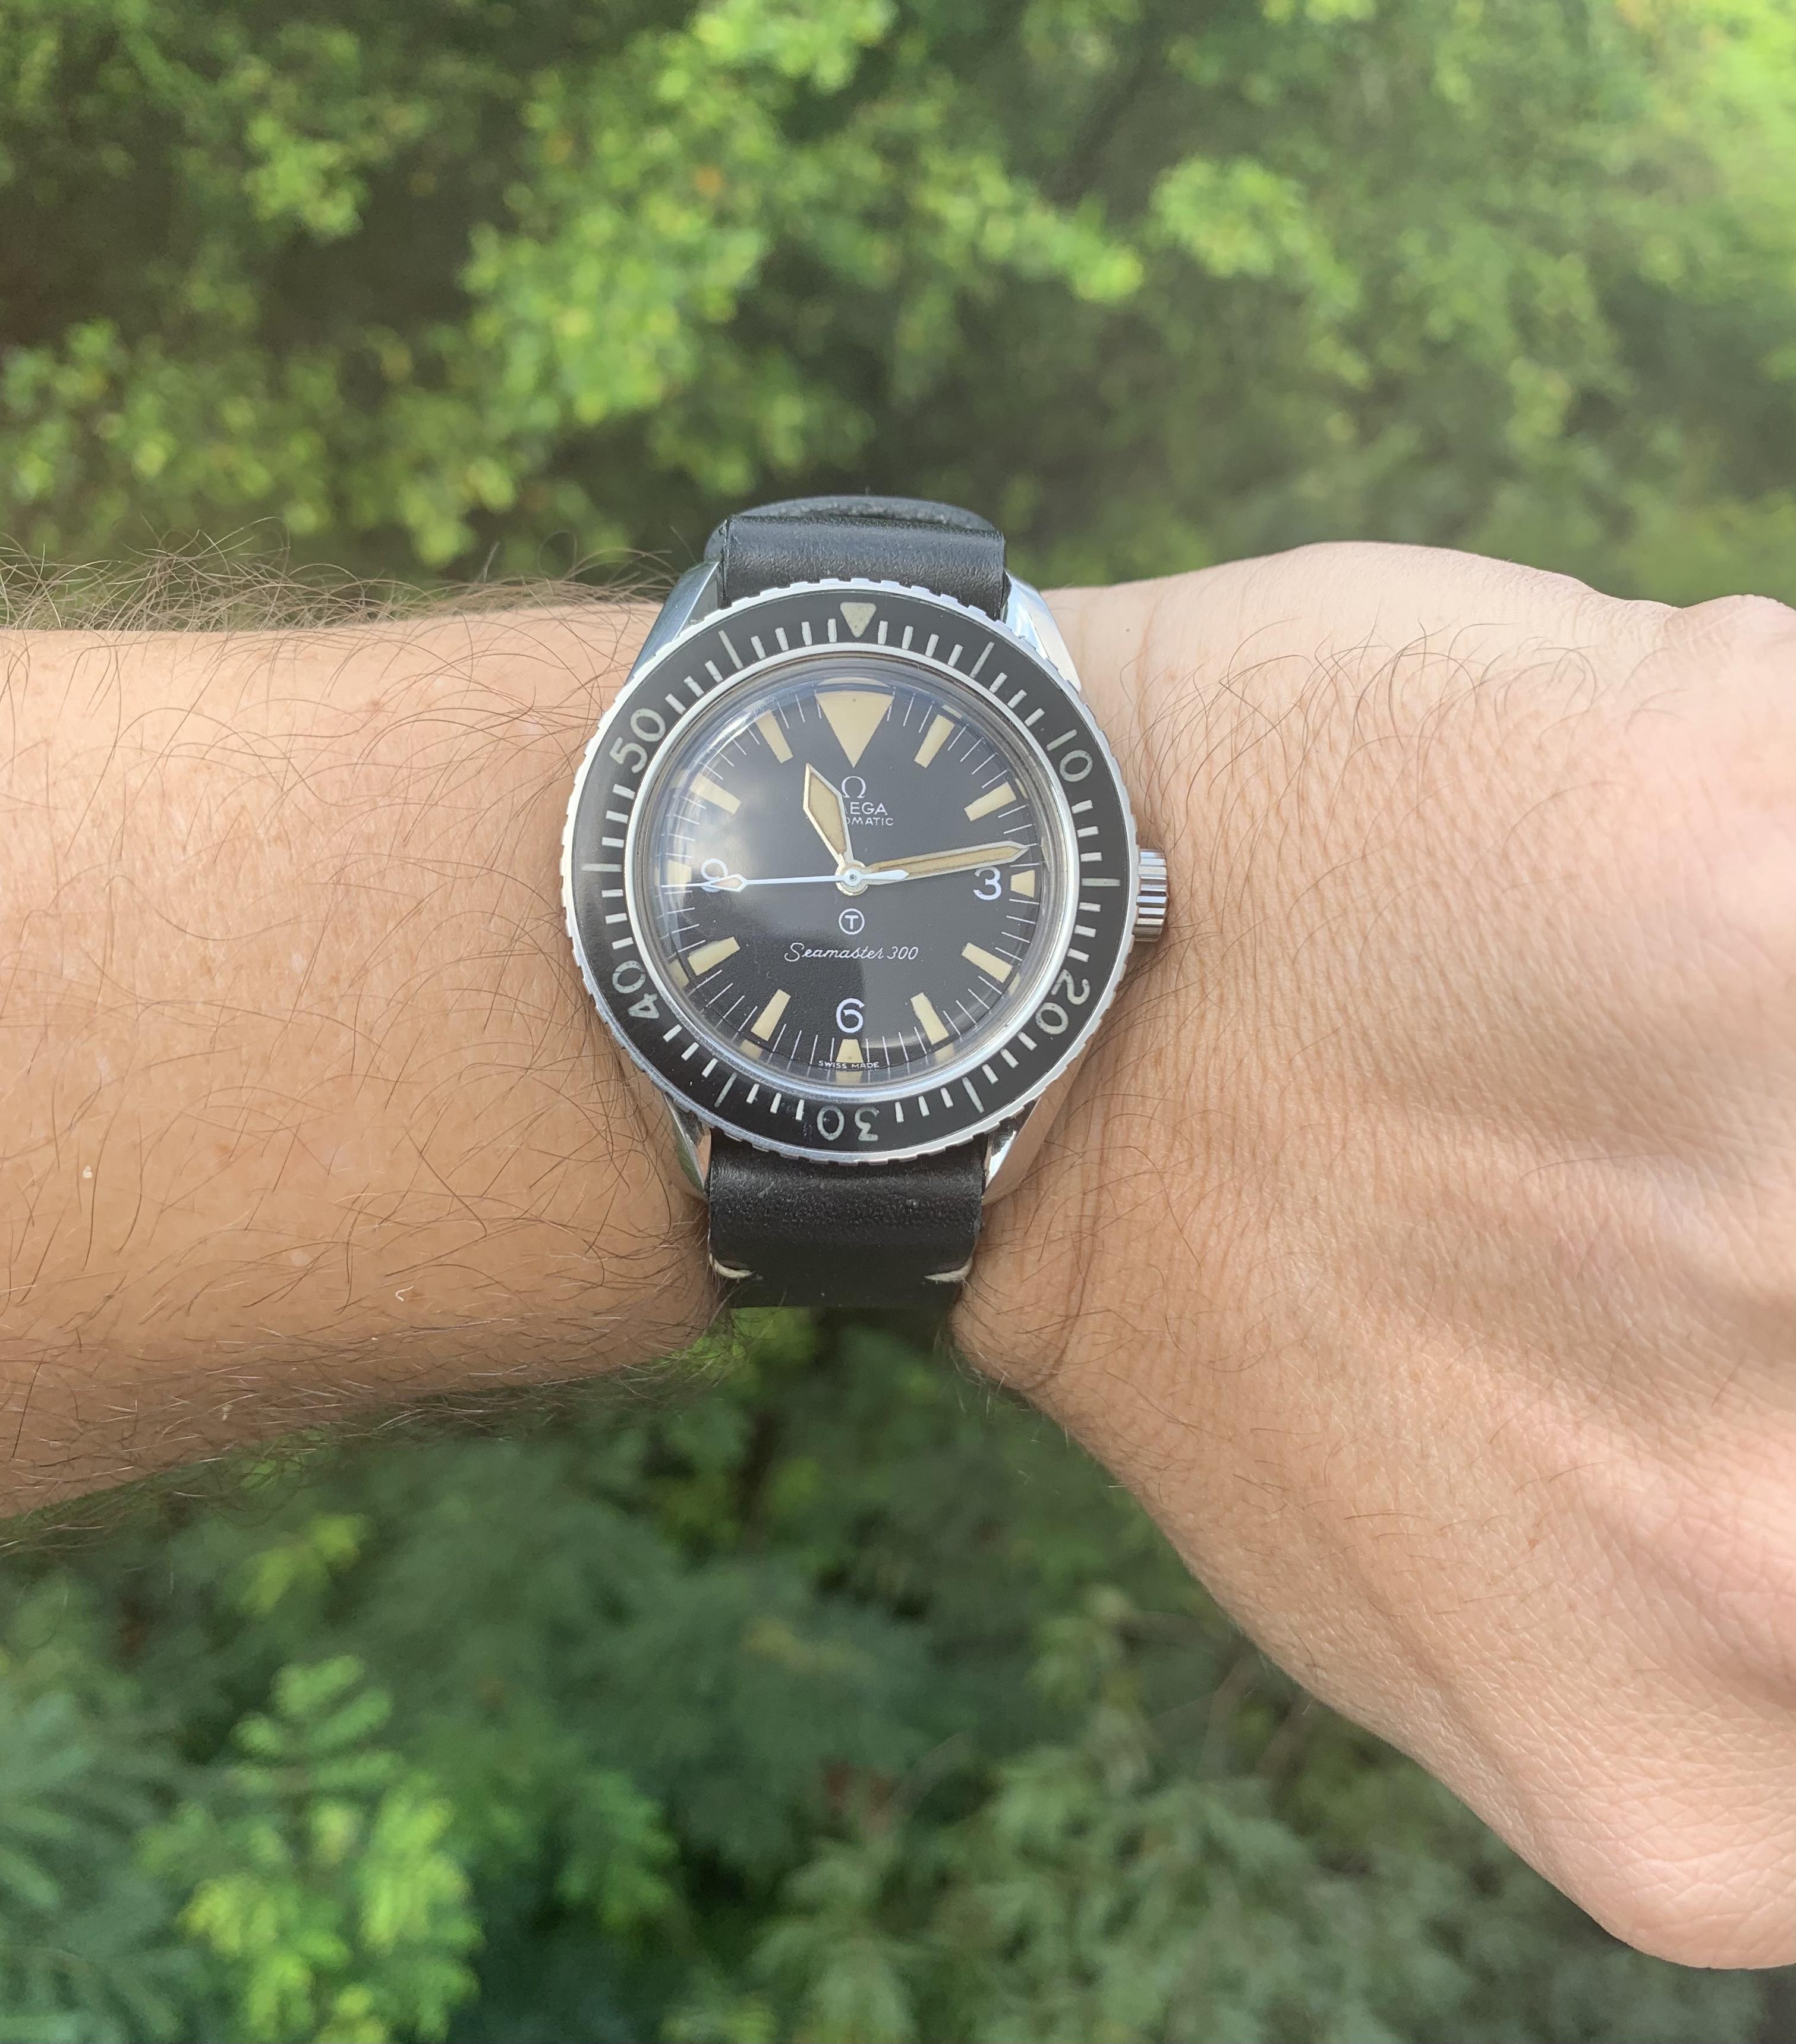
plus my seamaster 300
I vectorize, build and lume, the old way
-
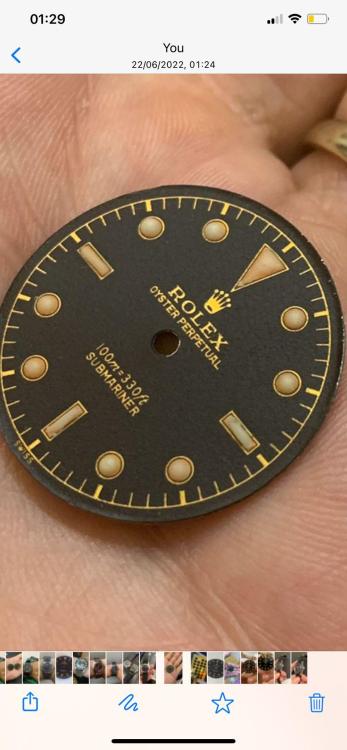
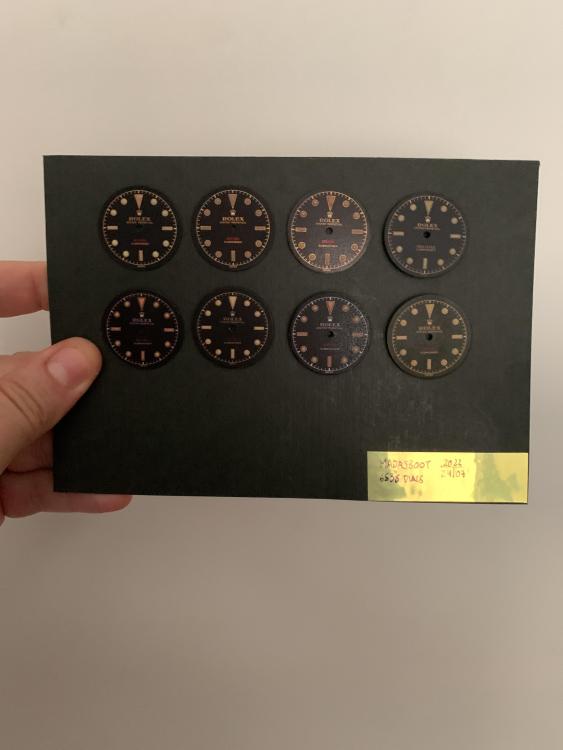
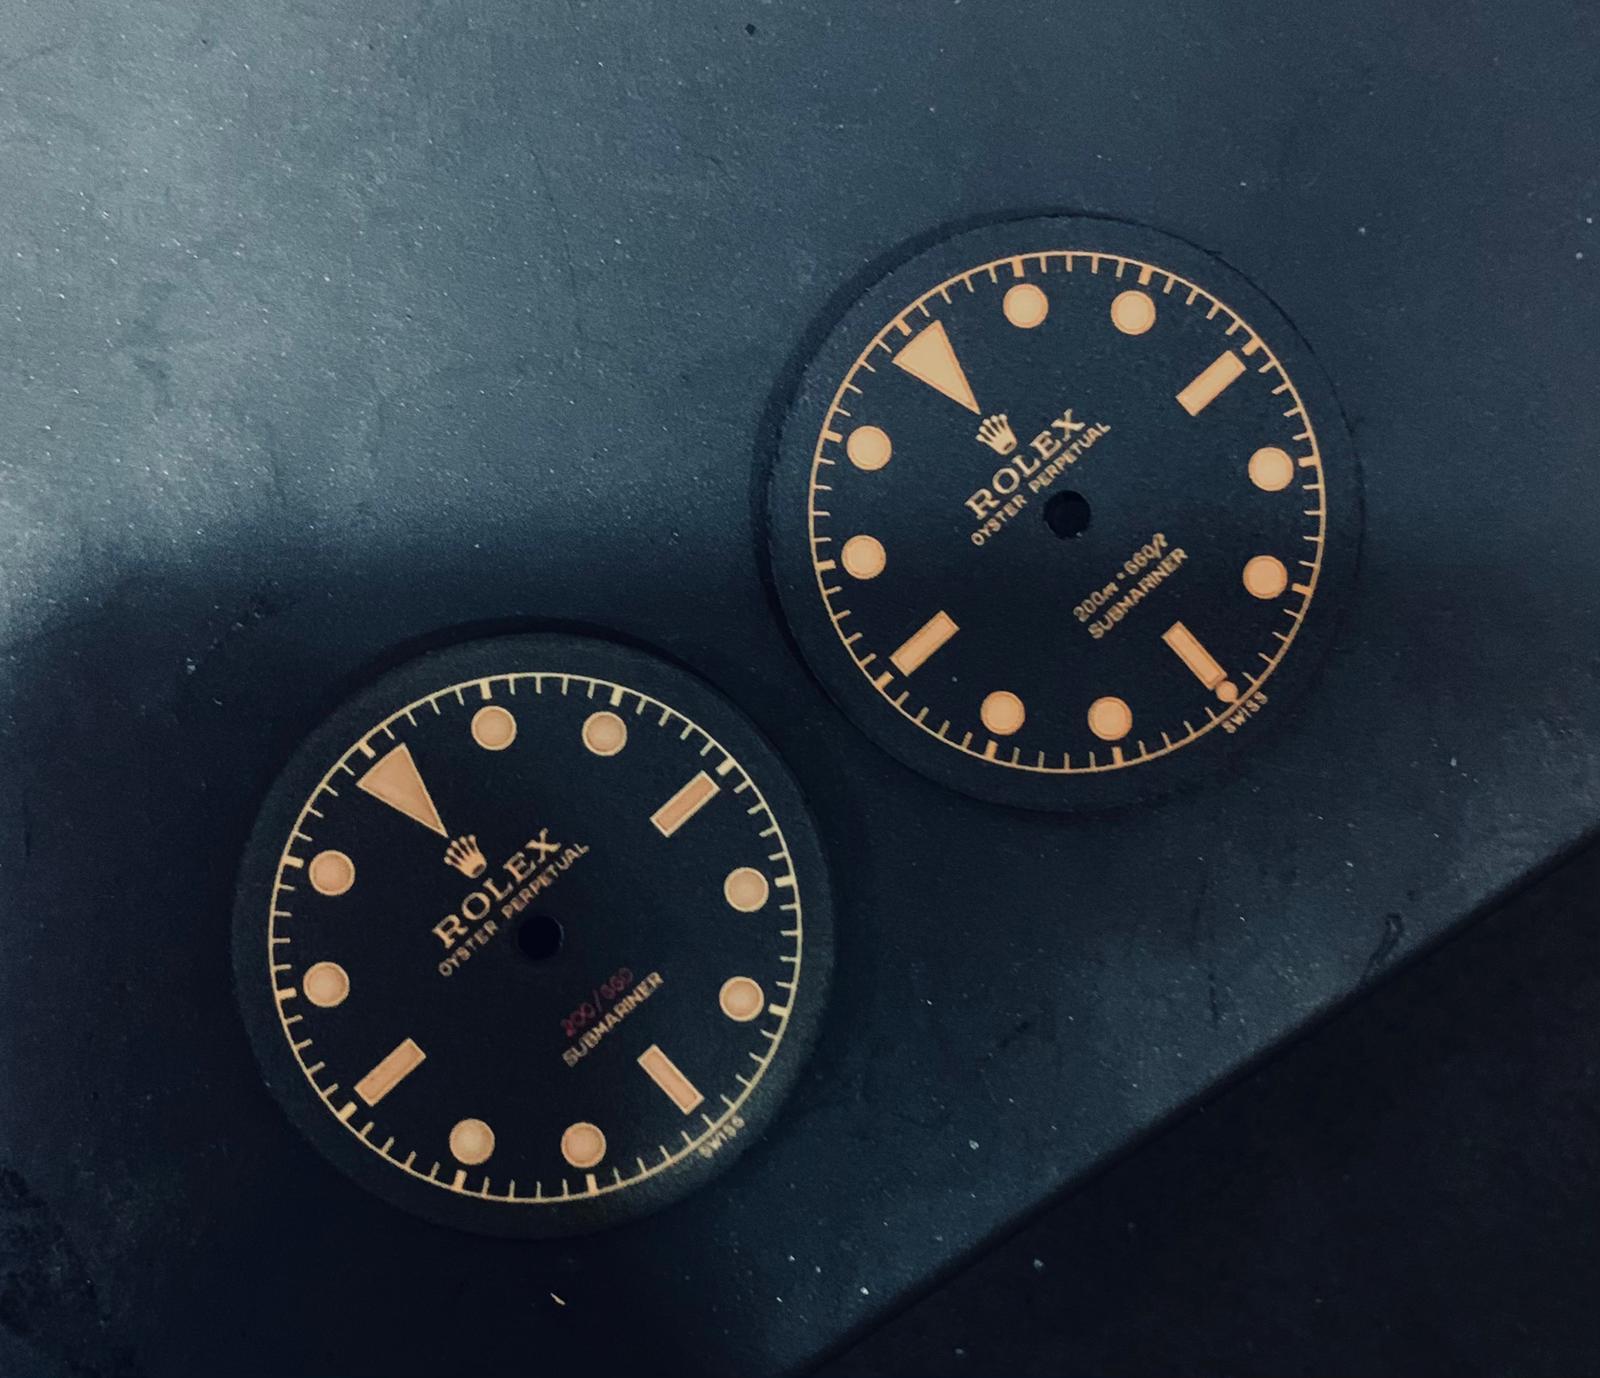
Some of the dials I made.
some gilted, some not.


-
2
-
-
1 hour ago, oldtools said:
Nice! How did you make the dial?
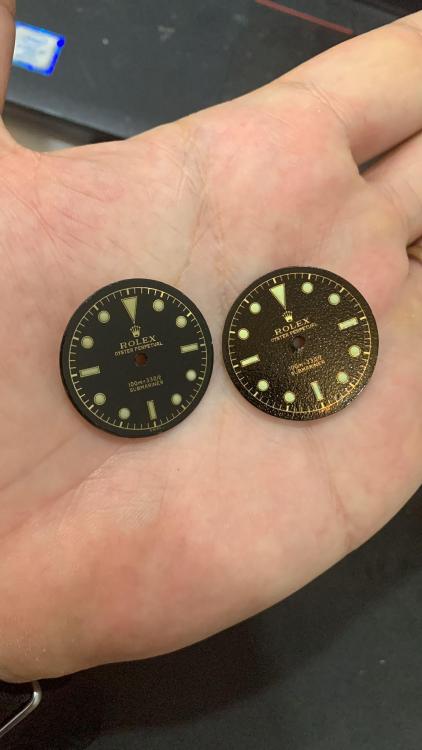
Hi. Thanks.
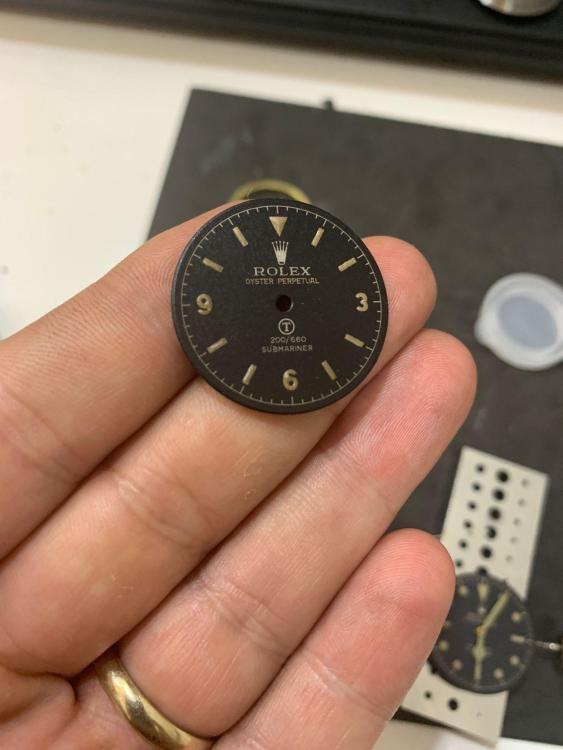
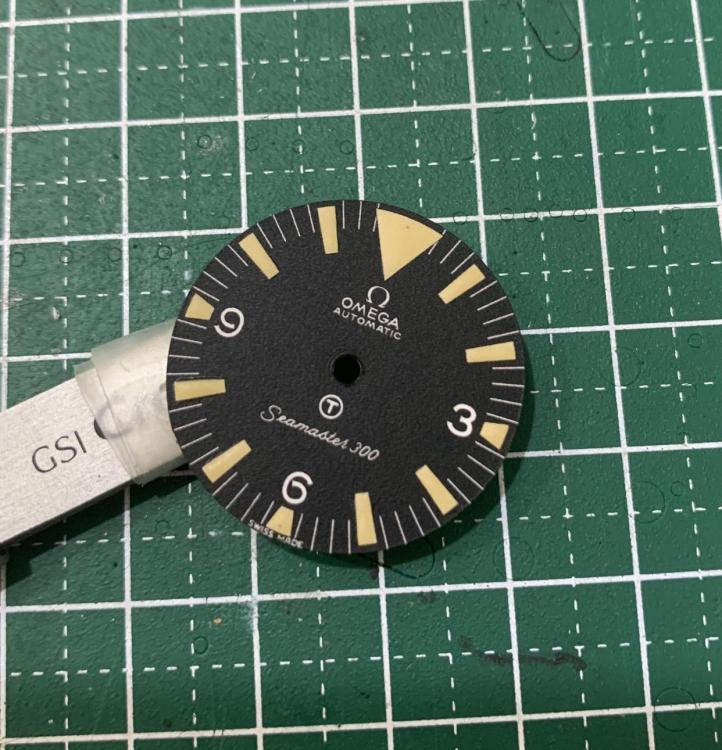
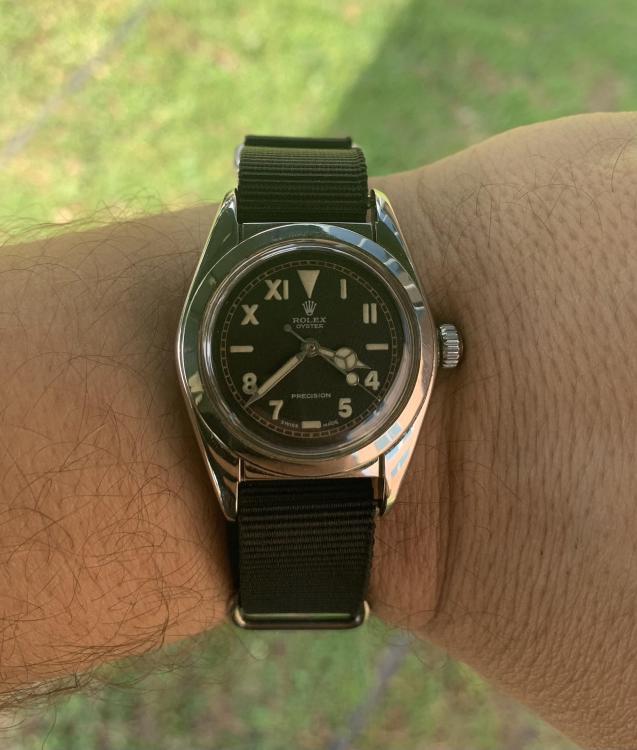
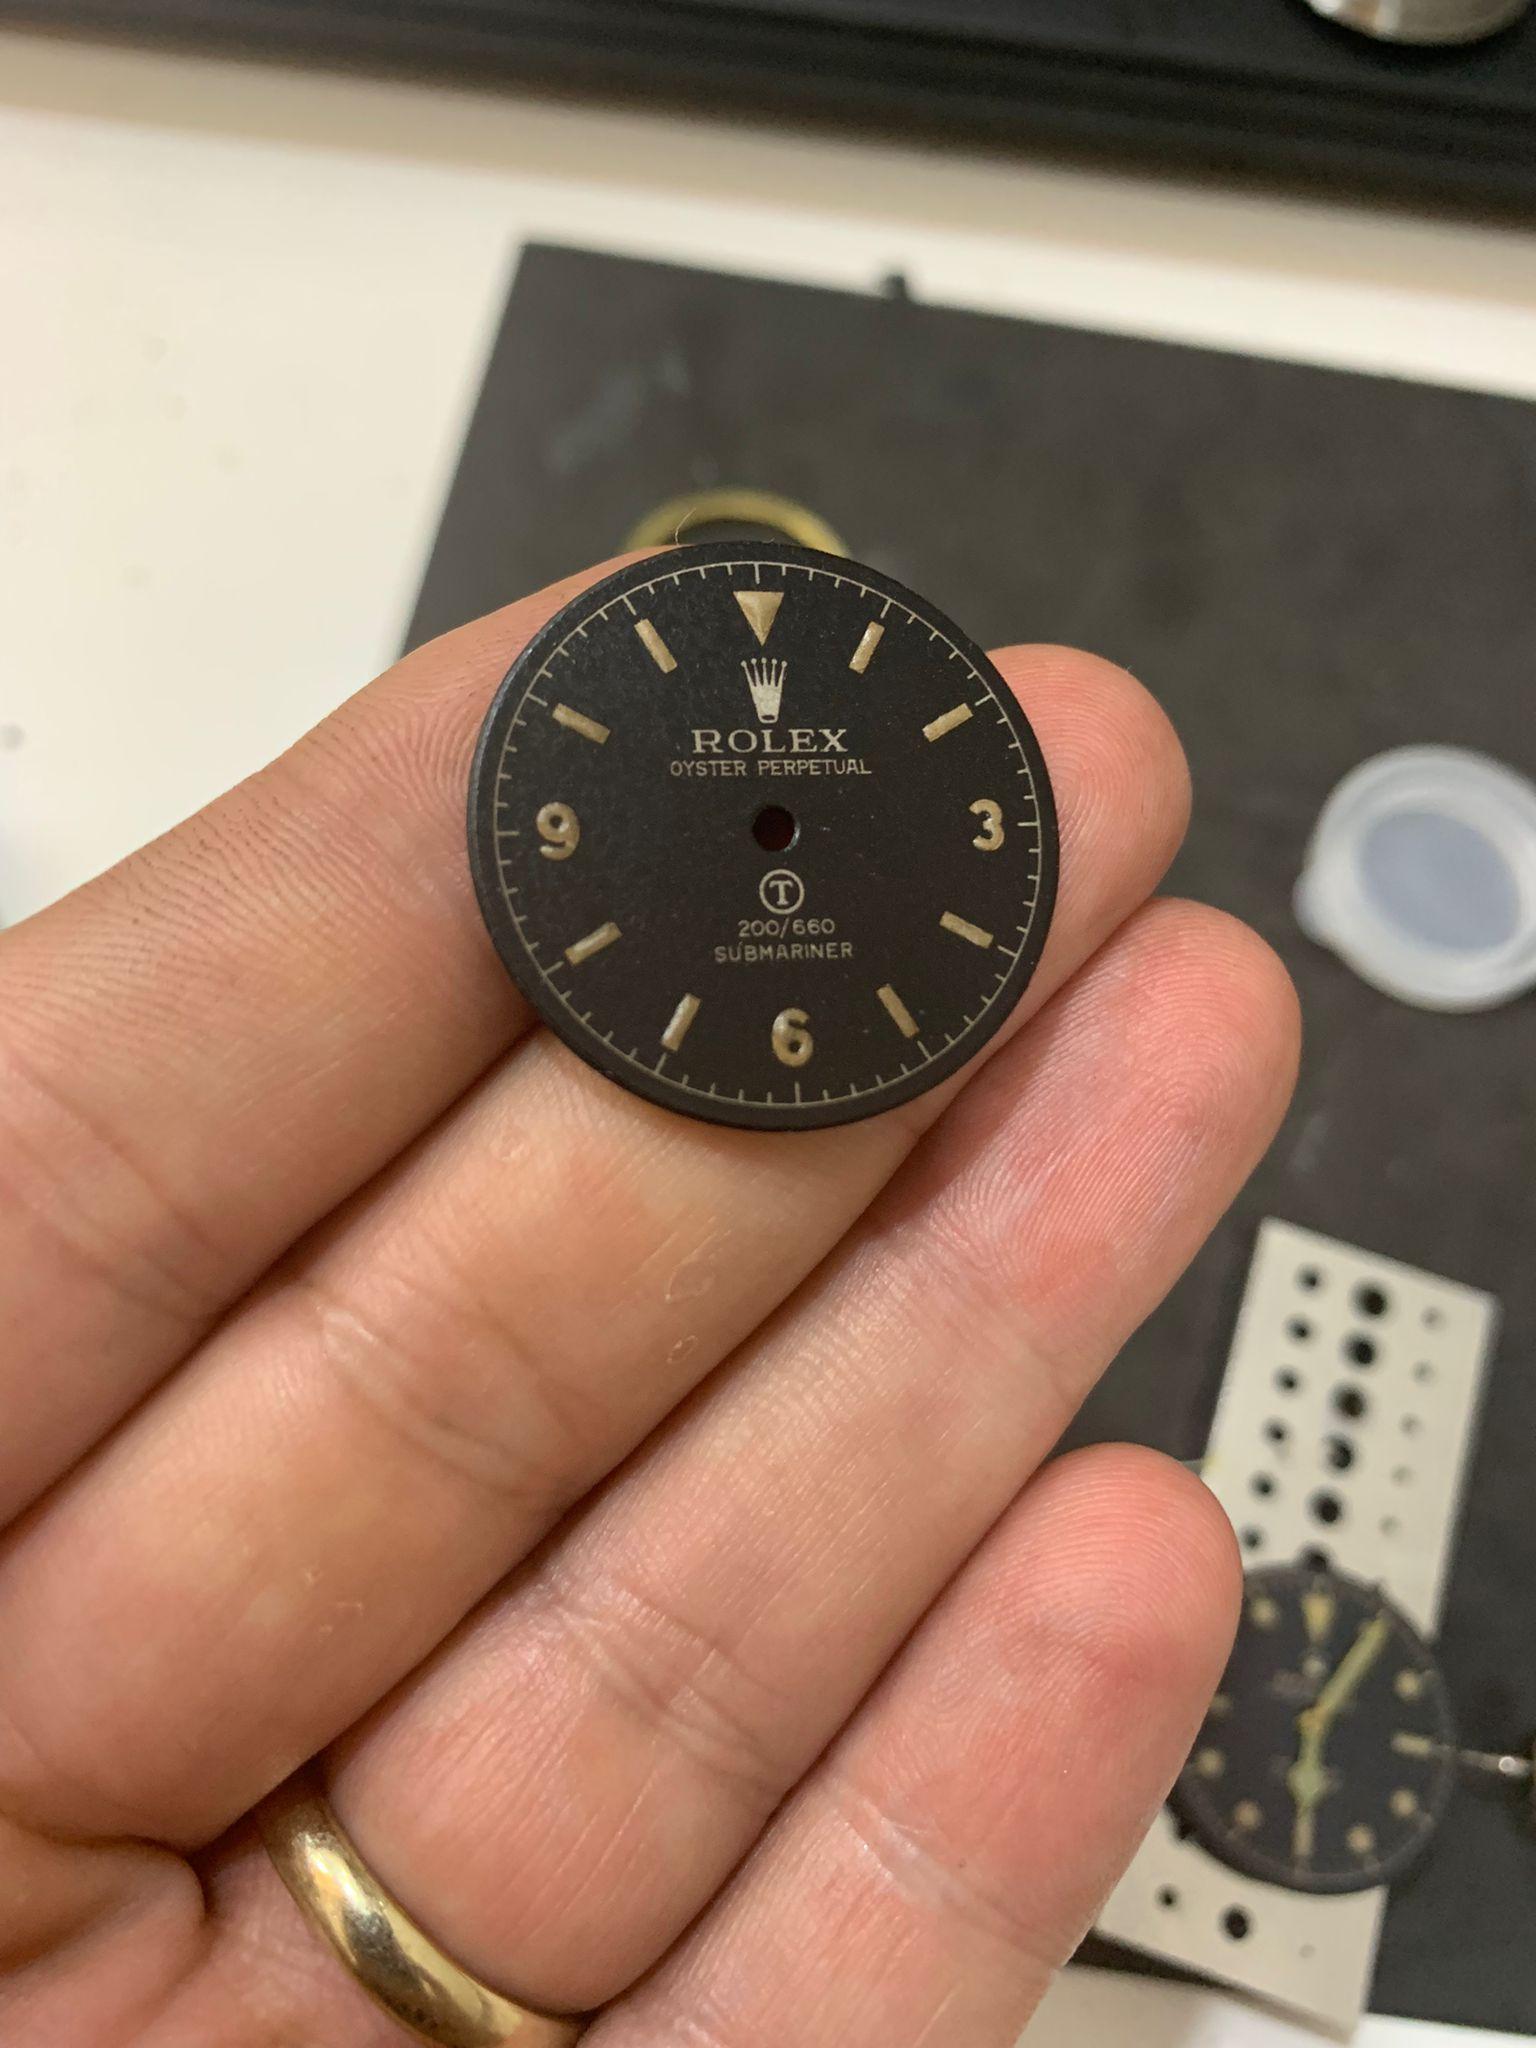
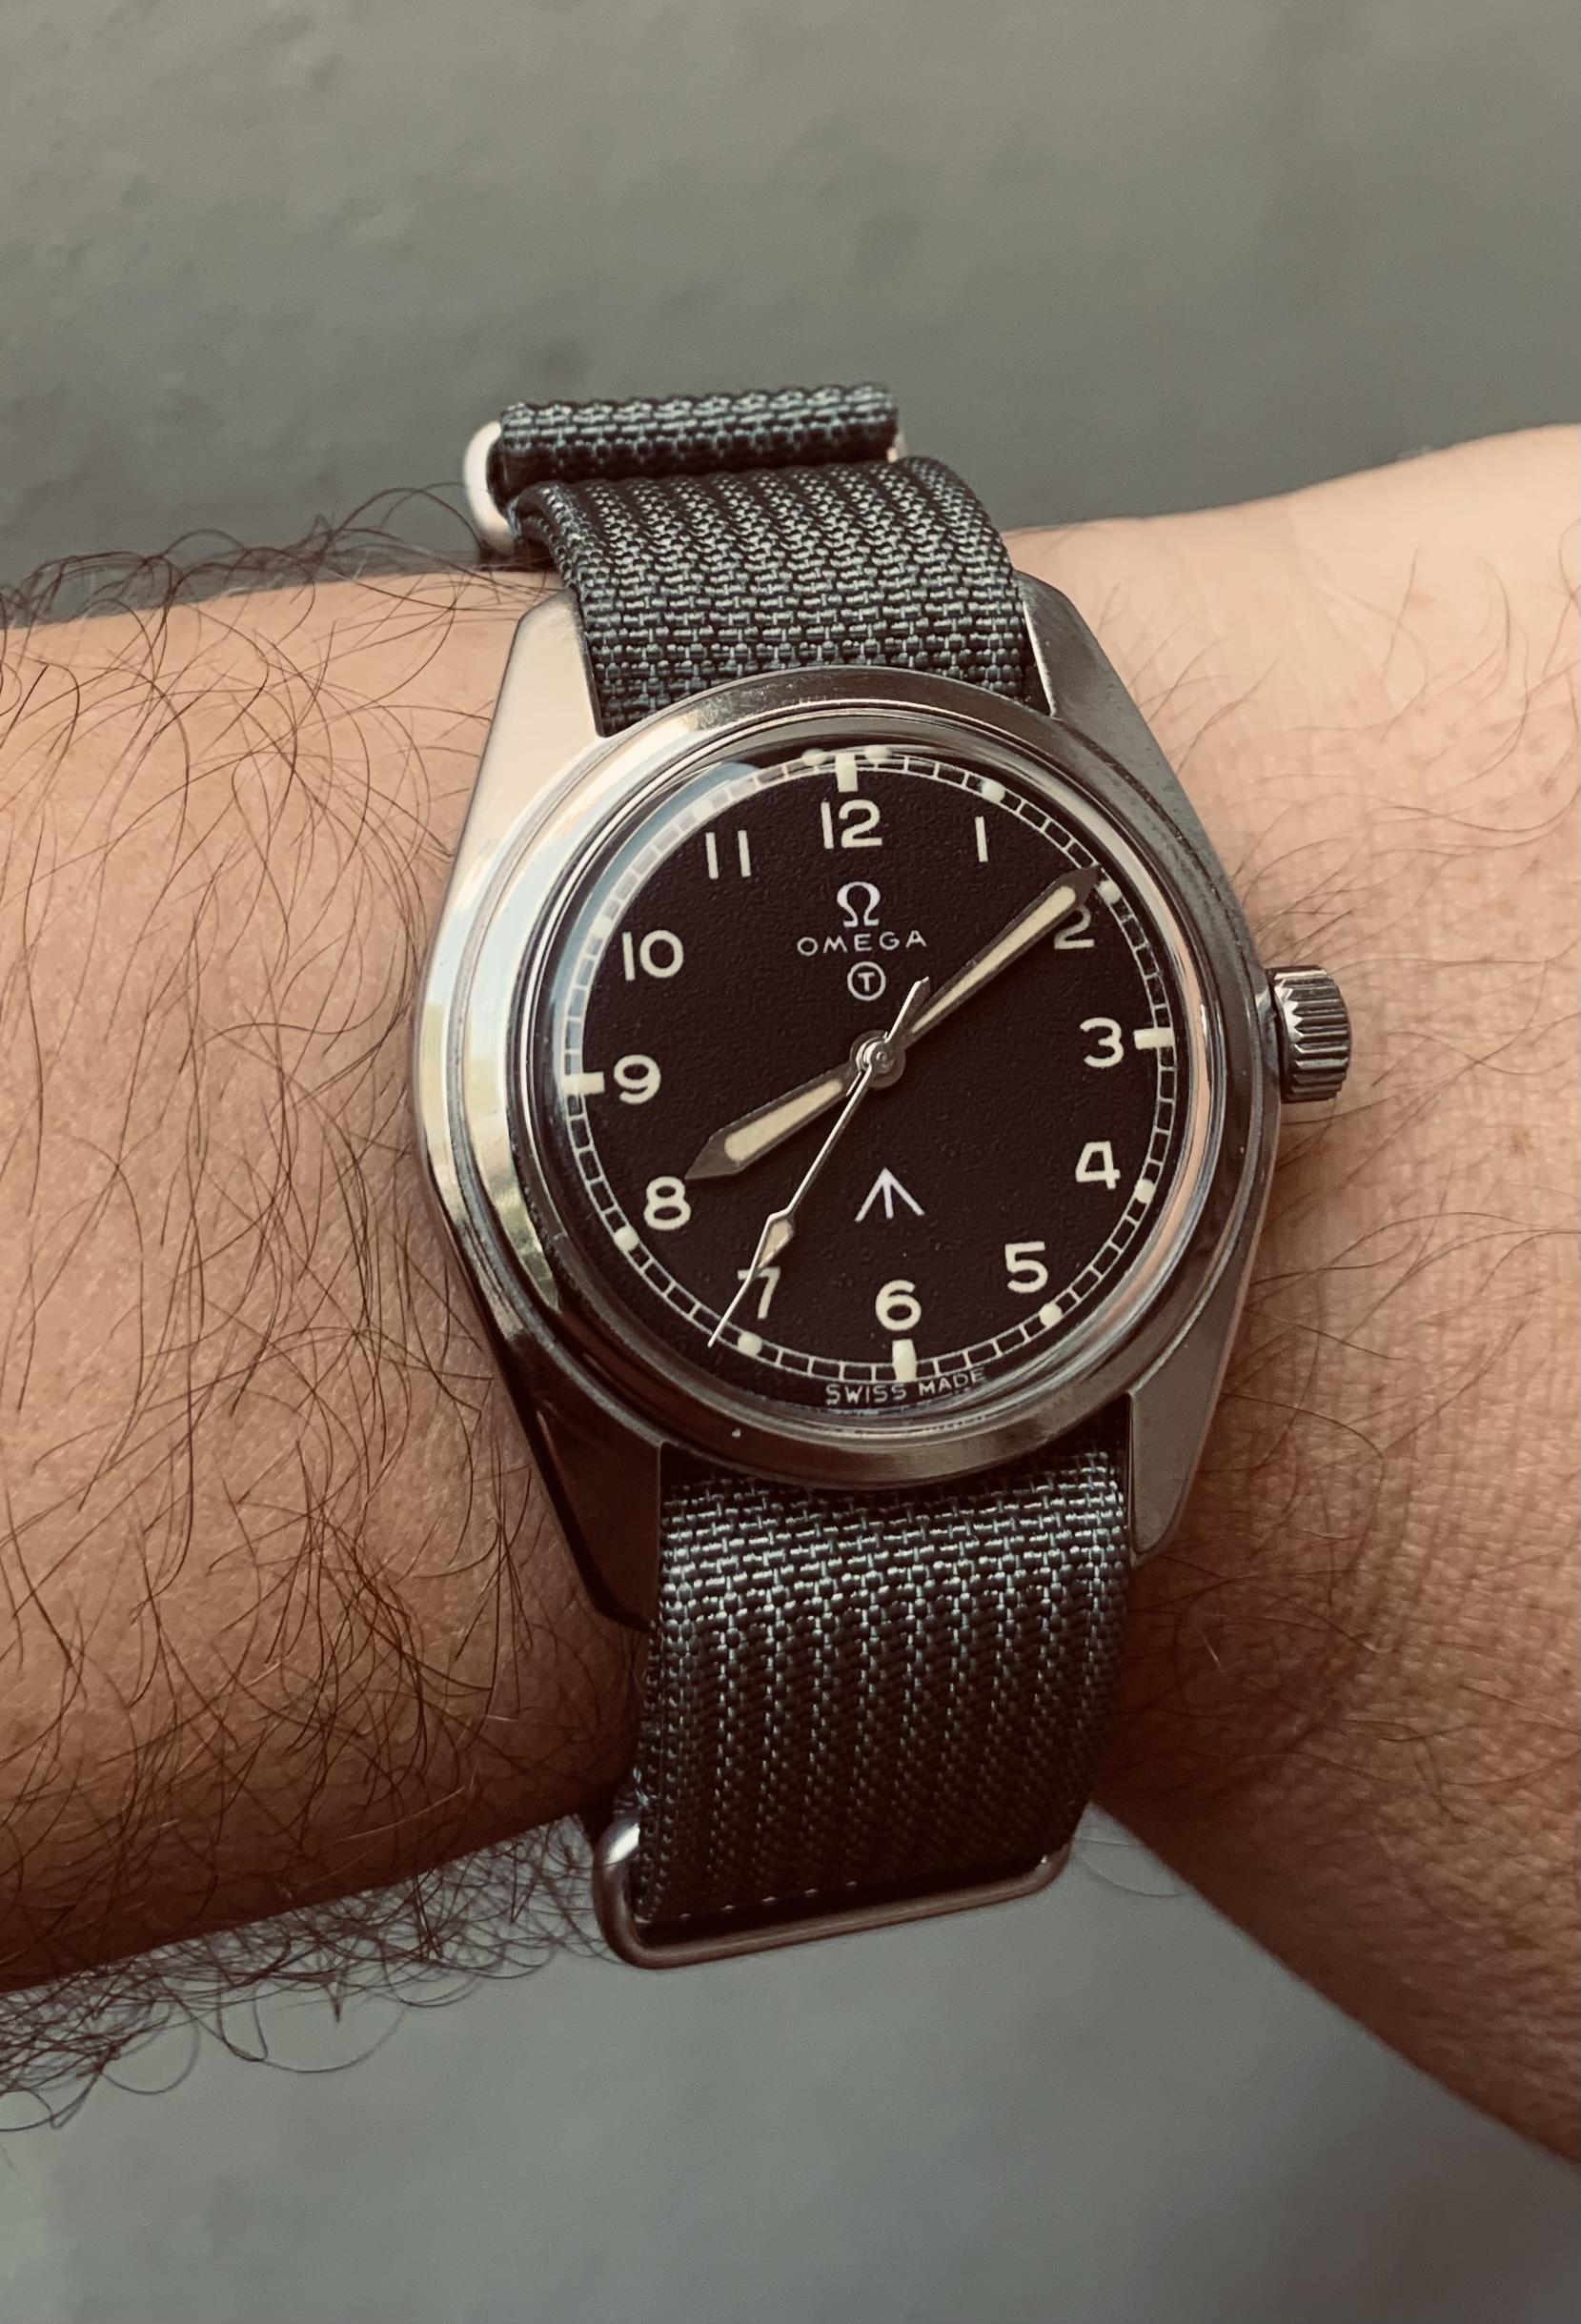
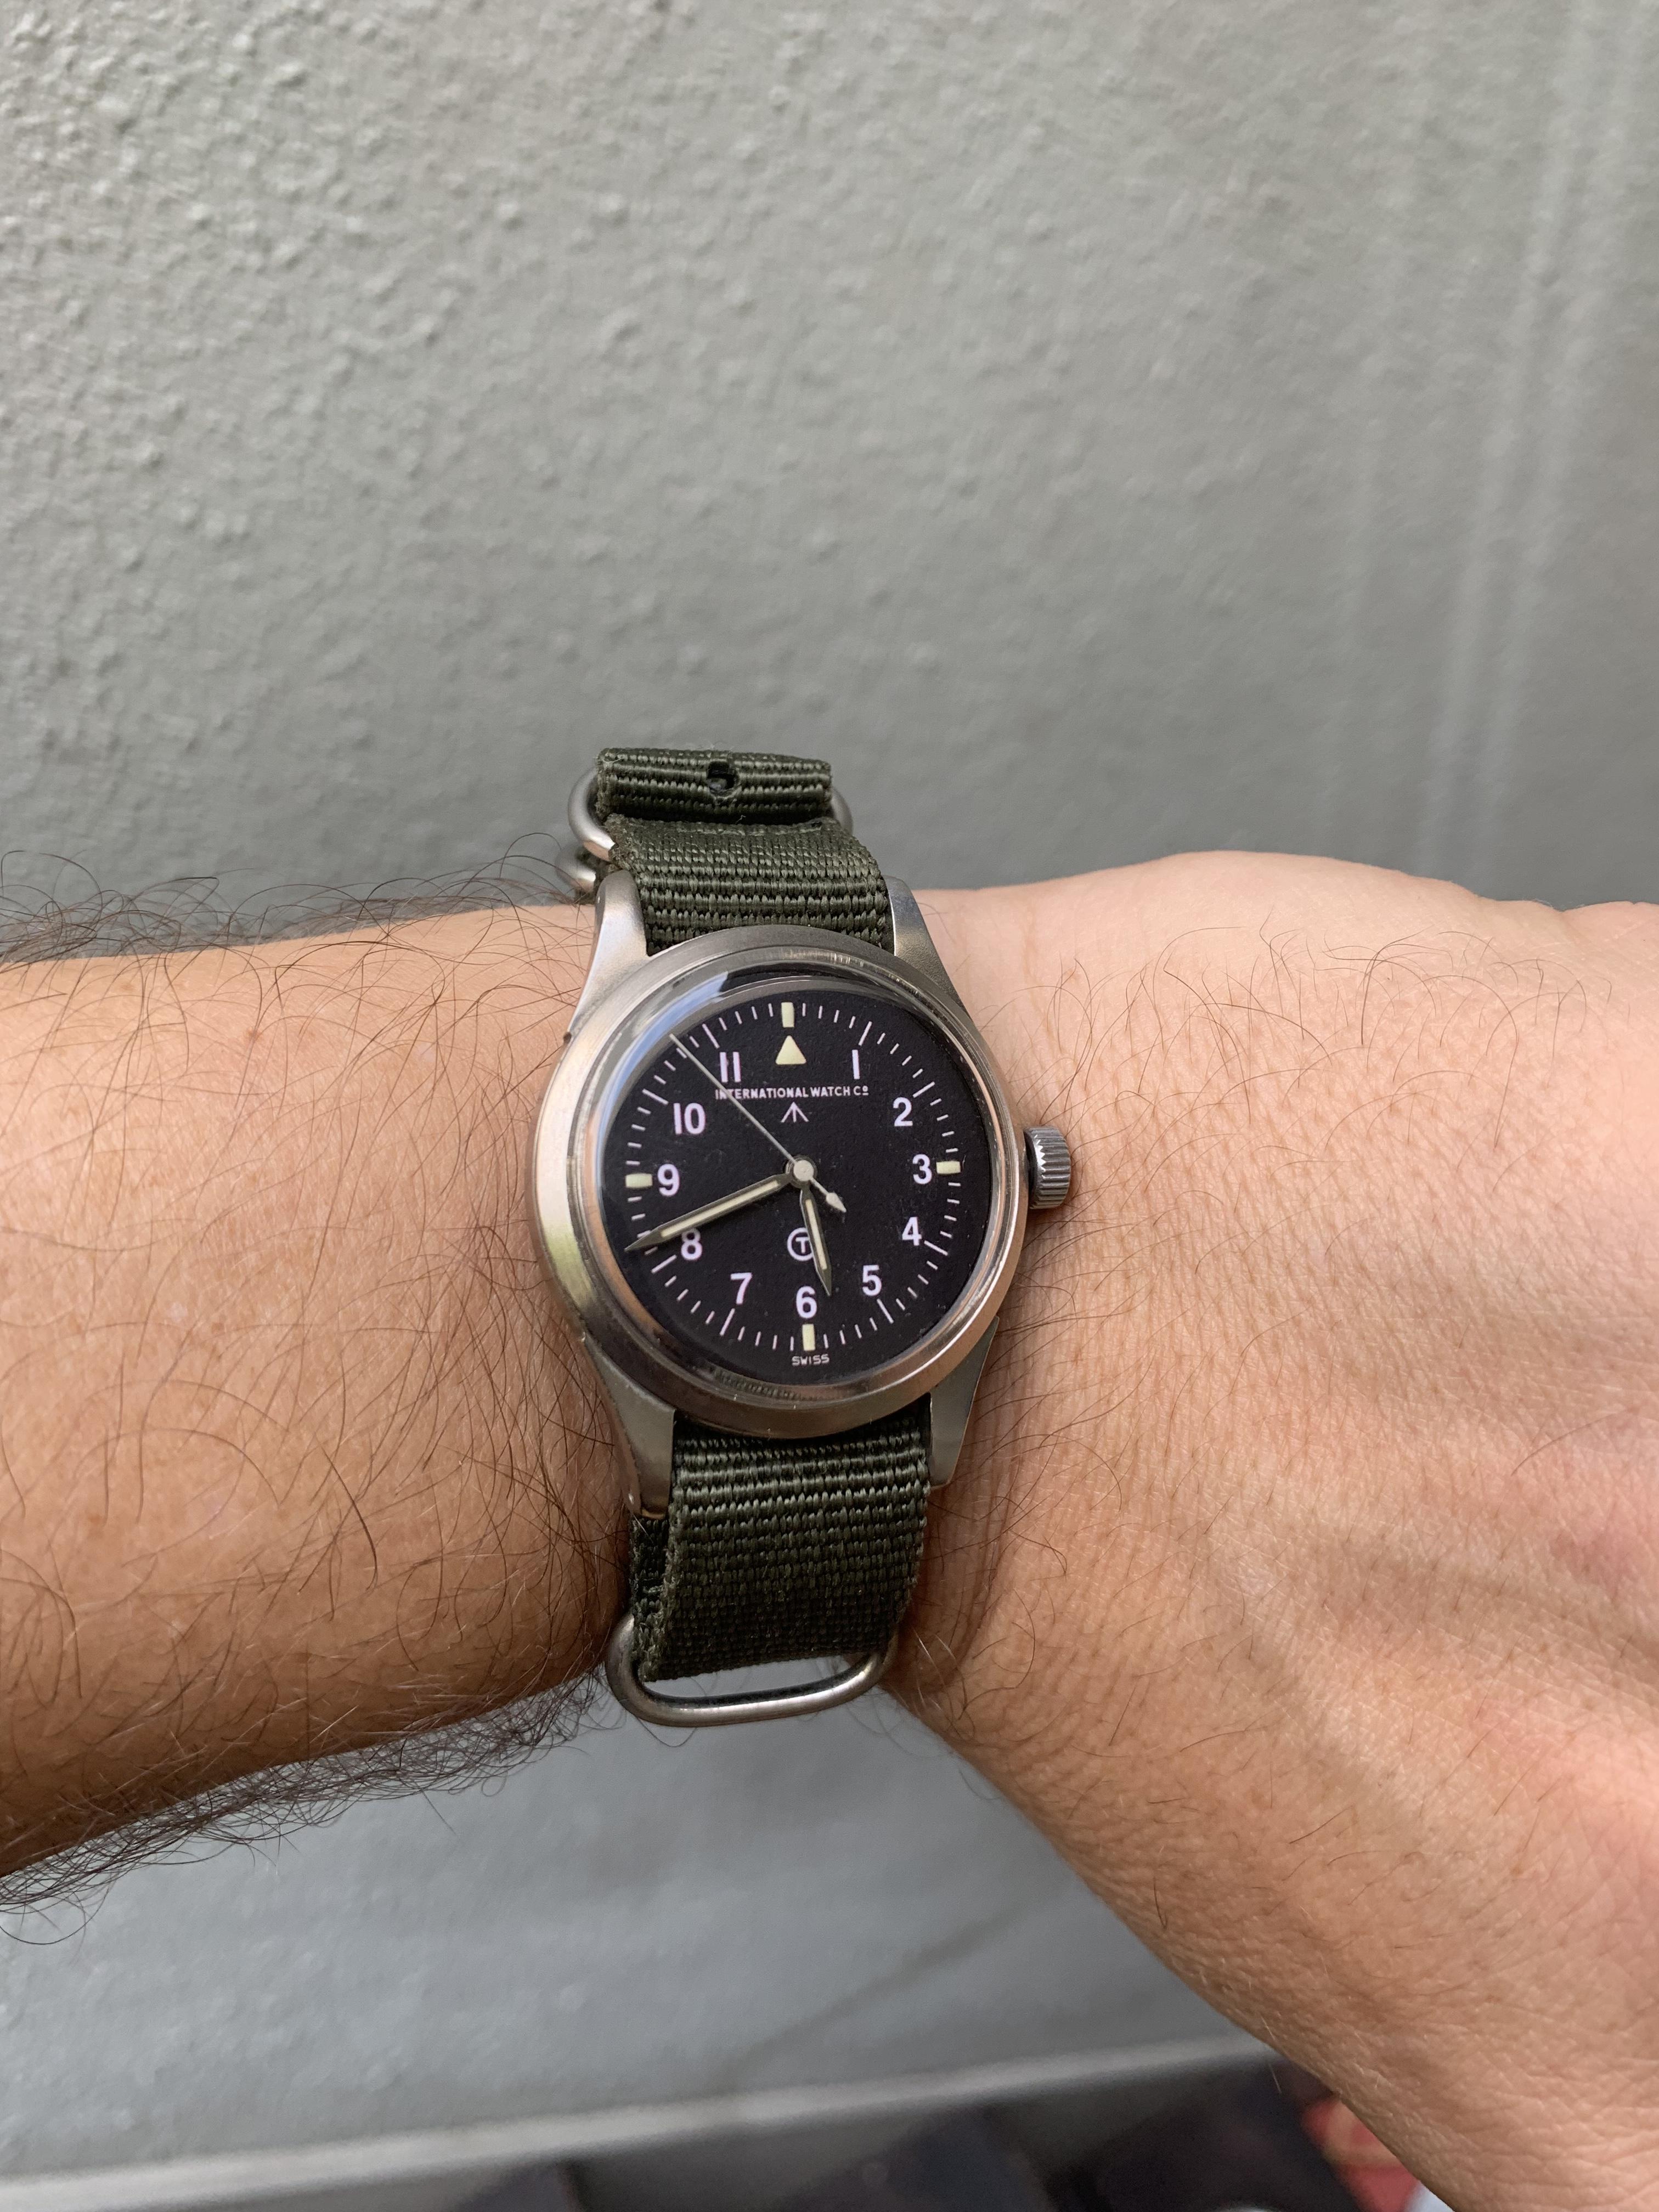
I did draw over a military dial tracing and vectorizing all the details and transferred it with resin to a 27.7mm dial plate.
lacqered and lumed with resin, ink and old lume pigment i bought from an old watchmaker.
3 minutes ago, madasboot said:Hi. Thanks.
I did draw over a military dial tracing and vectorizing all the details and transferred it with resin to a 27.7mm dial plate.
lacqered and lumed with resin, ink and old lume pigment i bought from an old watchmaker.

Done with the same technique but with foiled gold.

-
2
-
-
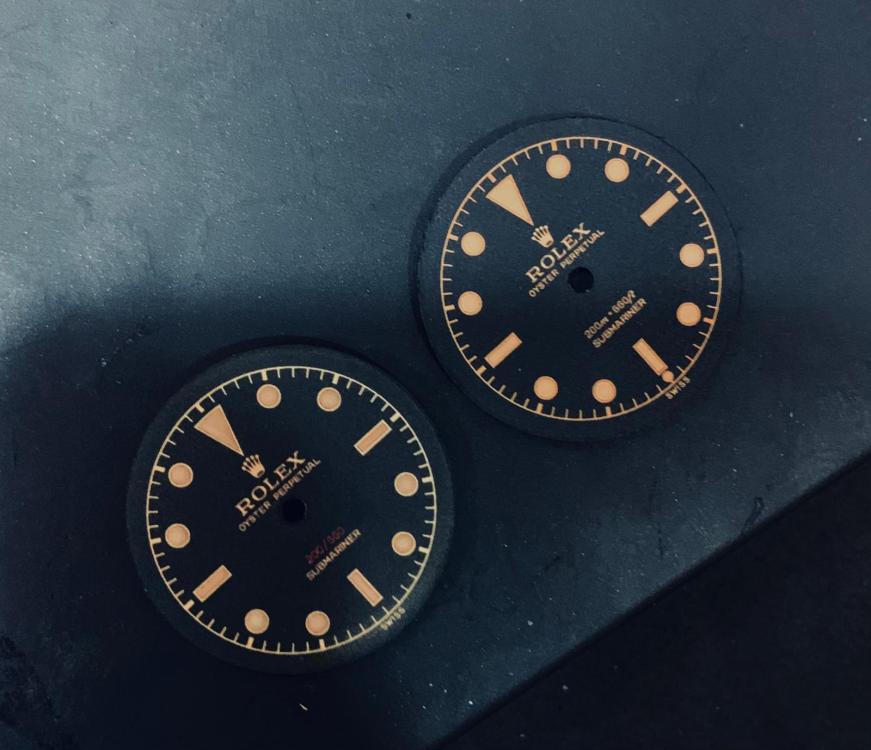
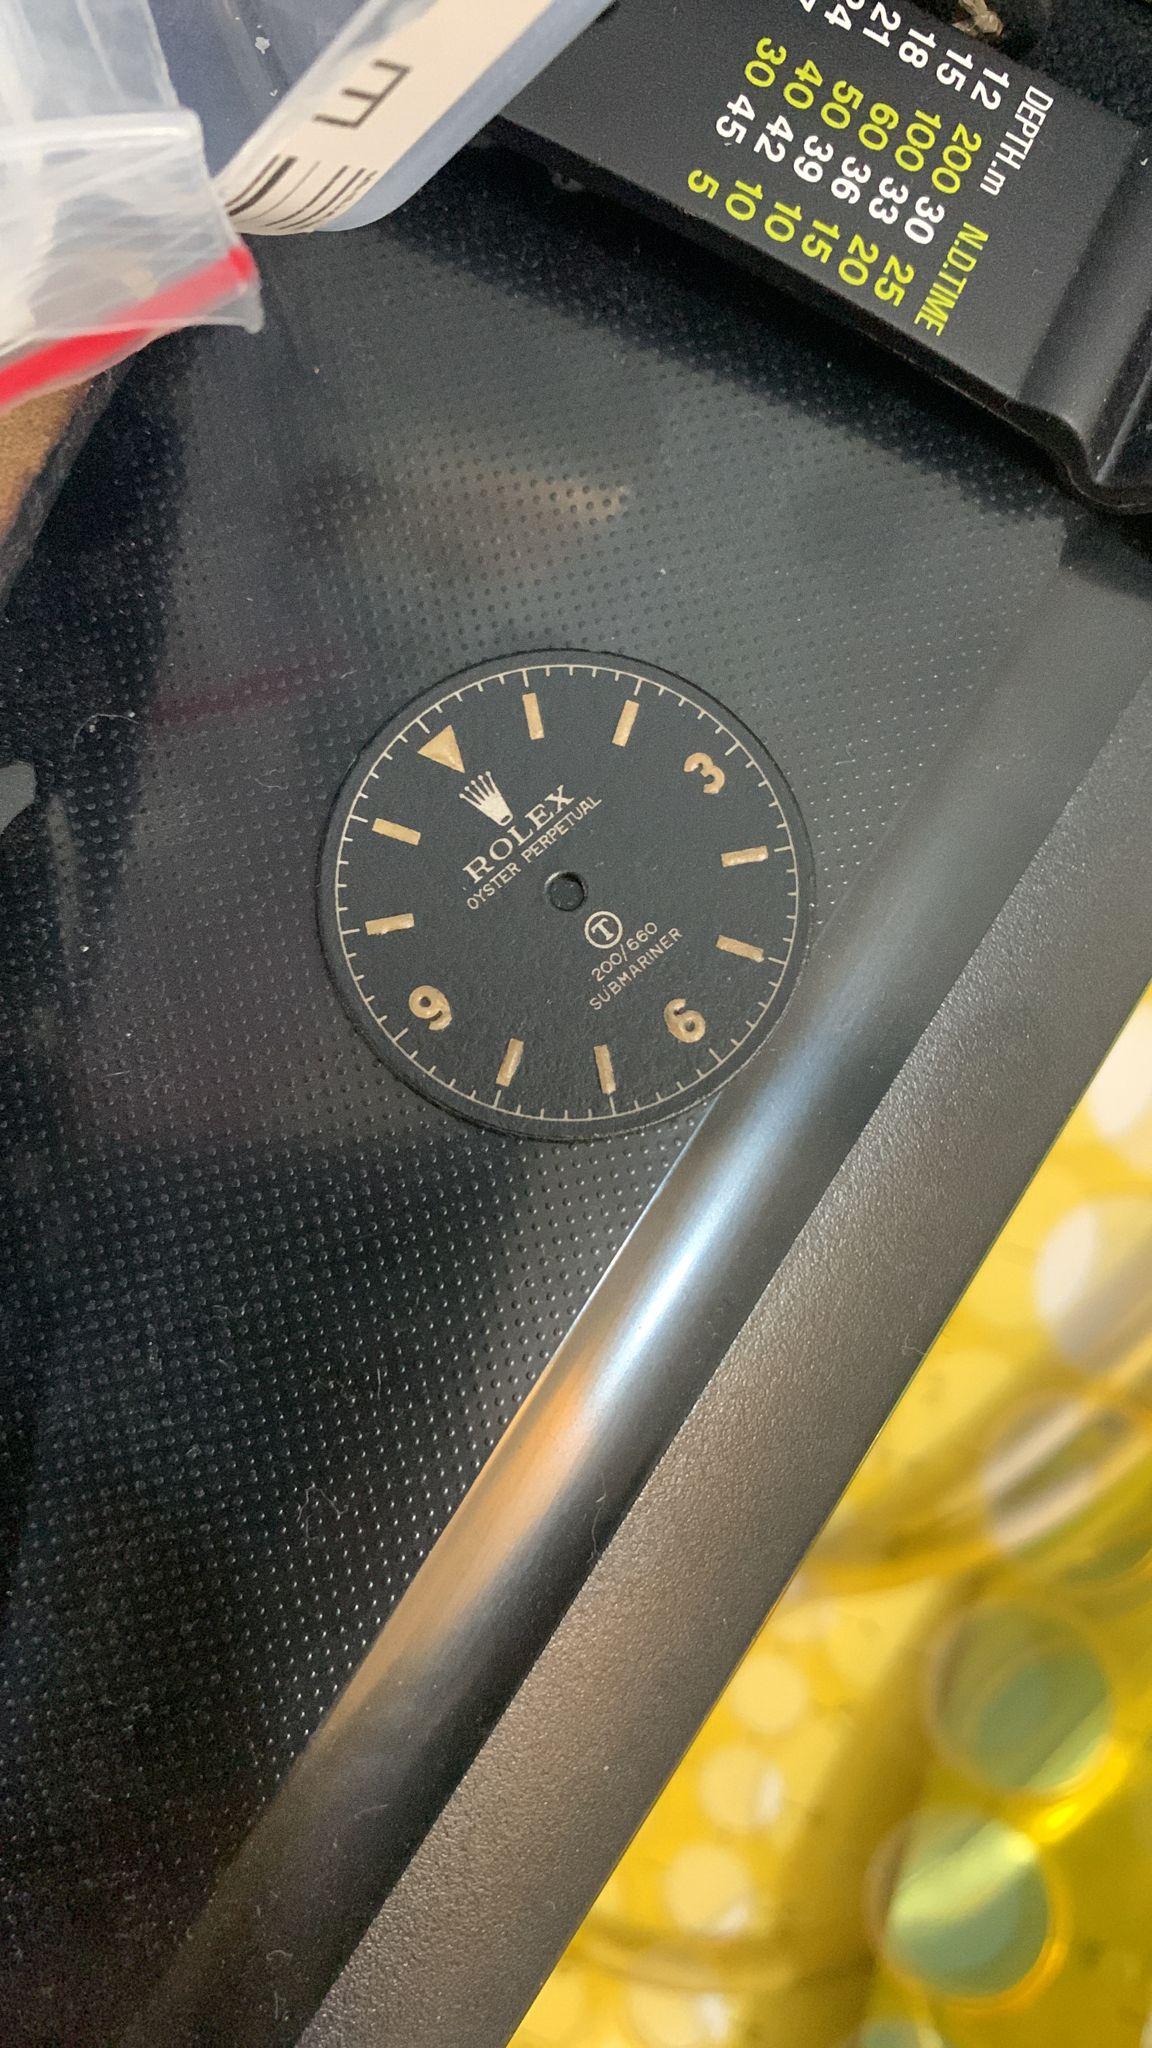
Self made dial
-
1
-
-
handmade gilt dial

-
1
-
-
-
-
David, so, so sorry about yours and our loss.
sorry as well since words are failing but on behalf of our friendship I wish him to rest in piece.
-
 1
1
-
-
-
On 7/25/2013 at 12:37 AM, Nanuq said:
Ahhhhh, pull up a chair.
No need B.
-
-
will share pics once done
-
1
-
-
but for the radium burn I would suggest you to use transparent color and dye pigments.
(citadel shades are perfect for that plus AK patina pencils).
radium burn on a dial is a very slow process and quite homogeneous if the watch hands were in motion for long so replicating it will require a radial approach and less of staining.
Staining usually happens in the lacquered layer.
 Just now, madasboot said:
but for the radium burn I would suggest you to use transparent color and dye pigments.
(citadel shades are perfect for that plus AK patina pencils).
radium burn on a dial is a very slow process and quite homogeneous if the watch hands were in motion for long so replicating it will require a radial approach and less of staining.
Staining usually happens in the lacquered layer.
In this example most probably the watch was kept for years in the position it has stopped, at 8.05
-
looks great.
-
1
-
-
Nice. I also got one of those from Raffles but the hour ticks are too thick.
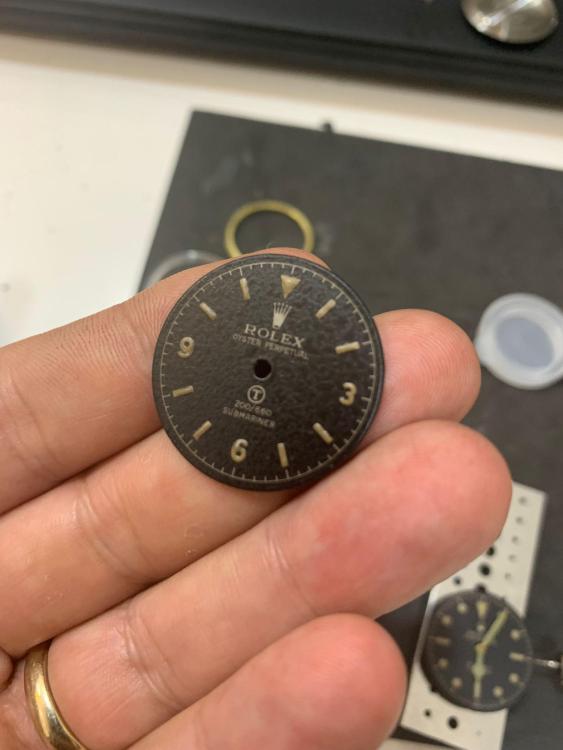
I am making my own gilt dial now.
-
23 hours ago, automatico said:
No guarantees because there might be an error..or three.
Hey R.
Not to worry…
nothing a good ‘ole set of cutting broaches cannot correct… ahah
i am lucky since raffles is distanced some blocks away from my place so hands galore.
I also bought an horotec set of broaches plus a swiss hand tool and fear no evil…
best, M.
-
On 4/3/2022 at 11:18 PM, automatico said:
"...I have two Adrian’s brevet crowns and even the correct tap but i am not good enough with metal works (yet) to redrill and re-tap the tube hole in the case.
And where I live I cannot find anyone to do the job for me."
Having the correct tap is one third of the battle.
My last case tube drill/tap job was drilling and tapping a JMB '1016' case from 5.3mm case tube size threads to standard 6.0mm size threads. Standard 6.0mm and 7.0mm (twin/triplock) case tube threads are 3.0mm diameter by .35mm pitch and take a 2.5mm drill bit. I do not have specs on 8mm case tubes.
The next third is drilling the hole in the case to the right size before tapping it. Look up the metric or number size drill bit to use for the tap size you have and buy a few bits. Carbide is best but high speed steel (aka HSS) bits will work if you keep them lubed while drilling. Since the case tube hole is already drilled in the case before you re-drill the hole, the new hole will almost always be straight. I underlined almost because things can go wrong.
I use a small milling machine with a homemade bracket to hold the case while drilling spring bar and case tube holes to size but a small low cost table mount type drill press will work just fine. My small drill press was $49USD on sale and I use it for all kinds of small jobs. The small milling machine is not necessary but since I have it, I use it and besides, it is inside where it is warm in the winter and the drill press is out in the garage.
The last third is very critical because the tap has to be started straight in the hole or it can get in a bind and break or not cut good threads...this is usually the hardest part of the whole operation.
So...what to do?
After you locate the proper drill bits, practice drill a few holes in a spare steel watch case, piece of steel strap metal etc about 3mm or 4mm thick and tap the threads to get a feel for it. This will demonstrate how easy it is to start a tap out of true and how to keep it straight. I will admit it is not easy but after a few practice runs you will be able to tell if the tap is starting straight or not by the force needed to turn it to cut the threads. Keep the tap lubricated and blow or flush the metal chips out every half turn or so. I flush the chips out with WD 40 etc in a spray can. After the hole is most of the way tapped you can remove the tap and clean the threads and tap before finishing it up but if you remove the tap before it cuts a few good threads, it will be hard to get it started. Very hard sometimes.
Tips:
I use a pin vise to start the tap because it is easier to 'eyeball' the trueness of a pin vice than a T handle tap wrench. Once the threads are started you can change over to a T handle if you want to.
After you drill the case tube hole you can 'cheat' when starting the tap if you mount the tap in the drill chuck and lower it very lightly into the case and turn it by hand (power off) to get it started straight. This only works if you have a precision case mounting set-up and a good drill press with no slop in the drill's spindle bearings etc. Do not try this at first on a case, try it on scrap metal etc.
Practice, practice, practice with a little patience added is the key.
Good luck!

Hi R.
precisely my case… Adrian sent me two of those beauties and some months later I got stem adapters and then found out that I had all except drills and taps.
Followed your suggestion with practice but metal (or holes) are not my element…
will persist though:)
that will be the cherry on top.
for now I am finishing some gilt dials
")
all my best
Marco
 28 minutes ago, paneristi360 said:
Looks great! i’m a big fan of vintage watches

Sent from my iPhone using Tapatalkthank you!
here is my latest, built from scratch

-
1
-
-
2 hours ago, altesporsche said:
Absolutely stunning ! Nice work !!
Thank you!
do let me know if you want to try it:)
I had built a few spares
best
M.
-
1
-
-
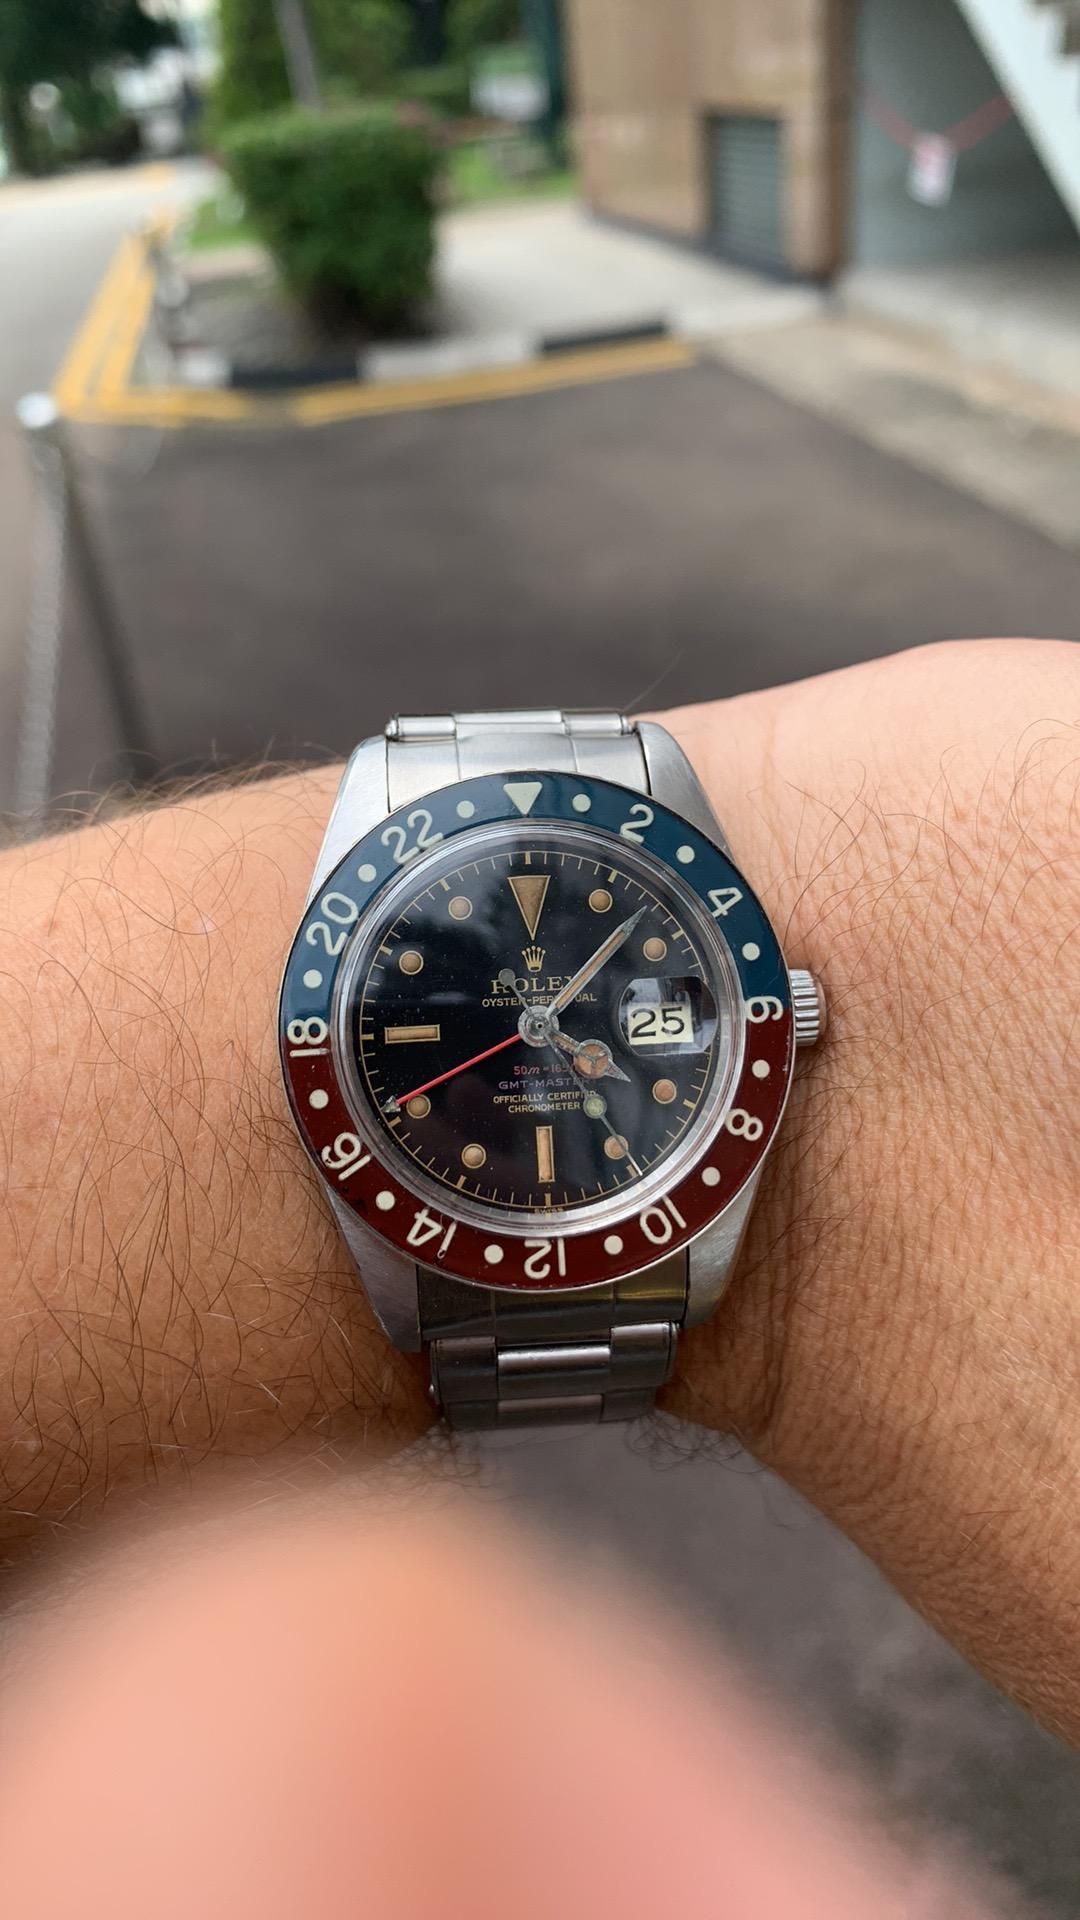
All by myself except case, crystal and crown
-
2
-
-
In the end is more of a vague memory made of plastic and quartz…
any resemblance (or feel) of the original is pure coincidence.
on the wrist it felt exactly the same as my son’s peppa pig watch…
-
1
-


"Are those holding 1030 movements? If so I get the first two..."
in The Rolex Area
Posted
Dear God…