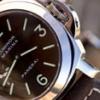
projectologist Posted February 16, 2013 Report Posted February 16, 2013 I decided the roller-bearing pin needed some refinement. On my Noob cg the little pin was sitting a little above the lever tip and was not dead flat. So out it came, got flattened, polished and re-installed flush. Couple of phone pics, the first one shows the pin finished and getting ready to be pushed flush. Next pic shows fully finished cg... outer lever tip shortened and rounded per gen, cg body and lever edges polished, cg pin also flattened - polished - recessed just a hair below flush with cg body. 1
Rolexman Posted February 16, 2013 Report Posted February 16, 2013 Nice job! Do you also own a lathe or did you use a different technique?
omgiv Posted February 16, 2013 Report Posted February 16, 2013 That is absolutely gorgeous!!!!! Did you flat polish the cg pin outside of the cg? The cg that I have has a slight curvature where the cg pin hole is located. if i flat polish the cg pin, it doesn't square up to the hole evenly in flattened. Also, what did you use to refinish the cg? I like the even graining.
HauteHippie Posted February 16, 2013 Report Posted February 16, 2013 Why did you think you were done modding? How silly. Looks great! Sent from my iPhone using Tapatalk
projectologist Posted February 16, 2013 Author Report Posted February 16, 2013 Nice job! Do you also own a lathe or did you use a different technique? That is absolutely gorgeous!!!!! Did you flat polish the cg pin outside of the cg? The cg that I have has a slight curvature where the cg pin hole is located. if i flat polish the cg pin, it doesn't square up to the hole evenly in flattened. Also, what did you use to refinish the cg? I like the even graining. I removed both pins and went through the same method to flatten them. Here's a pic showing my lo-tech method. The pin vise secures the pin while I move the block of wood accross various grits of sandpaper. When I start out, I have the pin extending a very small fraction beyond the bottom of the block... just enough to flatten but not remove anymore material than necessary. The main cg pin is re-inserted just a micro amount below flush which avoids any edges protruding due to the slight curve of the cg body's top surface. The even brushed surface was produced by moving the cg in one direction (don't brush back and forth) over 400 grit wet/dry sandpaper. When I do this, the cg body is held steady against a straightedge and drawn over the sandpaper which is glued to a flat surface. Each stroke is drawn over a clean section each time. Brushing with the same area of sandpaper more than once can create micro scratches that gives the finish an uneven look. And you want to avoid holding the sandpaper in your hand and using your fingers to rebrush the cg. Since your thumb is soft, it will not be possible to apply even pressure across the entire surface, resulting in a sloppy looking surface.
Rolexman Posted February 16, 2013 Report Posted February 16, 2013 I like your DIY style. Really inventive. Chapeau!
omgiv Posted February 16, 2013 Report Posted February 16, 2013 Thanks so much for the info and the picture!!!! This may be a completely dumb, or obvious, question but how to you keep the shape of the cg if you are pulling it across a flat surface? Are you using a rocking motion while you are pulling it across the sandpaper?
Recommended Posts
Create an account or sign in to comment
You need to be a member in order to leave a comment
Create an account
Sign up for a new account in our community. It's easy!
Register a new accountSign in
Already have an account? Sign in here.
Sign In Now