
manodeoro
-
Posts
303 -
Joined
-
Last visited
-
Days Won
7
Posts posted by manodeoro
-
-
Excellent! However, I can't seem to find those files anywhere on line?
B
I'll post a link (unlinked ) as soon as possible.
Envoyé de mon XT1068 en utilisant Tapatalk
-
14 minutes ago, Sogeha said:
That Sir is excellent and although slow has the advantage of being much less likely to end in tears. I congratulate you.
Thank you Sir ...
I tried that method cause I dont have a drill press and it proved to be definitely easy and riskless.
Hope it can help some members here.
-
Very nice...but you have to polish the lugs around the hole!!!
But a good idea
Gesendet von meinem Sony Erricson K750I
INDEED !!!
Chamfers, Polish, etc ...
And movement, dial and hands of course.
That was just a "step one" tuto to share my unexpensive but easy method
Considering it's my first attempt I'm pretty happy with the result.
Envoyé de mon XT1068 en utilisant TapatalkGreat tip! Thanks for posting! Looking forward to seeing your finished 5508.
Thank you
You will see her finished ... sooner or later
Envoyé de mon XT1068 en utilisant Tapatalk
-
Aside other projects I'm still trying to make "colored" Gilt dials ... I mean Gilt dials with some lines colored instead of gilt.
A few days ago I showed you my first attempt for a "Red Depth Gilt dial" but I had a HUGE problem with the color applied under the decal.It was, IMHO, a nice try but the Red Depth was very bulky and lef a "lump" on the decal ... so not very useful.This week I made my second attempt, not with a "Red Depth" but with a SYL.Everything is gilt and black, apart from the "Serpico Y Laino" which is "shiny white".It's not a complete success because I have designed the SYL letters too little and too thin so it's not very flashy or even easily readable.But this point is quite easy to rectify (just need to spend some time on Illustrator).The VERY GOOD point is that the colored line is not bulky anymore ... everything is smooth.And it means that in a few days (or weeks) I'll be able to show you a nice "Red Depth Gilt Dial" First pic - the dial "fresh" from applying - not finished nor varnished
 Second pic - same dial (still nor varnished) in the 6538 I used as a guinea pig for my thread
 The next one will get some lume
-
 2
2
-
-
Today I’d like to share what I would call the «Easiest way to drill vintage case lugs for 2mm bars when you’re a city dweller»So let’s begin with the facts ;1 - I have a 6538 case with pre-drilled lugs2 - I live in a city flat with no so much space for huge tools3 - I dont have a drill press and I dont really have the place for that (see point 2)4 - I have nice 2mm bars that fit in my 93150 bracelet and 580 end links but not in my 6538 caseAnd today I have decided to try an unlikely experience ... « drilling » the lugs of the 6538 with only hand grinds.The best part of this thread is that … IT WORKED PERFECTLY.The tools I have used are :- 1mm diamond grind- 2mm diamond grind- 3mm rond grindAnd here is a pic of those tolls ... much less bulky than a drill press
 The process I used is VERY BASIC.1mm diamond grind :I first enlarged the pre-drilling until the grind passes easily through ... by working carefully it is possible to keep the holes in the same axis.I think it’s best to rotate the file in both directions (rather than going back and forth)2mm diamond grind :There you have to be more patient and more applied because you do not want to pass completely through ... the aim being to get a hole of about 1.3 mm and not 2mm.Always the same method (rotation rather than going back and forth) and it is necessary to stop regularly to control the result with a 2mm springbar ... from the outside.When the springbar crosses almost completely the lug (it just blocks on the inside face) I changed tools.3mm round grind :I gently enlarged the hole from the inside side of the lug with the round file of 3mm ... always checking regularly to stop as soon as the springbar pass freely.This is the most risky phase because you have to do it at an angle and you have to be very careful, otherwise you risk scratching the opposite lug.All this process took ame bout 20 minutes to drill 2 lugs ... so it would take 40 minutes for a complete case.It is probably longer than with a drill press (although ... if one takes into account the time to install the drill press, to fix the box and to align the holes, etc ...) but it is much less risky.It's quite impossible to ruin your case and as one works gently the steel does not heat and does not harden.Plus you can do this in « spare time » ... by watching a movie, on public transport (if you have a seat), in a car (if someone else drives), in an hotel room (for business travelers), etc ...Here are some pictures of the job I did.still have to drill the 2 remaining lugs and the chamfers of the external face but it is already … not that bad.


 And here’s an overview with 2mm springbar in ... rather coolCant help but congratulate myself

-
1
-
-
No real tuto but ...@Bart Cordell's thread : https://rwg.cc/index.php?/topic/182744-Decals-print-dials-Is this a service that anyone on the forums does? I have a custom dial with design I made (non-rep) that I would love to see in a "gilt". If not, is there a tutorial around for doing this? I might give it a shot. Thanks!!
Read this one and others you can find here or other forums.
Then give it a try and in a few weeks/month (depends on you) you will produce your own dials.
Envoyé de mon XT1068 en utilisant Tapatalk
-
Nice ... but the index @6 is bad

Envoyé de mon XT1068 en utilisant Tapatalk-
1
-
-
Think you could ask Helenarou if they would print a custom dial, without lume.
You send them a crispy pdf or eps file of the dial and they print it for you.
Then you find a set of Omega hands and send the whole (dial + hands) to a modder to get the lume done.
Envoyé de mon iPhone en utilisant Tapatalk-
1
-
-
The big fear with reducing dial size is paint flaking. There are some threads. I believe members have had success by protecting the dial face and mounting the dial on a spindle such as a dremel, then holding sanding paper to the spinning dial. Slow, patient and very careful I would think. As I mentioned, ensure the chapter ring will not be hidden first. Do your research, take a brave pill, then go for it.
It's not only about the chapter ring.
The "TSwissT" @6 could be hiden and that would really be a pity.
Envoyé de mon XT1068 en utilisant Tapatalk
-
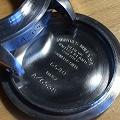
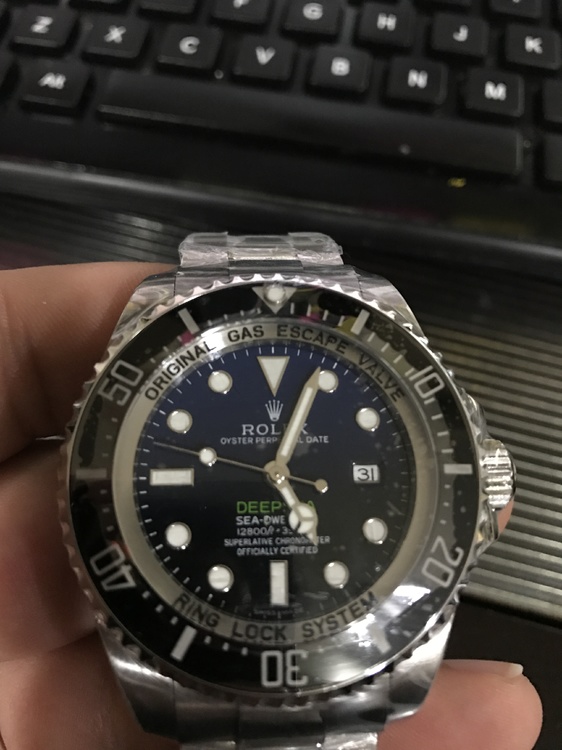
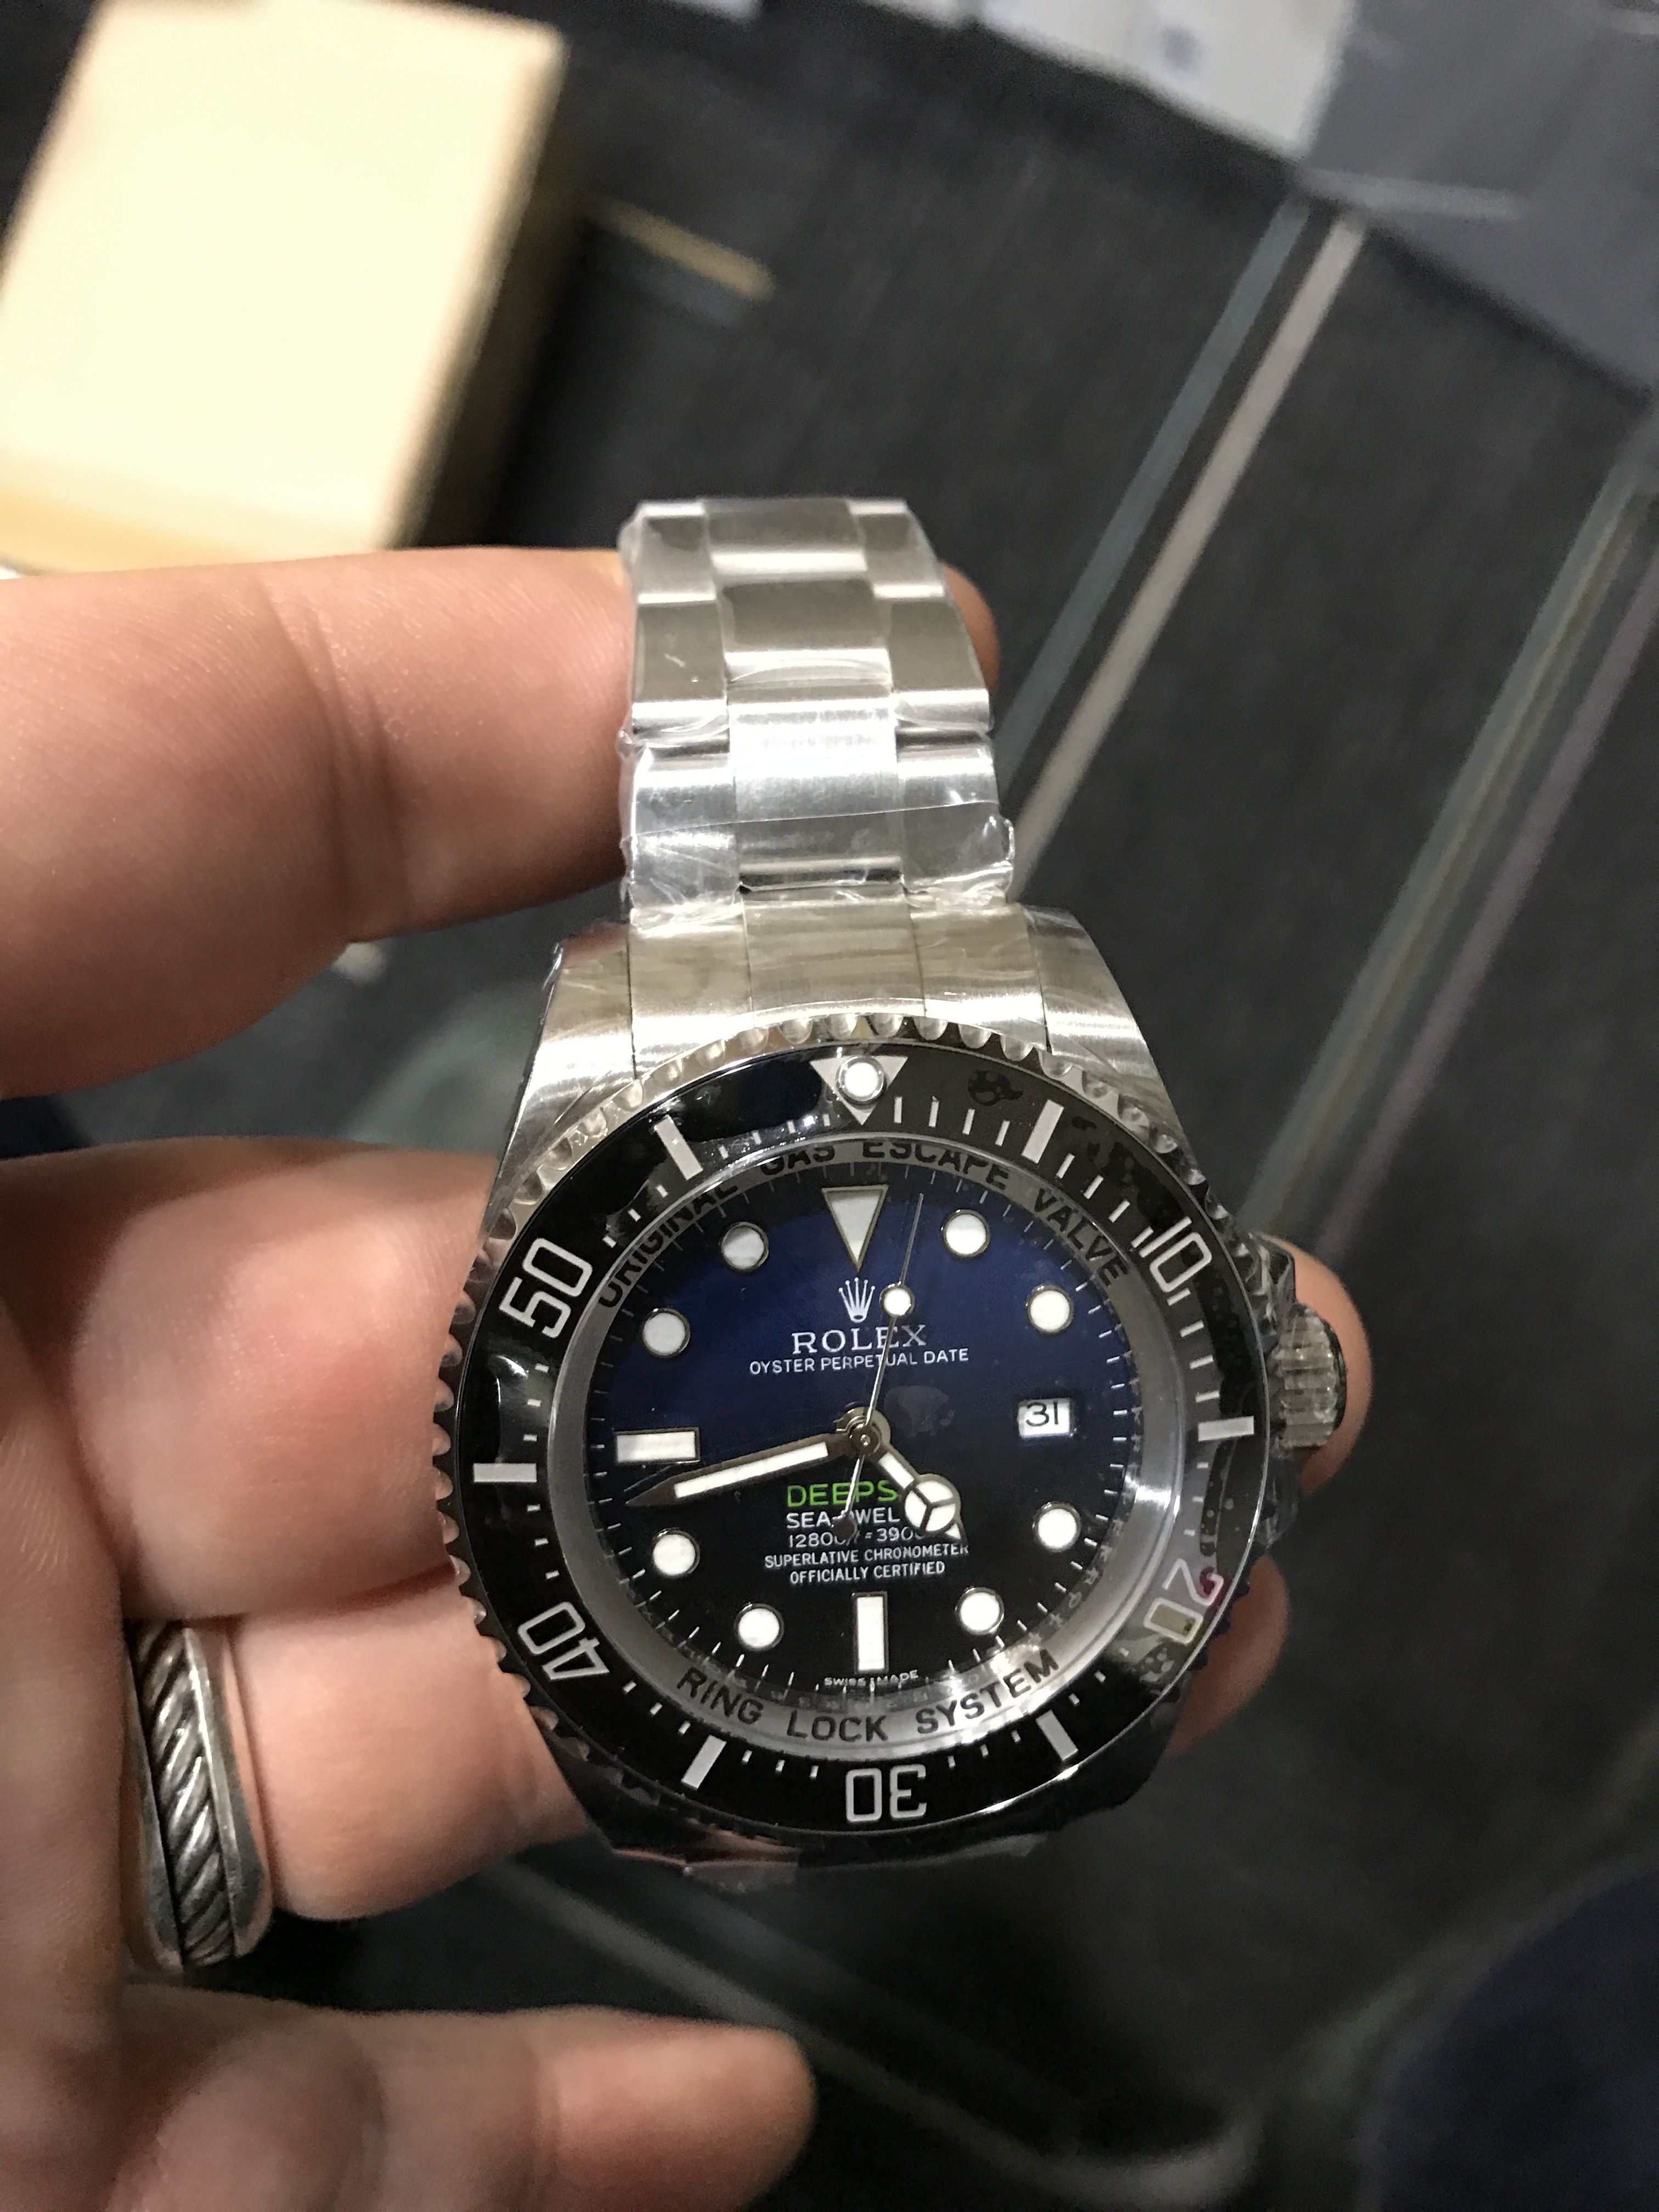
I just received this from a known TD - I noticed the thick font inside the dial (GAS ESCAPE VALVE) - I double checked if it was ideed a Noob V7, which the seller confirmed.
The watch just arrived today and as I keep looking at it and the photos from multiple TD websites, my font seems to be super-thick (look at the letter A's, the triangle is almost filled).
So is this the most updated version(?!?!) or I have a bad copy for $418?


Here's a link to a thread on RWI comparing DSSD Gen and V7
https://www.replica-watch.info/threads/dssd-blue-gen-vs-rep-v7-side-by-side.332474/
The fonts are not as fat as yours.
You should have a close look to your watch to check if the engravement is fat too or if it's only the ink that is puffy and "pops" out of the engravement.
If the engravement is OK you could sand the ink a little to solve the problem (but you'll have to open the watch and remove the movement and the crystal to do that).
Too bad for a 418$ watch.
Envoyé de mon XT1068 en utilisant Tapatalk
-
Yep, I tried red paint under the decal, but it left a 'lump'. The decals dry quite tight and take the impression of whatever they are applied to. Grinding a 'trough' of sorts in the specific area might work. Paint fill, then level, then apply the decal.
That's exactly what I consider doing !!!
I will handgrind if I cant borrow a Dremel but it could be much longer.
The nail varnish works much better than paint because it's more dense and resistant and it can be easily sanded and polished (already tried and works well).
Hope I can show something better next week
Envoyé de mon XT1068 en utilisant Tapatalk
-
On 19/02/2017 at 5:56 PM, JoeyB said:
The only red lettering I tried failed miserably. The red letters on a 6542 are painted on the surface of the dial, and looked really bad when trying to print it within the dial. Good luck.
On 19/02/2017 at 6:05 PM, Bart Cordell said:@JoeyB
Yes red printing is bad.
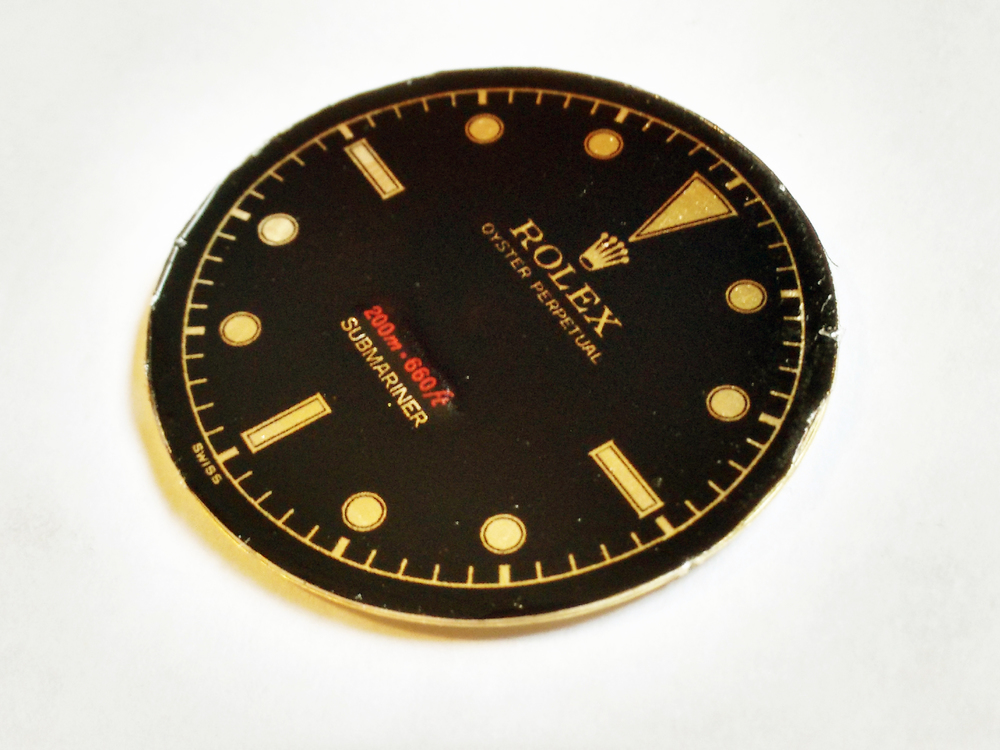
I already tried to place a decal with only red depth on the first decal with no success. I will continue to search a way.
There could be a way :
- nail varnish instead of printing
- under the decal instead of on the decal
Here is a pic (bad one) of my first attempt.
Considering I dont have a long experience with decal dials, I would say that it's promising.
The problem is the thickness of the varnish.
A way to avoid that would be to :
- grind the "red zone" with a Dremel before putting the varnish (unfortunately I dont have a Dremel)
- fine sand the varnish (when completely dried) until it does not "pop" from the dial anymore
- polish to get a smooth surface
- put the decal on the dial
Next week I'll try to borrow a Dremel, test that method and post a feedback..
-
2
-
-
... Ant printing more than 5000dpi makes puddles of ink on the decal paper ...
True !!!
I tried for weeks to print at 6000 dpi and/or higher def without being able to avoid puddles ... then I tried 4500/5000 dpi and everything was OK
I should have asked you some advice sooner.
BTW ... the idea of building and albino is slowly settling in my mind, so I will probably ask you some tips and tricks if you dont mind
Envoyé de mon XT1068 en utilisant Tapatalk
-
@JSebWC ... I've been searching the 6542's 24 hours hand but is seems missing ???
BTW if you want a low priced 6542 GMT dial you could try to make one with a copper dial and inkjet decal paper.
It's tricky but not that difficult with Photoshop or/and Illustrator and a good printer.
The most difficult part is the lume but you can have it done by a specialist.
Envoyé de mon XT1068 en utilisant Tapatalk -
Hi@boncovi
I just checked mine and it seems youre fonts are a little bit puffy.
But it could just be the pics.
Here is mine if it can help
Envoyé de mon XT1068 en utilisant Tapatalk -
I used to smoke a lot, 20 cigarettes a day so way to much.
I went to vaping, gain some weight, tried to loose it, begun running a lot, then mote, went to a first 10kms, loved that, then to semi then marathon, then untrarunning (100kms and over).
Now I'm fit, in very good health, still vap but not much and spend on watches all the money I save from smoking.
Sometimes a cigar an a malt, only with a few friends ... I dont need the show.
Envoyé de mon XT1068 en utilisant Tapatalk-
1
-
-
The 7500$ Gen on chronocentric was perfect but ... yours is not far from.
Congrats for this beautiful watch and wear it proudly.
But I HATE YOU because I never felt the need of a ranger and now I do.
Envoyé de mon XT1068 en utilisant Tapatalk-
1
-
-
you all can check out some more pics by www.rvltn.ch


Gesendet von iPhone mit Tapatalk
Suscribed too ... You do amazing work.
Cant wait to see what a collaboration with Bart could lead to
Envoyé de mon XT1068 en utilisant Tapatalk
-
what will be the next evolutionary step? dialprinting machine? I own one!
Gesendet von iPhone mit Tapatalk
That's how you printed "with love" on you wife's birthday present ?
That was just perfect !!!
Envoyé de mon XT1068 en utilisant Tapatalk


Easiest way to drill vintage case lugs for 2mm bars when you’re a city dweller
in Photo Tips, Tricks, & Tutorials...
Posted · Edited by manodeoro
Hmmm ... bought those tools in EU (where I live) about 3 years ago ... used them for another hobby (aerography)
UNFORTUNATELY ... it seems those items are out of stock and possibly discontinued ... and it seems difficult to find diamond files with those diameters.
FORTUNATELY ... I have checked the GSI Creos Hobby Department website and it seems they still produce something similar : www dot mr-hobby.com/en/itemDetail.php?iId=1863.
The best is to get contact to know if it's still available and where you can order.
If I find one I'll buy it cause my files are a little old.