When you buy through links on our site, we may earn an affiliate commission.
-
Posts
4,800 -
Joined
-
Last visited
-
Days Won
9
Everything posted by jmb
-
Other than the non-gen construction which makes it an absolute byotch to change crystals this case worked pretty good for the Snowflake. Nice CGs outa the box and the only thing I did to the case was enlarge the lug holes and have since changed the pearl dot...
-
Fitting a Clark 116 on a Josh 1655. An exercise in frustration.
jmb replied to pr0digy30's topic in The Rolex Area
You've not see hard until you try putting a gen-spec crystal on a case that has one of them infernal bezels/paperclip spring arrangements. On the Snowflake I had to take put the crystal in the lathe to "machine" the bottom part so it would fit in the groove machined around the top of the rehaut. I'm really hating doing this again as I usually use up 2-3 crystals in the process... -
I have a thick enough layer of the lume on 'em so I can still read it when the alarm goes off in the morning! I was initially disappointed with the Glow, Inc. lume as I had only done little "dots" DJ style but I layed it on pretty thick on this one and it really works fantastic for about $10/bottle...
-
I'm havin' a hard time not wearing this!
-
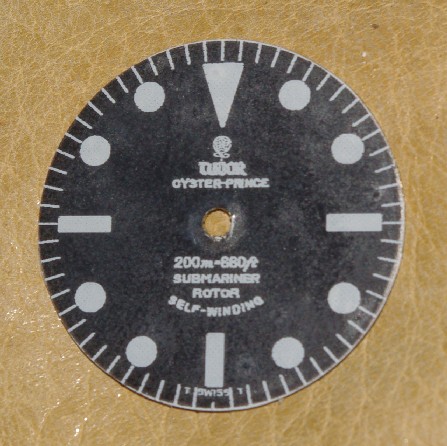
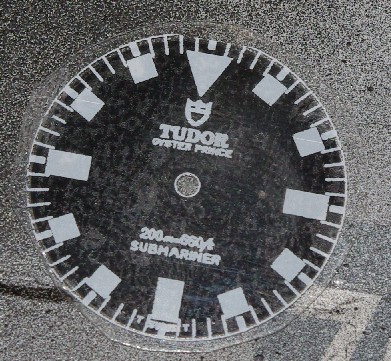
Here's a "proof of concept" dial with the peel 'n' stick stuff. I think this might stand a chance of looking respectable on regular decal paper. I need to "tone down" the "Tudor" script as it's bleeding a bit but everything else seems to look OK.
-
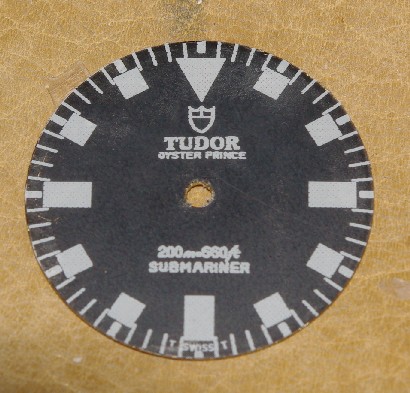
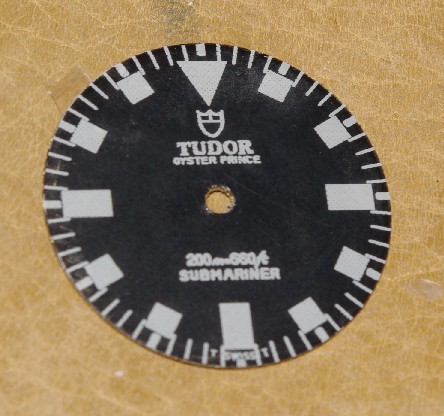
I kinda like the silver one. It has different hour markers than the other two and the shape of them looks very interesting...
-

Fitting a Clark 116 on a Josh 1655. An exercise in frustration.
jmb replied to pr0digy30's topic in The Rolex Area
I've found that .003" - .004" interference is about right. Don't off-hand know what that is in mm... -
Why, yes, yes they do!
-
Now that I'm getting the hang of it this one only took a couple hours to rough out instead of two days!! The majority of the text and indicies are very light in this "print" as that's the way I have to specify them to get them to print out correctly...
-
Check final rev thread. I have also lightened up from there as well... nanuq - That thing just hurts my eyes!!!!
-
Nanuq - I made the requested changes, I'm glad some of you guys have an eye for minute details like this - I don't! I'm going to print out another dial on clear and see how it looks! TeeJay - I would need to do it on a different printer as this old Alps (they have not been made for quite a while) does not do very well on large solid black area fills as sometimes "banding" is present. I am going to maybe give it a whirl, though...
-
The problem I am having is that to print in white I have to print at 600 dpi plus I'm printing onto clear vinyl peel 'n' stick material. I should get some regular waterslide decal material next week and I can make a decision. Worse come to worse I can re-do the artwork as a negative and go the two decal method ala slarti. This would, however, probably need someone else doing the printing as I don't have anything with high enough resolution. I bought this printer (to specifically do projects like this) on advertised specs and they don't tell the whole truth. I'll have to see how the minute "tics" look on the decal paper as I think I have the line weight set as light as Acad has a selection for but it's just the minimum dot size of the printer make's 'em print fatter...
-
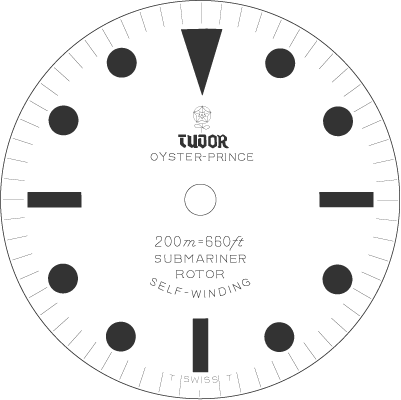
I think I have the artwork finished so that I can actually read everything on the dial - even the T SWISS T at the bottom! I am soliciting feedback as to the dials accuracy and layout from those in the know. It should be very close as I made a tracing of a gen pic. The black looks rather washed out and other flaws but I think a lot of this is due to printing it on a "peel 'n' stick" material and the water-slide decal should be much crisper. I can only imagine what this would look like at 1200 or 2400 dpi! Unfortunately while printing white I can only get 600 dpi out of this printer. But, still, this is only a decal and there is no way it would ever be able to withstand close scrutiny. I think it could be helped immensely if the lettering was "went over" with white paint (a dot at a time) by someone with an extremely steady hand and a good 'scope. This opens up a whole new world of possibilities due to widely varying dial and case sizes. I was going to show this one in a Sub case but it's to large but it would be fairly simple to turn a brass blank the proper diameter and scale the dial graphic accordingly.
-
R, looks mighty tasty even without gravy!
-
Any color is theoretically possible but I still have to decide if this printer will produce good enough quality. The printers are not made any more but are highly sought after by hard-core model builders as being about the best around for doing decals on. But, their stuff is not usually scrutinized under a loupe... Here's a "proof of concept" done with a clear vinyl "peel 'n' stick" type substrate you might make window decals out of. It is highly glossy and I didn't "squeegee" it out for fear of tearing off the printing so it's full of bubbles, etc. I discovered I had no "water slide" decals so I ordered some today but figured I could use these as a test medium. I can see I still need to thin down some features...
-
I have accidentally gotten a bit of oil on he hairspring and it will cause "coils" of it to stick together and make it run extremely fast...
-
Very nice! I have sourced an excellent white Oysterquartz dial with Roman numerals. I was going to put it into the case I machined but the dial is just a hair large so I will need to machine another... Which Miyota movement did you use in this?
-

DW 6263 vs Gen Daytona: Photo Comparison (UPDATED 7/31)
jmb replied to lhooq's topic in The Rolex Area
Gotta keep up the willpower... -
Wore this today while I was torturing the Snowflake...
-
Hmmm, kinda blingy for my tastes but not a bad looker!
-
I actually had a rep Tudor case back ( from Tudor Date-Day case) that fit the sub case!! I was so pumped so I milled off the "late model" Prince Date engraving, applied he proper engraving, screwed the back on, admired my work and patted myself on the back, turned the watch over and it was no longer running! The case-back was apparently just a few thousandths shallower on the inside and when I cinched it down with the wrench it bent something in the movement. So, I put the 2846 in it that I had originally planned on using, reinstalled the original case-back, glued on the correct pearl-dot, and tossed the 2836 into the "to be fixed" pile...
-
Looks great, R, I just put the correct pearl-dot in the homebrew Snowflake and makes a huge difference by itself. I will need to put in a new insert, though...
-
I just re-drew the "small" script with just "thick" lines instead of filled outlines and I can read everything just fine!!! I have found that although this printer is capable of 2400 DPI (in photo mode) I can only get 600 dpi in regular graphics mode which is what I need to print white. I have pulled the Autocad image into Illustrator, scaled it, and it prints great onto a clear transparency. Once the layout is "approved" by youze guyz then I'll print some decals... These will me white features on a clear background so only one decal will be needed (hopefully) to be applied to a black dial blank.

