When you buy through links on our site, we may earn an affiliate commission.


davethecat
-
Posts
223 -
Joined
-
Last visited
-
Days Won
3
Everything posted by davethecat
-
I'm good at drilling the holes on the side of cases. The center link in the bracelet is not a problem any more either. But, I still cant seem to do the end links right. What is working for you guys? The fold-over end link has two rings that appear to be tacked to the inside. The rings are too small for the 2MM spring bar. Any ideas other than finding gen 580's.....?????
-

My First Mbw And Info From My Attempt To Mod It
davethecat replied to MacDad22's topic in Watch Repair & Upgrade
try my lughole "lessons learned". It sounds like we had the same sorts of luck http://www.rwg.cc/members/index.php?showto...p;hl=davethecat -
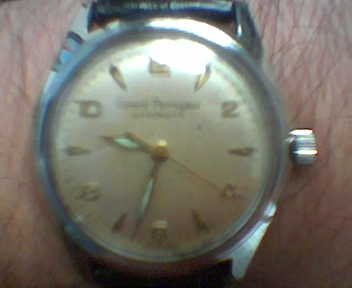
Mid 50's GP Gyromatic. SS on black leather deployant. Sorry the pics are so bad. Using my phone.

-
Another New Version Of The Asian 7753 (7750)
davethecat replied to RWG Technical's topic in Watch Repair & Upgrade
Hey Rob. Great stuff, as always. Question: is there anything distinguishing on the rotor-side that will tell us if we have this version of the 77XX as compared with the "NEW7750" ? Or is it just the dial-side gears that give it away. -
This one and the 6263 were my two boyhood dream watches. The Nautilus was one of the first reps I purchased and I love it. Still working on the 6263. Someday......
-
is the swiss 7750 w/secs at 9 less of a risk? only a couple of subdial shifts......
-
Are his v72 case kits any good? I'm getting an inch .....
-
If You Can Have One Gen Under $1500, What Would It Be?
davethecat replied to triplehd's topic in General Discussion
I got my Speedy Moon Pro for under $1500. You have to be patient. The gen is breathtaking & generates a lot of comments. -
I’ve got a wonderful MBW 1665 that I cant get off of my wrist no matter what other rep I buy. It happens to have a slightly annoying loose bi-directional no-click bezel that doesn’t seem to respond to any of my efforts to fix it. I believe I have read that others have this problem too. I don’t appear to have washer spring – unless I’m just missing it. Well, I found something that works. I took some very thin Teflon/PTFE pipe tape & cut it to a with of about 1/8th of an inch. I wrapped it around the base of the crystal ring. I overlapped the tape by a hair. I took a match and for the smallest of a second (you guys use seconds, right? I keep forgetting what’s metric & what isn’t ;-) and let a little heat hit the place where the tape overlapped. That secured the ends nicely. I replaced the bezel. Tight. Problem fixed. It’s been in use now for a month with no problems If you guys know where I could find a washer spring, let me know. Otherwise, this seems to be an OK fix.
-
I'm about to do a couple of quick projects..... Quick is a relative term of course 1. What is a safe glue for securing the dial to the movement? 2. I've got a YM that has a misalinged date - I'm hoping I can just adjust the current date wheel. In the event that I screw it up - where are you guys getting replacement overlays? Will any of the ones on eBay work? thanks guys
-
How Do I Remove A Milguass Bezel?
davethecat replied to davethecat's topic in Watch Repair & Upgrade
crap. that's one of the pricy bergeon removers. anyone try razor blades? on the watch , not your wrists...... -
How Do I Remove A Milguass Bezel?
davethecat replied to davethecat's topic in Watch Repair & Upgrade
tried the crowbar. didn’t work. drats. this is !@#%!@% me off. I've got this brand-spanking-new M.Young bezel that is staring me in the eyes and saying "put me on, you girlie girlie." but I'm apparently inadequate. dying for some help here. -
I tried to use a knife to remove the no-shoulder bezel on my milgauss 6541. No luck. The thing is too tight and there isnt much room under the bezel for leverage. Does anyone have something that has worked? Clearly, the same old approach that has worked for SD and Subs isnt going to do the trick.
-
Drilling Lug Holes - Lessons Learned
davethecat replied to davethecat's topic in Watch Repair & Upgrade
$@%$^%@$#%& did I say Carbide? I actualy used the Snap-On cobolt bits. I'll edit that into my original post DS -
OK. I survived. After reading all of the tutorials on this subject over the past year, I decided to mod my own MBW DRSD. Afterward, I thought that it might be valuable to the group to post some practical tips that I learned along the way. Call this "through the eyes of a naive but fearless novice.” 1. Don’t start this project unless you have AMPLE time to commit to the project. Don’t do what I did. I had a two-hour window prior to a social commitment. I found myself having to disengage and then pick it up later only to spend my Father's Day eve awake until 3a. I woke back up at 6a and finished everything by noon. I can see how this project can go very easy, and how it can get very hard. I suspect that every attempt is different based on the material you are working with and the impact of a millimeter here and a millimeter there. 2. Two words: Proper tools. Just because you have a Dremel, it doesn’t mean you have all of the tools you need. I used practically everything I had. 3. Use a power drill, not a Dremel. Save the Dremel for polishing the finished product. Any garden-variety drill will work. The Dremel simply spins too fast to do the job well. A power drill also has enough mass to add leverage to the job. I found that to be a big help. 4. Buy lots of drill bits. Specifically, buy lots of cobolt (or better) drill bits. You never know when one will break or dull along the way. As much as you will want to work this project to completion in one sitting, don’t create a hard stop by running out of bits. 5. Don't be cheap. Pay attention to how your bit is cutting. If drilling starts to get slow, there is a good chance that the bit is getting dull. If you even remotely suspect that you have a dull bit, change it. Worst-case scenario, you waste a $3 bit. Better to waste a $3 bit than a $400 MBW case. 6. Cobolt bits hurt. If you are holding the case in your hand as you drill, make sure that your finger is safely away from the exit hole when you break through. Otherwise, well..... If you think cobolt slices though SS like butter, just wait till you see what it does with flesh. :-( 7. Use the right oil. For the first half of the project, I used some old Slick50 PTFE-filled spray lube. I thought it was a decent (perhaps better) substitute for 3 in 1 or WD40. It worked OK, but not great. I switched to WD40 when I started on the bracelet. It worked 2x better. Make sure you lube both the hole and the bit. 8. While drilling, remove metal a little at a time. Counter synch the bit back out of the hole regularly. This "excavates" the metal out of the hole. 9. Drill on a perfect axis. Entering at an angle will oval the outer hole and will ultimately freeze the bit. Even when you are at a perfect 90-degree angle, don’t become complacent. Too much pressure on the bit will bend the bit as it turns, creating an ovaling of your outer hole. I can’t stress this enough 10. If you oval a hole, don’t over compensate, don’t try to fix it. Let it be - it adds character & makes the watch look more age-appropriate. Maybe a blessing in disguise? When you polish up everything at the end, it ends up looking much better & much less like a mistake. Furthermore, almost any tool mark adds to the believability of the age of the watch. Keep that in mind as you work. At the end, there are very few tool marks that can’t be recovered with a little Simichrome or a Scotchbrite pad. 11. When you have successfully drilled the case, don’t become complacent or overjoyed. I assure you that the hard part is yet to come. Drilling the bracelet was 2x harder than the case, and then adapting the end links was 2x harder than drilling the bracelet. Finally assembling it all back together was 5x harder than anything else I attempted. 12. End links. What can I say? If someone out there has a secret to what works, I'd love to hear it before I attempt to do this next on my 6541. The fold-over end links have a metal loop that appears to be tacked welded to the larger piece. On one of my links it was tacked at the top and loose on the bottom. The other rings were tacked both at the top and the bottom. It's too thin to drill out. I tired to bend and enlarge the ring as much as I could. There was solder material inside the ring, so I had to use a Swiss file to smooth the path out. I reamed the inside of the rings with the drill and that seemed to help too. I also used a circular and triangular Swiss file to bend and ream the metal at the same time. This part took me forever. I sincerely thought at more than one point that this was going to be the part of the project that ruined everything. I even went as far as doing a mid-project eBay search for replacement end links. No luck.... back to work 13. The end links get bent very easily. I assure you, if you bend an end link in an odd place, this whole project can turn into a nightmare. I bent one along the center-bottom cross bar. Afterward, re-bending it to fit, while still ensuring a straight axis though the spring bar path was quite a task. Also, watch out when you are reassembling the watch. The bottom corner-bend on the end link can bend easily as you try to pry the spring bars into place. If that happens, you need to observe the movement of the bracelet against the bent out portion of the end link. If it wears against each other, you have a big problem. End links aren’t easy to source, so don’t screw yours up. 14. Like the end links, there needs to be more discussion on how to drill out the bracelet. If you try to hold it in your hand and drill in a similar fashion as you drilled the case, you will quickly learn that you need a new approach. The bit will freeze in the hole and then the bracelet will spin violently until you stop the drill. It doesn’t matter how strong you are, you wont be able to overpower the drill by hand. A quick search pointed to a tip that made the difference: Using a long nosed pliers, camp the bracelet lengthwise along the bracelet’s center link. When it starts to work, see point #1 "Take your time!" Oh yeah, an ancillary & implied tip is "keep your computer close in case you need to search for tips." :-) 15. A set of Swiss files is absolutely critical. Go to Ofrei's and buy the real deal. If that's too steep, Home Depot sells a decent hobbyist set for about $15. I used these at several points along the way. 16. The second hardest thing I encountered is getting the thing back together. You've drilled, bent, reamed, etc. and now the tolerances of all of the changes compound on themselves. Trying to get the re-assembled end link and bracelet back on is a [censored]. By the time you get to this point, you will be inpatient. Resist cutting corners because any slip of the spring bar tool or screwdriver will mar your case. 17. Before you try to assemble everything, use your Swiss files to smooth out any drill entrance or exit. Pay very careful attention to the inside of the case holes and the bracelet middle link. If you ignore this, expect a terrible time trying to assemble the bracelet. In effect, the rough dilled-out lip left on the case and bracelet holes adds a few millimeters to the width. The tolerances are too tight to assemble everything smoothly. If you do happen to get everything back together with these exposed rough spots, you will in effect have a grinding pattern where the rough spot hits other pieces of metal. That cant be good over time. Be smart, clean up/file-down your mess. 18. When you finally get to the point of polishing up everything with your Dremel, soften the edges of the case and the bracelet to add to the faux aging of the case. 19. Simichrome is OK, but a rouge cream works better. 20. Now I know why they say "Do it yourself, you will get much more enjoyment when it is YOUR work." What they are really saying is: "If you manage to take this on by yourself, expect to go to the depths of hell in depression as you narrowly miss screwing up your pride and joy. When you manage to salvage everything and start back down the right path, you will be elated. It is quite a rush when you get to the moment that you realize that you can stop dictating in your mind your "Help Joe/The Zigmeister/Palp/Tommy !!! I screwed up big-time...." email.
-
I'm in if its in that range.
-
It looks like a 6694, but those pictures are too blurry to tell. Reminds me of what I see when I've had too much to drink. Mannual wind? If so its probably a 6694 with a 1225 movement
-
Siduri Loring
-
I've had watches sit in customs for more than a week. SF Customs can be very slow, but others are as well. OTOH, the longer you are in this hobby, the more likely you are to lose a shipment. It happens. All you can do is verify your dealer's policy on customs and follow through. Our dealers are so good, they make this seem like ordering from Amazon.com sometimes........ but its not. We all take a risk.
-
I was trying to fix my bezel and I put some scratche on the lugs of my vintage DRSD. If you know the vintages, the brush on the case is a little deeper than the brush finish on a bracelet. I've used a scotch brite pad, but that brushes too fine. I tried a copper brush on a test watch, but that scratches too deep and not very uniform. Anyone have a good method?
-
anyone selling the 16520 with the new asian 7750.
-
7750 movement. Which replicas have the new model?
davethecat replied to ryaku's topic in General Discussion
is there a pre-2000 daytona with the new asian 7750? seems like that would be pretty close to gen. -
question for you guys I have the MBW DRSD with the vinatge "no-click" bi-directional bezel. The bezel is slightly loose and rotates from 11 to 2 too easily. When it bumps up against something, it moves in one direction or another. Any of you guys encounter the same thing? Any idea on how to fix? Love to know if there is a secret before I try to guess.