-
Posts
308 -
Joined
-
Last visited
-
Days Won
7
Everything posted by manodeoro
-
My Fantasy Rolex Semi Bubbleback Project
manodeoro replied to earloflondon's topic in The Rolex Area
Really nice project and congrats for all the work you already did. Looking at those watches, and though your project is a "fantasy watch", I think you could drill the lugs oppositve to the crown side (and only those) so that your case could be more accurate. Like the one below [/img] -

My Fantasy Rolex Semi Bubbleback Project
manodeoro replied to earloflondon's topic in The Rolex Area
Looking at the pics I would say rafflesdials/Riyi -
May I introduce you to my newcomer, a 5500 Air-King Precision circa 1975. That watch shows a really nice patina dial and offers a thrilling experience on the wrist ... for vintage watch lovers of course. And it's been a really long journey to get that petite on my wrist. I'll tell you the complete story a little later but for the moment … i just hope you'll enjoy the pics. Here are some close-up pics … I’m definitely in love with that crown The complete story about that watch will come soon
-
Incredibly nice dial May I ask where you sourced it ? It's so clean that I could suppose that it's a DIY ... If YES congratulations for the work you've done If NO congratulations nevertheless
-
Hi Ricki Glad to see that A/6538 finished and congrats for the result. Mine is still on the bench waiting for case and caseback engravements but I really think I would be able to show it in a few weeks. Congrats again for that build ... you have done a great job !!!
-
Yesterday evening, drinking cachaca while enjoying that newcomer ... 5500 patina Air-King I think she deserves a rivet bracelet, ain't she ? Almost forgot the lumeshot
-

A/6538 Military Submariner with Burford dial
manodeoro replied to manodeoro's topic in The Rolex Area
Thanks Still no new pics to post because I'll wait for that watch to be finished to show anything more, but some build updates : - lug drilled - fixed bars and tubes modded ... still not on the case because I want to engraved it @6 before - engravement templates ready for the case and caseback - silix caseback modded so that it looks more accurate - handset selected and aged and ready for lume (will do that along with the dial) The two-tone custom bezel proves to be much more difficult than I thought to achieve - first one was a complete failure ... - second one was cool but didn't cliped firmly on the retaining ring - next one ... should be perfect ... at least that's what I hope Next week I'm leaving for a 3 weeks trip in Vietnam so I wont work on that build until mid April. If everything goes as supposed I hope I'll show something in May. -
All this has begun because my wife heard about my "Miss Bond" project a few months ago (my sons are faulty here ... they can't keep a secret). Now she's impatiently waiting to see that watch, but I'm never satisfied of the dials I build for that project and always delay the finishing. So I've had the idea, to smooth a little the waiting process, to design a simple build for her for Valentine's Day. I started with what I must call an "overdecorated" project ... something really too "sweetened" I showed that project to some friends and they asked me if I really wanted to produce what they called a "shamallow watch" So I have decided to build something a little more ... "less" THE BASE WATCH : I started with a 36mm Datejust from Silix ... nothing really special about that watch except the nice sunburst effect on the dial And please dont call me a Scrooge This is, indeed, a cheap base watch, but the final result is much better IMHO And she (my wife) will get a diamond (real) ring as a birthday present while we will be in Saigon next April NEW BRACELET : The Oyster bracelet that came with the watch was really not comfortable (at the least) even after a baby oil bath. So I quickly swapped for a Jubilee bracelet which is much more soft on the wrist and had a real "jewellery" look to the watch. I've had to bend a little the springbars so that they could fit in the holes inside the lugs, so that was not a 5 minutes swap but evrything went well at the end. I've had the watch on my wrist for a few days just to be sure it was working OK and kept time well, then I begun modding it. THE DIAL MOD : I have kept my first idea of a gradient pink layout, kept the "red hearts" too ... but the central "LOVE" writing had to go to the bin ... really bad taste it was ... sometimes I wonder "what's on my mind" I did not took pics while modding the dial but it's really an easy and simple modd, as long as you keep the path and act patiently enough. This method can be used for any other DJ and/or DD dial mod, as long as you want to get a "soft" and "non covering" color pattern. PREPARING THE DECAL : 01 - scan the existing dial so that you can use it as a template 02 - open the scan with photoshop (or the gimp) and resize it to the dial's size 03 - create the pink gradient pattern with the air-brush tool on an specific sheet 04 - open a new sheet and place the "hearts" ... playing with different sizes and taking care not to place them over the printings of the dial 05 - create a tiff image with only the pink pattern and the hearts (not the dial used as a template) and print it on a clear decal sheet ... the difficulty here i to play with the color density because when put on the dial the pink pattern will be less dense ... so if not enough density when you print and the pink pattern wont be visible but if too much density and the sunburst effect on the dial will disappear 07 - spray 2 coats of matte varnish (waiting 24 hours between each) and let dry PREPARATING THE DIAL : 08 - carefully release the bar indeces and the coronet ... warning !!! those parts are really tiny and have a tendency to satelize themselves ... and take care not snatching the tiny lume dots 09 - carefuly "clean" the holes on the dial, where you will insert the pins under the indexes and coronet when putting them back ... I use a really thin needle (used for sawing silk) with a handle made with painter's masking tape PUTTING THE DECAL ON : 10 - moisten the decal sheet ith tepid water then put it on the dial ... there will be some "bubbles" where the decal covers the lume dots but we will take care of that later 11 - let dry for 24 hours so that the decal has perfectly stuck ... it's really important because we wont put any varnish now because it could hide the sunburst effect on the dial 12 - moisten the decal with "micro sol" (in fact I use white vinegar ... much cheaper and works perfectly) only where it covers the lume dots and xait for about 5 minutes ... then the decal is softened so you can press it around the lume dots with a moisten paper towel ... the decal should perfectly deforms arround the lume dots and ... no more bubbles 13 - let dry for 24 hours PUTTING THE INDEXES AND CORONET BACK ON : 14 - get the "silk sawing" needle and carefully pit the decal where there is holes on the dial ... so that the pins under the indexes and coronet wont tear the decal 15 - put the indexes and coronet back and gently press on them so that the pins are perfectly pushed in ... get some eyewash and use it cause your eyes are probably aching now 16 - put the dial upside down on a soft fabric and put a really thin coat of hypo cement on the holes where the pins are inserte ... just to secure everything 17 - let dry for about 24 hours THAT'S IT ... now you can put the dial on the movement, put the hands back, case everything and enjoy ... or offer of course, if it is a gift UPGRADES SCHEDULED and/or CONSIDERED : BEZEL ... scheduled : After RWI shutdown I thought I would never get the nice engined urned bezel that ZuluGMT offered on sale (I didnt had his PP adress and he didnt had my shipping adress). Fortunately RWI is back and since today the bezel is on his way to me. So in a few days it will be there and will take the place of the flutted bezel. ENDLINKS ... scheduled : The endlinks that came with the Jubille bracelet are really bad, even after reworkong the polish/brushed effect. So I will replace them really soon ... probably from Raffles CROWN ... scheduled : The crown is ... really not perfect ... like many crowns on Rep Datejust. Too low on the case, inside chamfer to enough present, etc ... I first thought about reworking the inside chamfer to make it look better but I finaly search for a much better "crown + tube" set ... possibly Gen if I can get a good offer (and it I can fi it) CLASP ... considered : It keeps well closed and is not too much ugly ... but a little ugly evertheless So it will depend on how my better half keep loving her watch ... if her first entusiasm evolves into passion and if that watch keeps on her wrist then I'll opt for a clasp swap. After that ... we will see if I stand there of go to something better ... the DG283 keeps time pretty well but it's a cheap movement, so possibly a 2843-2 and a new handset All this will depend on how my beauty loves her new beauty Of course all (constructive) opinions and (good) advices are welcomed so please feel free to post here PICS : Indeed ... so I here they are Perhaps I put too many pics of the dial but I wanted to try to show how the pattern can change from "dark pink" to "almost invisible" just depending on the lighting
-
Could someone please tell me where is the WOW !!! button ?
-

Under the tree.... Rolex 1970 6263 with a fantastic PN dial !!!
manodeoro replied to rolojack's topic in The Rolex Area
SUPERBE !!! Jack ... you should be ashamed to post such beauties ... you make us all envious -

A/6538 Military Submariner with Burford dial
manodeoro replied to manodeoro's topic in The Rolex Area
Thanks for the advice [emoji5] The problem is I want one part to be "coppery", not "sylvery". That's why I'm building this with 2 parts, one is plain steel, the other one I have "coppered" it with a stove. The work's going well but I won't work on it between the Eve's cause I'm leaving for a ski journey. sent from my Moto G5 Plus using Tapatalk Of course I wish you all the best Eves ( Christmas and New Year) you can have. sent from my Moto G5 Plus using Tapatalk -

A/6538 Military Submariner with Burford dial
manodeoro replied to manodeoro's topic in The Rolex Area
Thanks !!! and you're welcome Along the next months I'll make tests to see the different colors one can achieve using that method and I'll try to build a chart with : - gaz burner size - "cook" duration - color If I achieve that I could call my thread "Mastering the Art of Watches Cooking" [emoji6] sent from my Moto G5 Plus using Tapatalk -

A/6538 Military Submariner with Burford dial
manodeoro replied to manodeoro's topic in The Rolex Area
Wake up early this morning, so I had some spare time for "bezel ring cooking" Some comparison pics, 5513 eBay bezel ring untouched vs 5513 bezel ring polished and "cooked" (still same process : 30mn cooking / cooldown, repeat 3 times) I definitely LOVE that subtle "yellow/gold" color ... next month I'll try coloring a complete watch using that method I will also do some test soaking a stainless steel piece in linseed oil before "cooking" to see what I get ... linssed oil is supposed to enhance the process so I should get a more brownish color -

A/6538 Military Submariner with Burford dial
manodeoro replied to manodeoro's topic in The Rolex Area
Thanks@Nanuq [emoji5] BTW ... please just remind me to say "NAY" if you ever invite me to a BBQ [emoji39] sent from my Moto G5 Plus using Tapatalk @Dlf ... would like to share that thread with you [emoji5] If it weren't because of you I could have never discovered that model ... Thanks a lot sent from my Moto G5 Plus using Tapatalk -

A/6538 Military Submariner with Burford dial
manodeoro replied to manodeoro's topic in The Rolex Area
Thanks @capre @Desai As you already saw in the first post, those A/6538 came with a really special bezel. So let's just talk about that part of the build (work just in progress) A/6538 CUSTOM BEZEL First let me quote (partially) Shane Griffin from "Gear Patrol" : "Around 1957, when the MOD was ready to commit to the Submariner, Rolex was several years and several upgraded references into the Submariner’s history. The 6538 ... was made into a MOD-spec version, the A/6538. The MOD required, among other specific features, a larger bezel, allowing gloved divers more gripping power; and a bezel material of German silver, which would typically dent upon impact, versus cracking or breaking." The required bezel was virtually (and as far as I know) a "thick" 5513 bezel build in 2 parts : - downer part (the one that clipped on the retaining ring) made from stainless steel - upper part made from "german silver" That specific construction could be controversial but when one look at the pic below it really seems the bezel is made from 2 parts, the upper part being corroded differently than the downer part. The different color of the upper part could be due to the specific composition of the "german silver" ("nickel silver", "maillechort") that can contain a significant percentage of copper (40 to 70%). In all cases, that is THAT pic (plus the Burford dial of course) that made me "fall in love" with the A/6538 and that pushed me to try to build the "same" watch. So, after grafting a new rehaut to my Silix 6538 case, I am, at the moment, actually building a 2 parts custom bezel ... and I know ... I'm probably crazy I will show pics of the finished bezel and explain the building process but today I want to speak about "bronzing" stainless steel. The upper part of my custom bezel should look like the one on the pic above, so it should have what I would call a "light yellow color" So last week I PMed my good friend and "king of steel" @mascob to get some infos about how to "lightly bronze" Stainless Steel. As usually he was enthousiastic, did some tests with a torch and send me the pics altogether with process advices. Result was really nice but not "light" enough and color was too "orange/yellow". The other problem was that ... I dont have a gaz torch. So if I wanted to get that "really discreet yellow color" I had to heat the bezel : - at a lower temperature that the one obtained with a gaz torch - in a very well distribued way to get a homogeneous coloration On Saturday morning, about 6AM, I was cleaning my italian coffe maker (search Bialetti Moka Express on the web) and I had an epiphany !!! The downside of my coffe maker, plain stainless steel, was partially showing a light yellow color :cheese::cheese::cheese: So to reproduce the process I just had to analyse "how do I heat my coffee maker" ... The answer was : - very low heat - long time So, just after drinking me coffee, I took an old twisted bezel, put it on the smallest burner of my cooking plate, light the burner and waited to see if something would happen. And my expectations were more than fullfilled ... after 2 heating periods of 30mn each my bezel showed a really light but really nice yellow/gold color That was all for Saturday but on Sunday afternoon I have decided to try another 30mn heating period and I put my bezel on the burner again At this very moment I had a little "problem" as my wife entered the kitchen and looked alternatively at me and the bezel on the burner ... Her : "Please tell me, my love, are you cooking a ... watch ?" Me : "Well, darling, I'm NOT actually cooking a complete watch ... just a watch bezel" Her : "Are we supposed to ... eat that thing ?" Me : "Definitely NO my dear ... you know I cook organic food only and I can't attest that that bezel is an organic product" There is moments in life when you're dealing with your wife/girl-friend and you know that you HAVE to find something to say and/or do if you want to avoid sleeping on the couch. So I flashed my "Clooney's smile" (Clooney ... not clowny) and said : "We've been living together for ... 35 years and see, I'm still able to surprise you ... what else ?" Then she laughed and kissed me, poored two glasses of Saint-Mont (Tannat, Pinenc, Cabernet Franc and Cabernet Sauvignon) and waited with me for the final result. So here are the pics, almost exactly the colored I 'm trying to reproduce and BTW ... I did not slept on the couch -
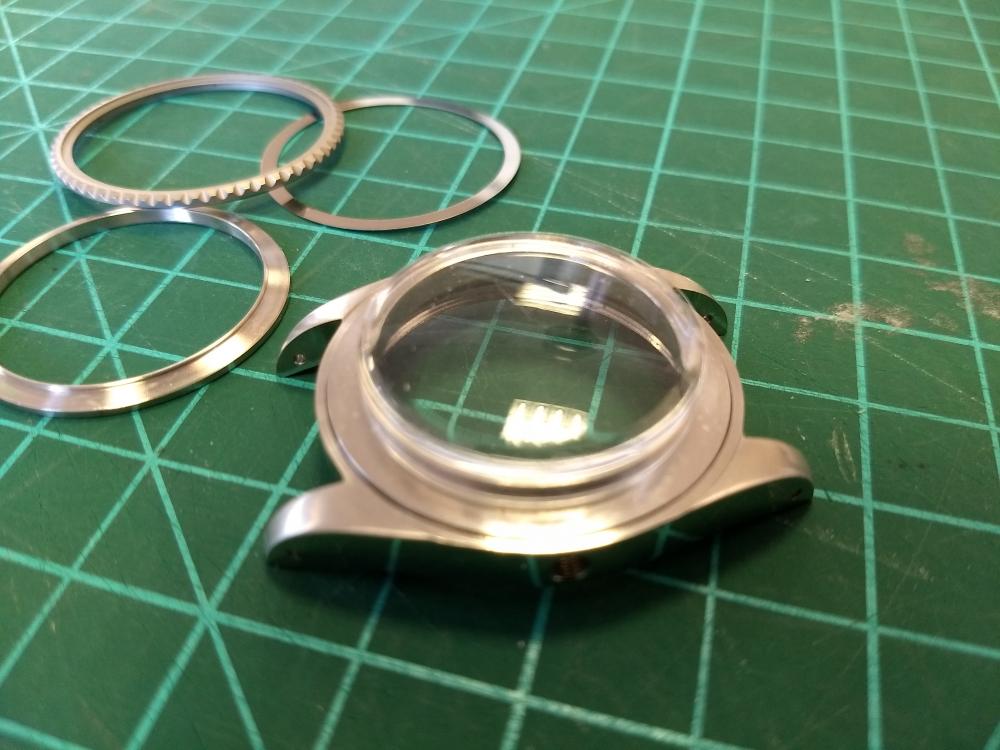
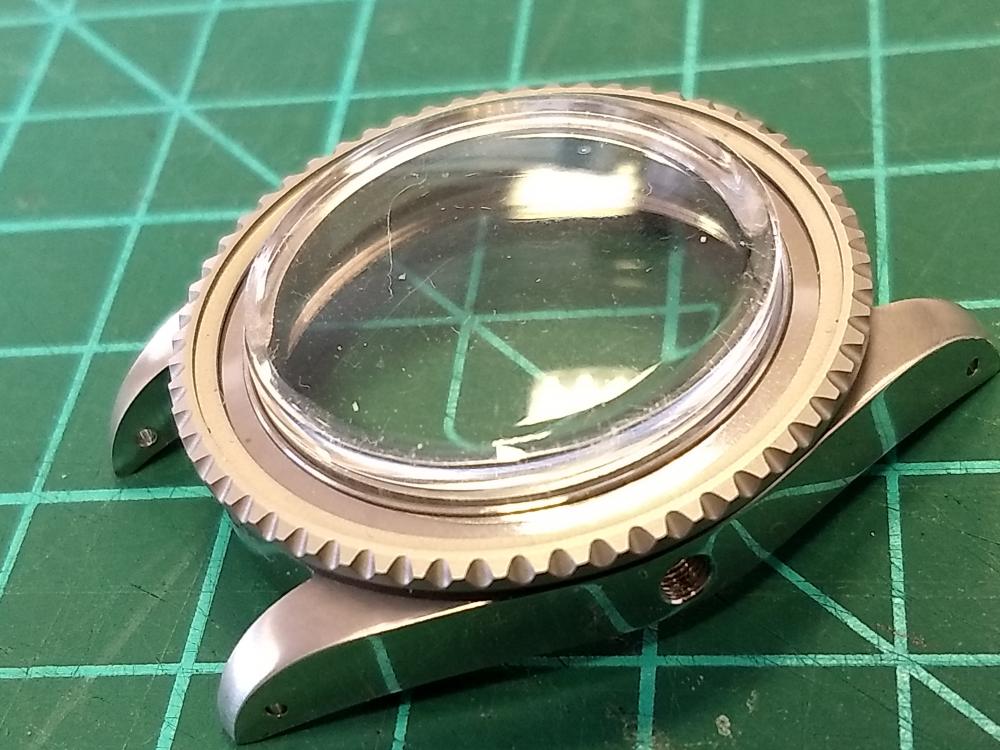
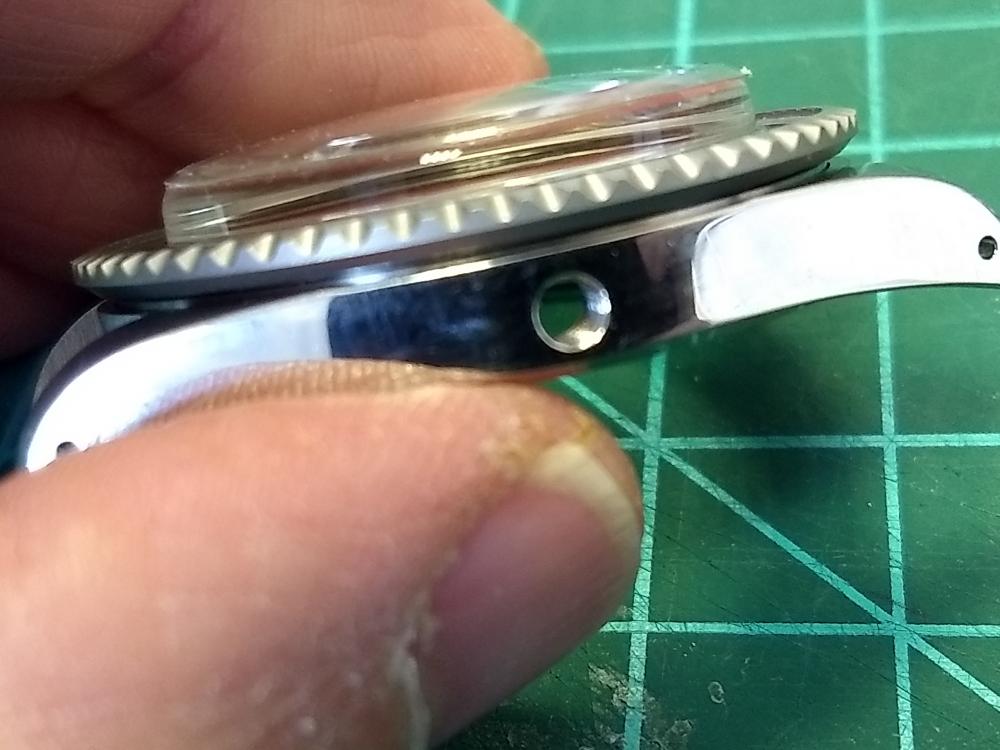
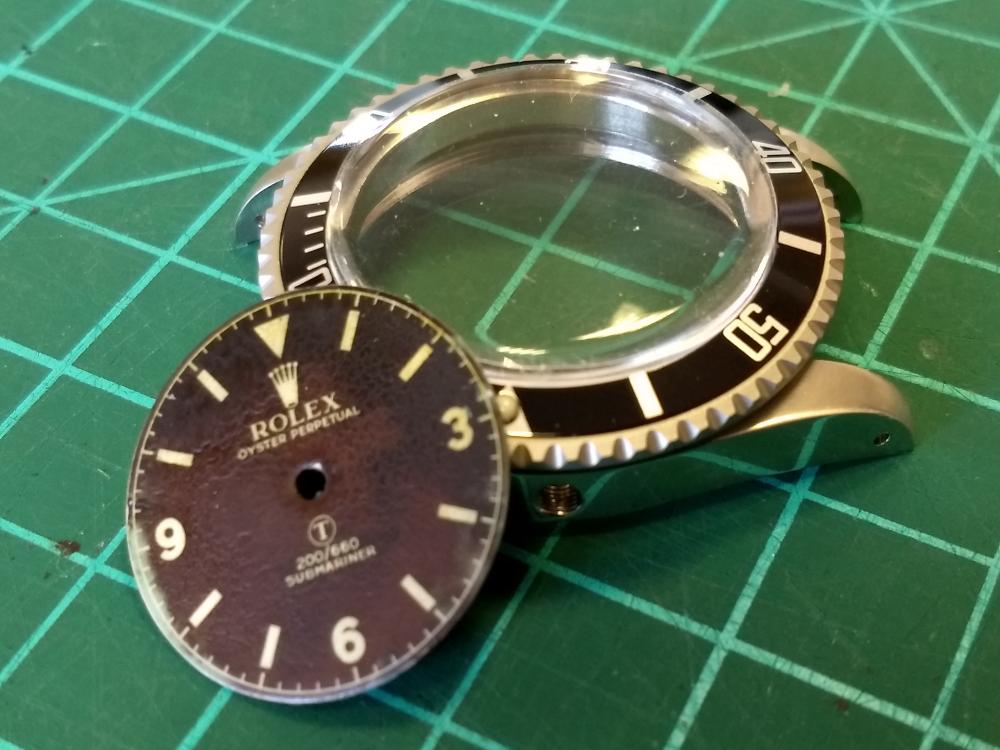
Hi crazy watch lovers When I begun that build I made myself a promise that I would not create this thread before having a complete story to tell. But I'm too impatient so I have to post now ... and I will write and post eveything else later all along the builsing process. So what is this all about?... about an A/6538 ... a "Burford" one specifically Question was ... what should I do to wear this watch? 1st option was to become VERY wealthy and lucky enough to find one to buy ... 2nd option was to have some imagination plus a little patience and build one. Unfortunately, as far as I know, a correct 6538 case that already can receive a 5513 bezel costs about $800 to $1500 - totally out of my budget. Fortunately !!! I have A BUNCH of imagination and A BUNCH of patience. So here is what is already done : 1 - start with a Silix 6538 midcase ... $ 45 but NOT accepting a 5513 bezel assembly 2 - shave the rehaut and graft a new one ... "gen-specs" an "easy" mod as long as you know how to measure, design, draw ... and have a friend who own a lathe and is OK to provide some help 3 - build a Burford dial strating from scratch ... and while I was in the building a vintage dial I decided to make it "Tropical" So here I am now, with still a lot of work to do but the most difficult parts of that build (grafting the rehaut + building the dial) are already done. Building the custom bezel won't be easy but it's already in progress ... the rest will be a peace of cake So let's talk about THE CASE The Silix 6538 midcase have been rworked on a lathe and the original rehaut have been "shaved". A new rehault has been turned, on the lathe too. I did all the technical design but the lathe work has been done by my friend @mascob (not a member here unfortunately). @mascob sent me back the reworked midcase and the rehaut and I managed to make it all fit together. Here are some pics Silix 6538 midcase with the new rehaut already "grafted" + the T19 and the 5513 bezel assembly Same midcase with the T19 and bezel assembly on ... the bezel turns perfectly A "nice" insert (will change that one) and the home-made 26mm Burford dial that I'll put in that case About the ... BURFORD DIAL making Well ... that was "almost" easy I already had designed (for a nice forum member) a crispy Burford dial some months ago, using both Photoshop and Illustrator (dozens of hours searching for good pics + dozens of hours working on the design using a 5000ppi definition). That design was black and withe only and done for a standard Silix case using a 29mm dial so I : 1 - resized everything using Illustrator so the design could fit a 26mm dial (25.8mm exactly as the Burdford dials where supposed to be reprinted on on 6538 Gilt dials) 2 - spent about a dozen of hours (again) using Photoshop to design a "blank" tropical 26mm dial 3 - copied the white parts of the first design and pasted that on the "tropical" design 4 - printed on clear decal paper and protected with 2 coats of matte varnish 5 - prepared a 26mm dial with a "cream" paint ... randomly applied so that some areas where more or less clear or dark ... then sanded finely to get an almost smooth surface (not perfect) 6 - applied the decal on the dial and sprayed 2 coats of matte varnish ... each coat dried for about 24 hours 7 - sprayed a 3rd coat of matte varnish and used an hairdryer spo that the varnish dried faster on some areas 8 - sprayed a 4th coat of matte varnish and used the hairdryer again ET VOILA ... Now the next fun part of that build will be to put a 25.8mm dial in a modded 6538 midcase with a 26mm case opening WITHOUT holding it with a Gen movement It could be, theoretically, impossible ... But there are ways, you know, and I have a few more tricks up my sleeves and ... THAT is another part of the story that I still have to write ... just hope you liked this one
-
Thanks@Nanuq ... I'm not certain wich build you wowed but ... I will consider it's mine [emoji39] And a "wow" from you ... I receive that as an honour, considering the really high quality of your builds and watch catches. When I joined the forum and begun playing with reps exactly a year ago, I never thought I would be there today showing a highly modded case. But all this happens thanks to the forums and nice members sharing their knowledge and experience. sent from my Moto G5 Plus using Tapatalk
-
Hi @Dlf That thread must be kept alive, so here are some pics of my own A/6538. I must thank you a tousand times because you made me discover that model. I started with a 6538 Silix case and I grafted a "gen-specs" rehaut so that it colud take a T19 and a 5513 bezel assembly Plus I have built a tropical Burford dial for it I dont want to use the 5513 bezel because it's too thin ... about 1.5mm So I'm building a "2 parts" bezel that will be about 3mm thick and will look like this one
-

NEW rep Daytona with 904L steel and a 4130 clone movement!
manodeoro replied to highoeyazmuhudee's topic in The Rolex Area
+100 As the chrono function is not mandatory for me (at least less than the thickness a as I have skinny chicken wrists) I'll stick on my 23J until a real 4130 clone shows up. sent from my Moto G5 Plus using Tapatalk -
You must be true [emoji6] At first I thought it was the Silix pearl resumed because in the first pic it seems to be circled (and Athaya are not as far as I know). But after looking closely at the other pics it appears not to be circled. So probably Athaya ... have to order a lot of then to get a better finish on those oldies. sent from my Moto G5 Plus using Tapatalk
- 41 replies
-
- rolex submariner
- bond submariner
-
(and 2 more)
Tagged with:
-
Very good job ... that pearl completely changes the look of the insert.@rolojack ... could you please confirm ?.. I definitely must do the same mod on my SYL [emoji3] sent from my Moto G5 Plus using Tapatalk
- 41 replies
-
- rolex submariner
- bond submariner
-
(and 2 more)
Tagged with:
-
@rolojack ??? Could it be the Silix one with a new pearl or a DIY pearl ? If YES ... Les bras m'en tombent !!! sent from my Moto G5 Plus using Tapatalk
- 41 replies
-
- rolex submariner
- bond submariner
-
(and 2 more)
Tagged with:
-
Je suis étonné et choqué que les images pornographiques soient autorisées sur ce forum. Please Bart ... spot showing that watch [emoji16] sent from my Moto G5 Plus using Tapatalk
-
Just finished to rehab a cheapie : https://rwg.cc/index.php?/topic/189890-Heavily-modded-16610-cheapie-...-or-"minutes-of-a-shitinerand-plastic-surgery" So I had to wear it at least one day ... I got used to it and I will miss it [emoji6] sent from my Moto G5 Plus using Tapatalk
-
11 - FINISHED ... and redy to go back to his owner : Thursday I received the new dial for that "ex-quite-ugly-now-pretty-nice" cheapie. So this morning she was ready for some pics though the light was not very good. She ticks the time pretty well, the crown can perfectly be screwed on the crown tube and she looks pretty good ... IMHO I know my father in law will be very happy and it’s been a very interesting exercise of plastic surgery. Now it’s time to leave for a 2 weeks vacation then I’ll go back to a much tougher build projects that I hope to finish before next december … but shh!!! it’s classified :hehehe: And, as promised, here are some pics before I wrap it in a soft cloth and put it back in my bag ...


