When you buy through links on our site, we may earn an affiliate commission.


freddy333
-
Posts
15,787 -
Joined
-
Last visited
-
Days Won
194
Everything posted by freddy333
-
Outstanding Avitt. Really well done.
-
Actually, you just jogged something else in my memory (alot of loose things floating around in there). I remember, when I read that post, noting that the watch, a 5513, was fitted with what looked like a Seadweller bezel. It was much thicker than the standard Sub bezel. There was only a side photo of the watch in the post, but I remember thinking that the bezel looked odd at the time. And only because it was posted by one of the generally trusted regulars at the time (it could have been James Dowling) that I assumed it was correct and genuine. From what I have been able to gather in researching the Comex Subs, the first shipment of about 150 and some of the second shipment of watches Rolex delivered to Comex were just standard 5513s with a plain steel He valve added (the valves on these early watches were chrome-covered steel instead of stainless steel and often turned black due to the oxidation of the metal after the chrome wore away). The second (and later) shipments were given a unique model number, 5514, and began carrying the 'Comex' label and caseback numbering. I think that is the way it worked.
-
Yes, I shudder to imagine how he carries all that info without toppling over.
-
I believe it is the 78360 with 580 or 558B end links.
-
Thanks Nanuq. I figured you would have some knowledge of this. I am with you regarding the reasoning behind the T39 on the Seadweller, but do you have any documentation indicating the T19 superdome being used on a 5514 or 5513-based Comex non-date Sub? I almost recall someone posting a gen 5514 on Timezone a few years ago with a superdome (not sure which tropic though), but I have been unable to locate either the original post or any other documentation to verify this.
-
(This is an addendum to the previous Chasing a Grail thread) Looking for opinions on the best crystal to use for a 5514 project (this will be fitted with an original He valve mod as well). As far as I know, the 5514 was never issued with a T39 superdome (please let me know if you have factual info that refutes this), but I am having trouble deciding between the taller len's beveled profile or the shorter len's more square profile. Am I correct in thinking that the beveled lens was typically installed by RSC and the squared lens is probably the style that was often affixed to the watch from the factory? I do not have a gen T21 for comparison (though that is an option as well), but I am wondering what the consensus of opinions are between these 2 (I think 1 of these is from Clarks and the other from Helfands (not sure which is which though)
-
Euno -- Either you take watch collecting a bit too seriously, or some of us have alot of catching up to do. Outstanding collection.
-
Looks like Xmas comes early this year for a few lucky children. It is hard to imagine that such a fine collection represents the cost of only about 1 gen. You cannot wear just 1. How pedestrian. Any sight of a MBW 5514/5513 on the horizon for this kid?
-
Between Venus & Valjoux, how far is a foot?
freddy333 replied to freddy333's topic in Watch Repair & Upgrade
So the positions of neither the pinions (for the hour/minute & 3 subdials) nor the dial feet match? That's what I thought, but I had to ask. Thanks Euno. -
Does anyone know if the pinions & dial feet positions are the same between the Venus/Lemania bi-compax movements used in some vintage Daytonas (like this) and the V72 tri-compax I know these are different movements, but since they share many of the same components & component positions, I thought the dials might be swappable. I would like to use the dial from this Venus/Lemania-powered watch on a V72 without having to modify the dial or feet? Also, will the vintage Daytona dials from 7750-powered watches fit the v72? I have a handful of these watches and it would be nice to be able to swap dials among them.
-
If this watch is from one of the collectors that state they hand inspect each watch sent out, I can see your point. In that case, it would seem to me that they should either exchange the watch for the correct one (at their expense) or refund your entire purchase price. I would love to hear the reason from the seller for the mistaken shipment.
-
Without knowing who you bought the watch from, I cannot say whether it was bait and switch or just a case of a rep factory changing specs on a drop-shipping seller who may never have been informed of the change by the factory (or he may have been out of stock and sent what he felt was a similar watch). If you bought the watch from one of the collectors here and you sent him comparison photos of the watch from HIS website and photos of the watch you received (I would circle in red the items that differ from the watch pictured on HIS website), I am sure he will either swap it for the correct watch or refund your purchase. If he is not willing to do that, there is a Trade Review forum to post your experience to the rest of the members. But I would only post after you have exhausted all the reasonable options dealing directly with the seller. And, yes, you will probably have to eat the cost of return shipping. Be sure to follow the seller's instructions to help avoid additional headaches.
-
Every commercially made rep contains one or more inaccuracies, sometimes they can be glaring mistakes. And in the case of modern Rolex reps, they can be all the more obvious since you can walk into any Rolex AD and be reminded of how 'off' even the best commercial reps are. I am not a big fan of modern Subs Seadwellers and I do not know who you purchased your disappointing watch from, but I would recommend that you do a bit more reading of the current and recent Sub threads as there appear to be a number of promising items according to other members who are more knowledgeable on the modern lines.
-
Links > Watch Parts
-
Fitting the gen 1570 movement in an MBW 1665
freddy333 replied to kingkitesurf's topic in Watch Repair & Upgrade
A donor watch can be had for less than $200, which I admit is still alot to pay just for a valve. If you have a lathe, you could make your own or, as was my backup plan, you can use a small rivet that many watch parts houses & some hardware stores sell. You would still need to fashion the spring clip yourself though. But I just felt it was worth the cost of the extra watch to get a ready-made working valve. With the addition of the 1570, I think an He valve and a gen (or more accurate repainted) dial are an absolute MUST. -
Rocket -- As others have said, you are not the only one this type of thing has happened to. I have had not 1, but 2 experiences similar to what Ubi described, where a watch literally fell off my wrist dropping into a sad heap on the table below. It was a good learning experience that taught me to regularly check the bracelets on all my watches.
-
Same again. Great work.
-
Fitting the gen 1570 movement in an MBW 1665
freddy333 replied to kingkitesurf's topic in Watch Repair & Upgrade
Outstanding work, KKS. I have been considering the same thing as a finishing touch to my DRSD project. I would love to see your finished product. And if you need info on an He valve, this may work. -
Two watches on the winder have started running slow.
freddy333 replied to kasigi's topic in Watch Repair & Upgrade
I agree with Robertk. The winder may not be winding the watches fully. You can easily check this by taking one off the winder, winding the crown 45 turns and setting it down (face up) and check it in 24 hours. If the time is correct (or within specs), there's a problem with the winder (or its settings). If this watch is running slow, then there may be a problem with the watches themselves. You might still check the winder to be sure it is not jerking the watches or winding them too fast, which could be the source of problems. -
QC'ing a watch instead of drop-shipping does help to weed out many DOAs (watches that arrive dead or with serious problems). But after 25 years of experience with reps, I find that most problems occur between 48 hours and 1 month after you receive the watch. And a pre-sale QC is not likely to locate a problem that has not revealed itself yet. One of my earliest reps, a two tone Datejust and was one of the 1st to be fitted with a 'genuine Swiss ETA' and 'real gold plating' on the bezel & bracelet (which I modded with gen end links & clasp back in the days when you could walk in & buy these from any Rolex AD), which I purchased for the ungodly sum of $225 in 1984. This watch became my daily 'beater' for nearly 10 years and it is still running. The crown tube is stripped, the movement has never been overhauled (and needs it) & it has alot of inaccuracies by today's standards, but it still runs. Anyone interested in the history of reps might appreciate this price list I just found from the mail order company I used to purchase reps from in the pre-Web days The watch pictured above is the 'L' version of item 201-214 (A = ETA Automatic, Q = quartz, & L = ETA with laser applied gold plating - these L watches were generally considered the highest grade of reps 20 years ago). Most of the collectors here (at least those I have dealt with) are always willing to exchange a watch that proves to be defective within their warranty period. A good & reliable way to force many mechanical problems to reveal themselves is to follow this procedure with any new watch - rep or gen -- Upon delivery, and before removing all the plastic transport wrapping (in case you need to return it), gently & carefully wind the watch 45 turns and then set the correct time. If the watch has a chrono (stop watch) or other user-controllable complications, start those as well. Set the watch down (dial side up) on a table and let it sit there, without touching it, for 48 hours (or until it stops running). (In the case of a chrono, if the chrono runs for 30 minutes, stop it, reset it and start it again. Let it run for 2 hours and then stop and reset it. Do not restart during the remainder of the 48 hour test.) If the watch stops in less than 38-40 hours, I would consider that questionable and ask the seller what he thinks. In most cases, he will probably tell you to repeat the test and see what happens. If the watch continues to run normally & keeps good time (+/- 6 secs in 24 hours is reasonable for most reps) for about 2 days, it is working properly. Now it is safe to remove the plastic and start wearing your new beauty. But always remember that these ARE reps. And, as such, they are not manufactured to the same quality standards as their gen counterparts. Nor, with a very few exceptions, will they receive the same QC inspection before leaving the factory or seller's hands. Something to keep in mind when the average $200 rep watch craps out a few years after you bought it.
-
TTK - I don't care what anyone says about you, you're alright in my book.
-
is it me, or does something not look right with this auction.
freddy333 replied to stilty's topic in The Rolex Area
Center links look solid and the 11 bids from the same bidder is cause for concern. On the other hand, the seller has a good, solid history. My guess is the seller may not be aware of the issues with the bracelet. But I think I would stay away if you are looking for a gen bracelet. Too many issues with that one. -
Alot of people sell them.
-
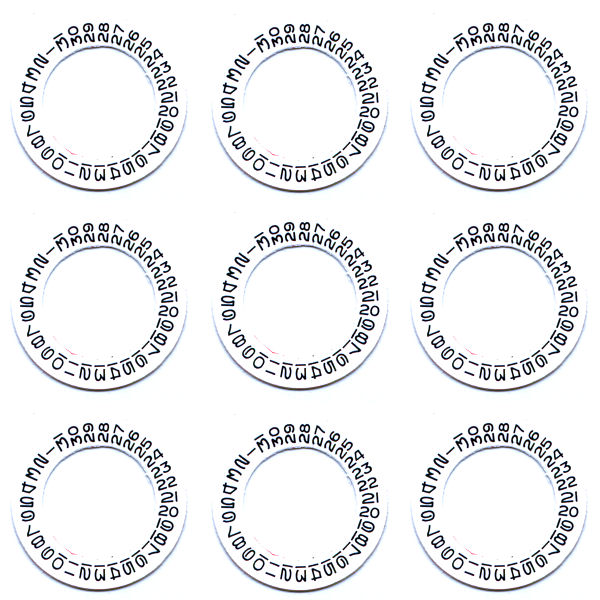
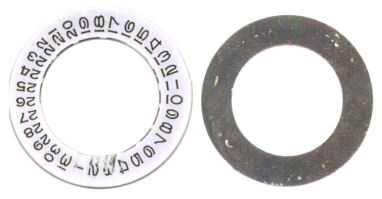
I do not have a way to print onto plastic, but I did try copying the Watchmeister datewheel onto a matte DVD label. The material is similar to what the Watchmeister sticker is made from, but it does not seem to stretch or pull out of shape as much. This was a slight improvement over the Watchmeister material, but it still did not seem very stable. I scanned the Watchmeister overlay (at 1200dpi @ 48-bit color) and produced a master TIFF image that I used to print onto DVD label stock. This is a smaller jpg version of the master that I used But, to be reliable over time, these things really need to be made out of metal.
-
I mean the original MBW datewheel overlay, which came glued on top of the ETA datewheel in vintage MBW Subs & Seadwellers (at least it came glued to my ETA 2846's datewheel). The MBW overlay is made out of a thin sheet of metal, maybe aluminum, and has the (serifed) dates painted onto it. I have the Watchmeister overlay (UBI's sticker) in there now, but it is causing frequent problems, so I want to go back to the original MBW metalized datewheel. Unfortunately, I smeared the printing on the MBW overlay while I was working on something else (look at the 1, 2, 3 & 4).