When you buy through links on our site, we may earn an affiliate commission.


freddy333
-
Posts
15,787 -
Joined
-
Last visited
-
Days Won
194
Everything posted by freddy333
-
If anyone has a spare vintage MBW Seadweller or DoubleRed datewheel, one of the recent metalized versions -- with the bolder serifed fonts please PM me.
-
TTK - I have been trying to email/PM you regarding another MBW. Can you check your gmail please?
-
I forgot about the dog..
-
2 of the best
-
Nanuq -- With that chainsaw tool of yours, it is no wonder your thumb is so famous (whatever is left of it). My singlemost indispensable tool is a 4x loupe. Without that, little else would be possible. Archibald - These were reshaped with a combination of dremel and hand files (the Patek could use a bit more tweaking & a datewheel with a bolder font)
-
I went on a run to China town (NYC) and made a purchase.
freddy333 replied to TighTTChrono's topic in General Discussion
Archibald -- Although I have not looked seriously for a year or so, I have never seen anything anywhere near the quality of what is available from the collectors here on the streets of DC. But I agree that there would certainly be a market here if someone on the street made them available. On the other hand, the constant lines of buyers might draw too much unwanted attention. -
I am totally with Euno on this. More refinement, less bling. Do a proper Lange 1 with a working big date or a reliable Asian Valjoux 72/727 and you will have my vote.
-
TTK -- You have a PM at GMAIL.
-
Alligoat -- You are right about the crystal being sapphire. I was just referring to that watch from Andrew being the 'old style' Datejust (old dial & clasp). You are also right about having to build a franken if you want the acrylic crystal, etc. I had considered doing that as well, but with the cost of used gen datejusts starting around $600-$700, I just could not justify the cost of a franken.
-
Tribute To Rep Submariners. Let's See The Classics!
freddy333 replied to By-Tor's topic in The Rolex Area
I have one of those ND dials too. The CWP dial was also nice, but it had other problems. I am sorry to hear you are having DW problems. I thought I was the only one. It looks wonderful after you spend an hour or two tweaking it into the right position. But, unfortunately, it is a ticking time-bomb -- just a matter of time until the adhesive starts to loose its grip and either the numbers shift out of position or the adhesive gums up the datewheel gears and everything comes to a stop or the paper sags & gets caught under something and the date either takes 2 hours to switch to the next day or gets stuck between days or any combination of these. I know the guys put a great deal of time & effort into the project, but it would been worth the extra time & expense to produce the DW on a metalized substrate like the OEM MBW DW. The good news is that it is a relatively easy process to unstick the DW (at least temporarily). But you do have to open the case, remove the dial and ungunk the top of the movement (I keep a bottle of denatured alcohol - mineral spirits - handy for this). To be safe, it is probably a good idea to keep the watch away from heat and out of direct sunlight for any length of time (do not sunbathe with your watch if it has one of the Watchmeister DWs), as either tends to make the adhesive soften and the DW shift its position. One time, I was able to fix the DW when it got stuck between dates (at least temporarily) by slowly clicking it through 2 entire revolutions. That at least got it working for a couple of days until it got stuck again. Good luck. p.s. Anyone with a spare vintage MBW Seadweller or DoubleRed datewheel, one of the recent versions -- with the bolder serifed fonts please PM me. -
Actually, there are. Andrew and some other collectors have them (click here). I believe Andrew (and some others) can also provide other dial/bezel options if you request them.
-
My 1st gen Rolex was a twotone Datejust like that one and the crystal was the same.
-
Tribute To Rep Submariners. Let's See The Classics!
freddy333 replied to By-Tor's topic in The Rolex Area
I am surprised Ziggy did not widen the 6 & 9 hour markers. But other than that, superb specimen. It looks like you had better luck with the Watchmeister datewheel than I have. -
I always strive for a 'just returned from Rolex service' look. That is, gleaming, but imperfect. Perfect lines and completely clean dials on a vintage piece always screams fake to me and it is hard to walk that narrow line between aged patina and battered & worn.
-
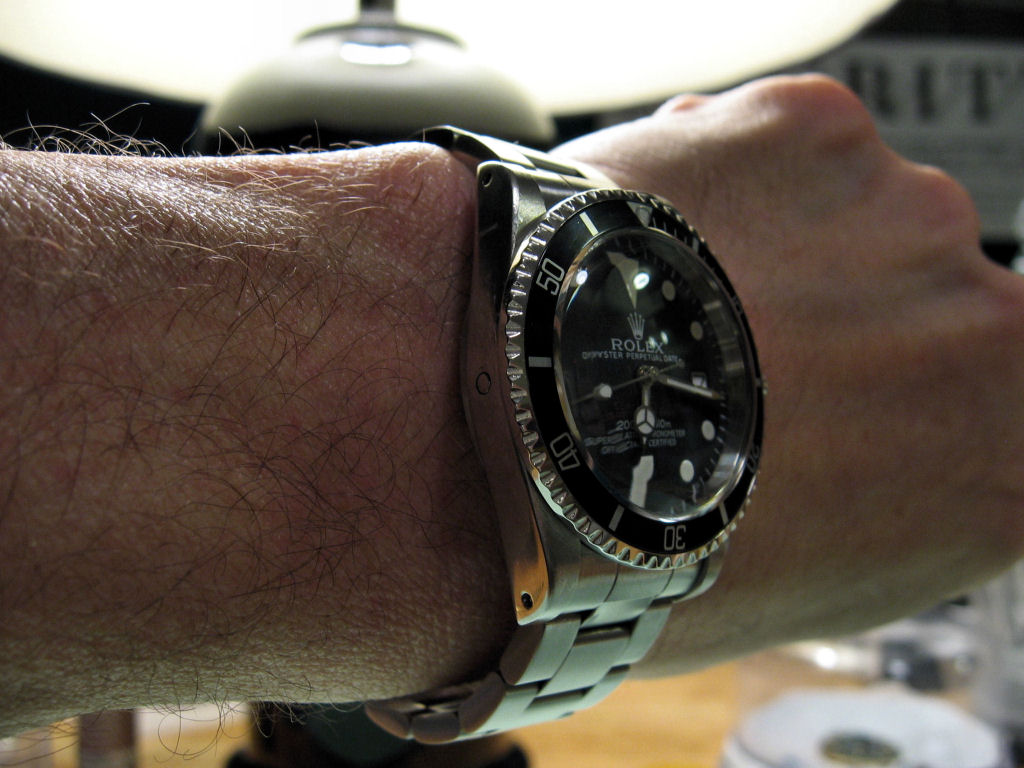
There is a hole in the side of the lug If you do not have a springbar tool (you should get one), you may be able to use an unfolded paper clip. Just be careful not to scratch the adjacent surfaces.
-
Everything they sell is WAY overpriced. But in those cases where you NEED the part they are selling and cannot find it anywhere else, you have to pay the price (or be patient & search harder).
-
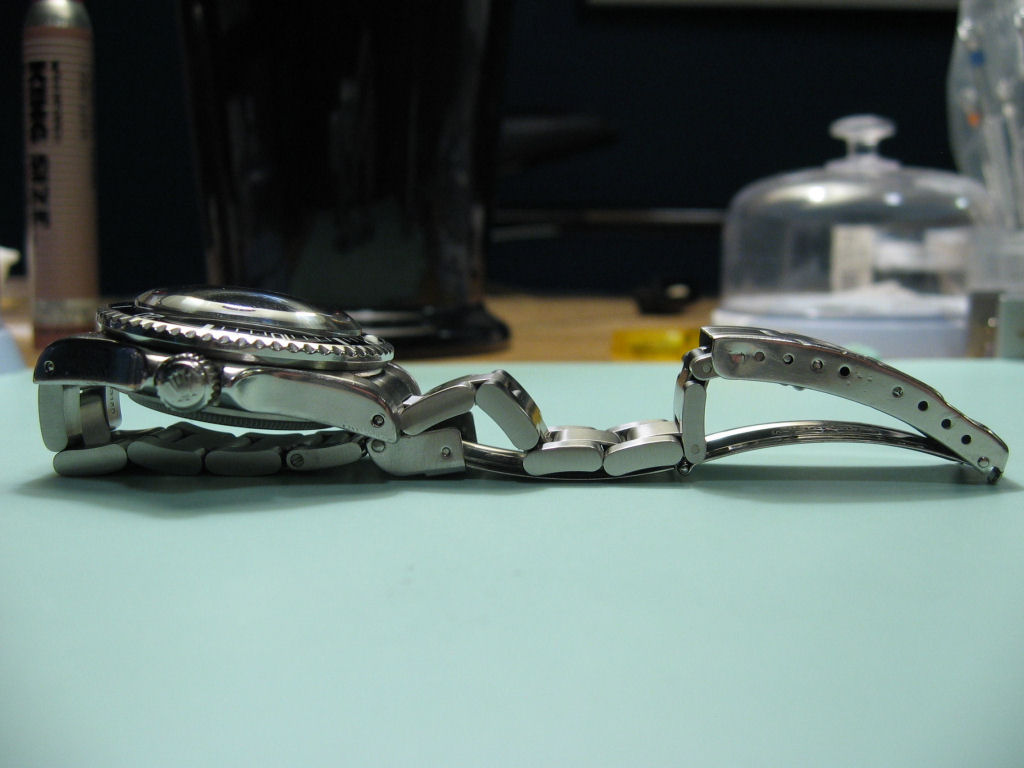
Excuse my ignorance, but are the end links hollow and does the case have a lug hole in the side? If not, can you post clear pics of the top & bottom side of the links where they fit onto the case?
-
The weekend starts out looking like this But who knows what it will look like on Monday?

-
Remember, you are talking about Rolex. And owners have been known to swap bracelets around. So it all seems reasonable to me.
-
The 1680 came with the folded 9315 or hollow middle link 93150. Either is correct. The watch looks legit to me.
-
Looks like a white DW to me, which is correct for that watch.
-
Yes on all counts. They are lovely watches.
-
If anyone is sitting at work & bored, I operate a pirate radio station on the Web. We broadcast very infrequently, but we are on air now and until about 5am UK time (midnight East Coast US). If you have a java-enabled web browser (Internet Explorer, Netscape, Firefox, etc.) you can tune in to a low-fi feed here. The style is very eclectic and you never know what you will hear in TOKYO. Not really watch related (except that you might hear the occasional Rolex tune), just thought I would mention it since it is Friday night & the end of the week.
-
I agree with Avitt -- Your work looks excellent. But some of us cannot draw a straight line and have trouble keeping the paint inside the lines.
-
Tribal -- I remember that and it looks good. Is this the one you applied (slowly) with a pin?