When you buy through links on our site, we may earn an affiliate commission.

Dawagner
-
Posts
257 -
Joined
-
Last visited
-
Days Won
1
Everything posted by Dawagner
-
Not enough swing for the balance wheel. It fluctuates from very fast to very slow in s/d. I am suspicious that someone put the incorrect staff/roller jewel onto it as it doesn't look original (to the yuki) may be the actual rolex roller jewel assembly. Also the hairspring was bent at the stud so I straightened that out so it is 90° to where it enters. I'll post a photo/video when I get home.
-
Hey RWG does anyone have some good photos of a yuki balance wheel and hairspring preferably detached from the cock? I'm trying to diagnose a possible hairspring issue and want to double check the geometry of mine vs a known working one. Thanks!
-
Noob all the way and if your conus hit up BK he is quick and top notch.
-
TC Cadell Submariner Rouge - First Photoshoot
Dawagner replied to Nightwatch's topic in The Rolex Area
Are the min/hour hands black or is it just the angle and lack of reflections? -
I have a similar issue. I have a login and password that are registered but they have never activated them. Never got an email to follow to activate or anything it's like it's sitting in someone's inbox to approve.
-
It's a D-blue day here
-
I had this happen on mine too are you sure the stem had been fully pushed in so the keyless works move into the non time set position?
-
-
You can watch the whole thing on Thewatchrepairchanel on YouTube. He does a couple 7750 movement teardowns.
-
That explains my struggles with the 2824 I was working on. Thanks President
-
All the way out in the last position.
-
Most if the time it's pretty easy. And goes something like, 1. Remove caseback 2. Remove crown stem 3. Remove the two movement holder tabs securing the movement in the case
-
Hey Guys got a big favor to ask. Is anyone located near Houston that has a 2824-2 hour wheel or a whole movement for sale. I got burned on a "new old stock" one from the bay that came missing the hour wheel and I'm not sure the local watch Supply House is open today. This was to finish off a Christmas gift for the wife. Let me know! Thanks for your help!
-
-
I think I saw 19mm fat bars on wholesaleoutlet990's ebay store
-
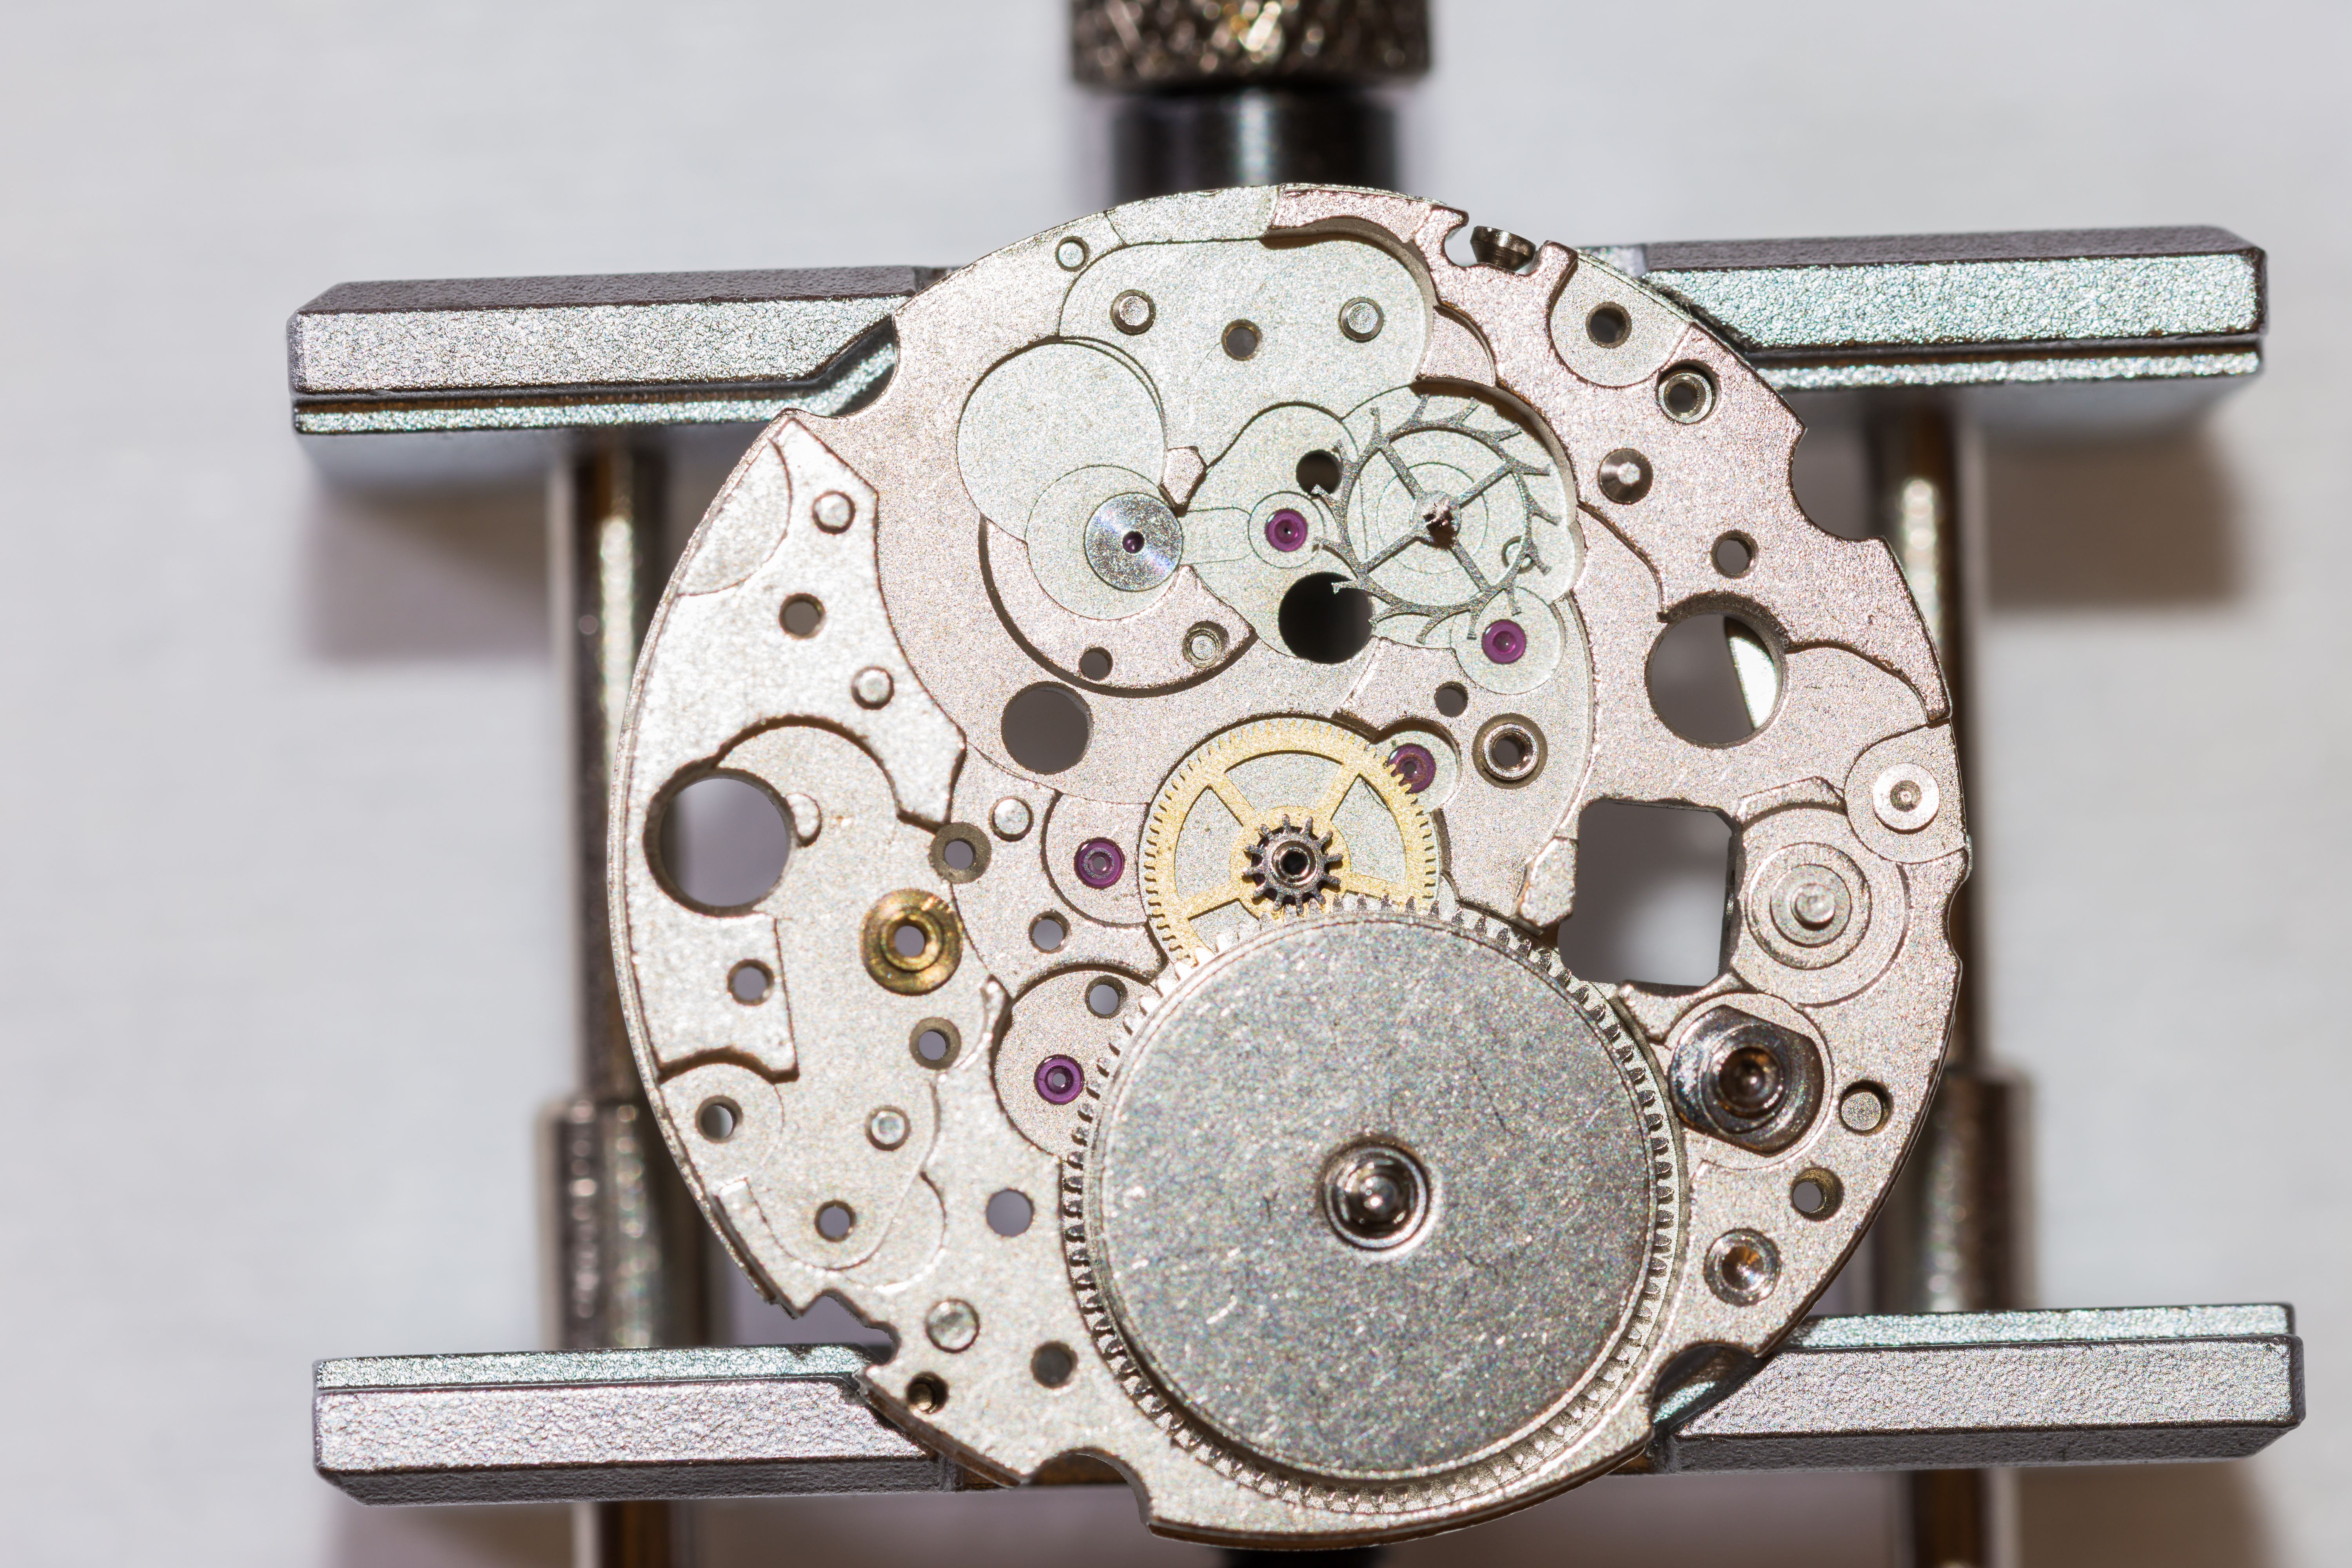
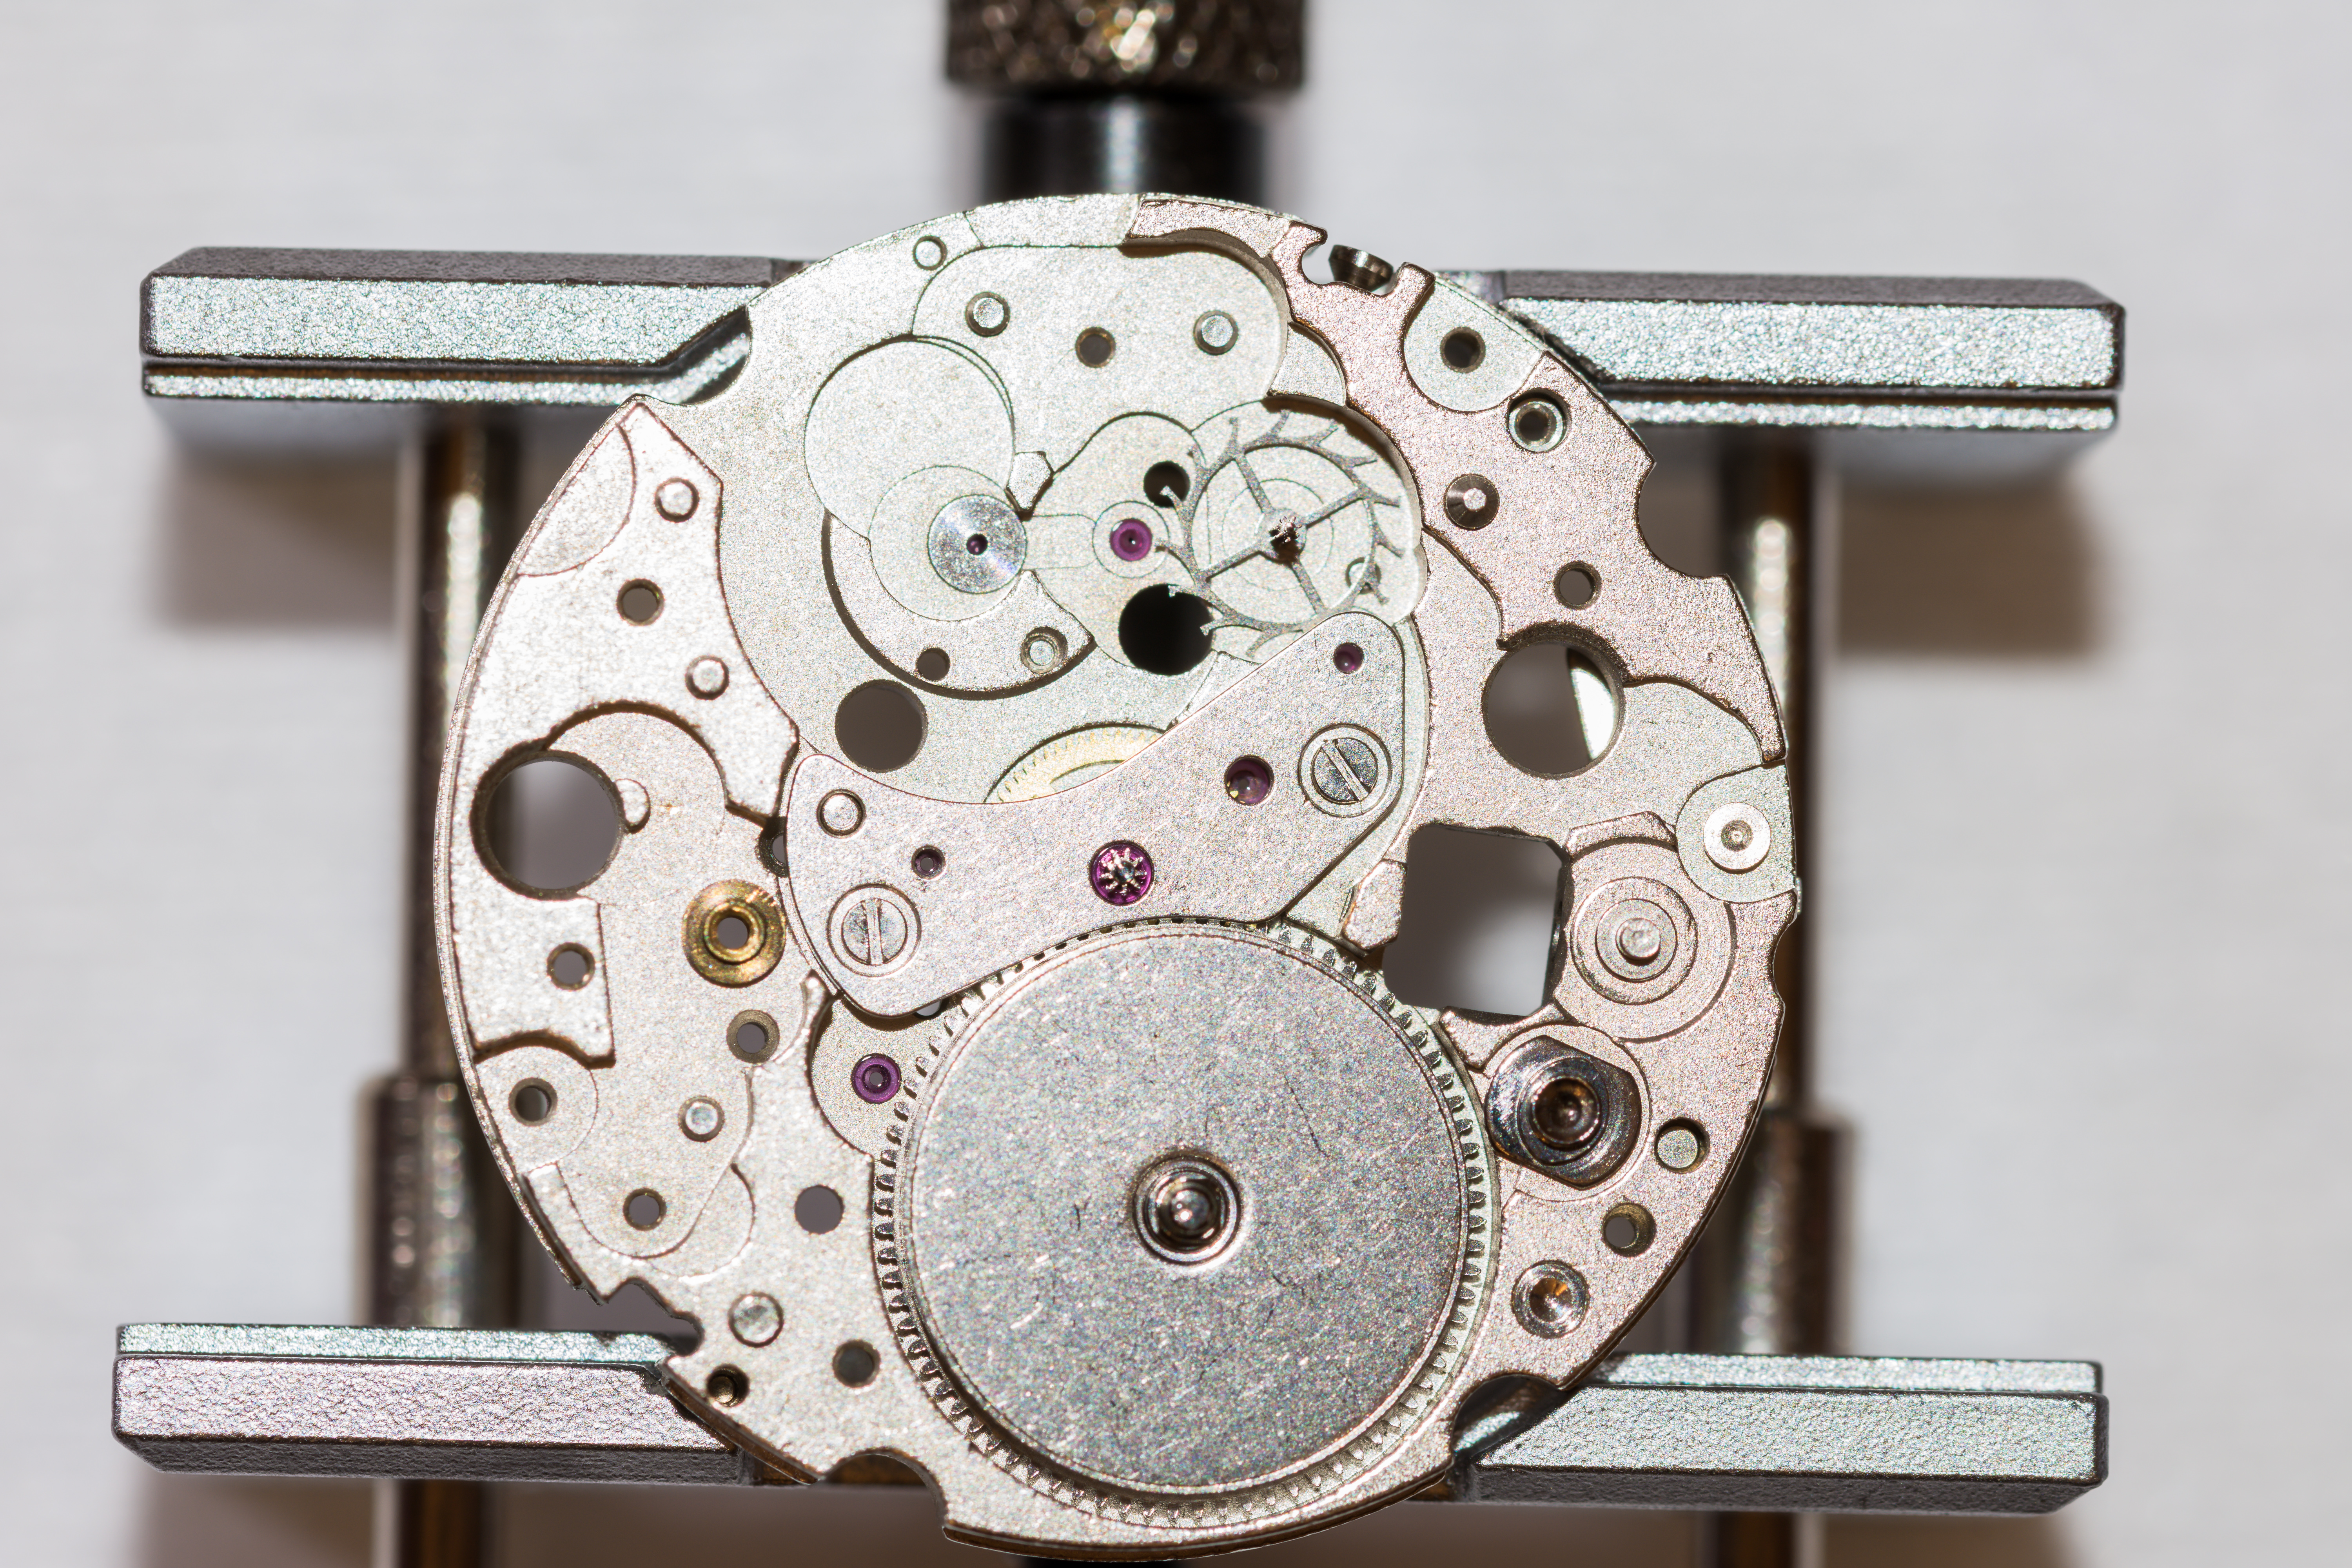
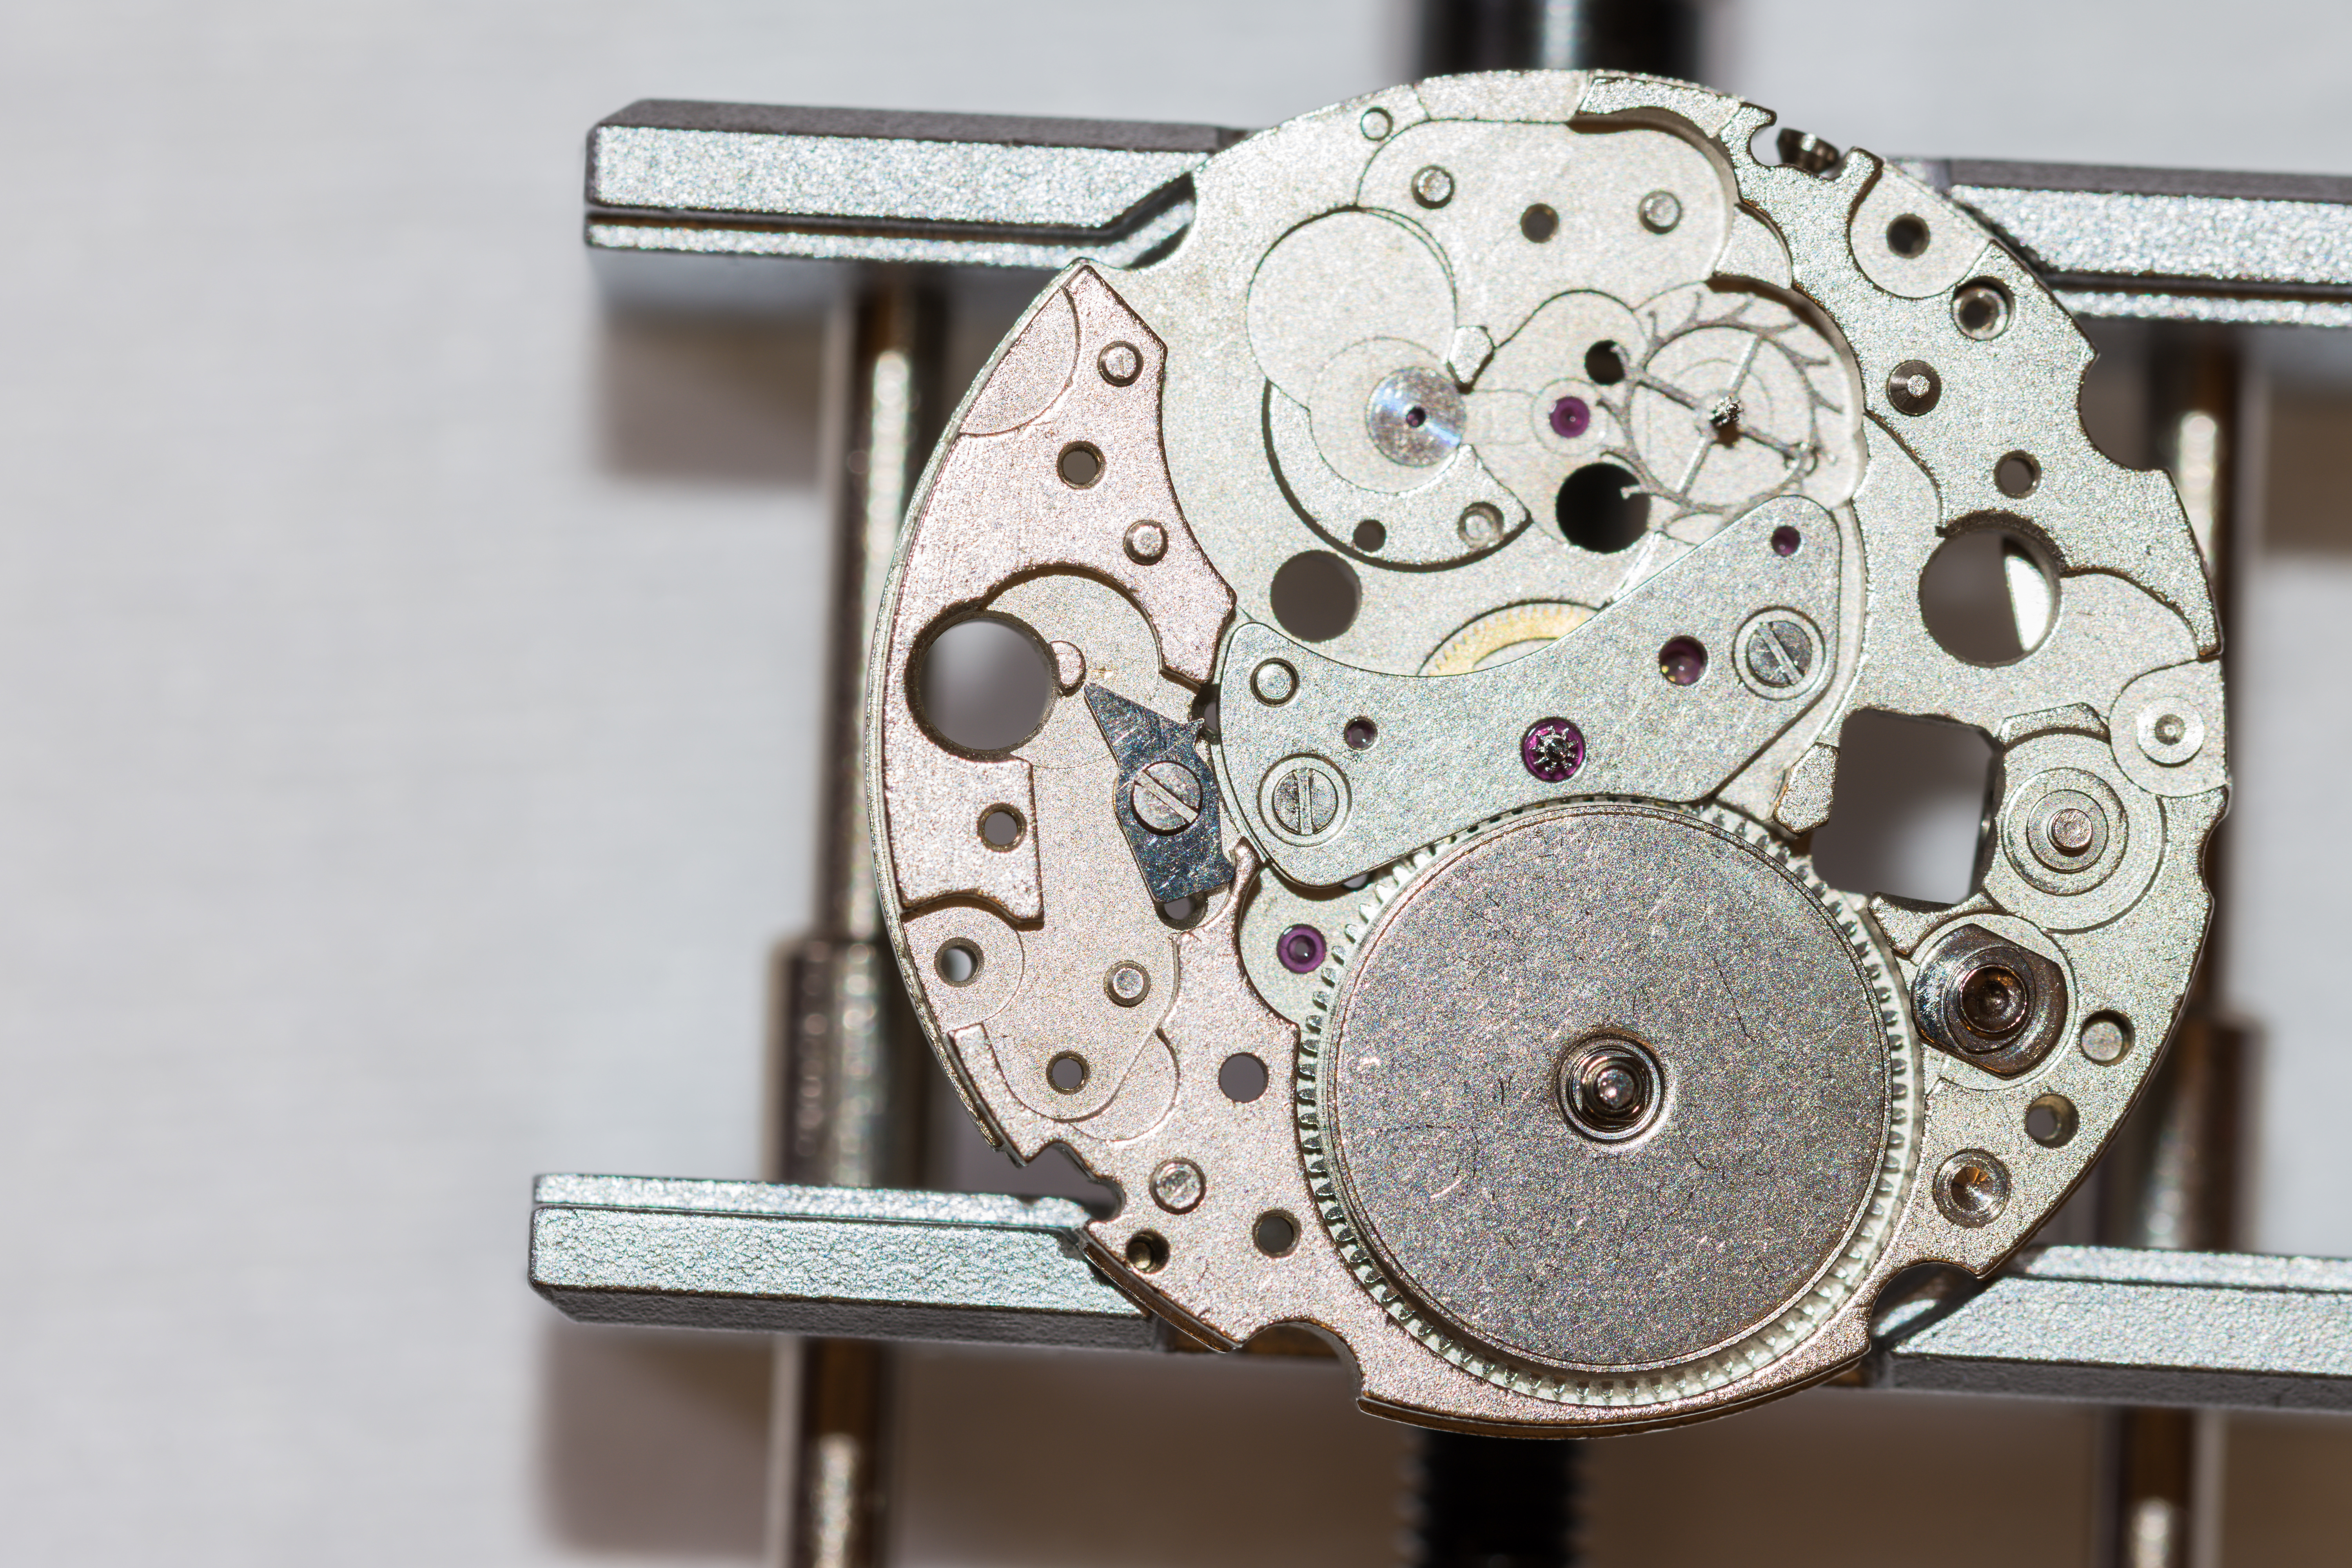
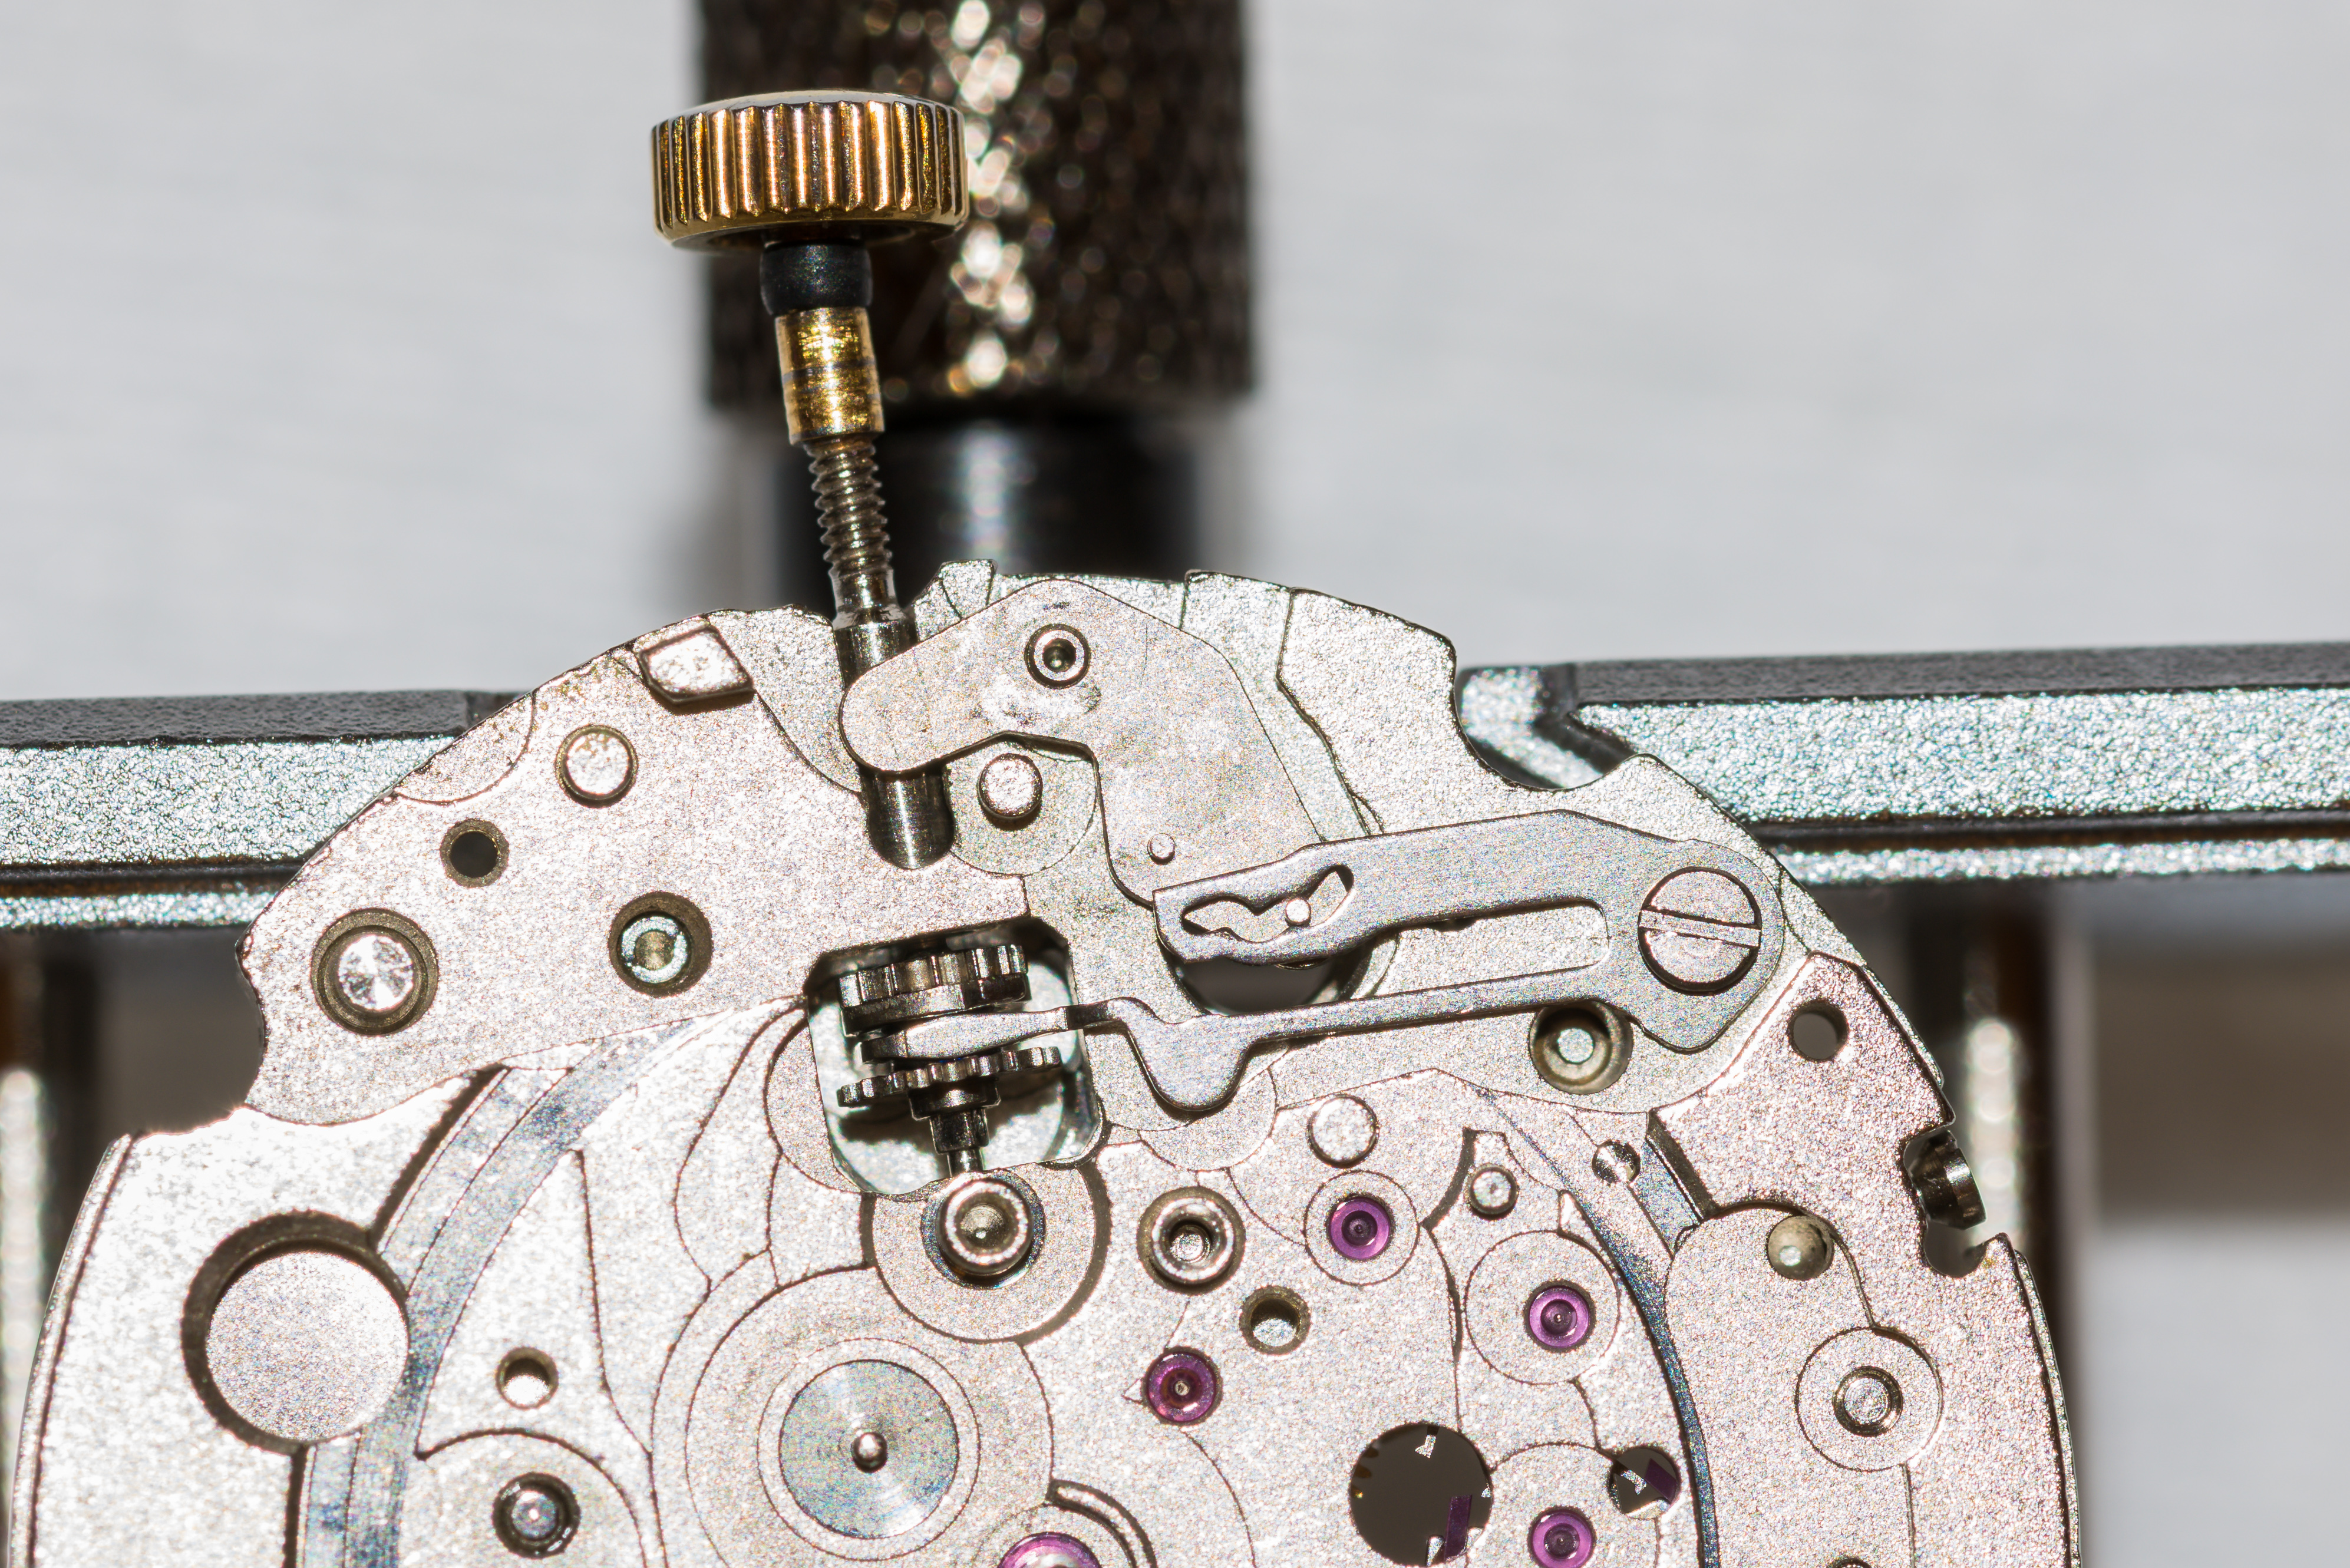
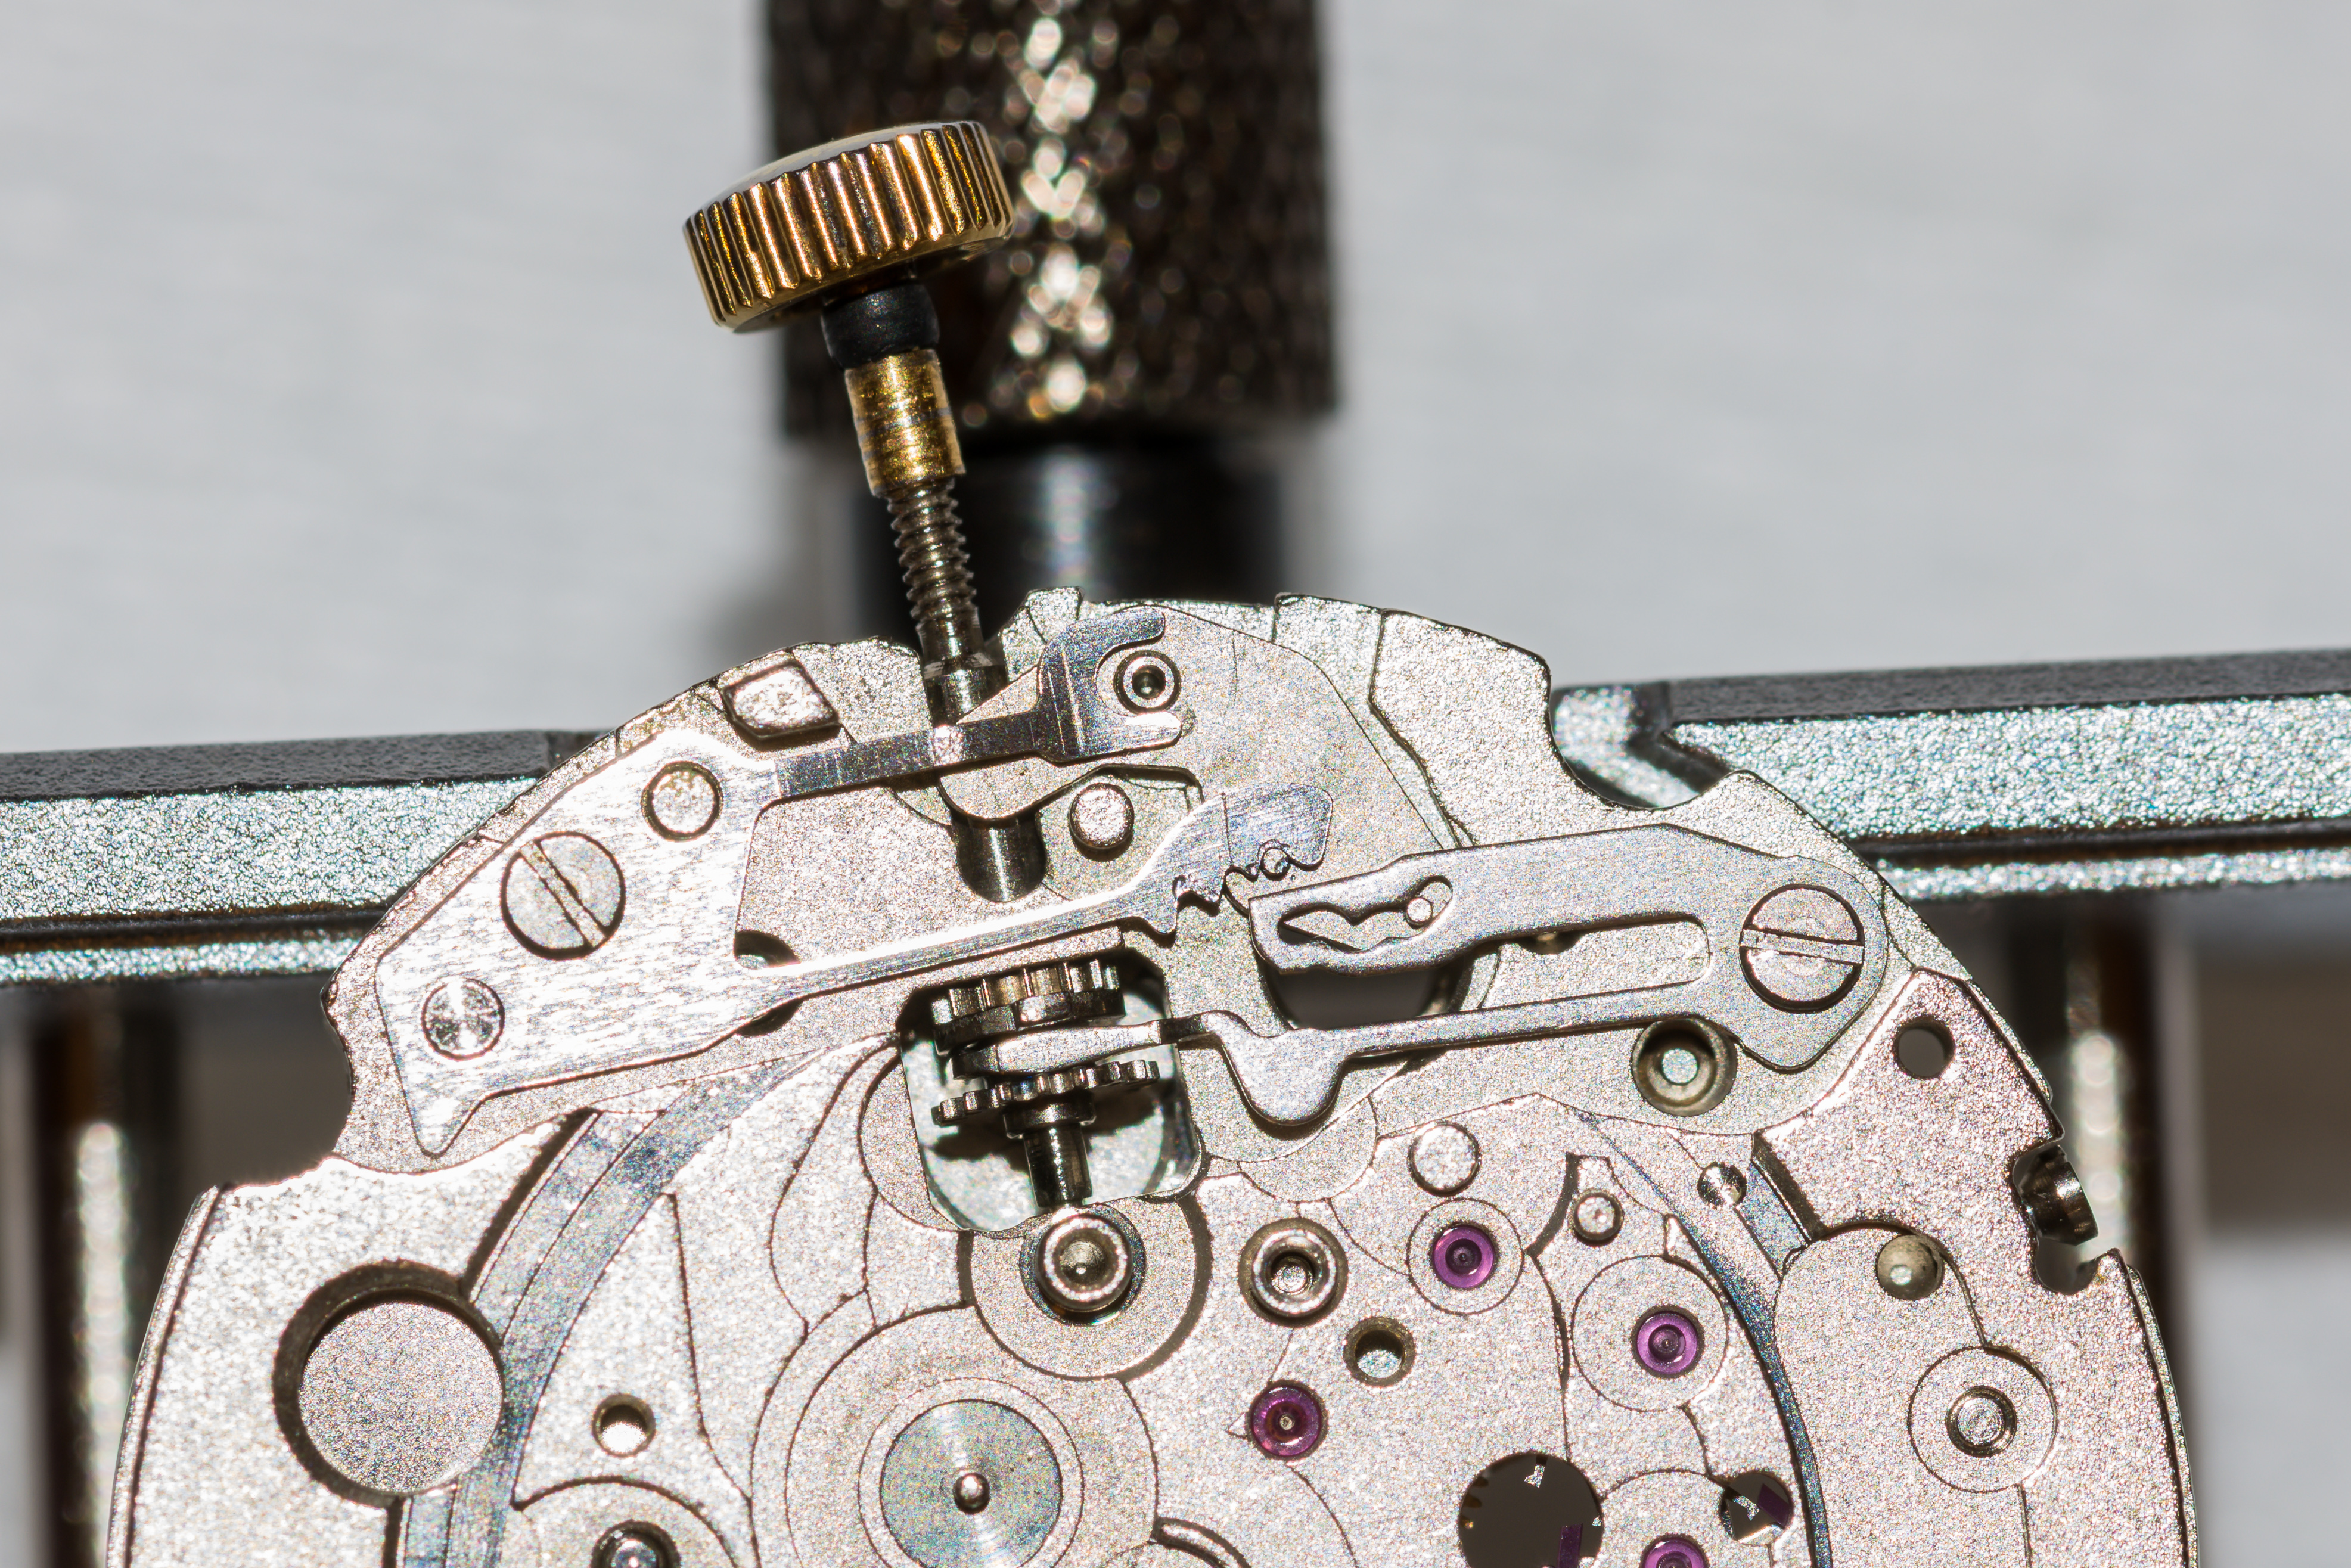
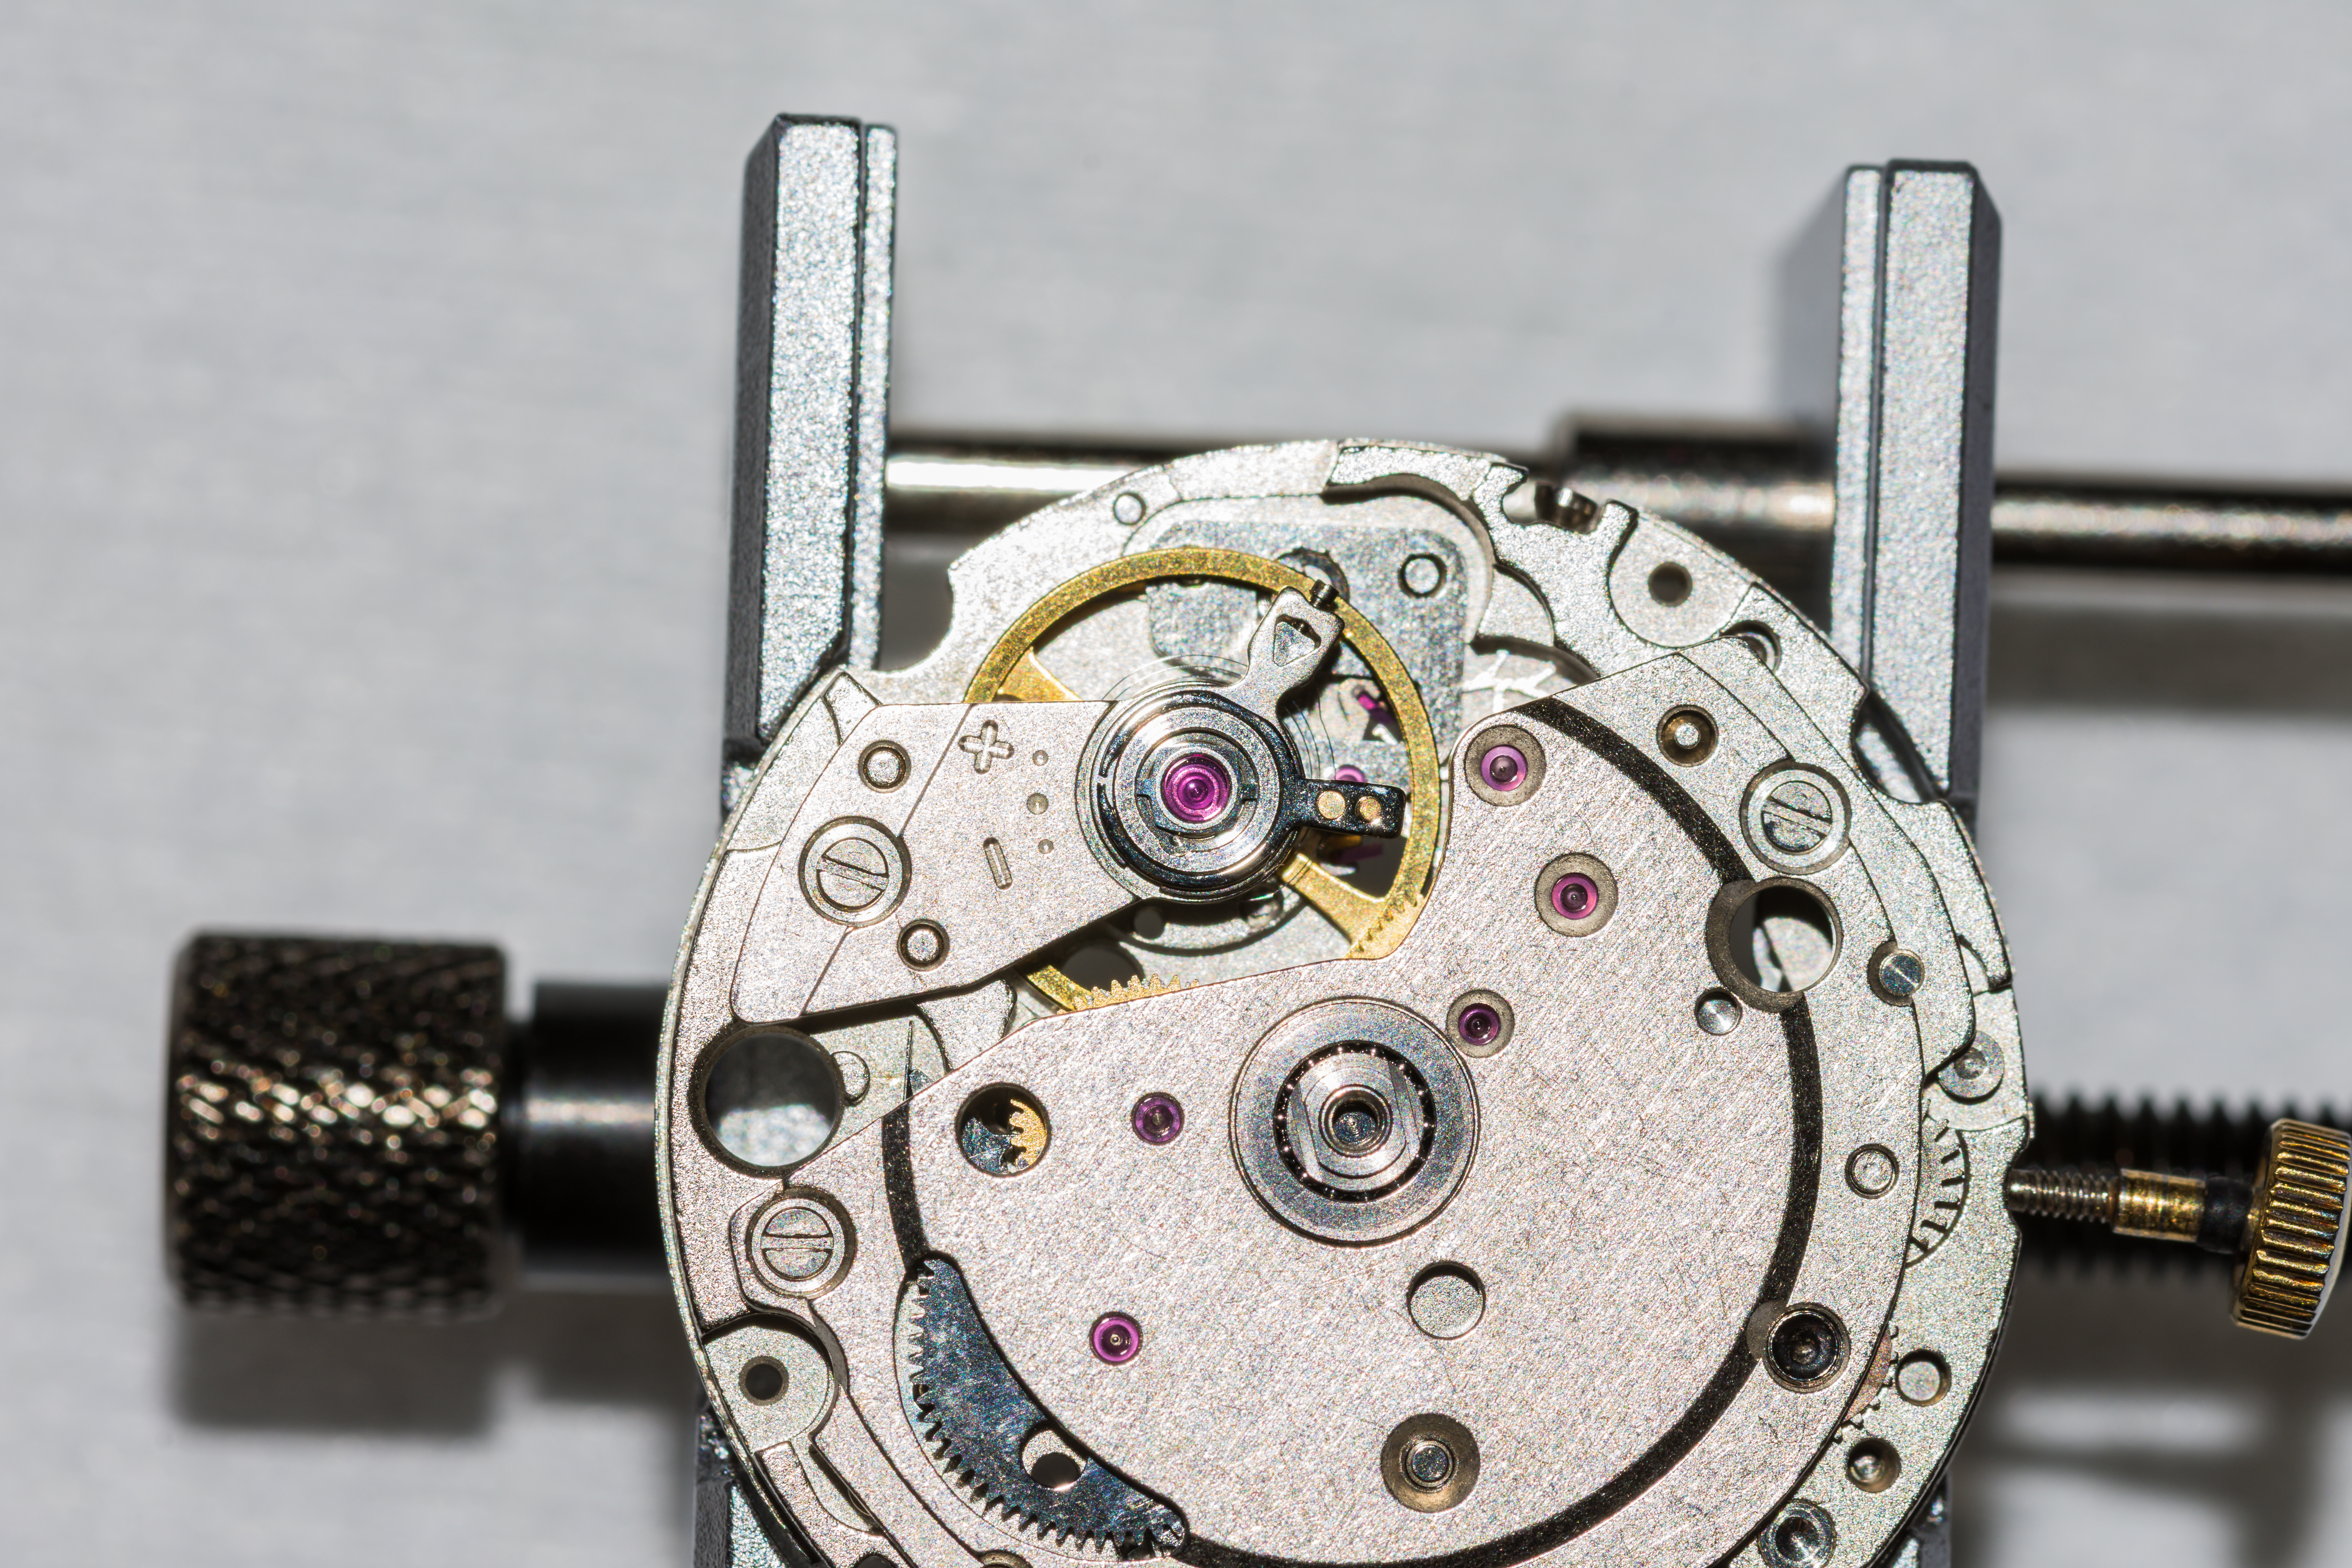
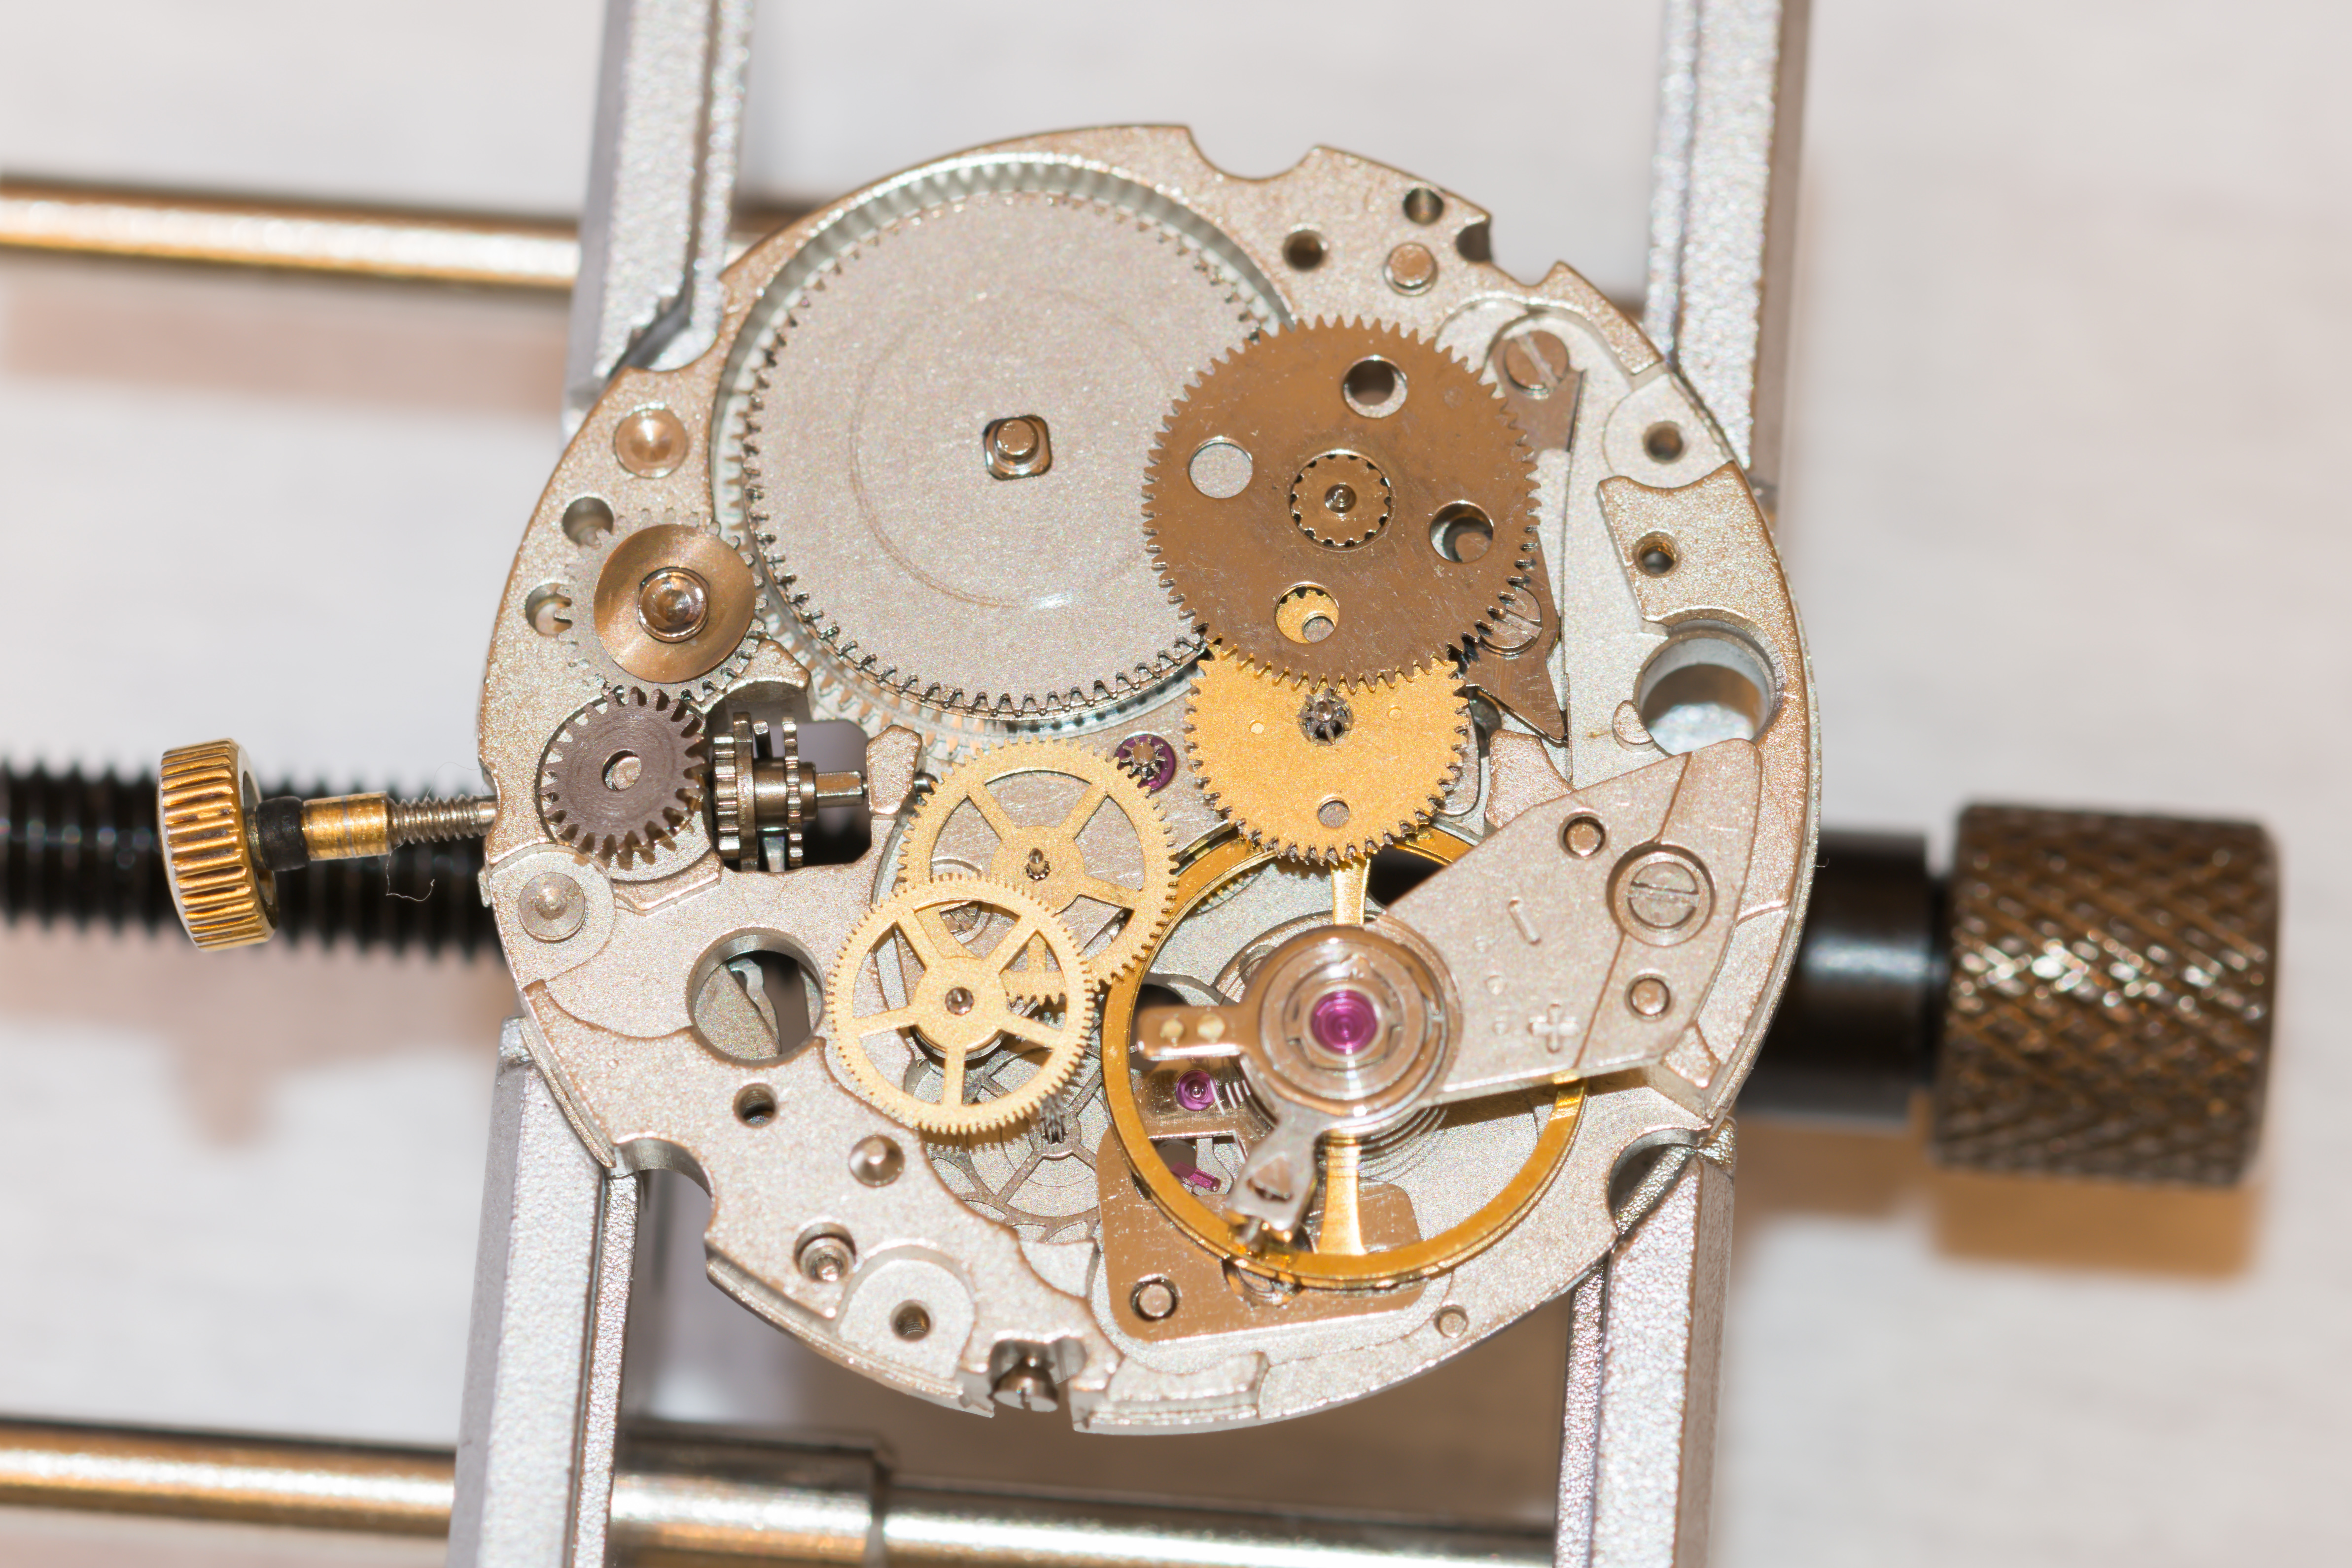
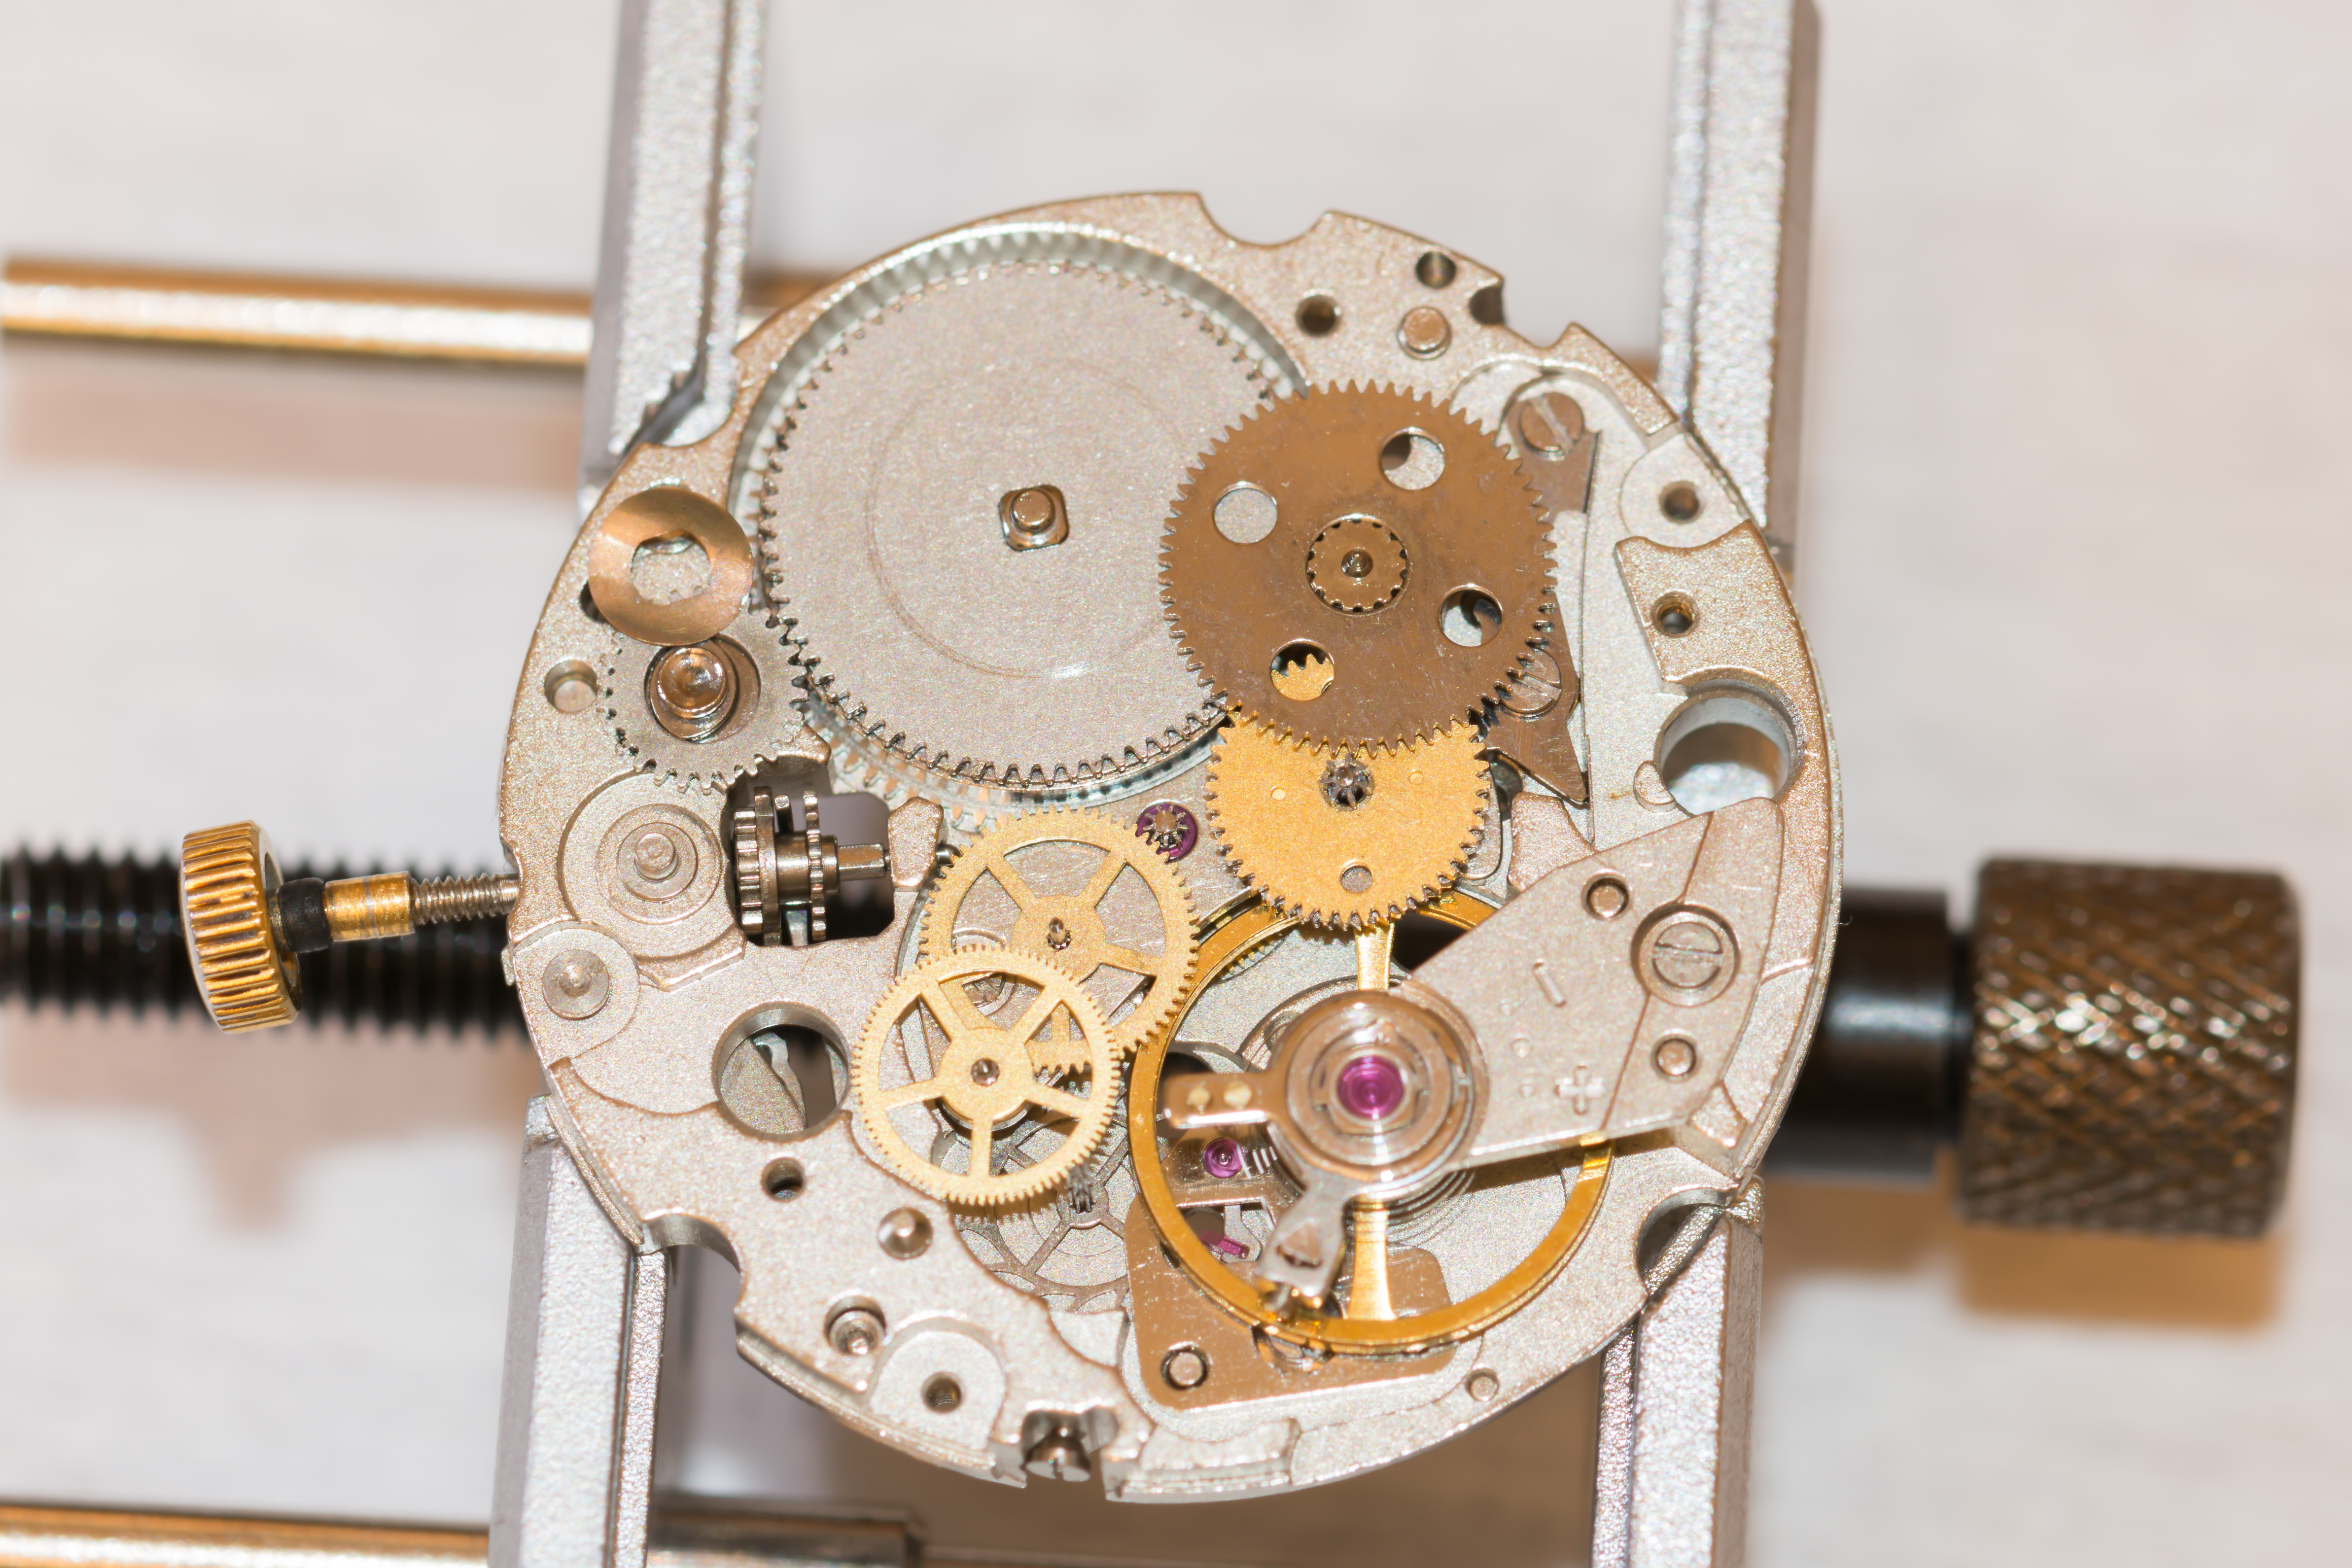
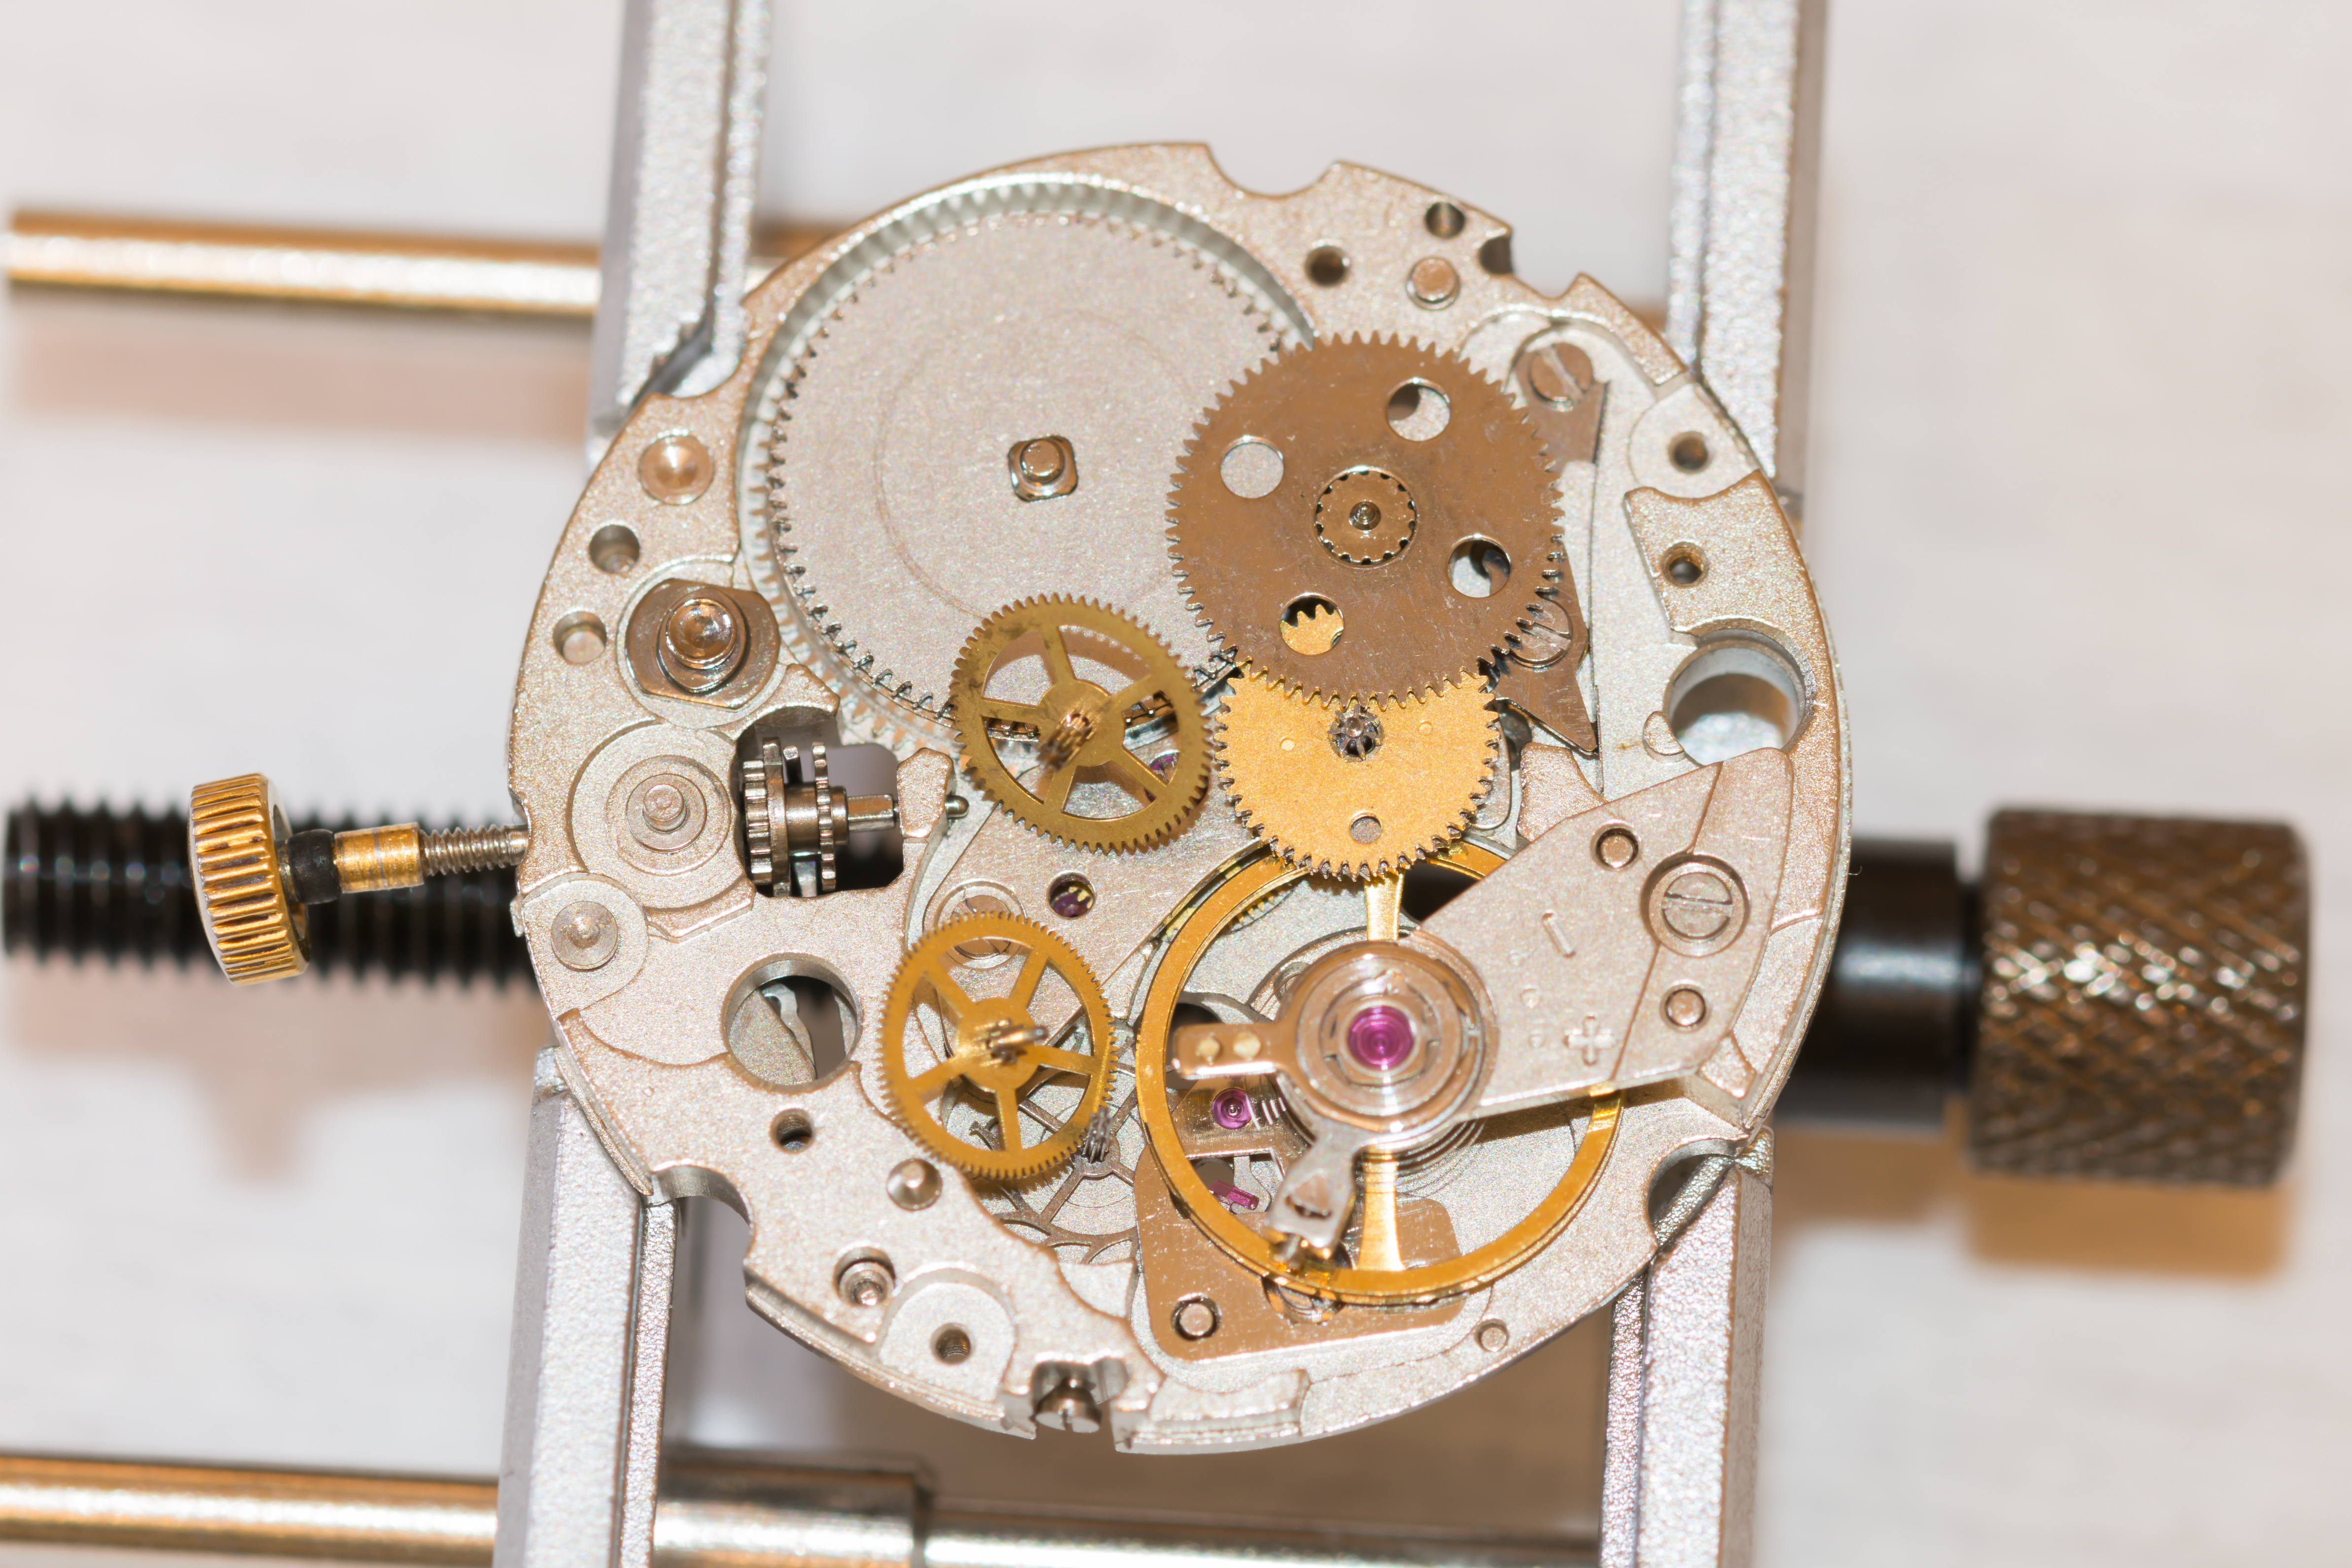
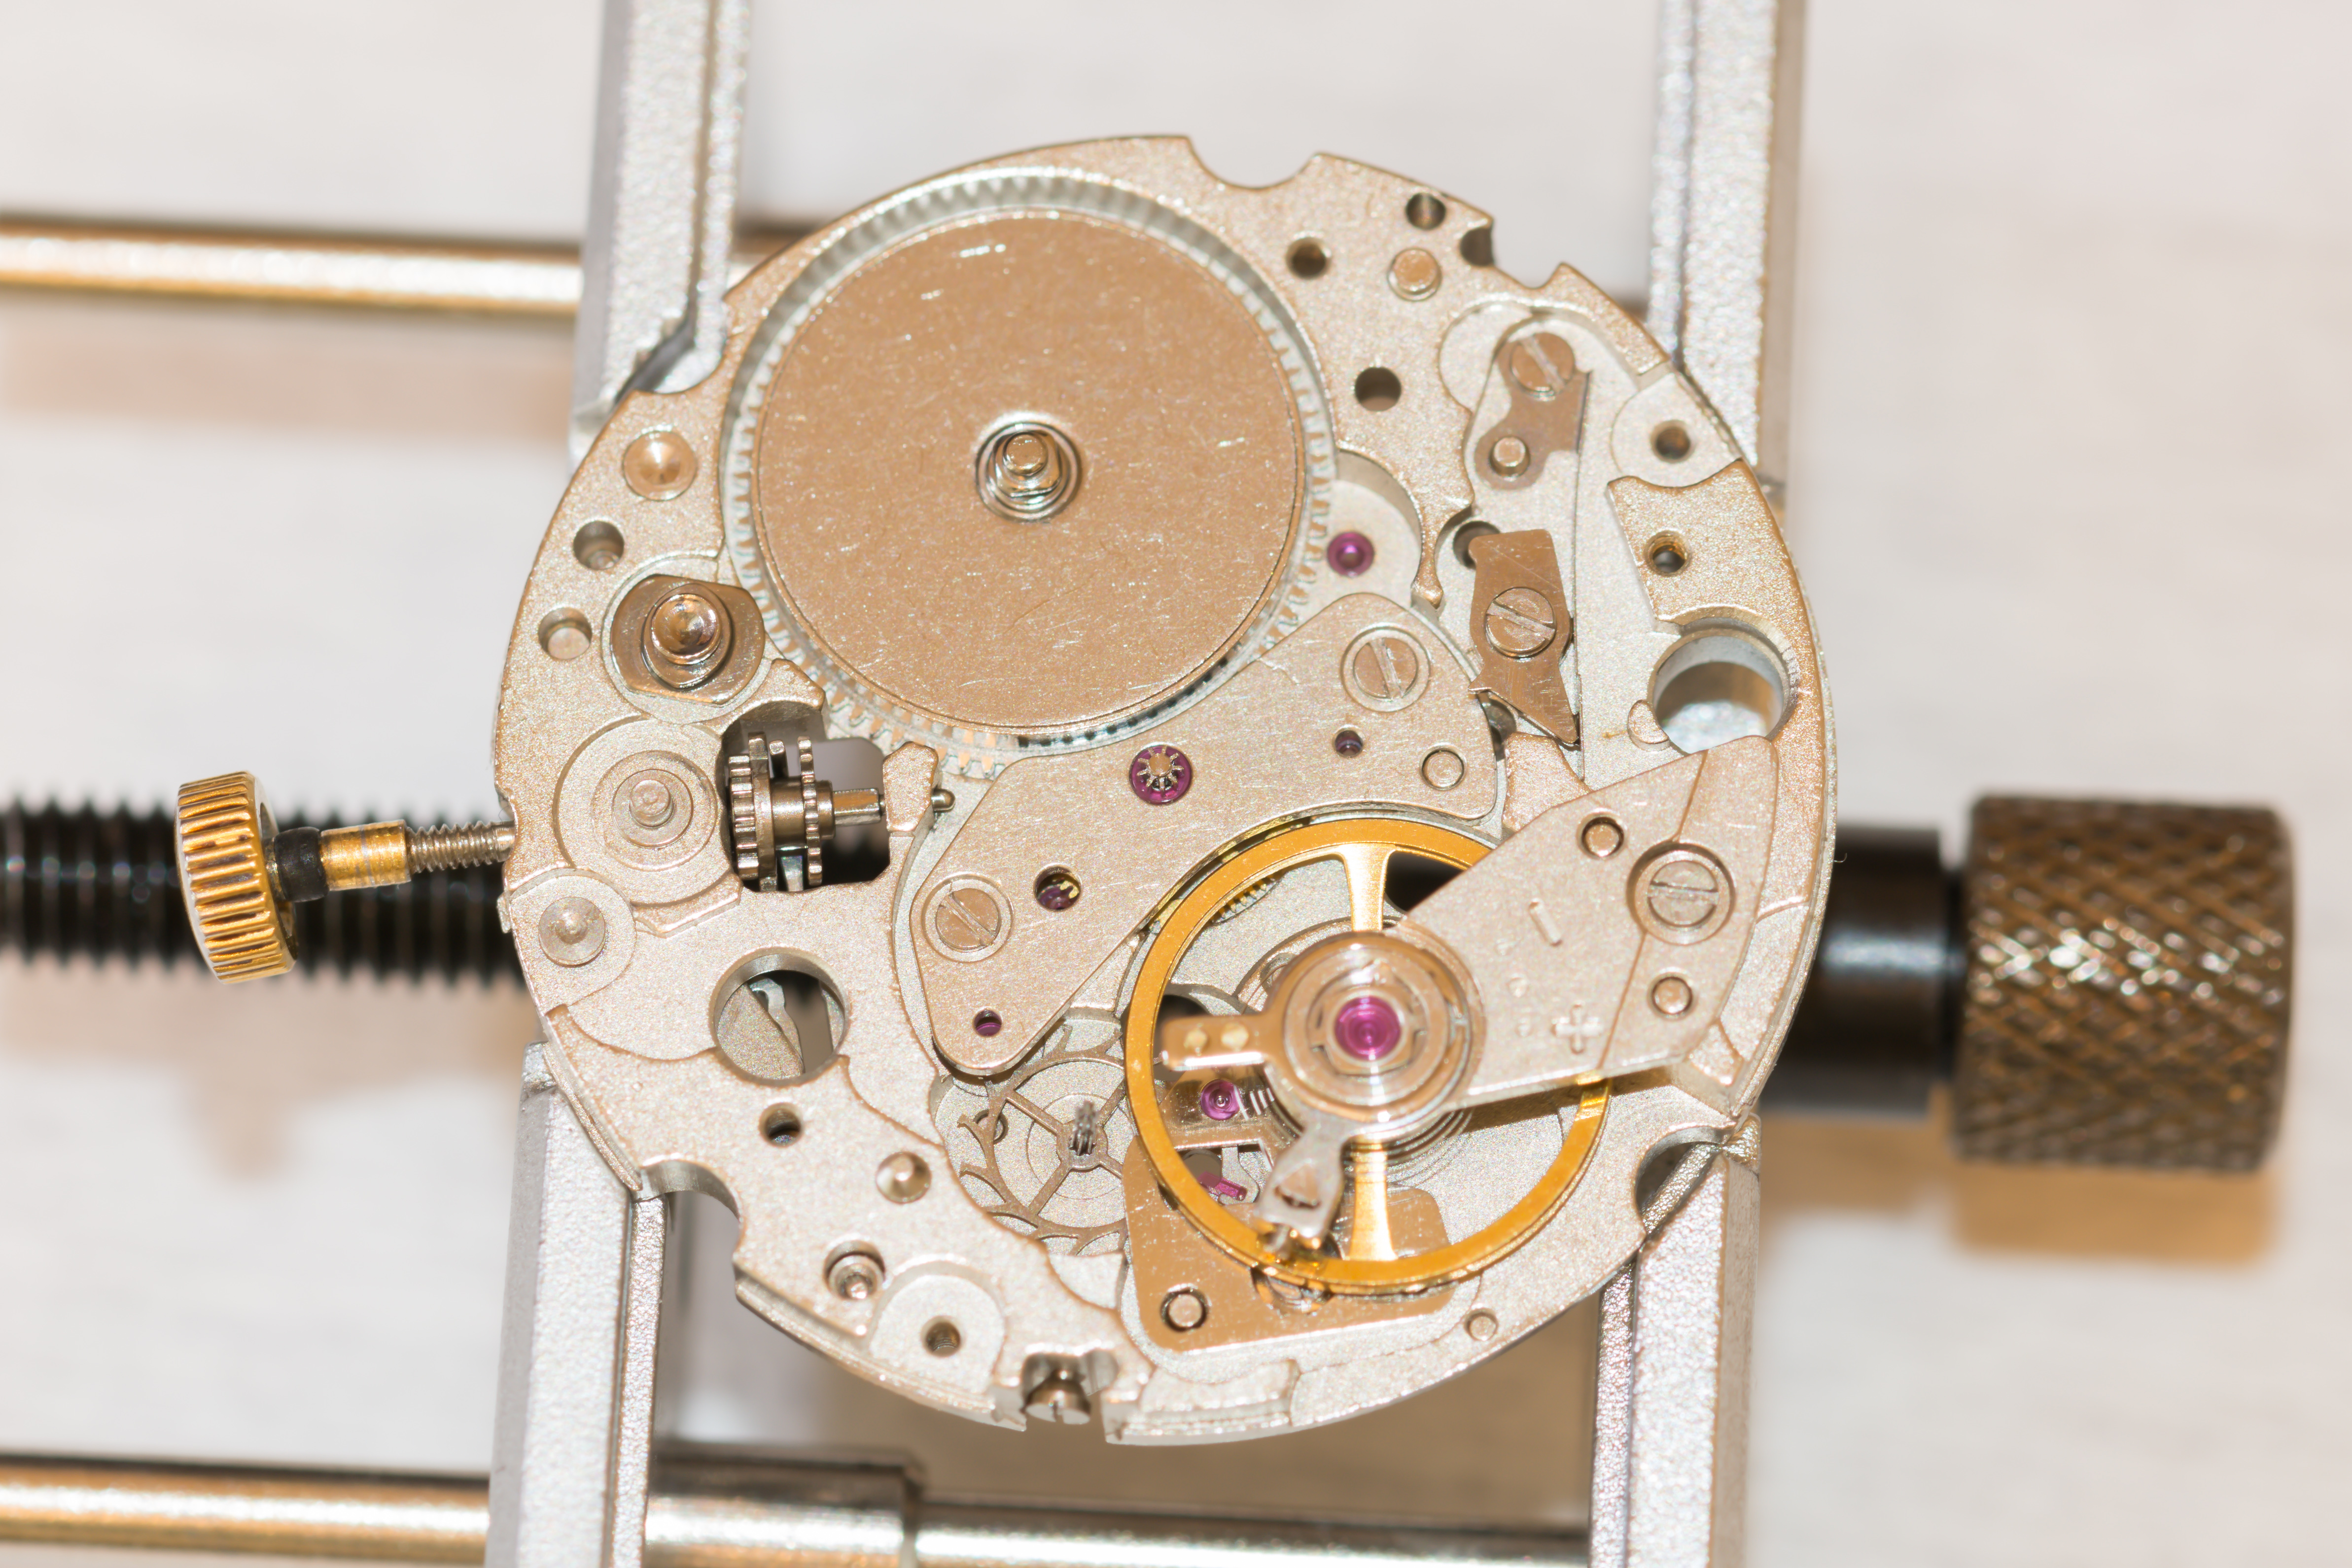
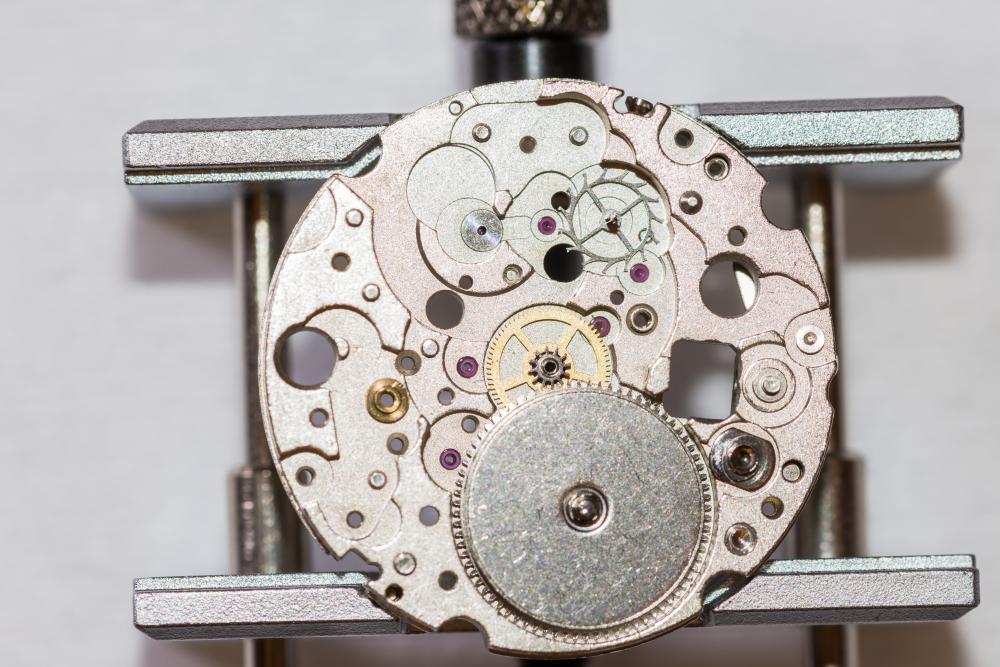
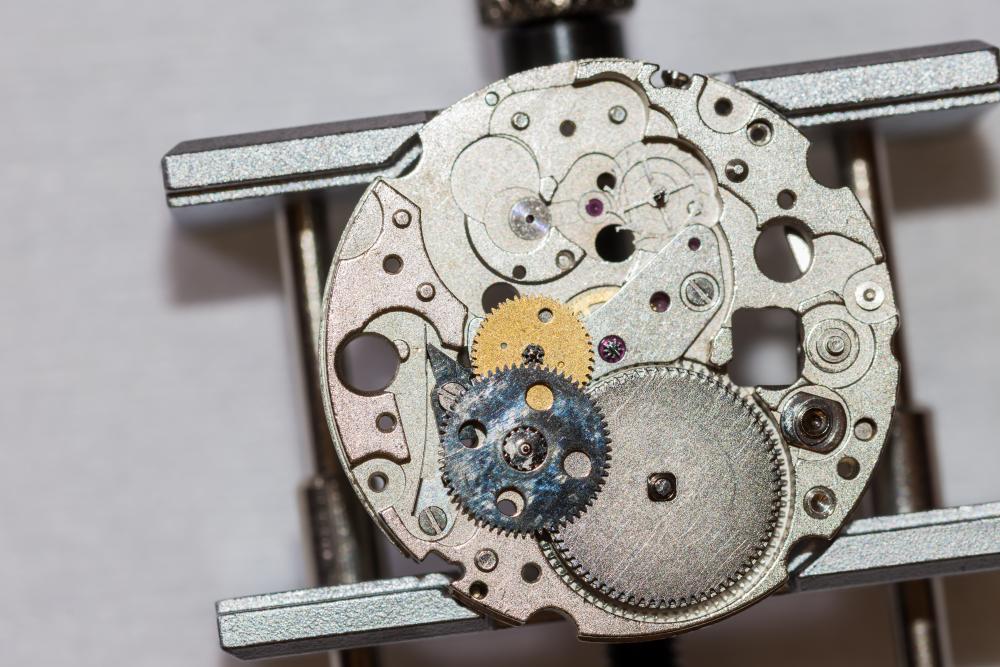
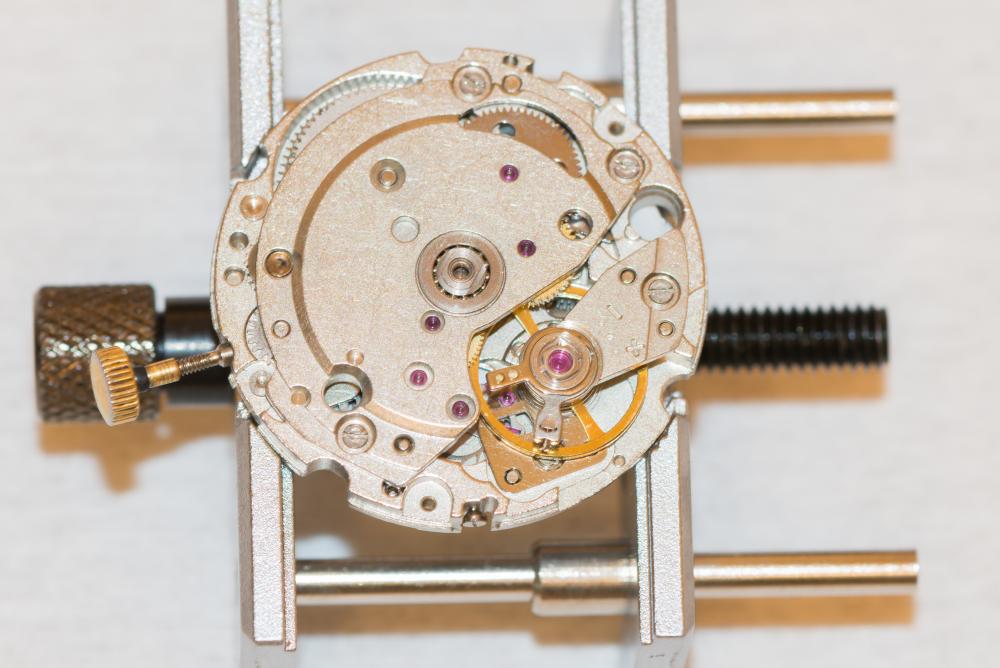
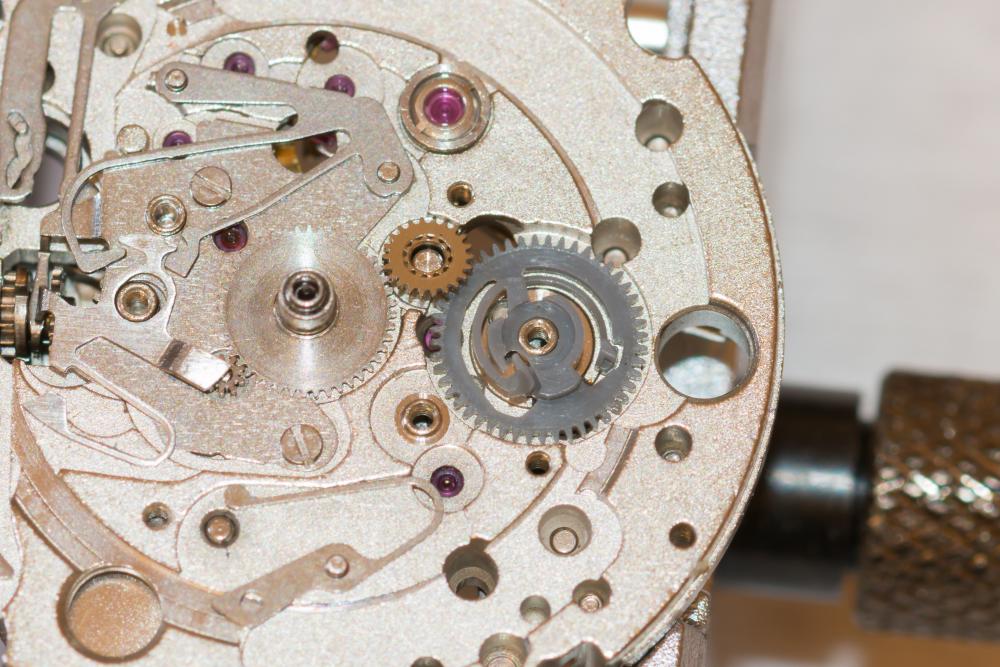
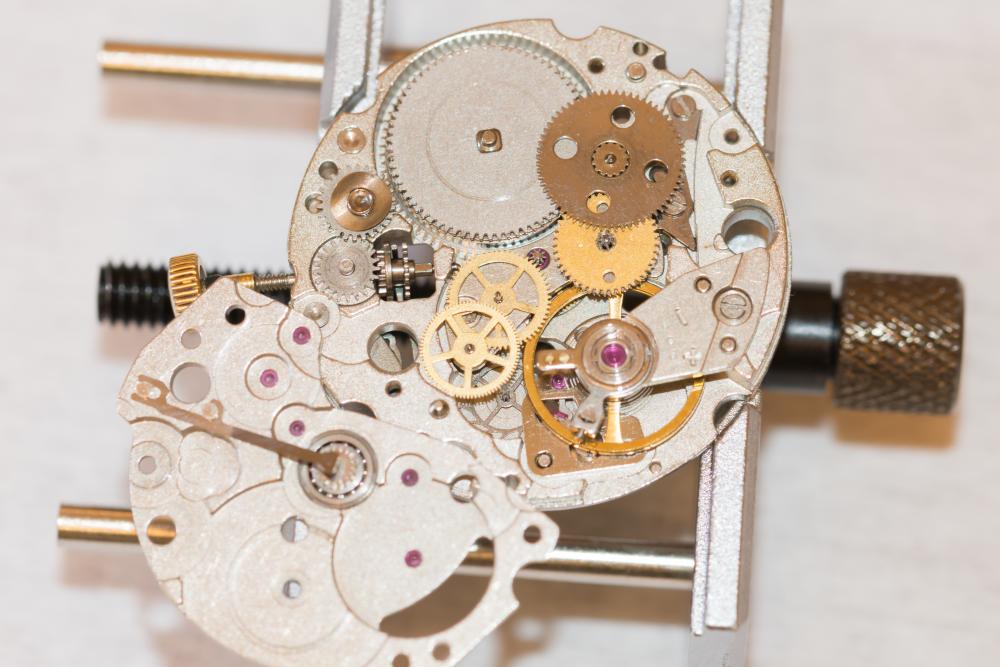
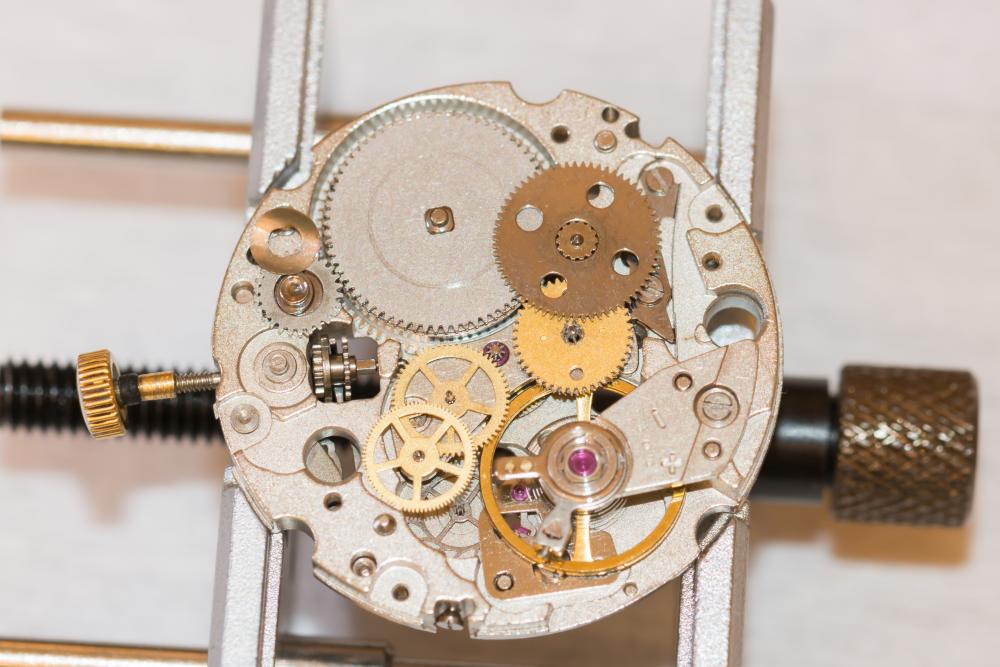
OK now that parts are all clean its time to reassemble! I do apologize i may have skipped a couple shots and I switched the angle of the camera to try and eliminate the Depth of Field issues with being at an angle but going directly perpendicular on caused the glare/surface ugliness of the parts to be a lot more visible. Disclaimer: I will say that my way is definitely not the only way to reassemble. I followed no guide and just went with what worked for me and seemed logical from other movements. First up Escape wheel. Then the center wheel and the barrel and arbor. Make sure the teeth on the barrel are on the bottom side and the section of the arbor that is squared is facing up. This will engage another gear that sets on top and is how the mainspring is wound. Next install the center bridge and the seconds pinion. I used some Moebius 9010 to lubricate the shaft of the seconds pinion where it rotates in the bridge jewel. Then we move onto the click and the click spring. Lubricate the contact points of the spring and click with 9501. The automatic works gears are installed next. The gold wheel is a double wheel and has a silver metal wheel sandwiched underneath. This silver wheel is what the click actually interacts with so you have to rotate the click out of the way to get the wheel in place. This pressure put on by the click does make installing the wheel bridge a pain in the a** later on where you have to try and align 4 wheel pivots pretty much blindly into their specific bridge jewel's... Next up the motion works wheels. The fatter/larger/darker in color wheel goes in first. Next up the keyless work gears. Note that the little brass spring washer kind of snaps down over the center pivot and is to curve up like a bowl not down towards the plate like a mound. Ok this is the worst part about this movement. Everything in the automatic and motion works is held in place by this large bridge. and you have to get 4 pivots and the barrel arbor all lined up correctly. Take your time and go slow and soft. I used a oiler to help reach each wheel and try to maneuver them into place. When you think you have it you probably don't. Make sure all motion work wheels spin freely. To test the automatic works I used a piece of peg wood to move/wind the barrel. When all are aligned then screw down the 3 bridge screws. Im going to keep these full size so you can see how the bends in the levers are supposed to face. I lubricated the lever contact points with 9501 and the winding pinion contact points with D-5. Next up is the pallet. The shorter arm faces toward the center of the movement. I must have skipped the photo but then the pallet bridge goes on. It can only fit one way. Lubricate the pivot stone on the bridge before proceeding to the balance as it will be covered. The balance in place. Not pictured is the attachment of the oscillating weight but that is self explanatory. Thank you all for reading! I hope that helps someone out there! Let me know if you have any questions!

-
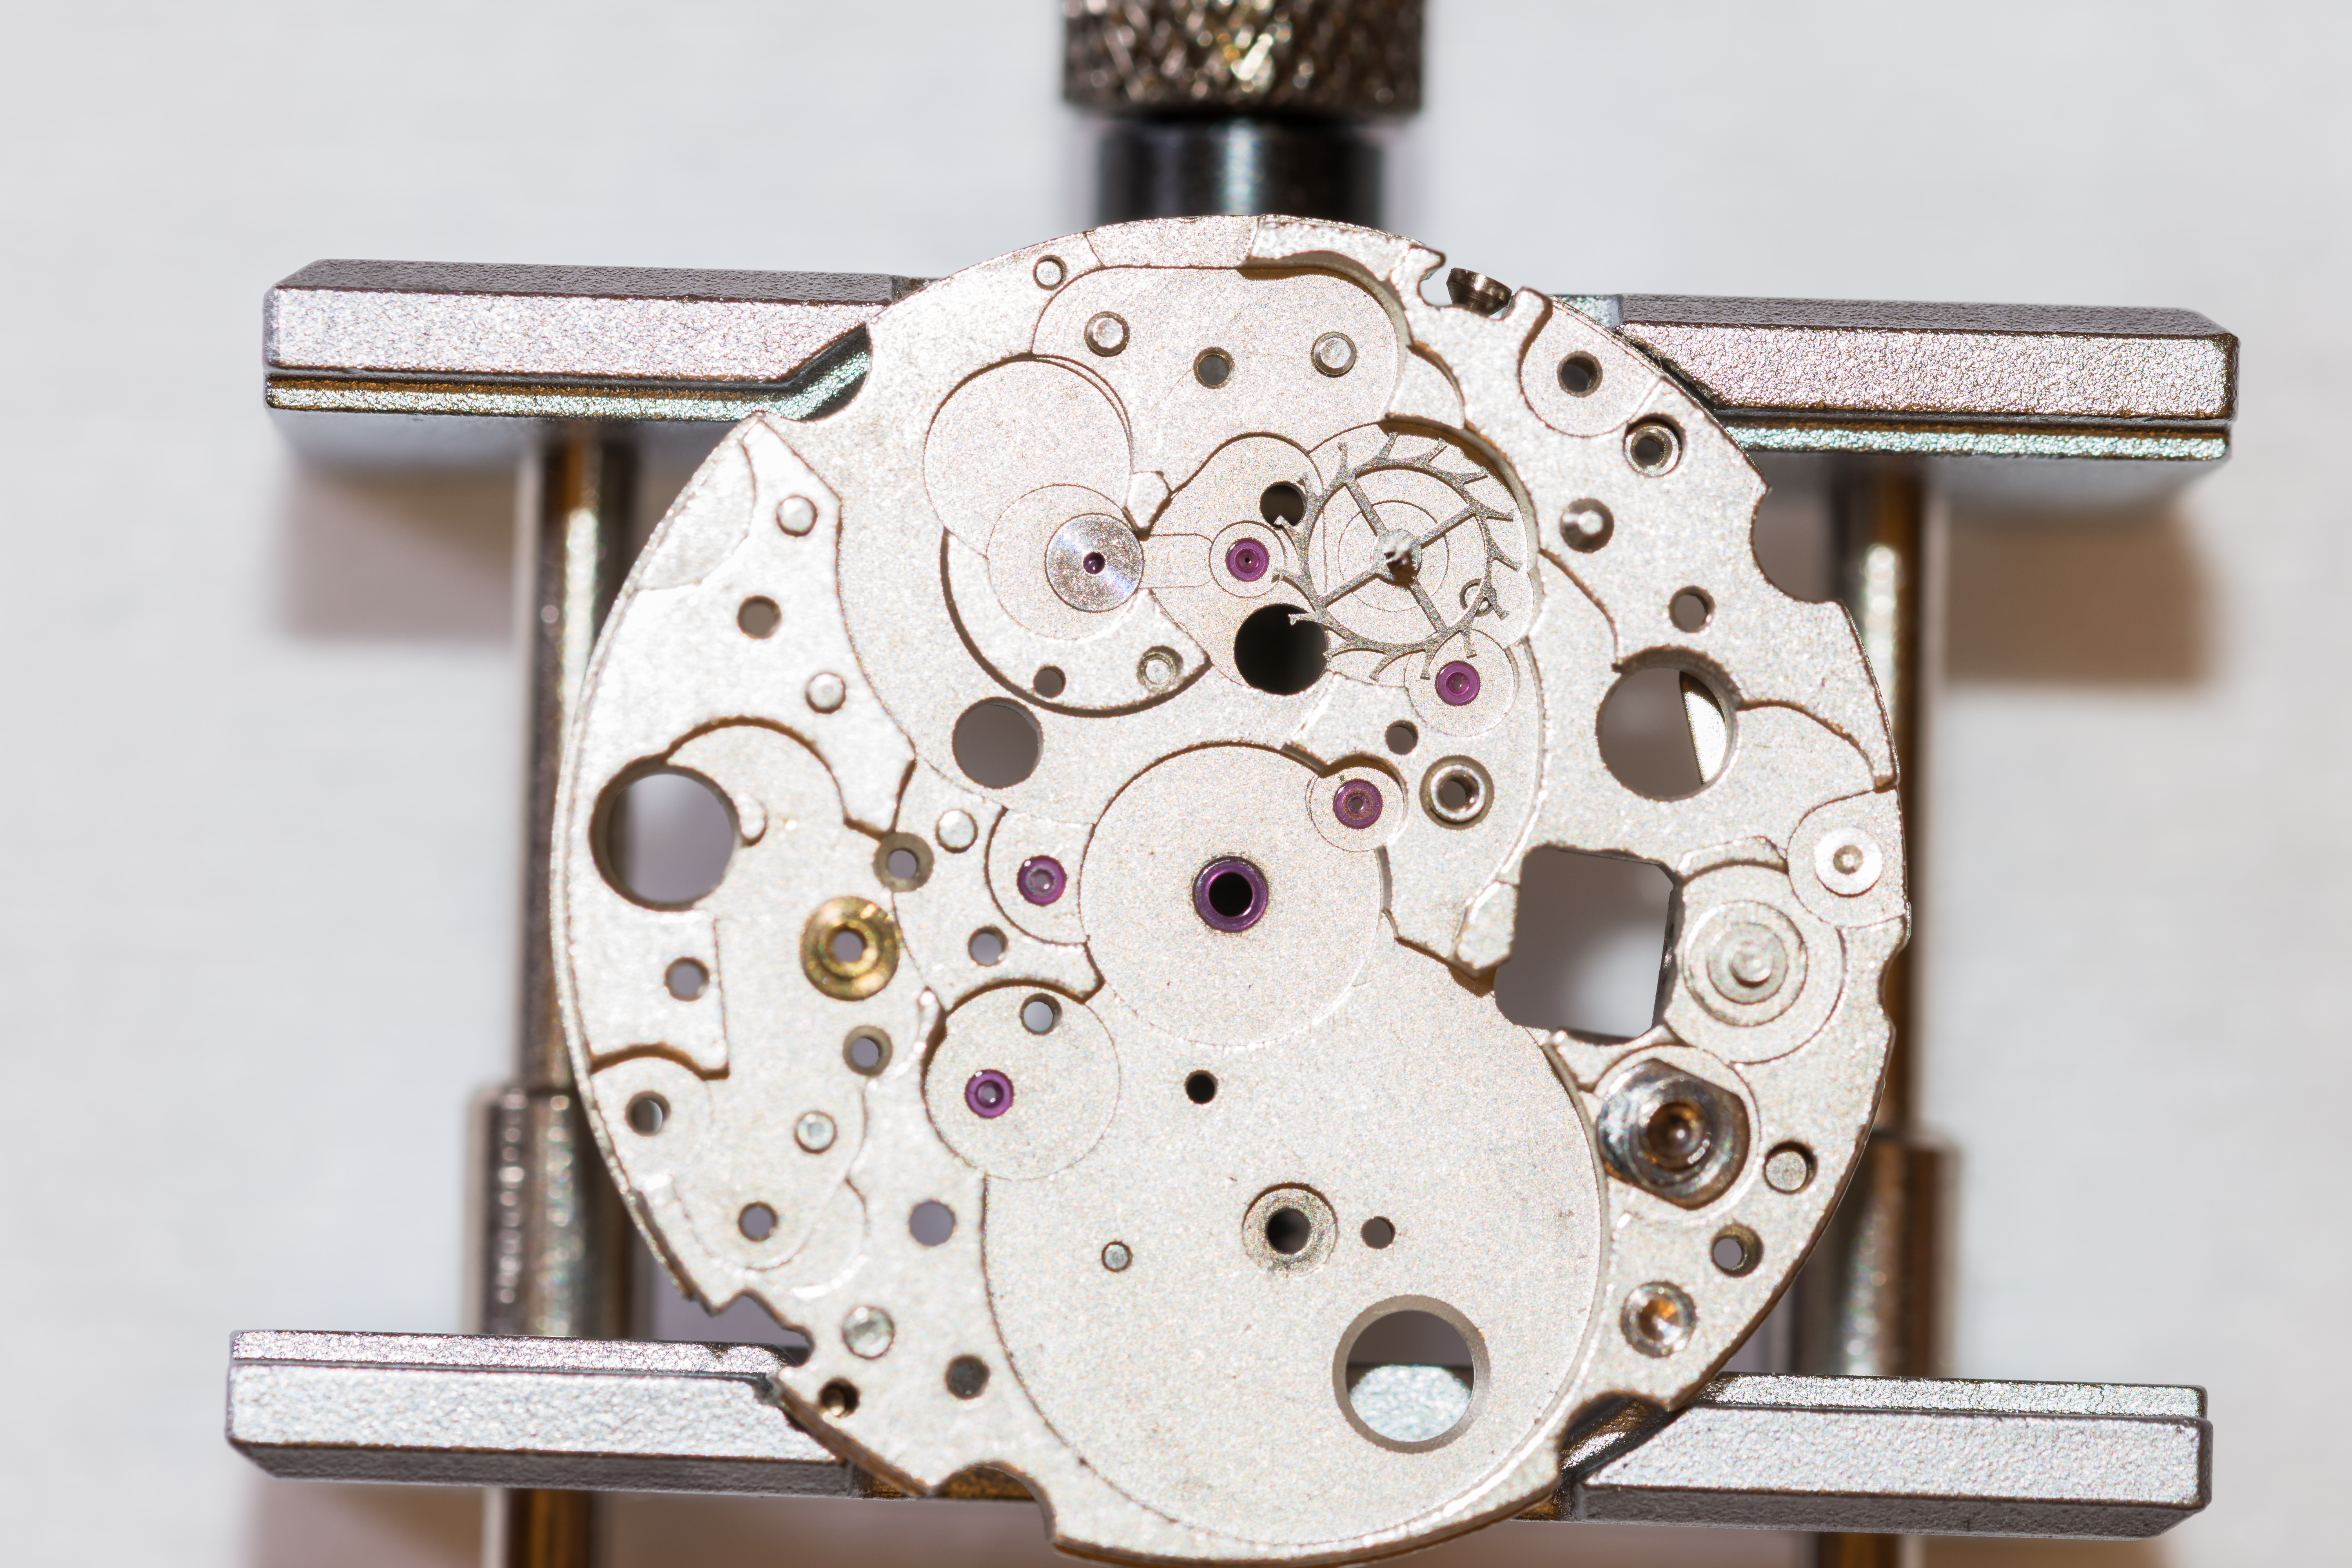
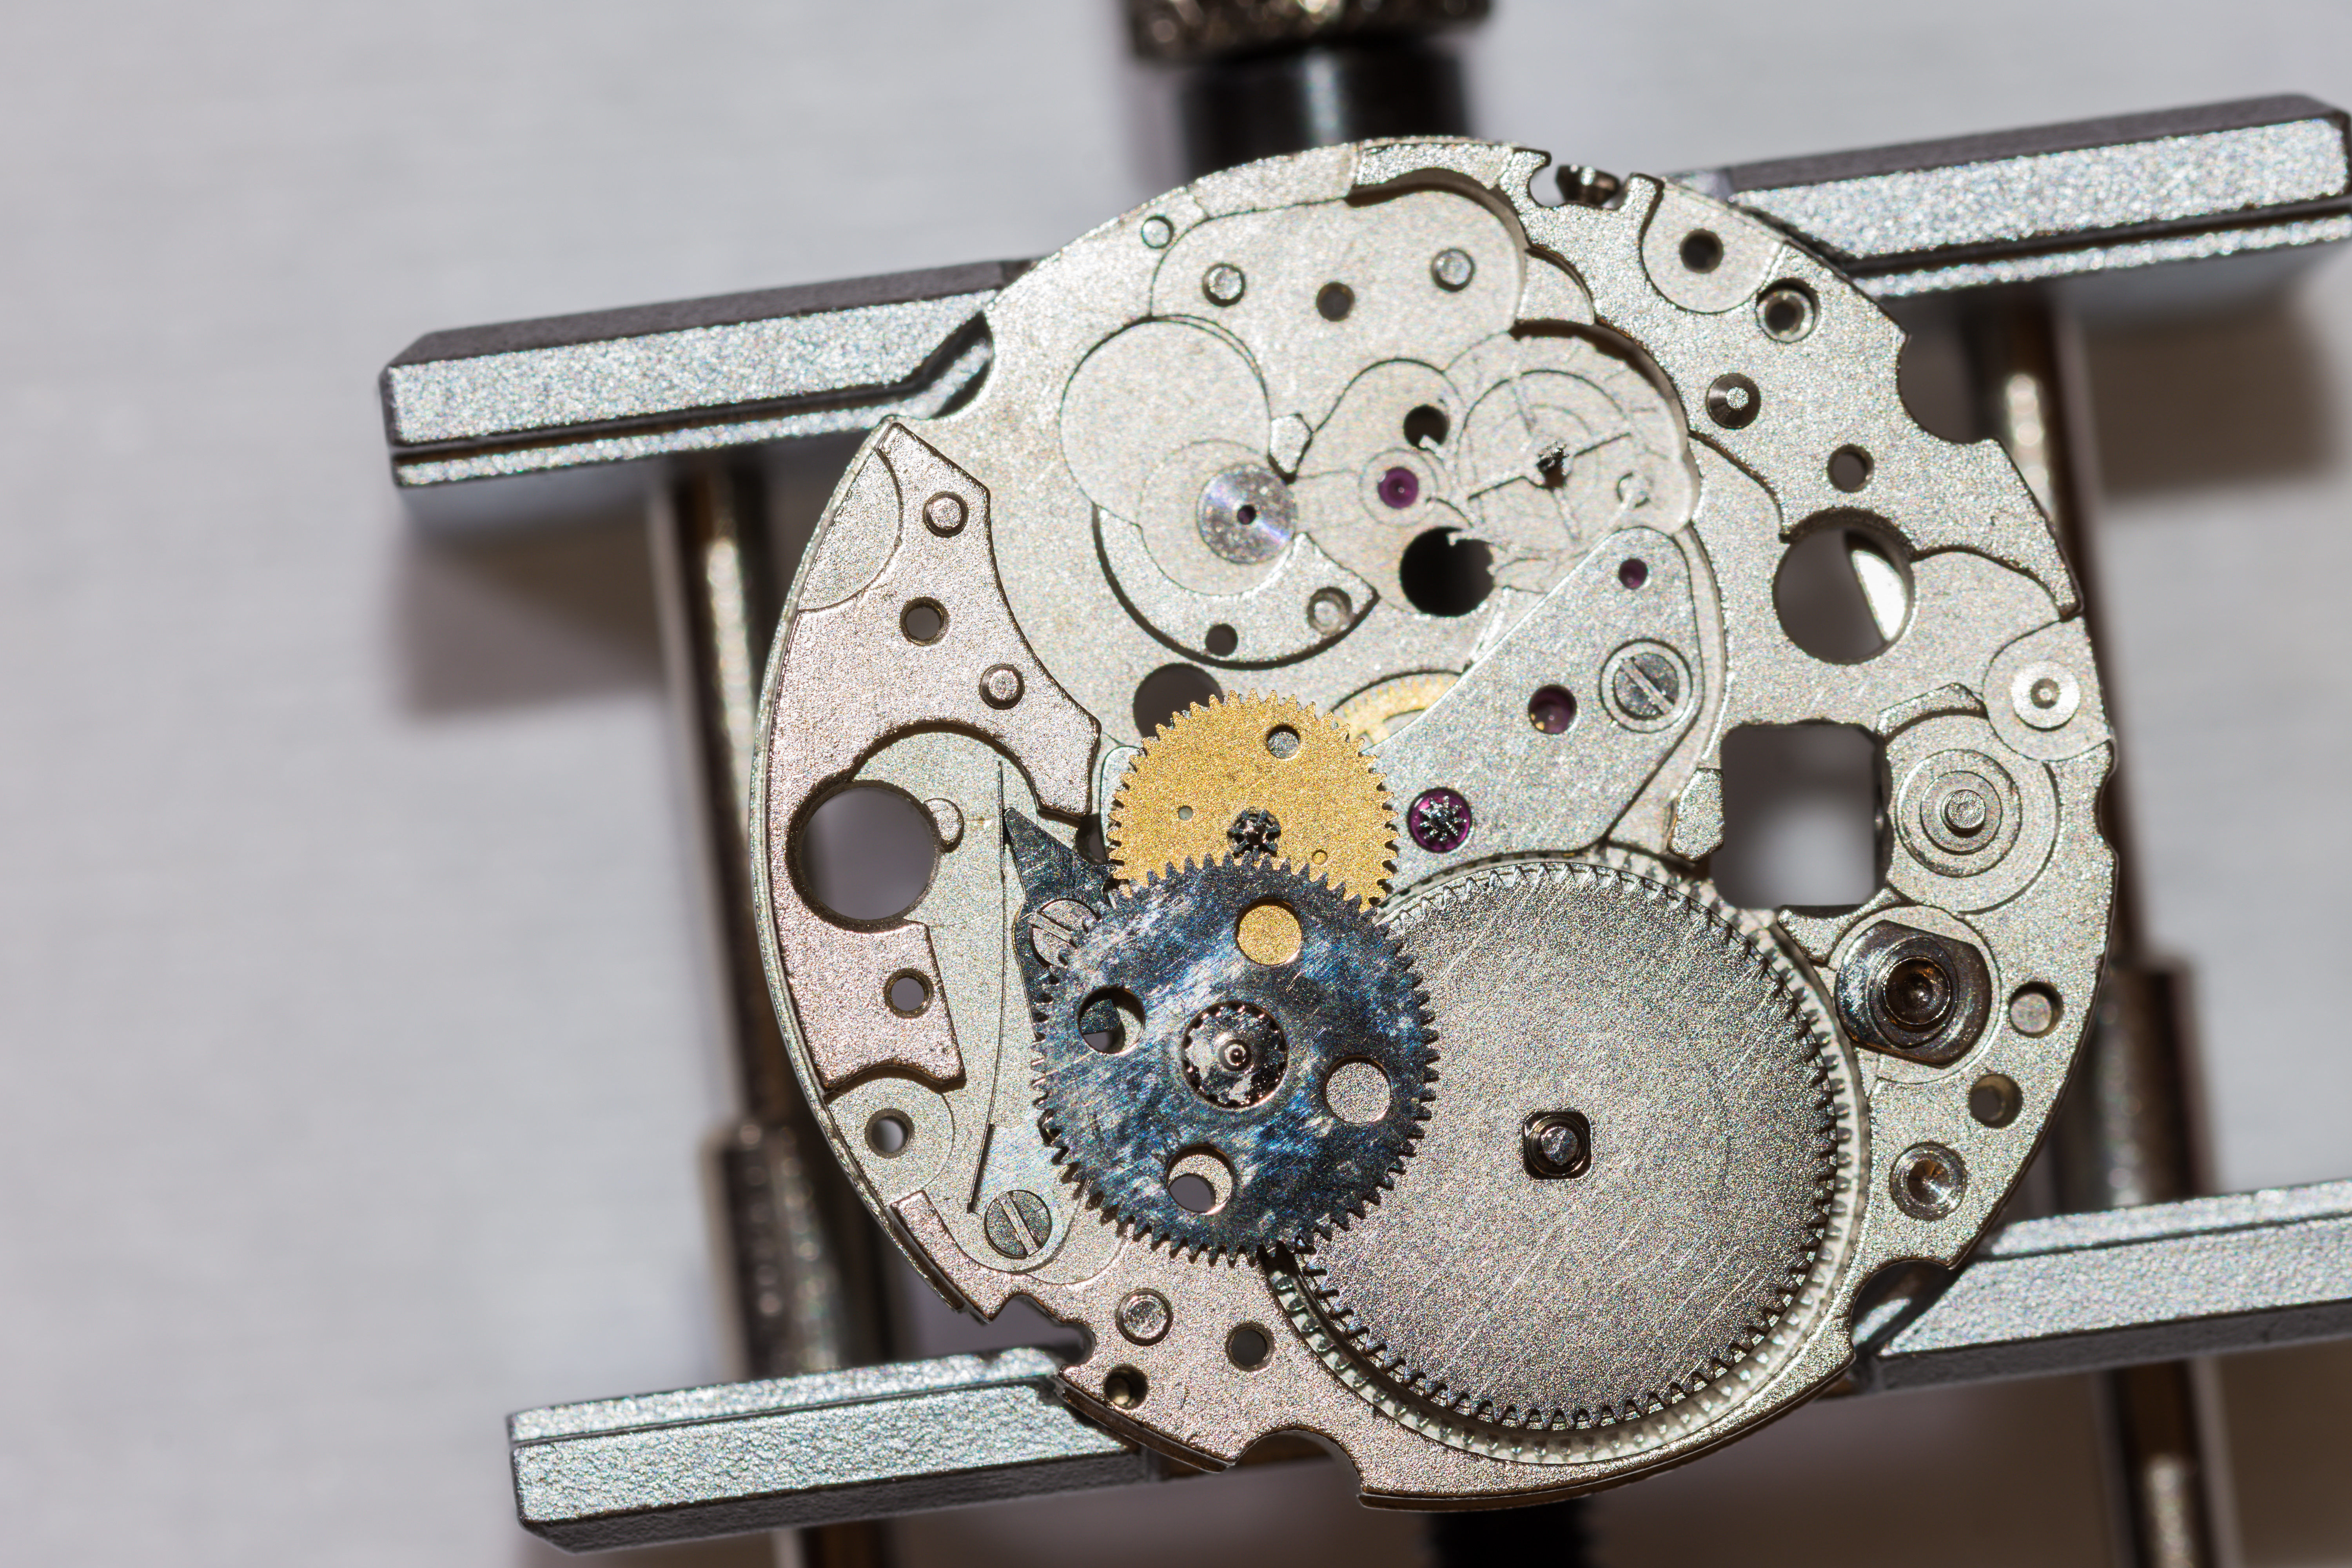
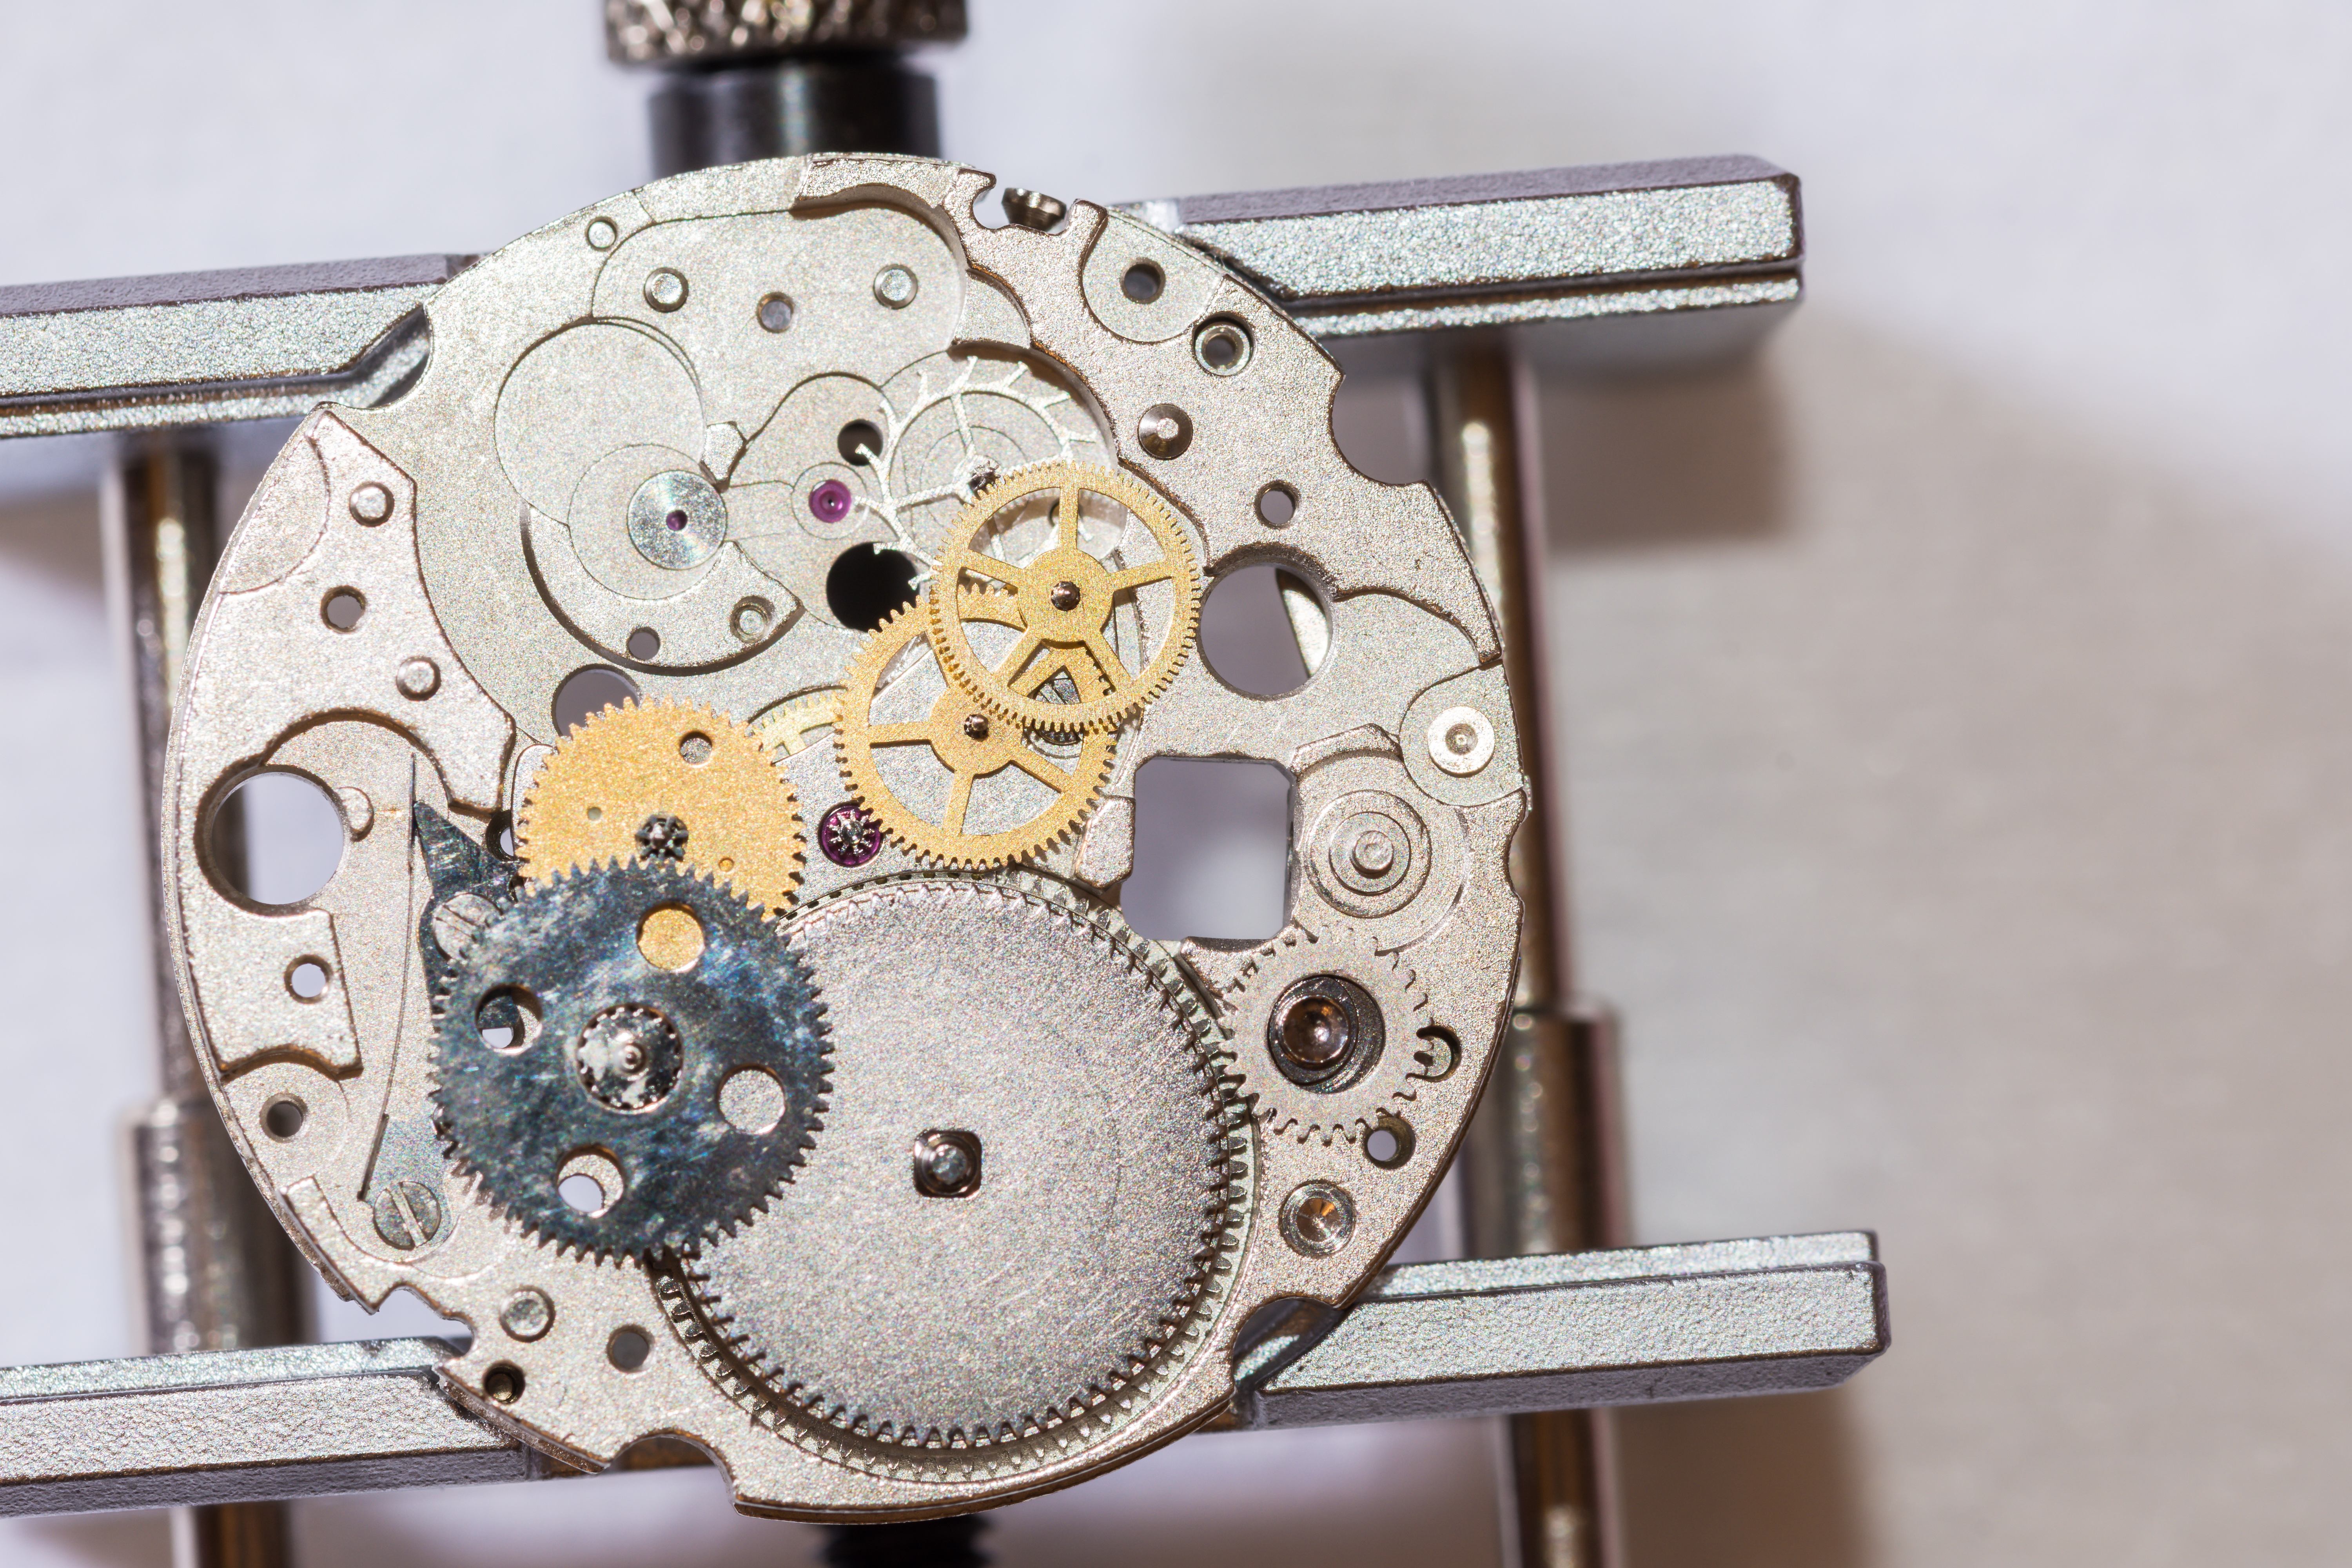
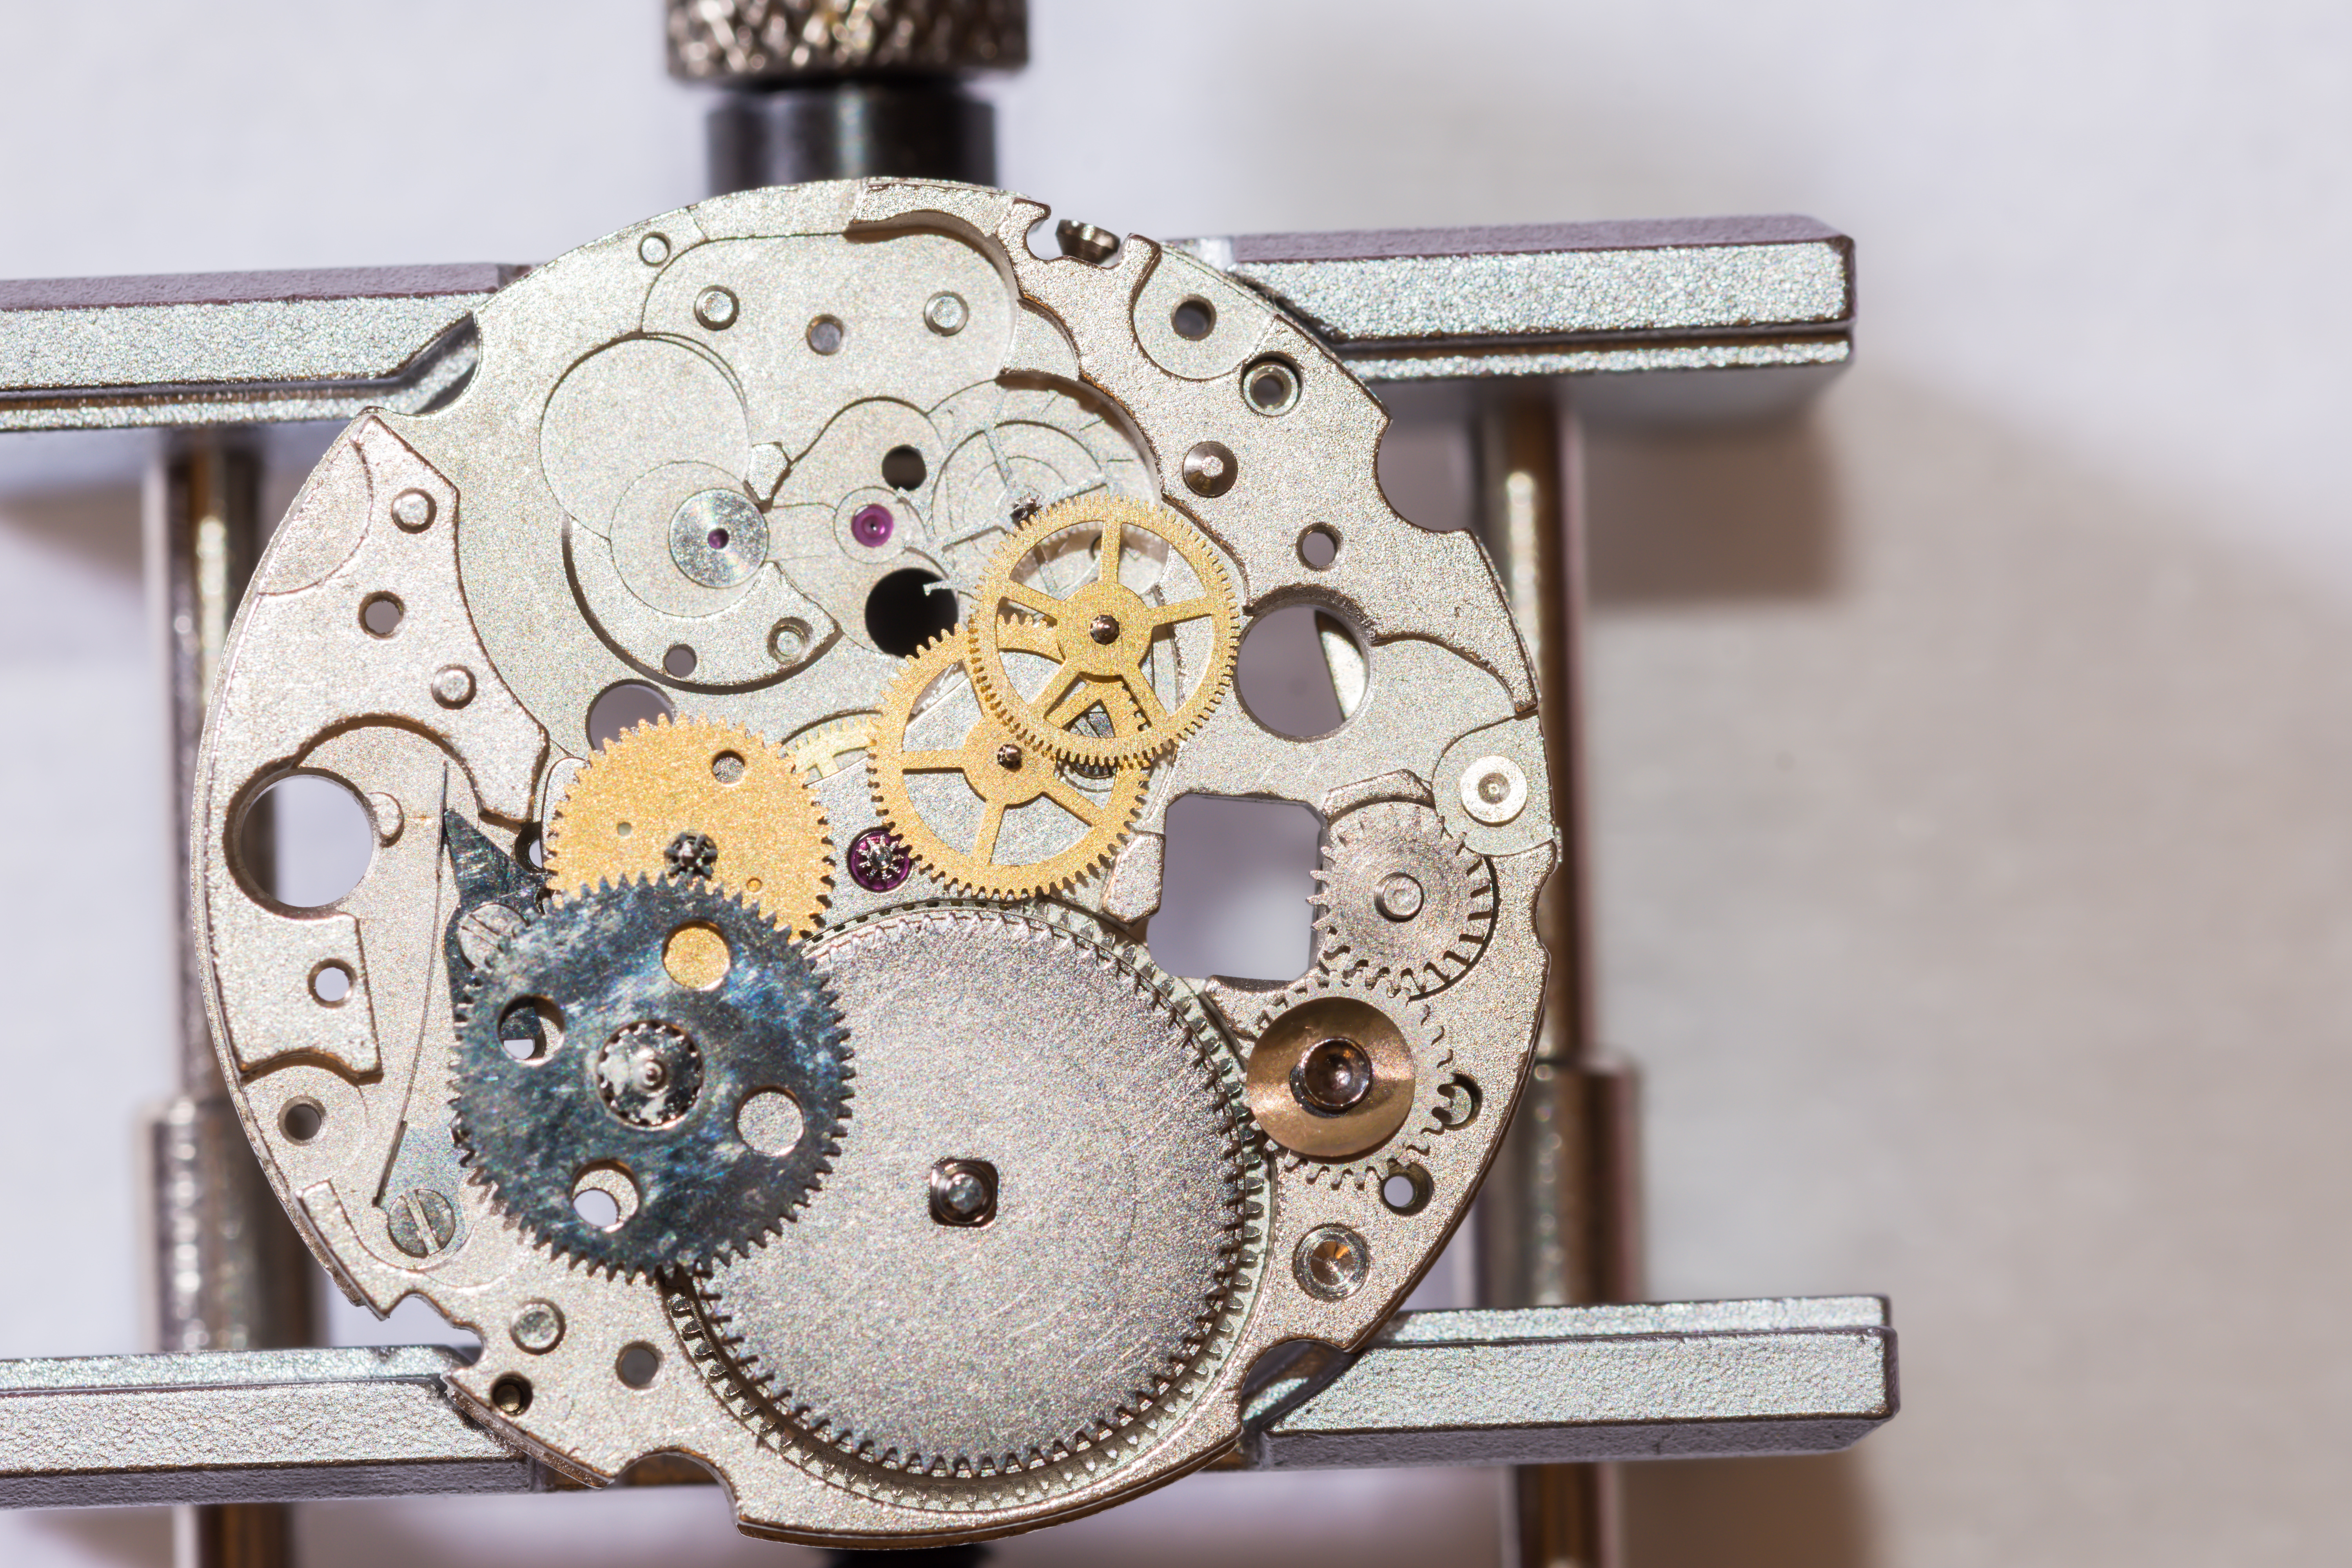
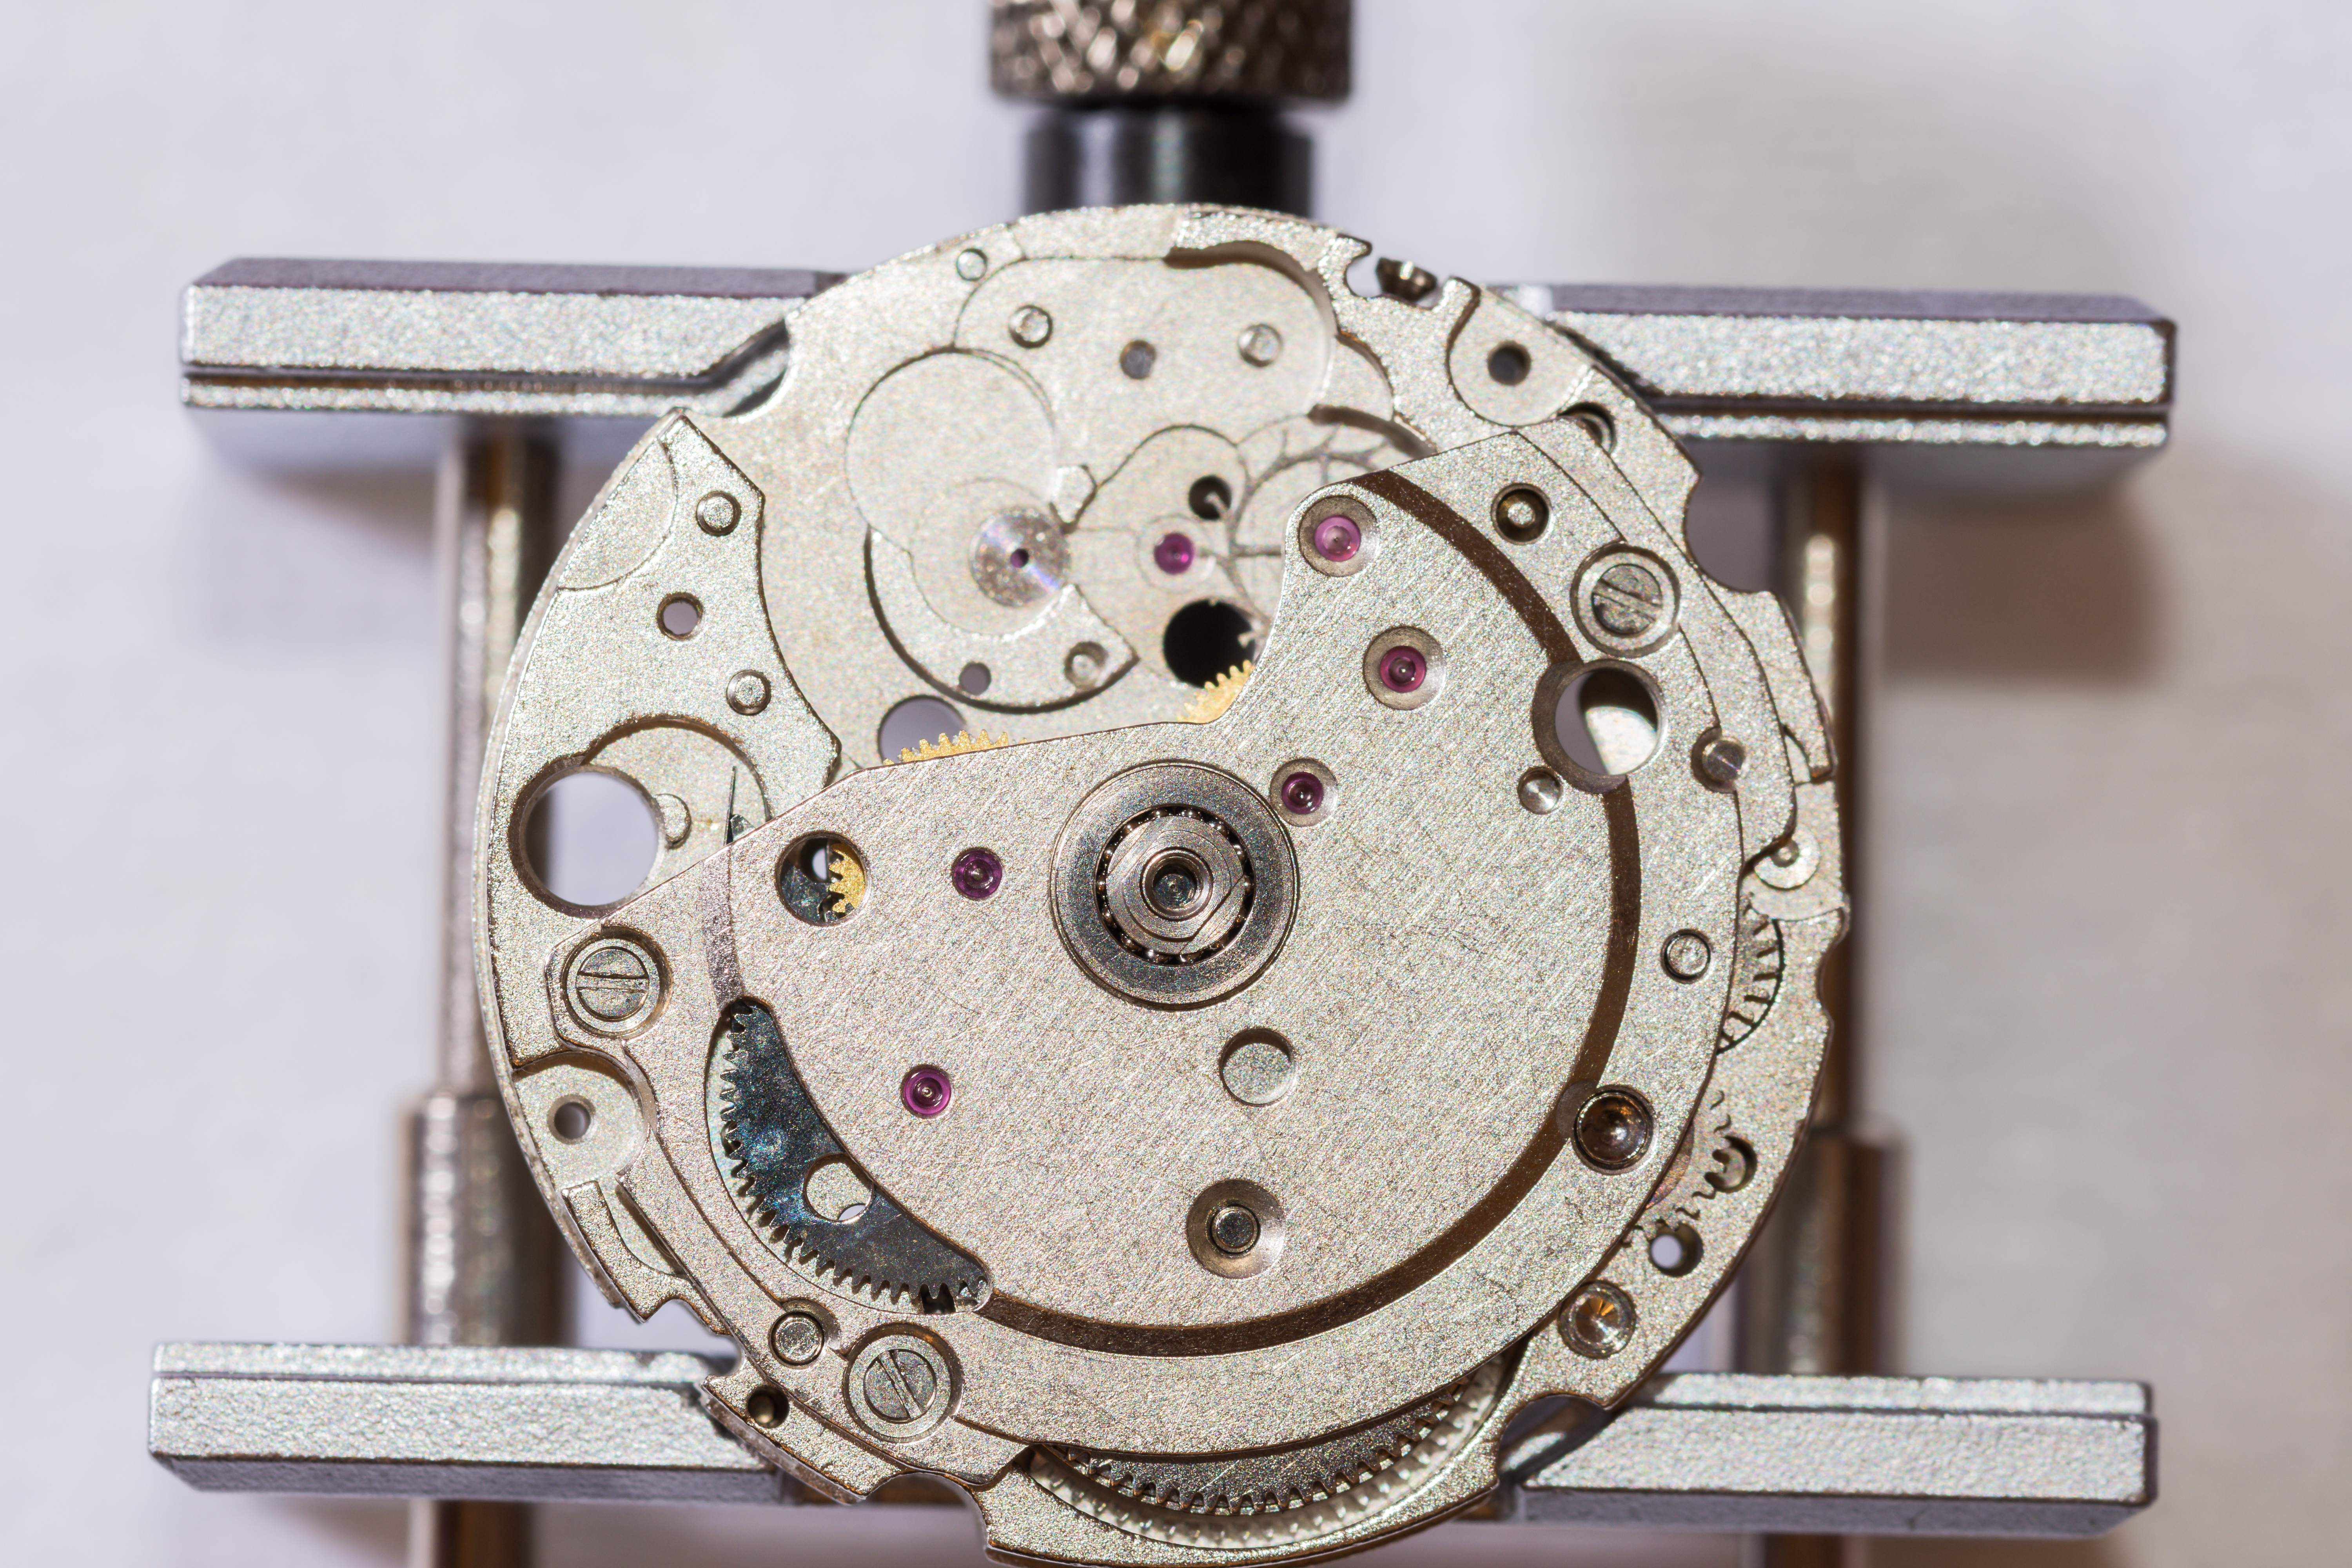
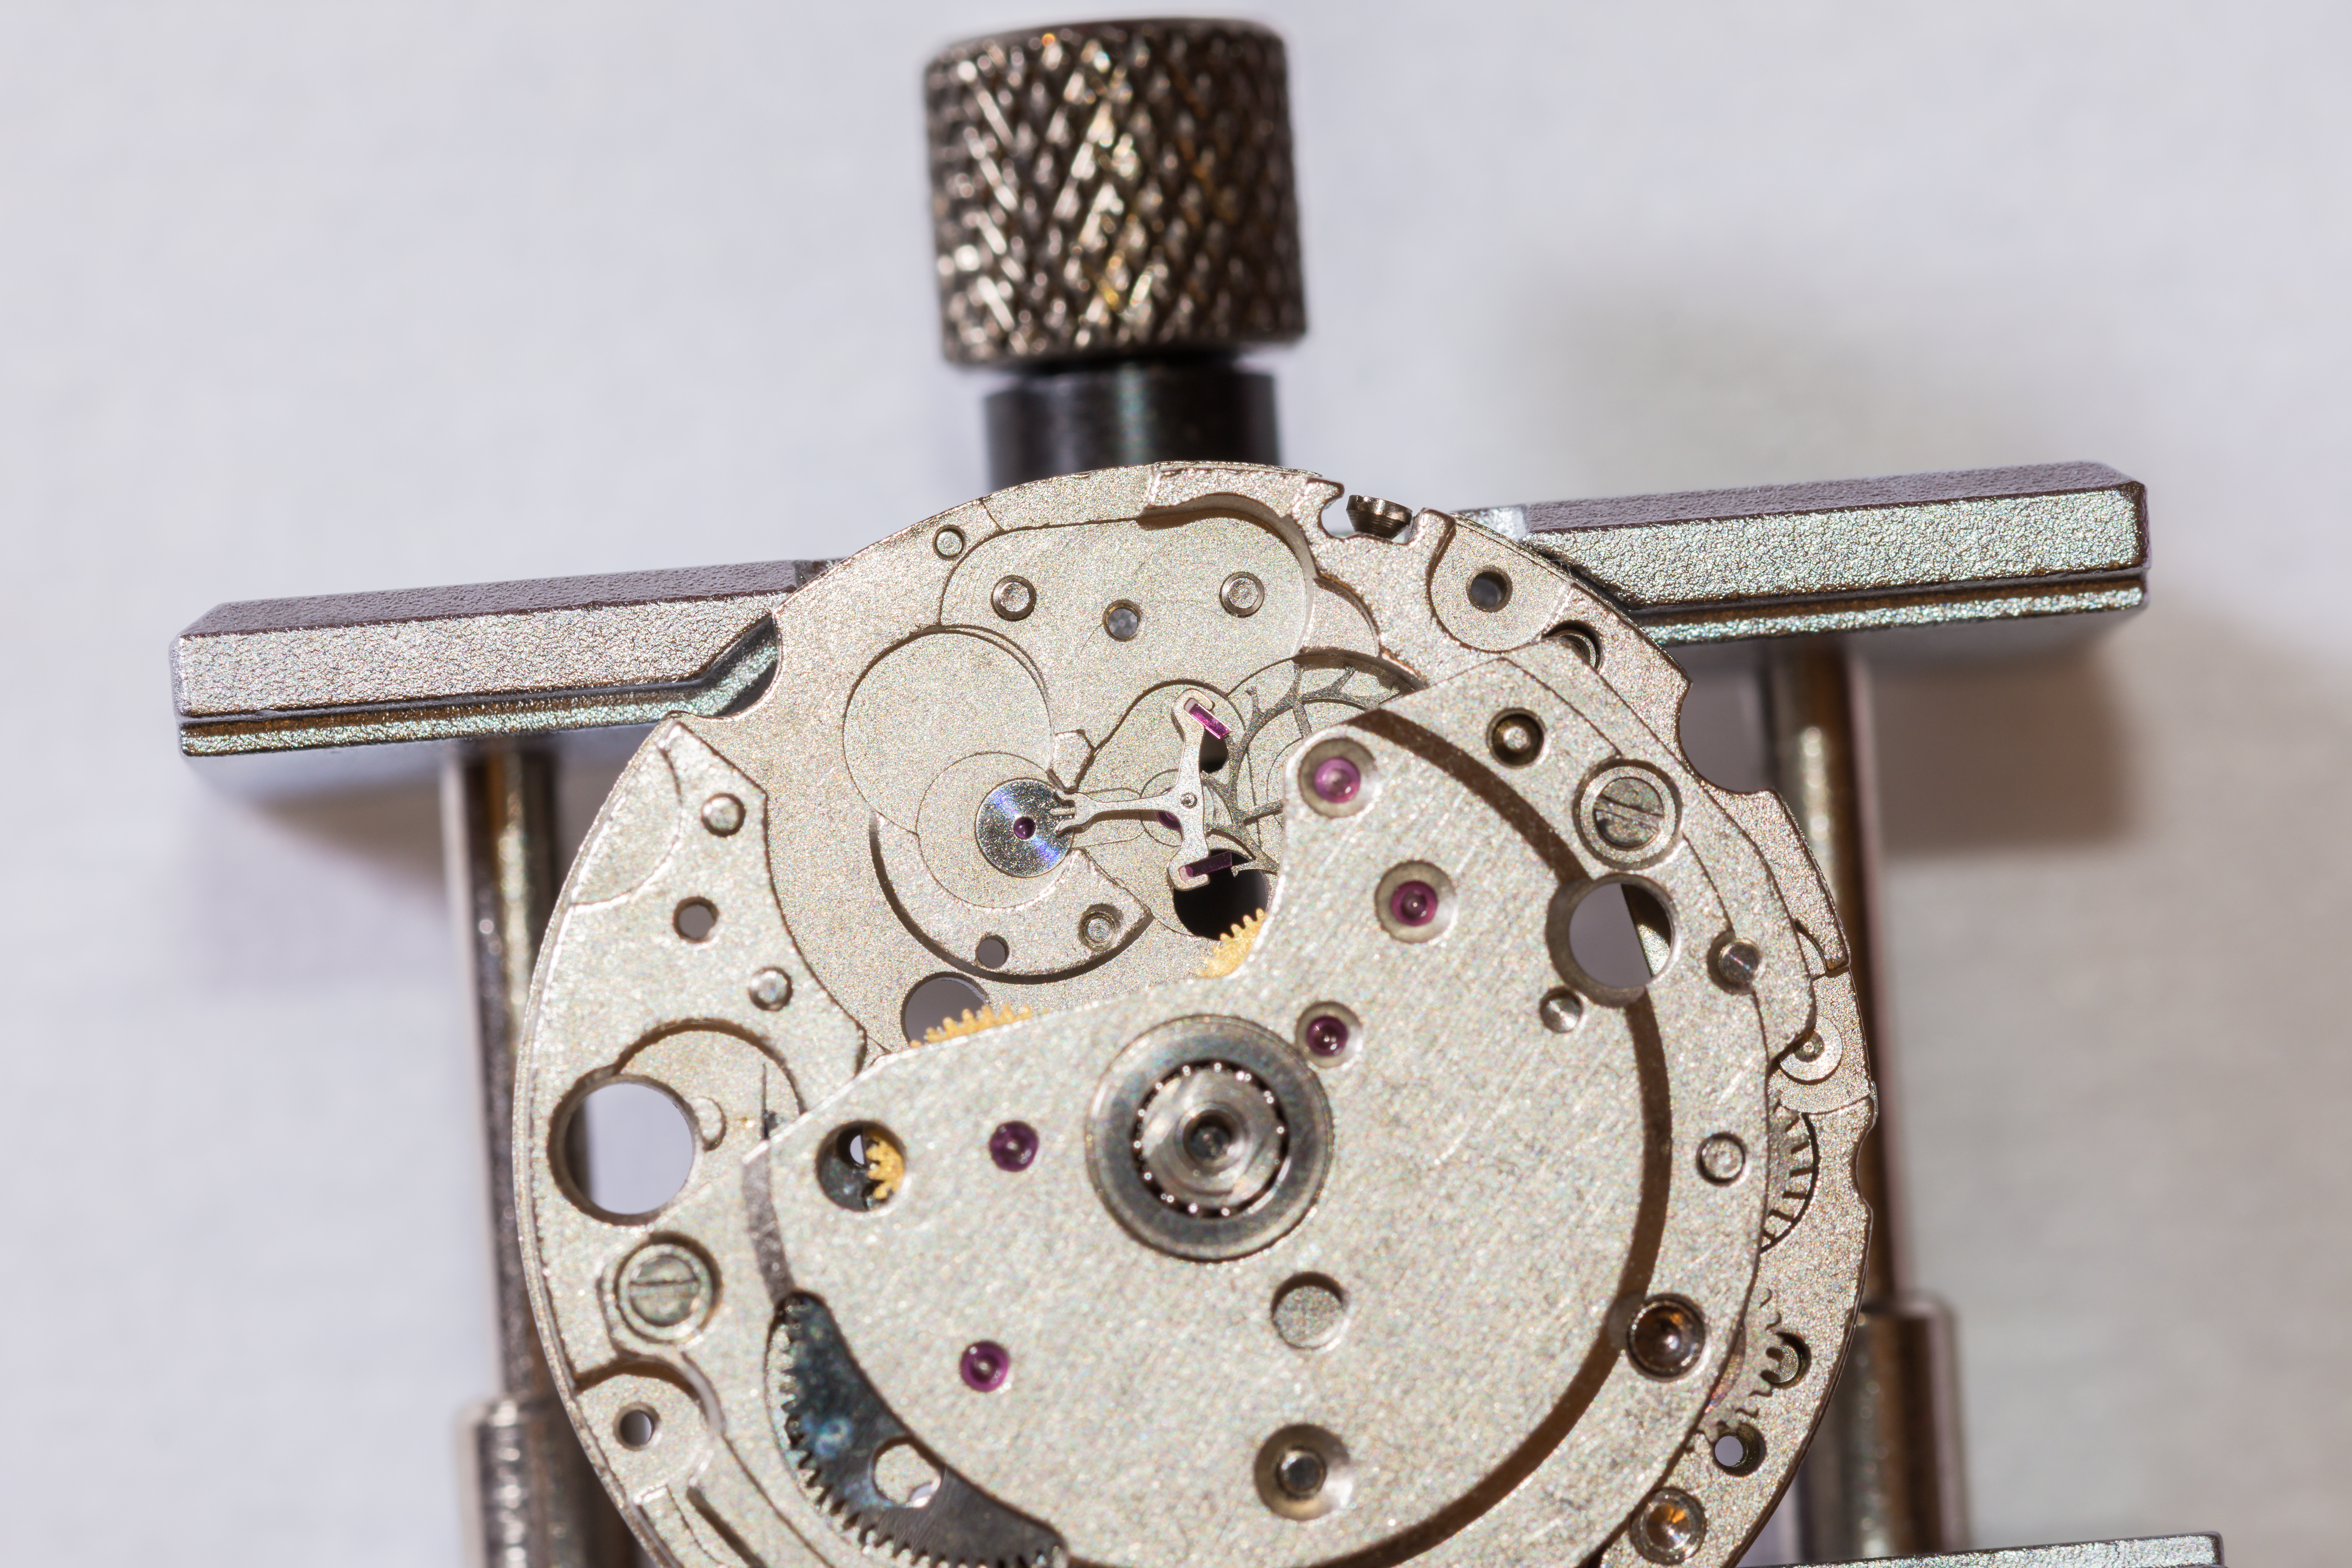
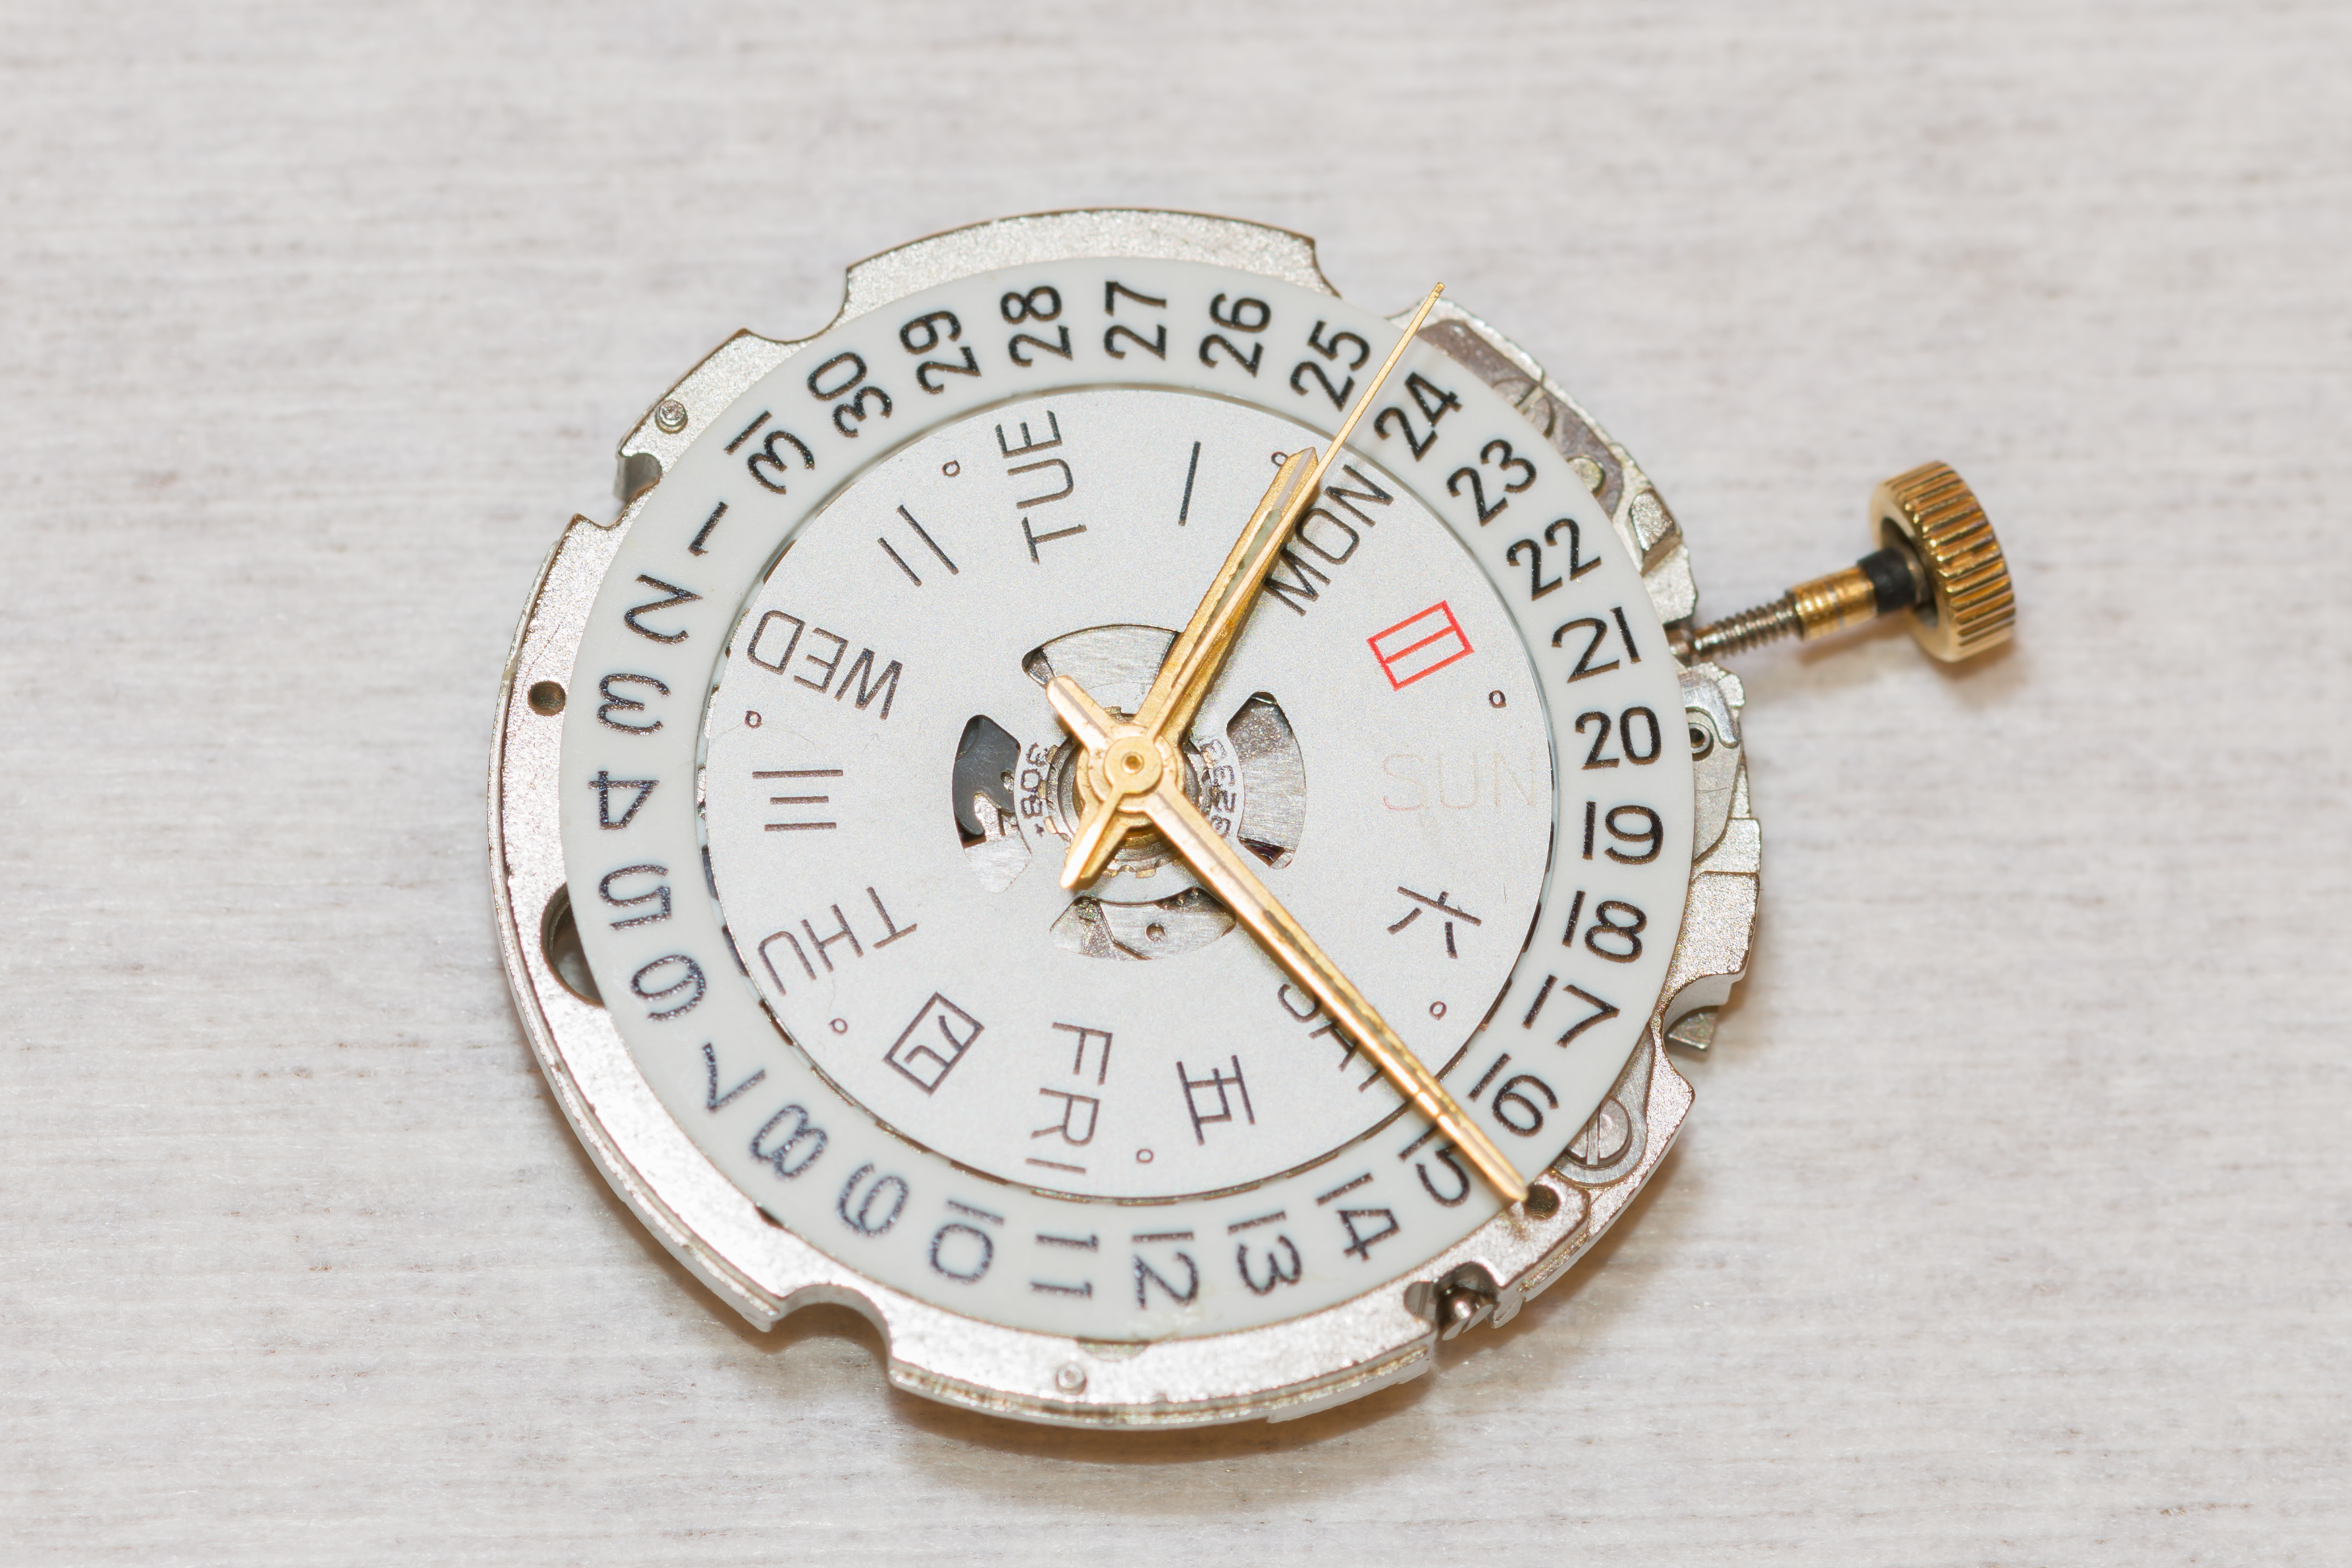
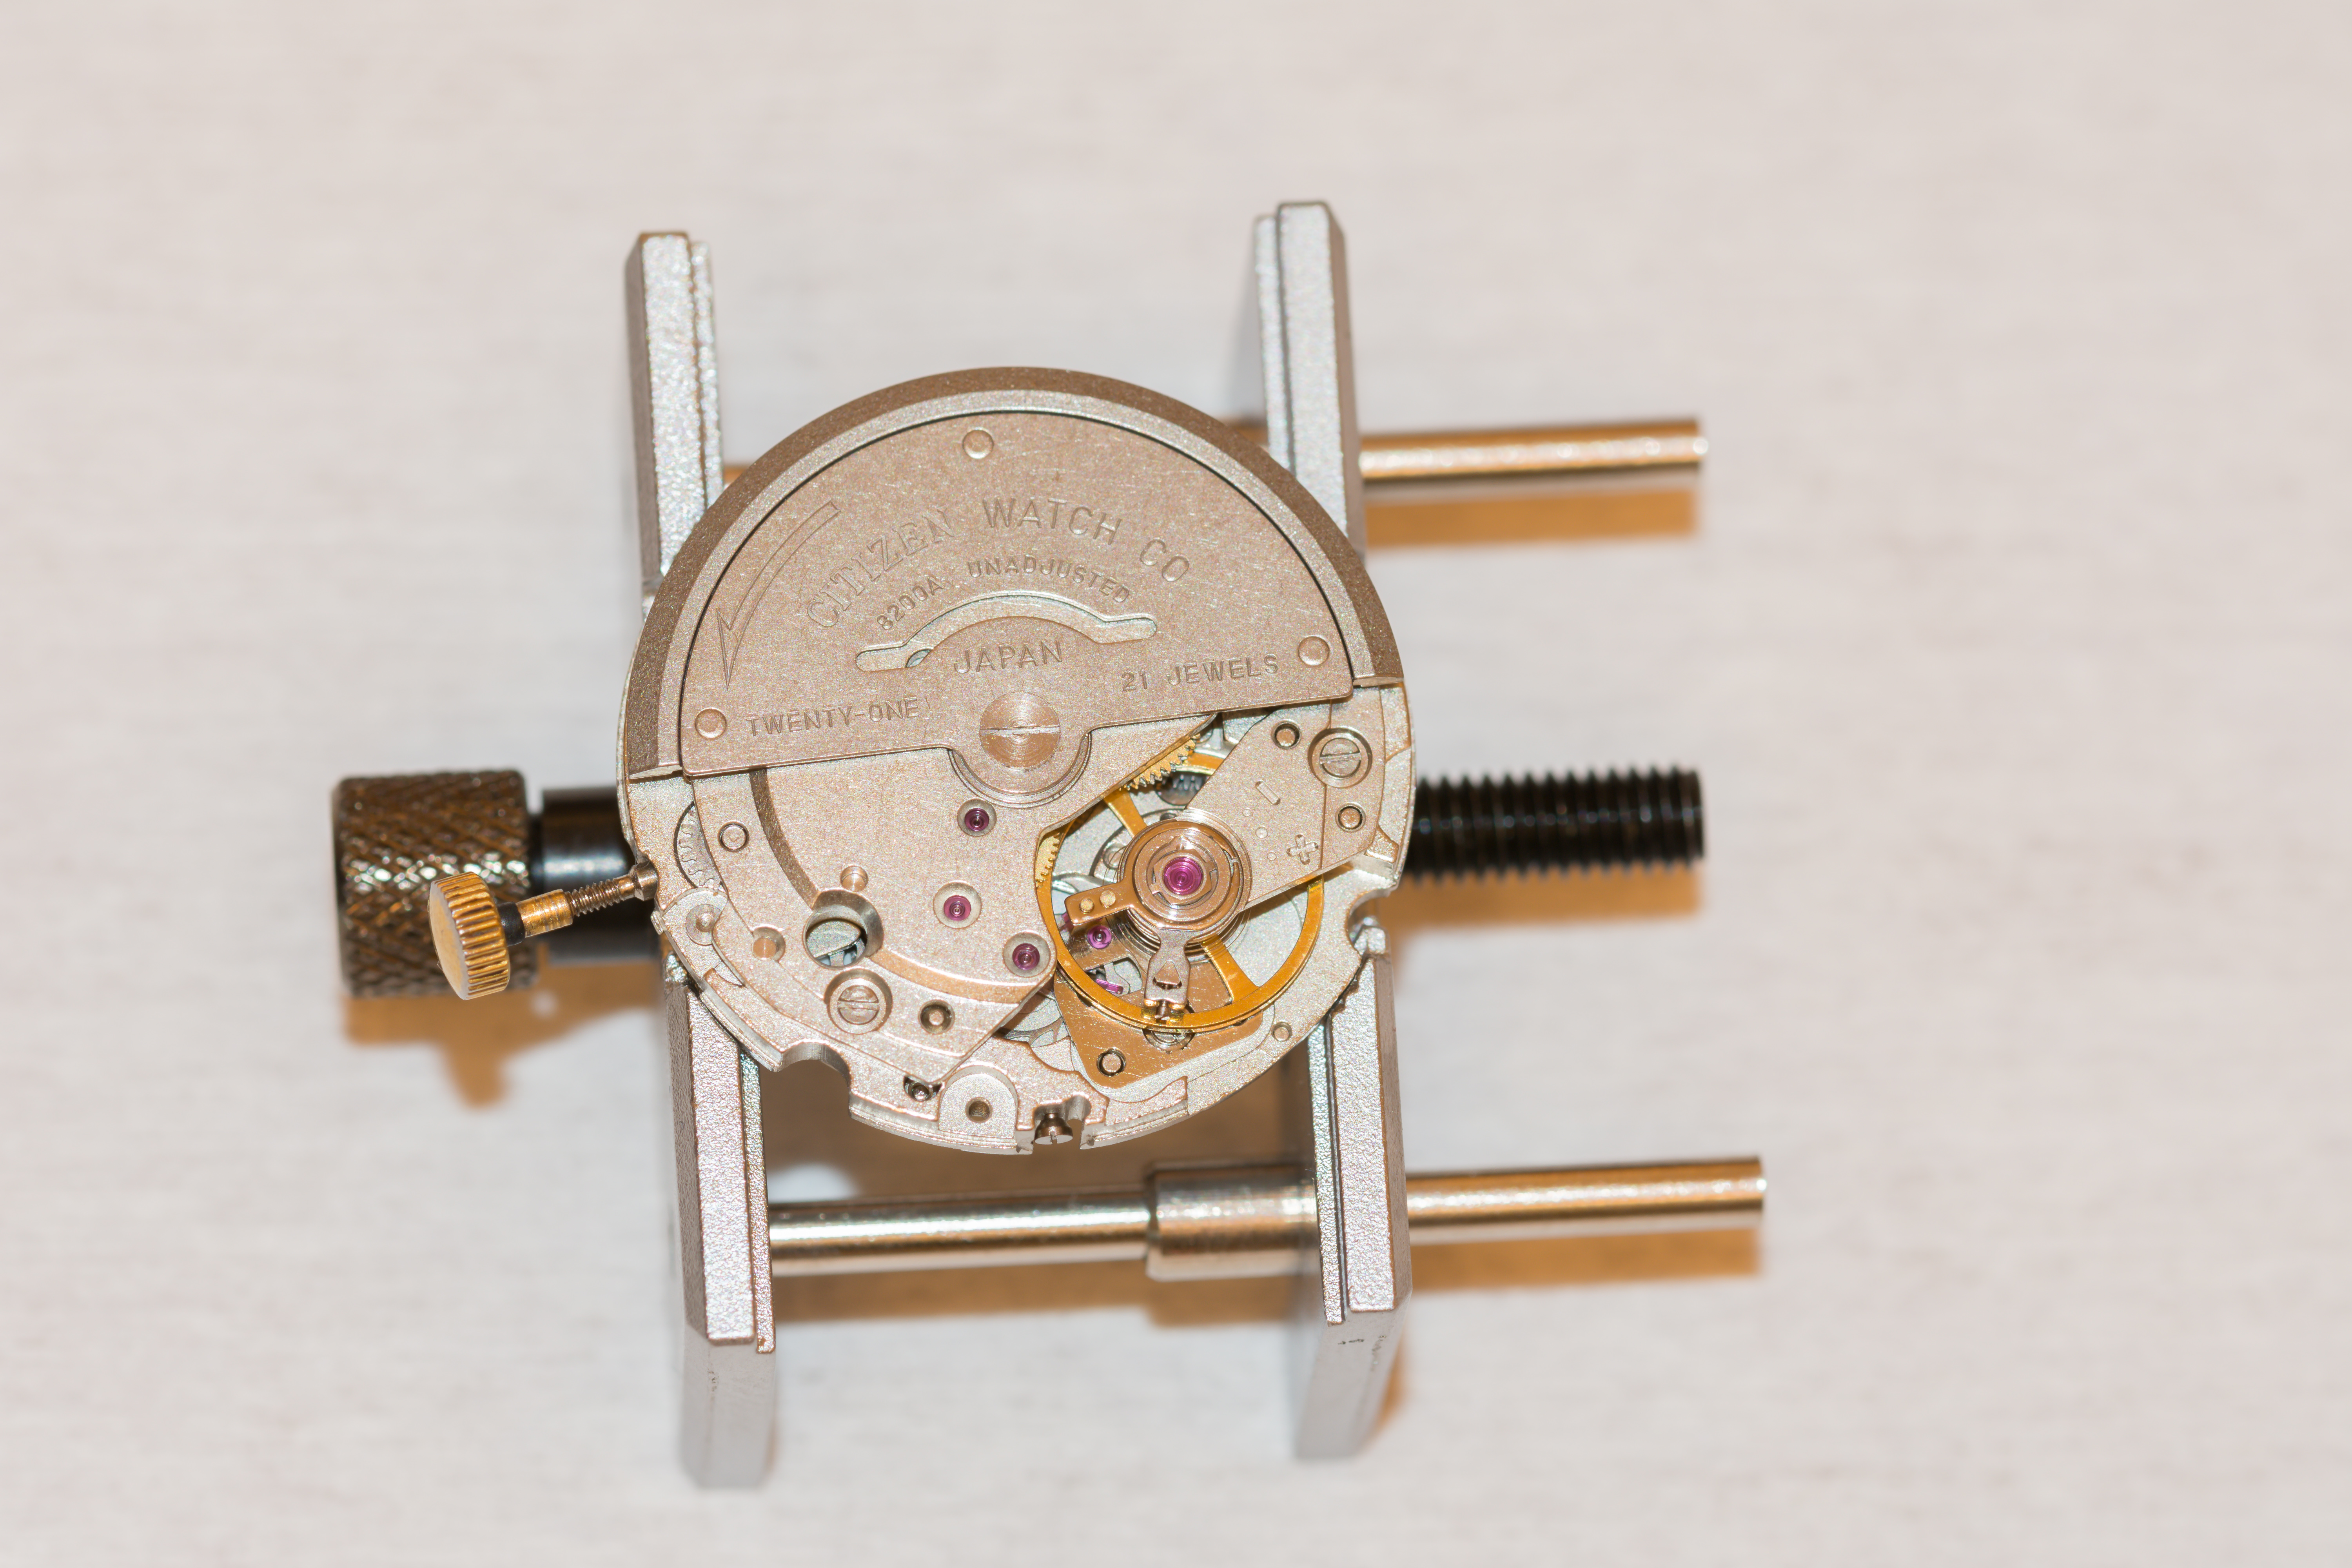
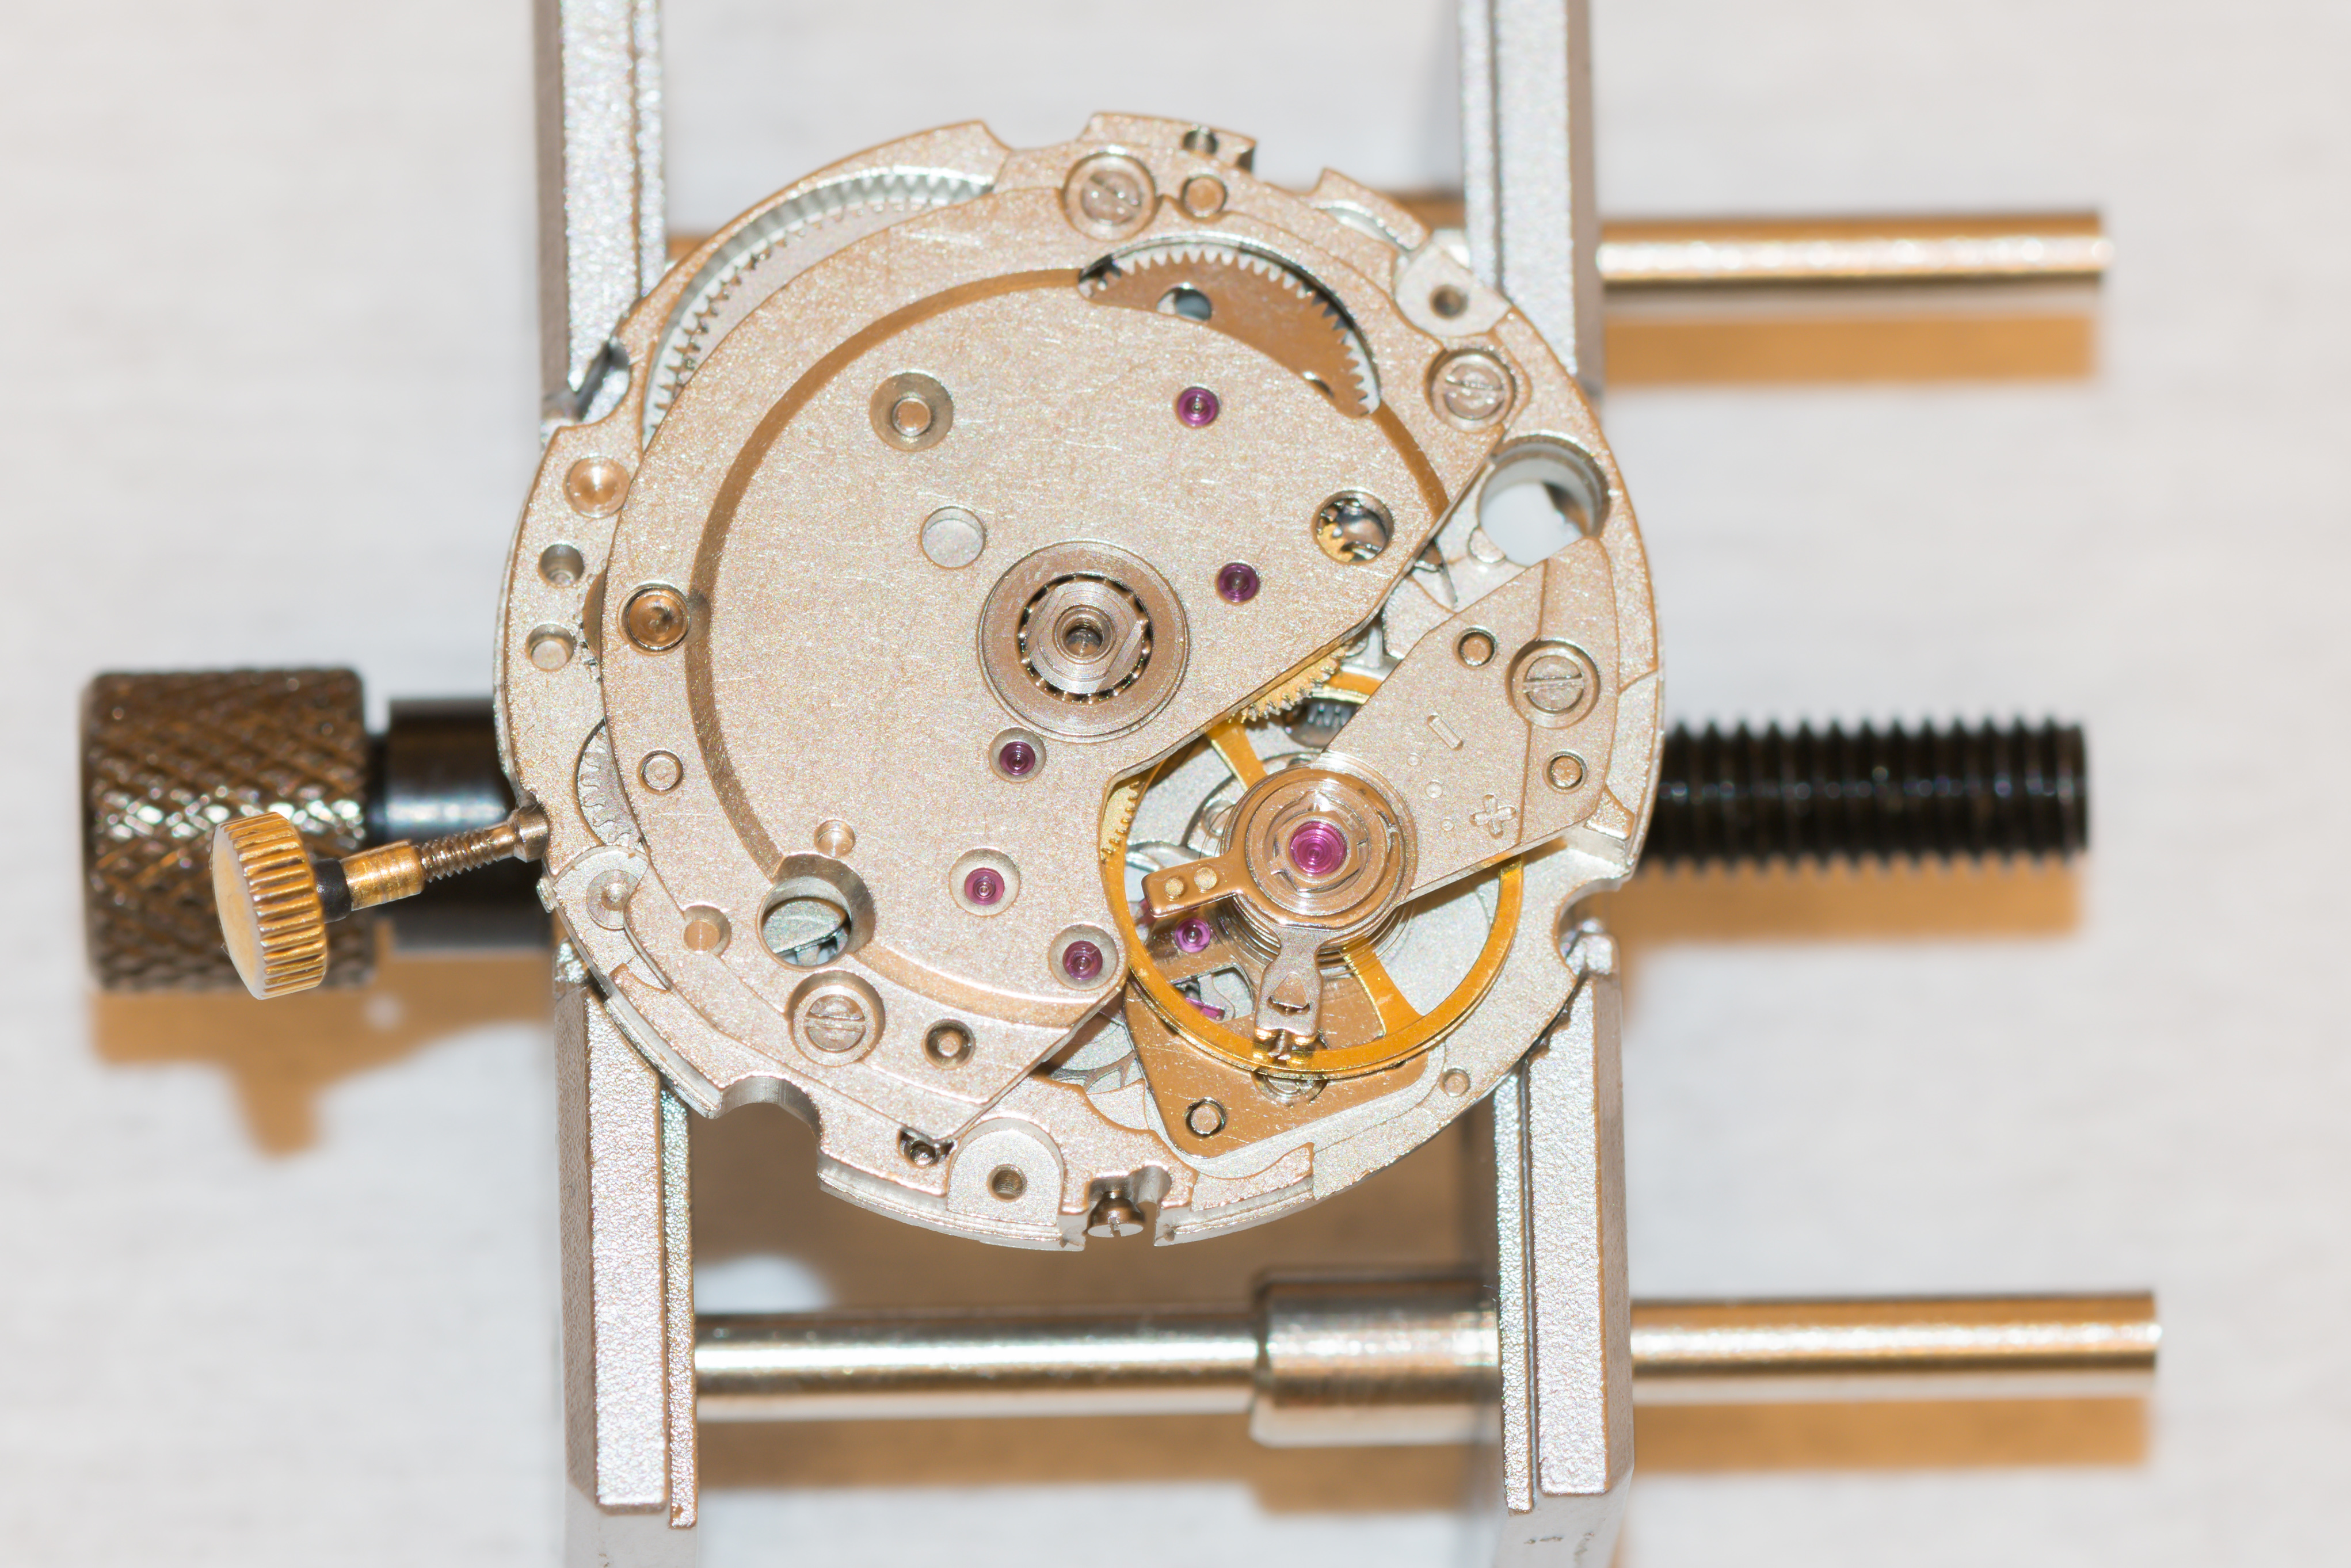
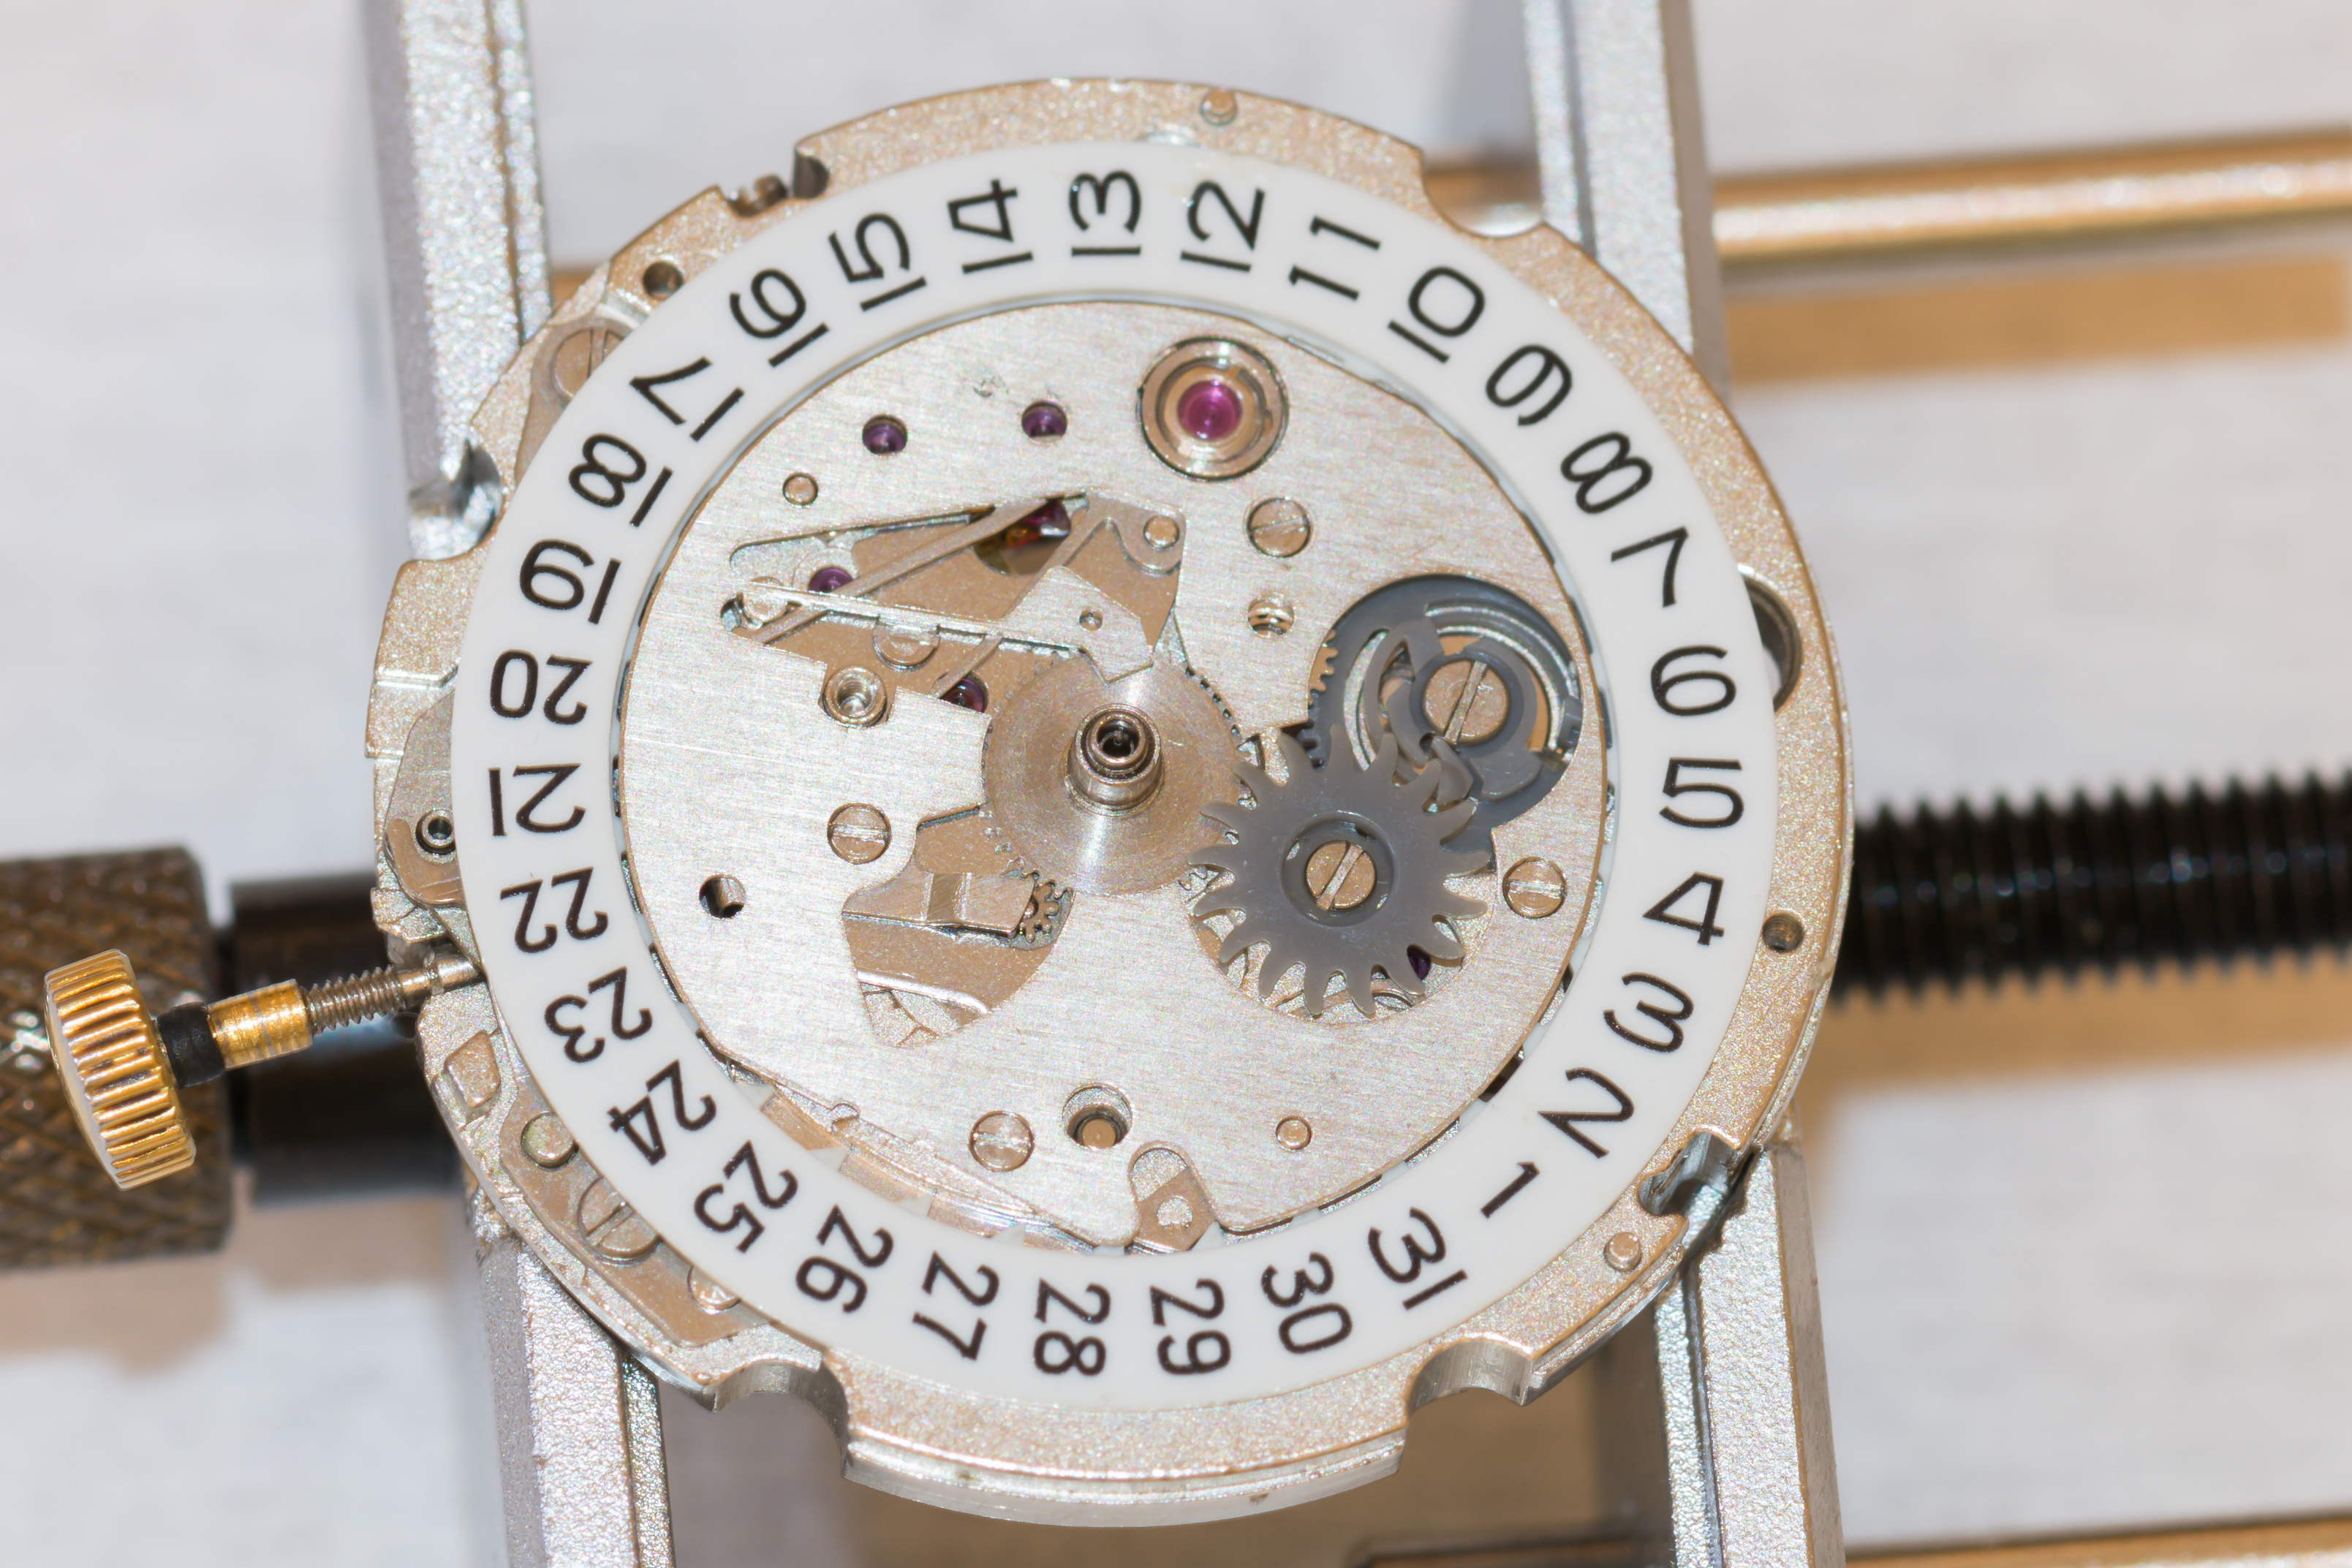
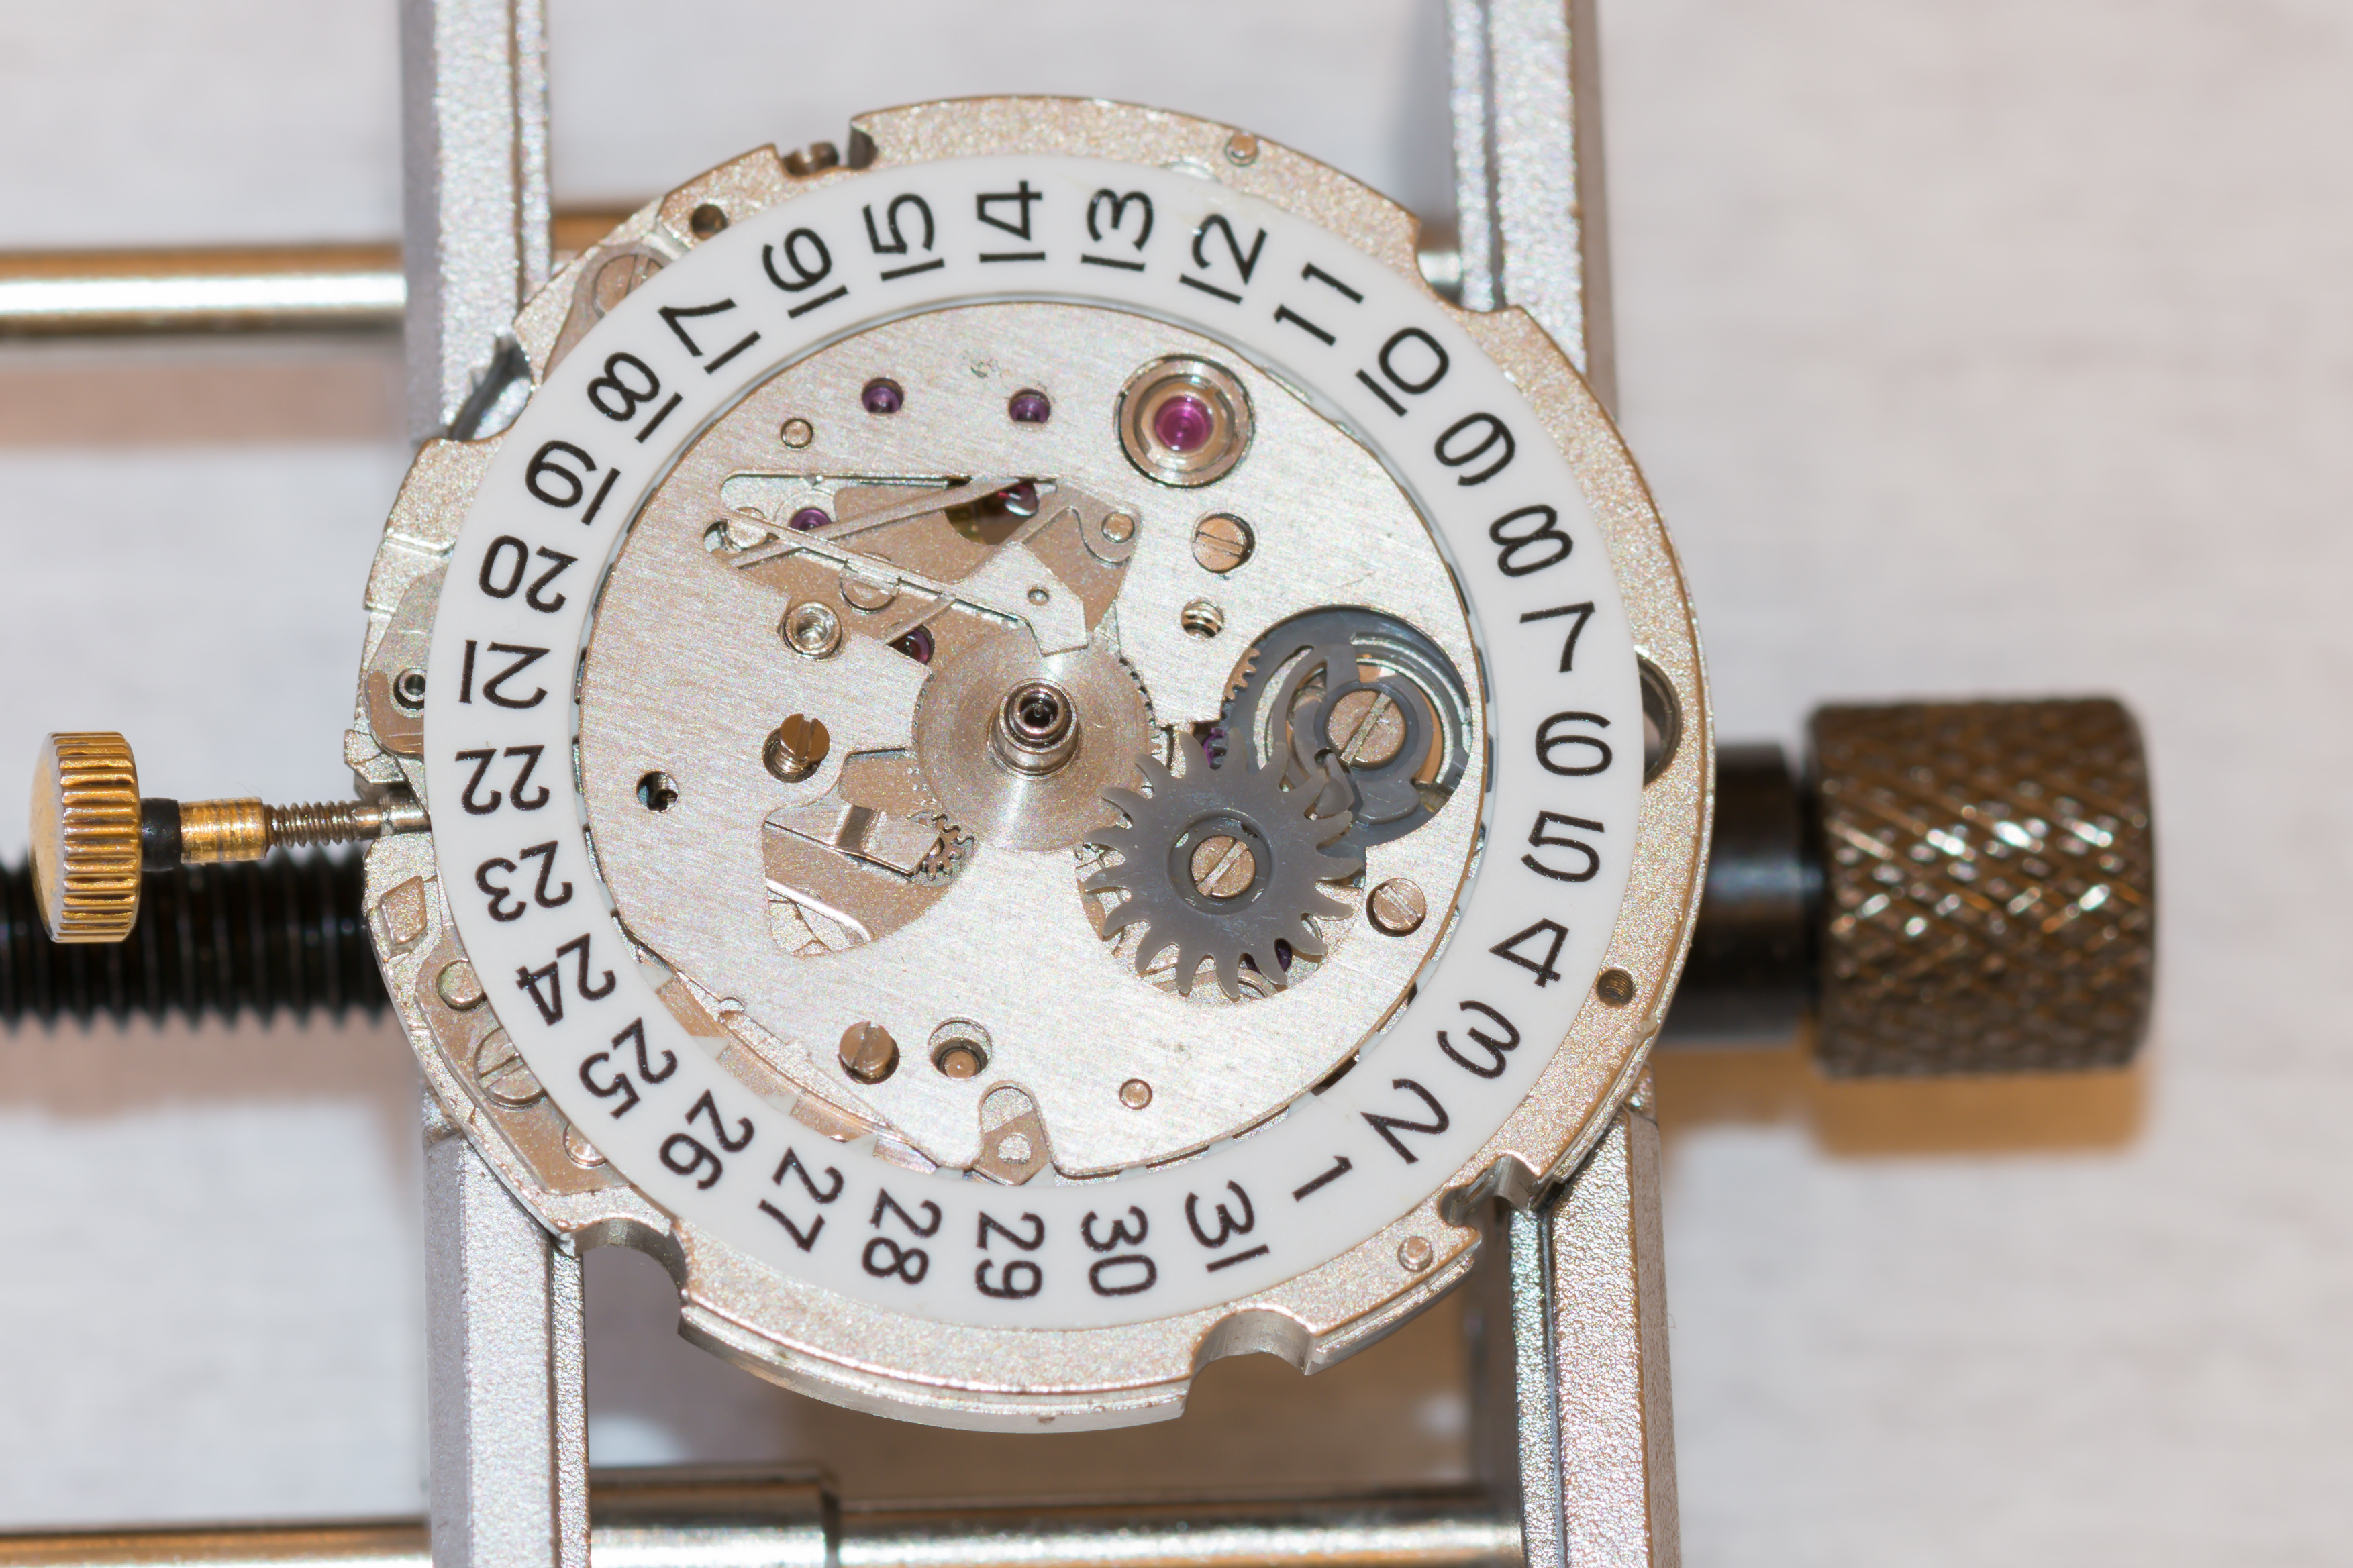
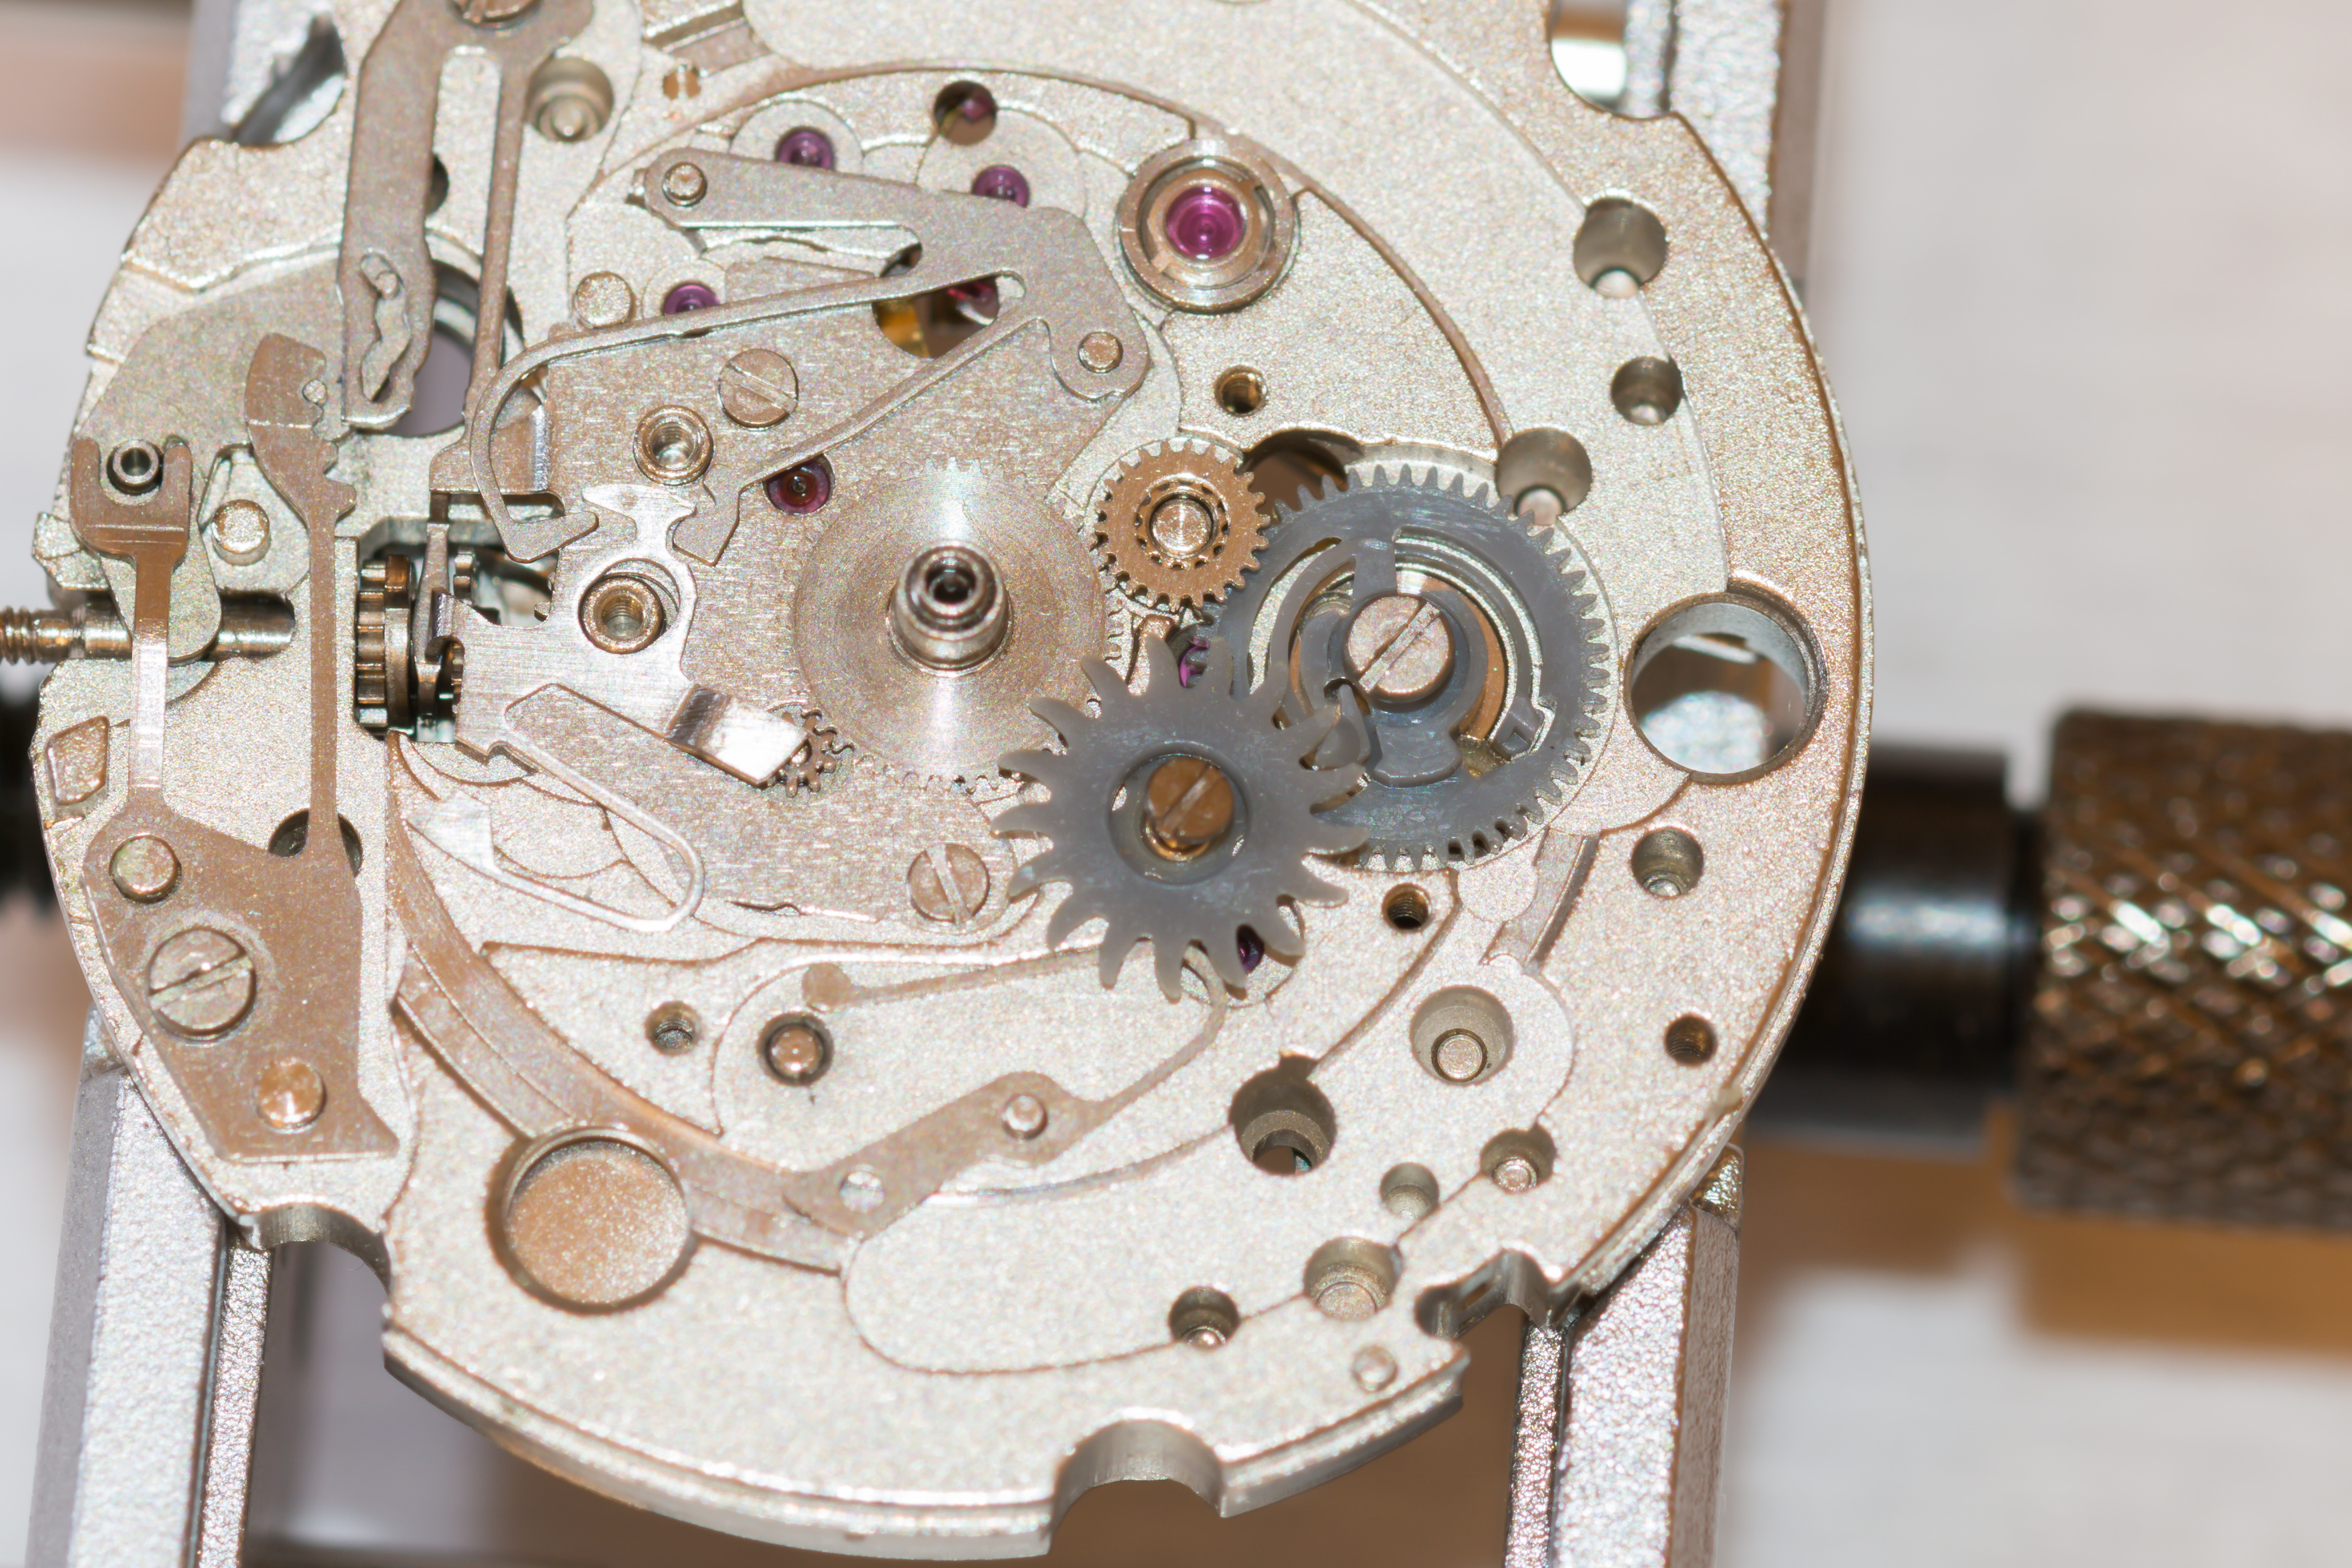
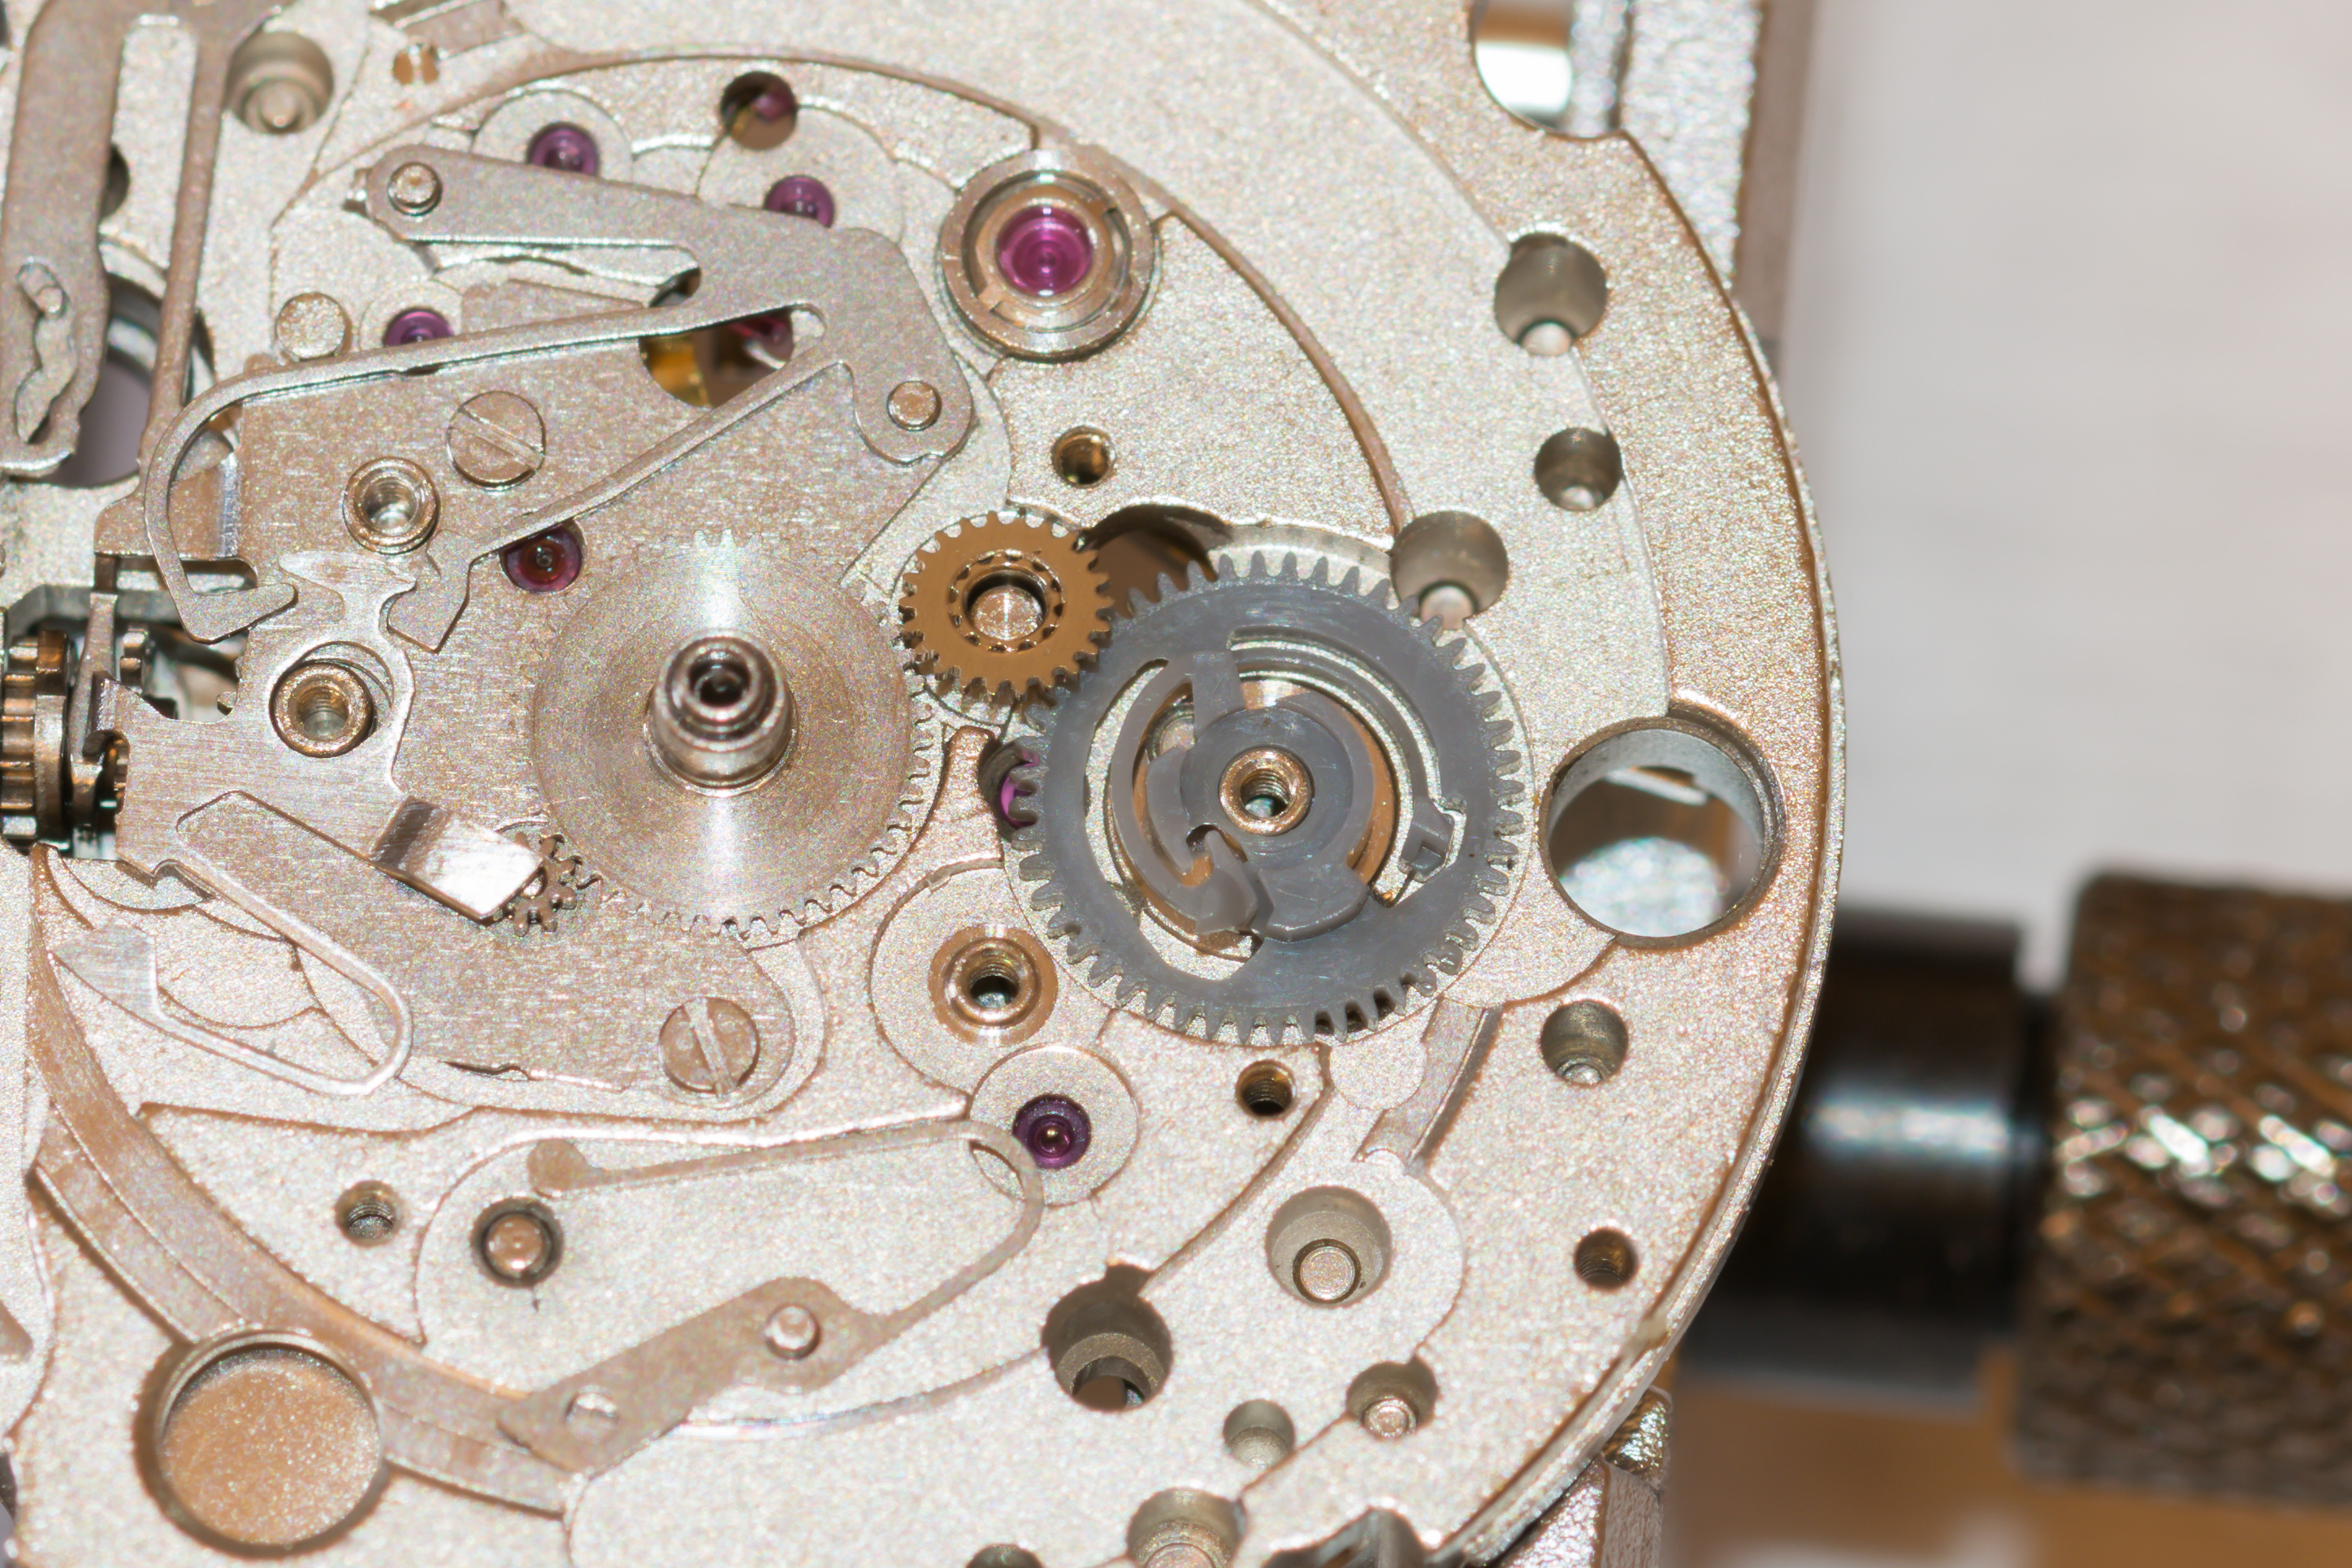
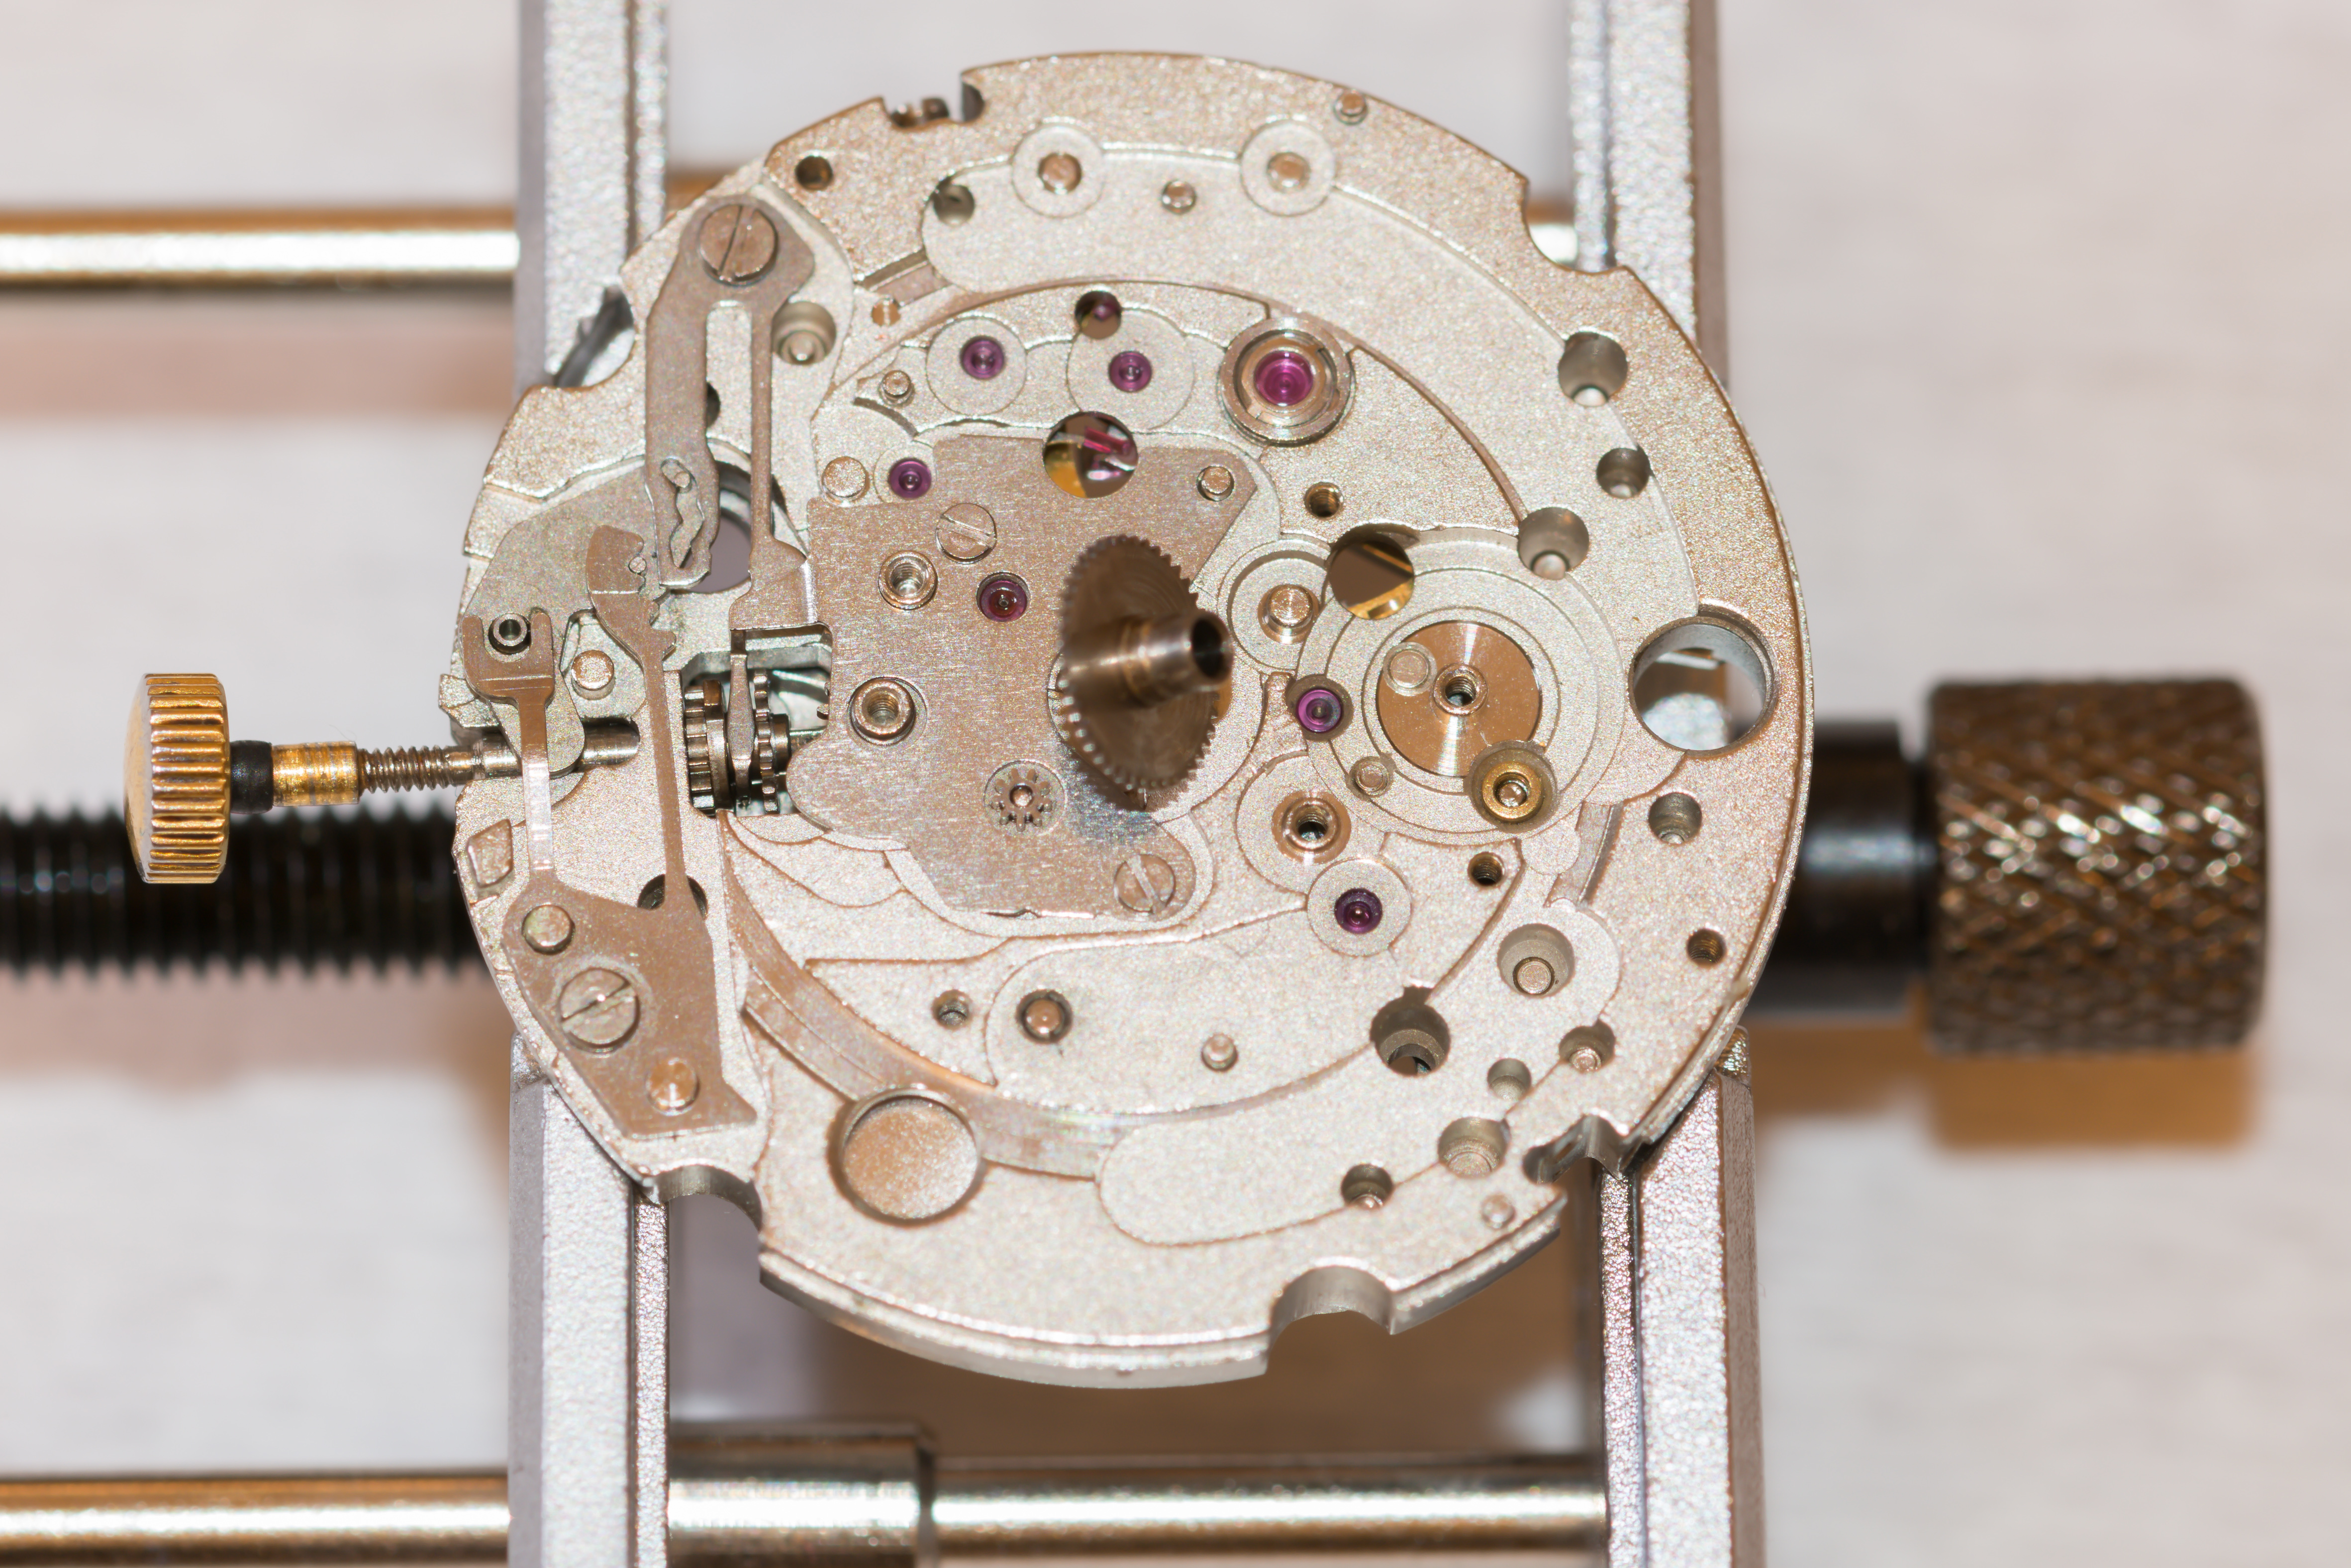
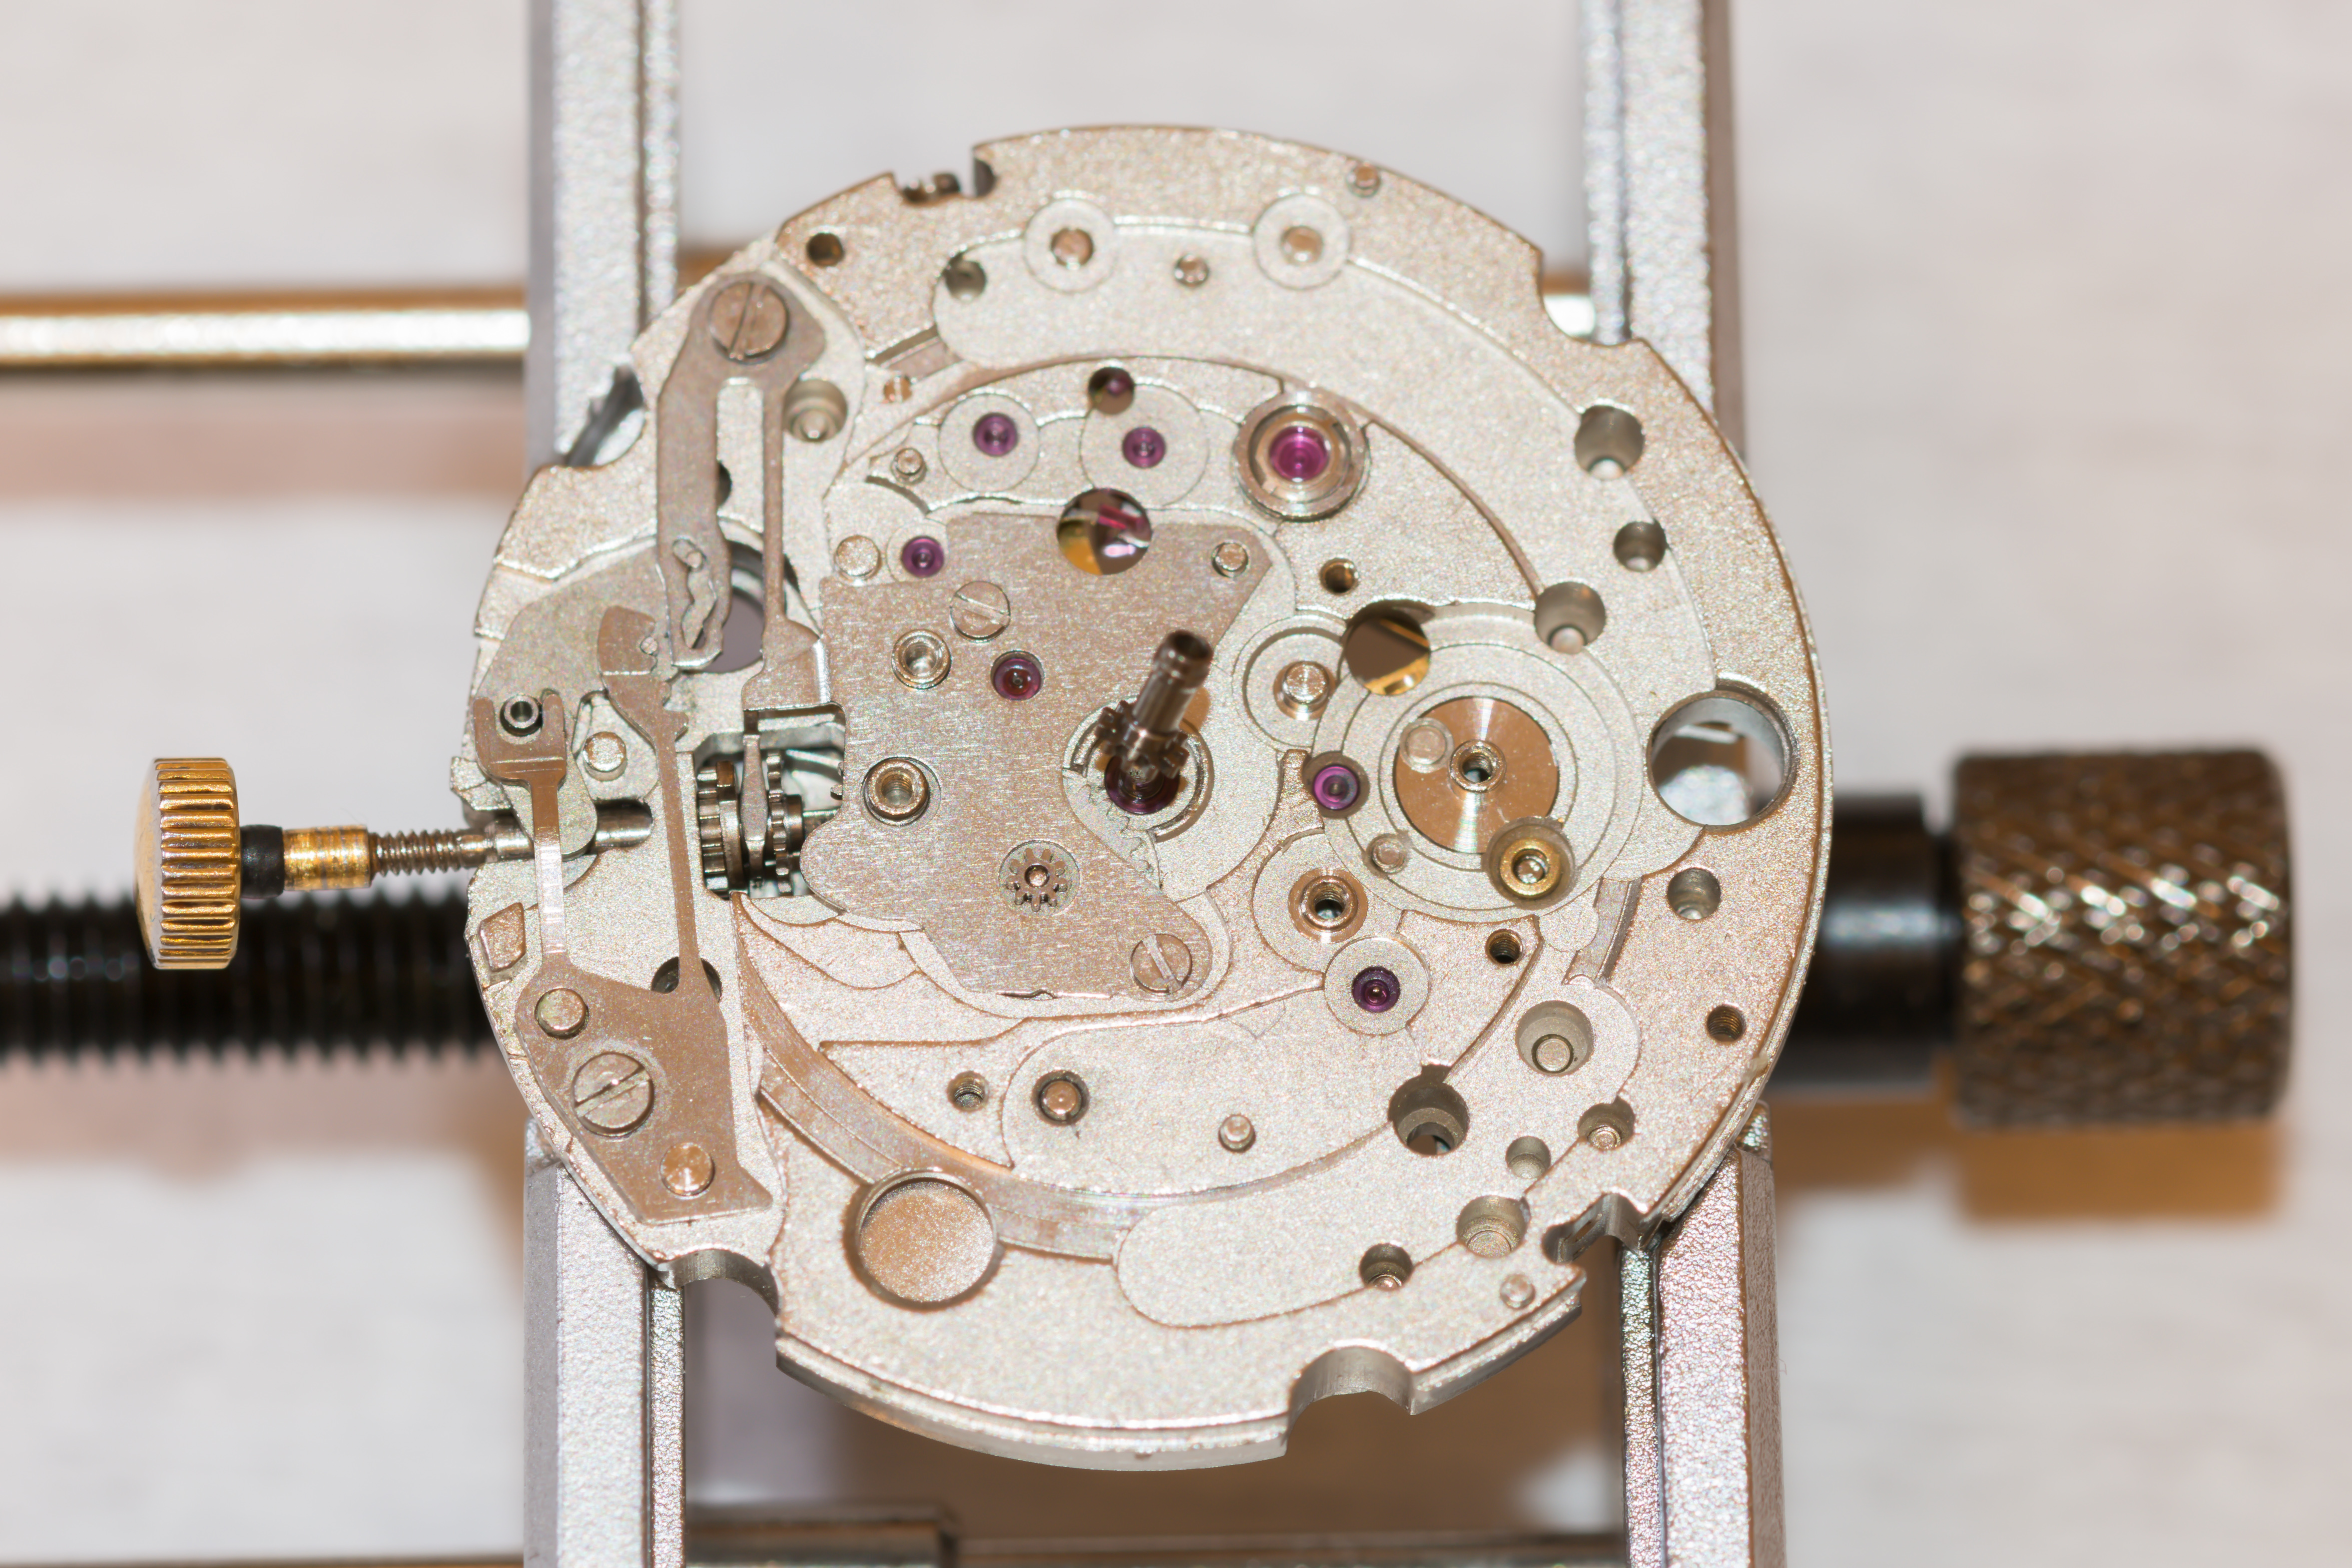
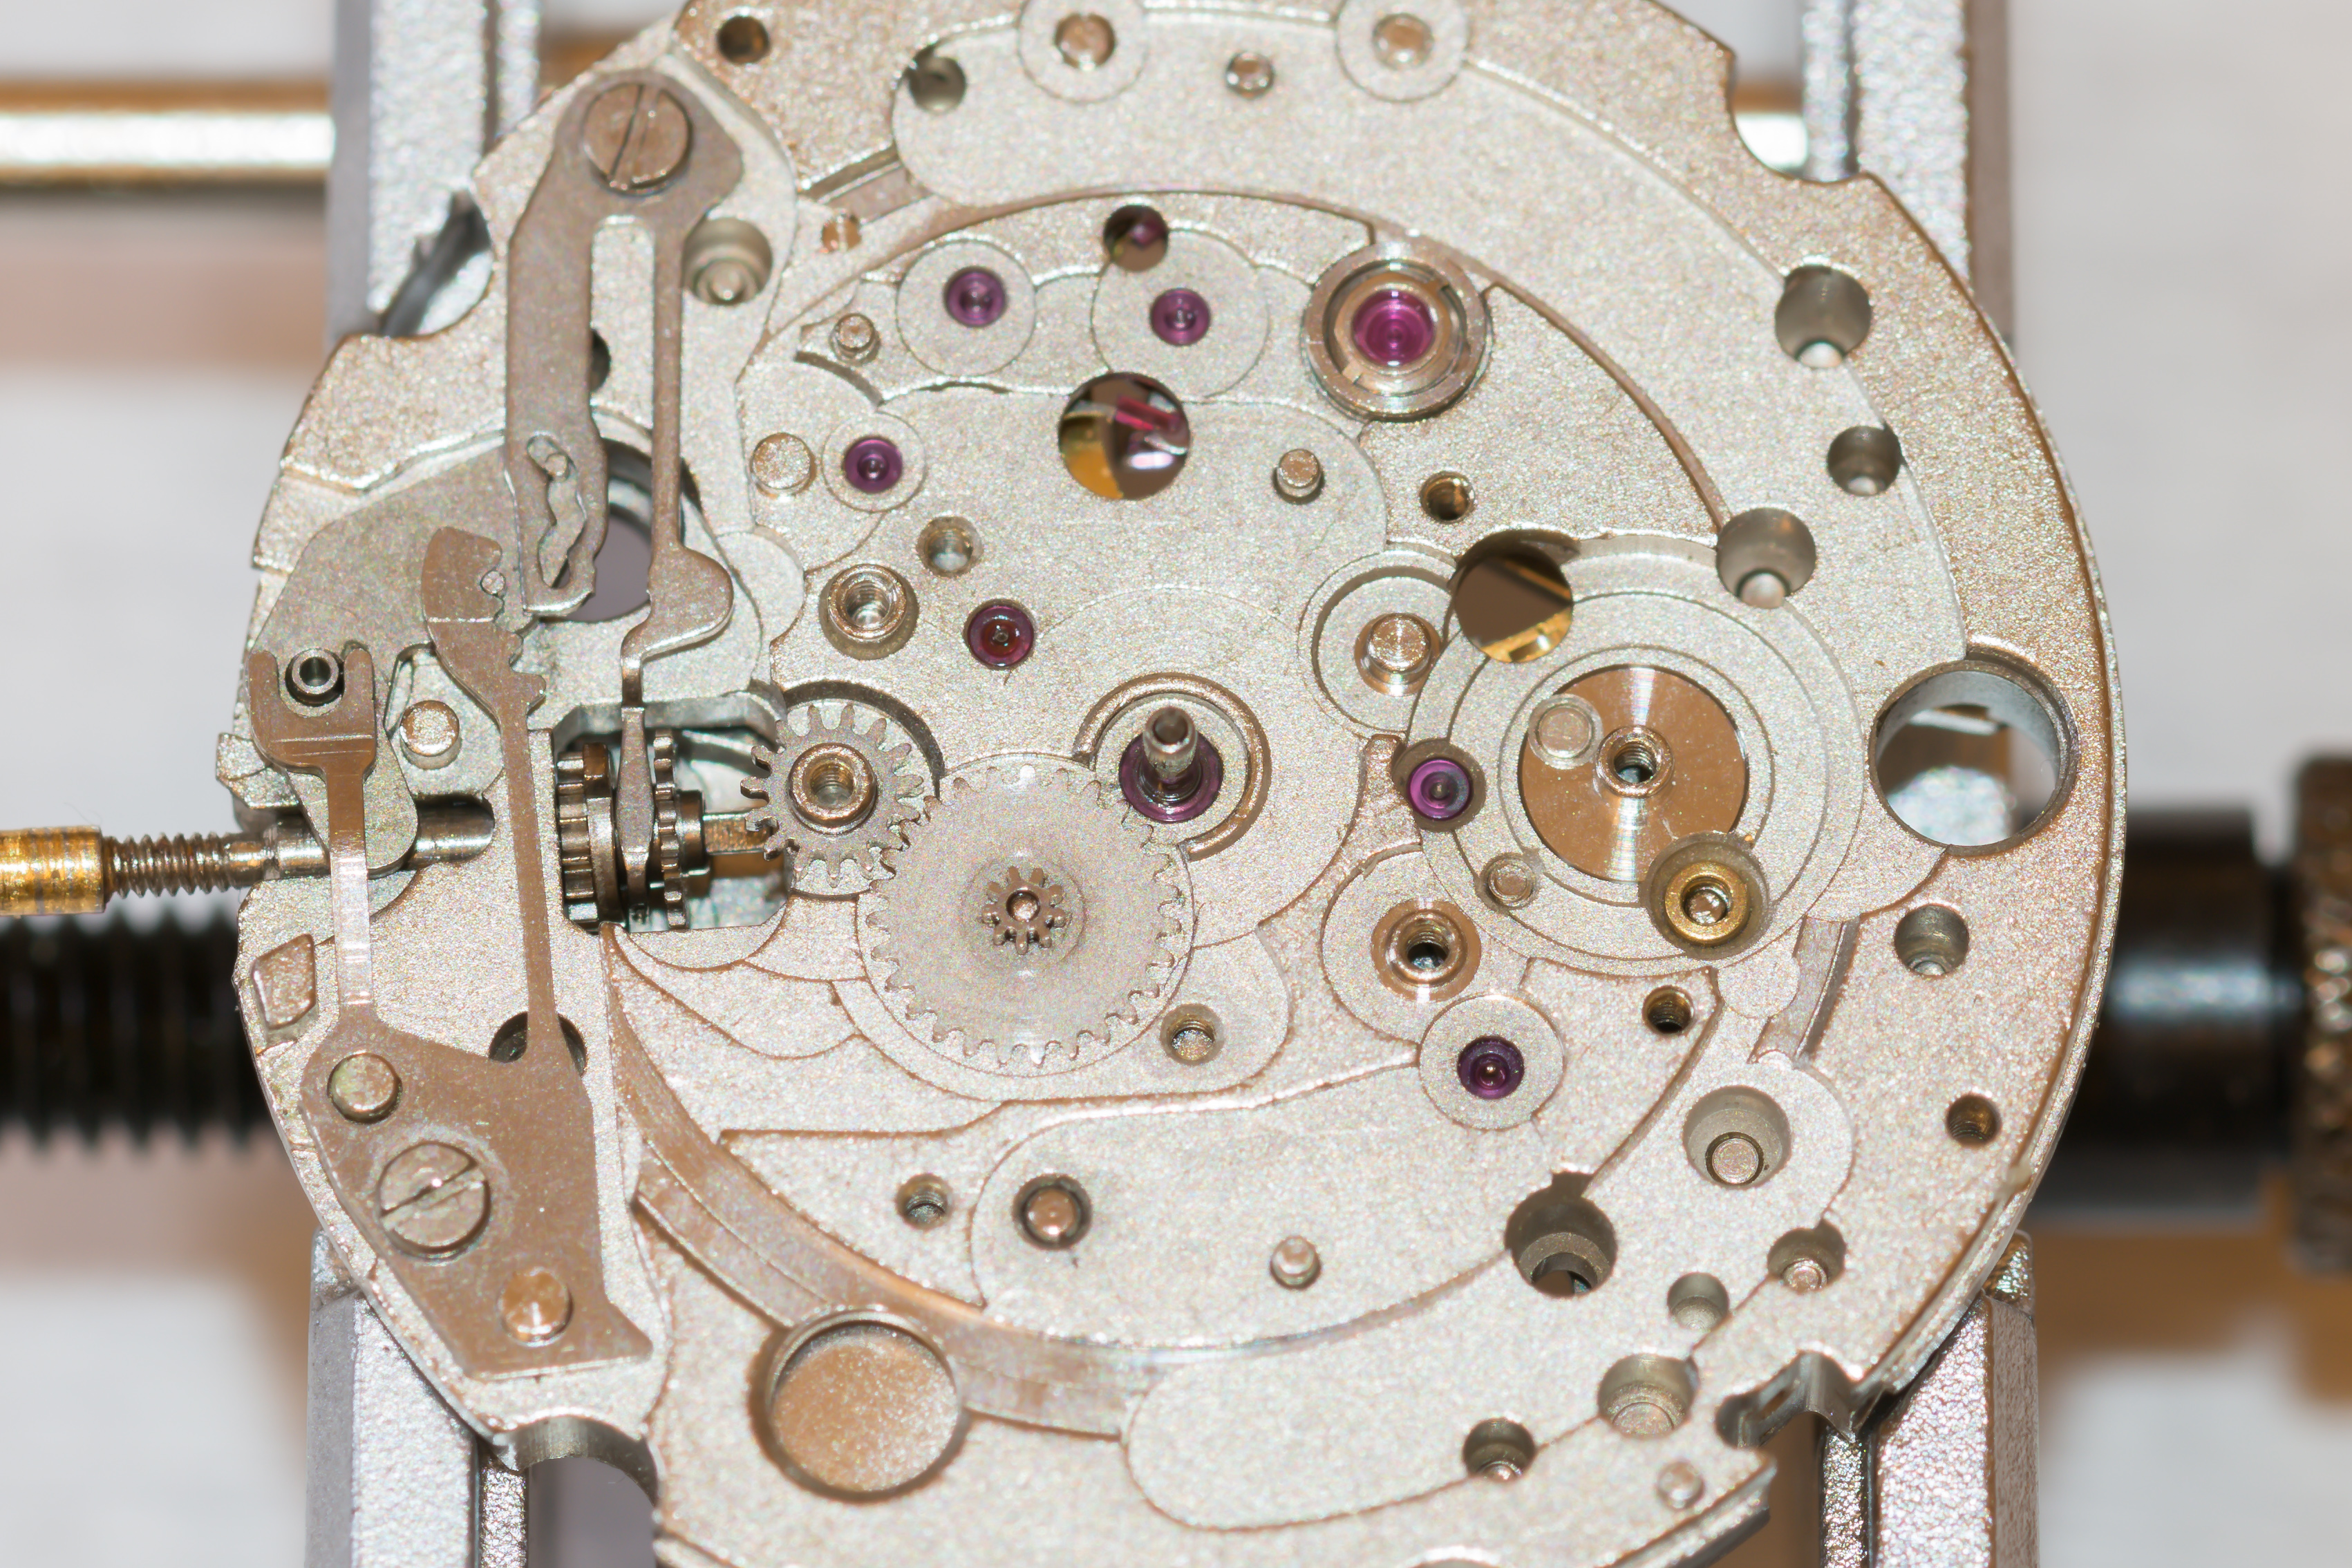
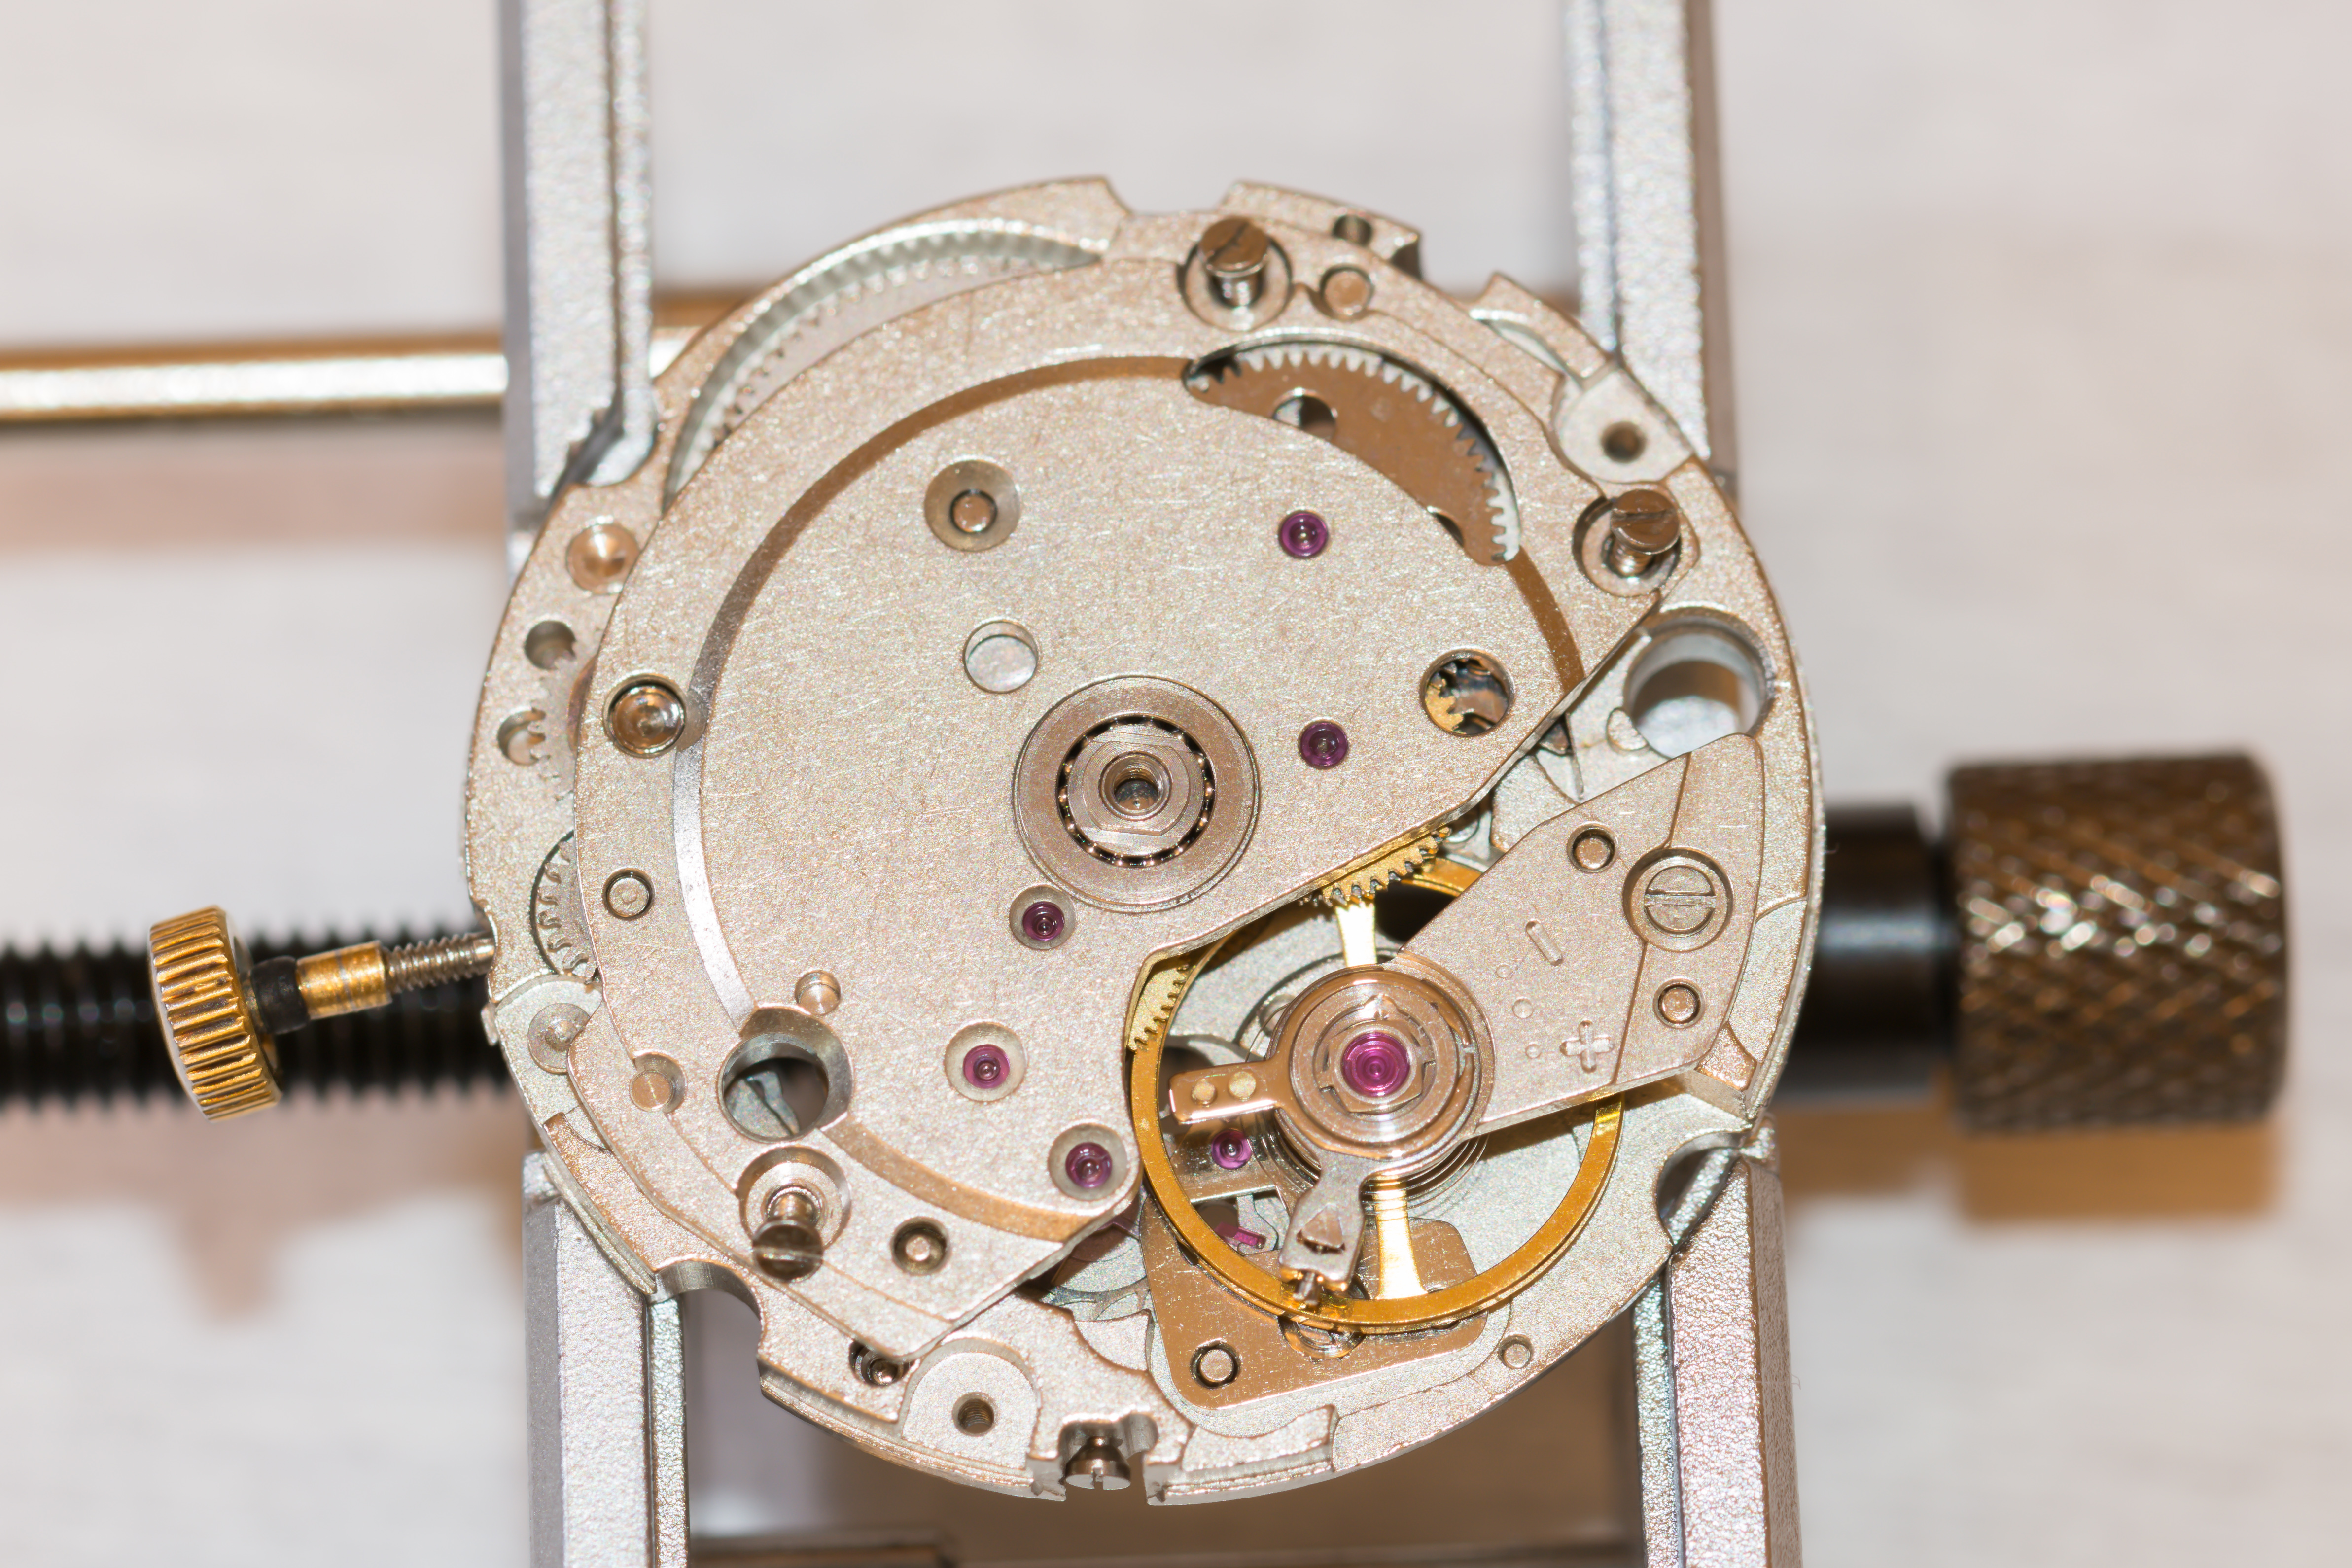
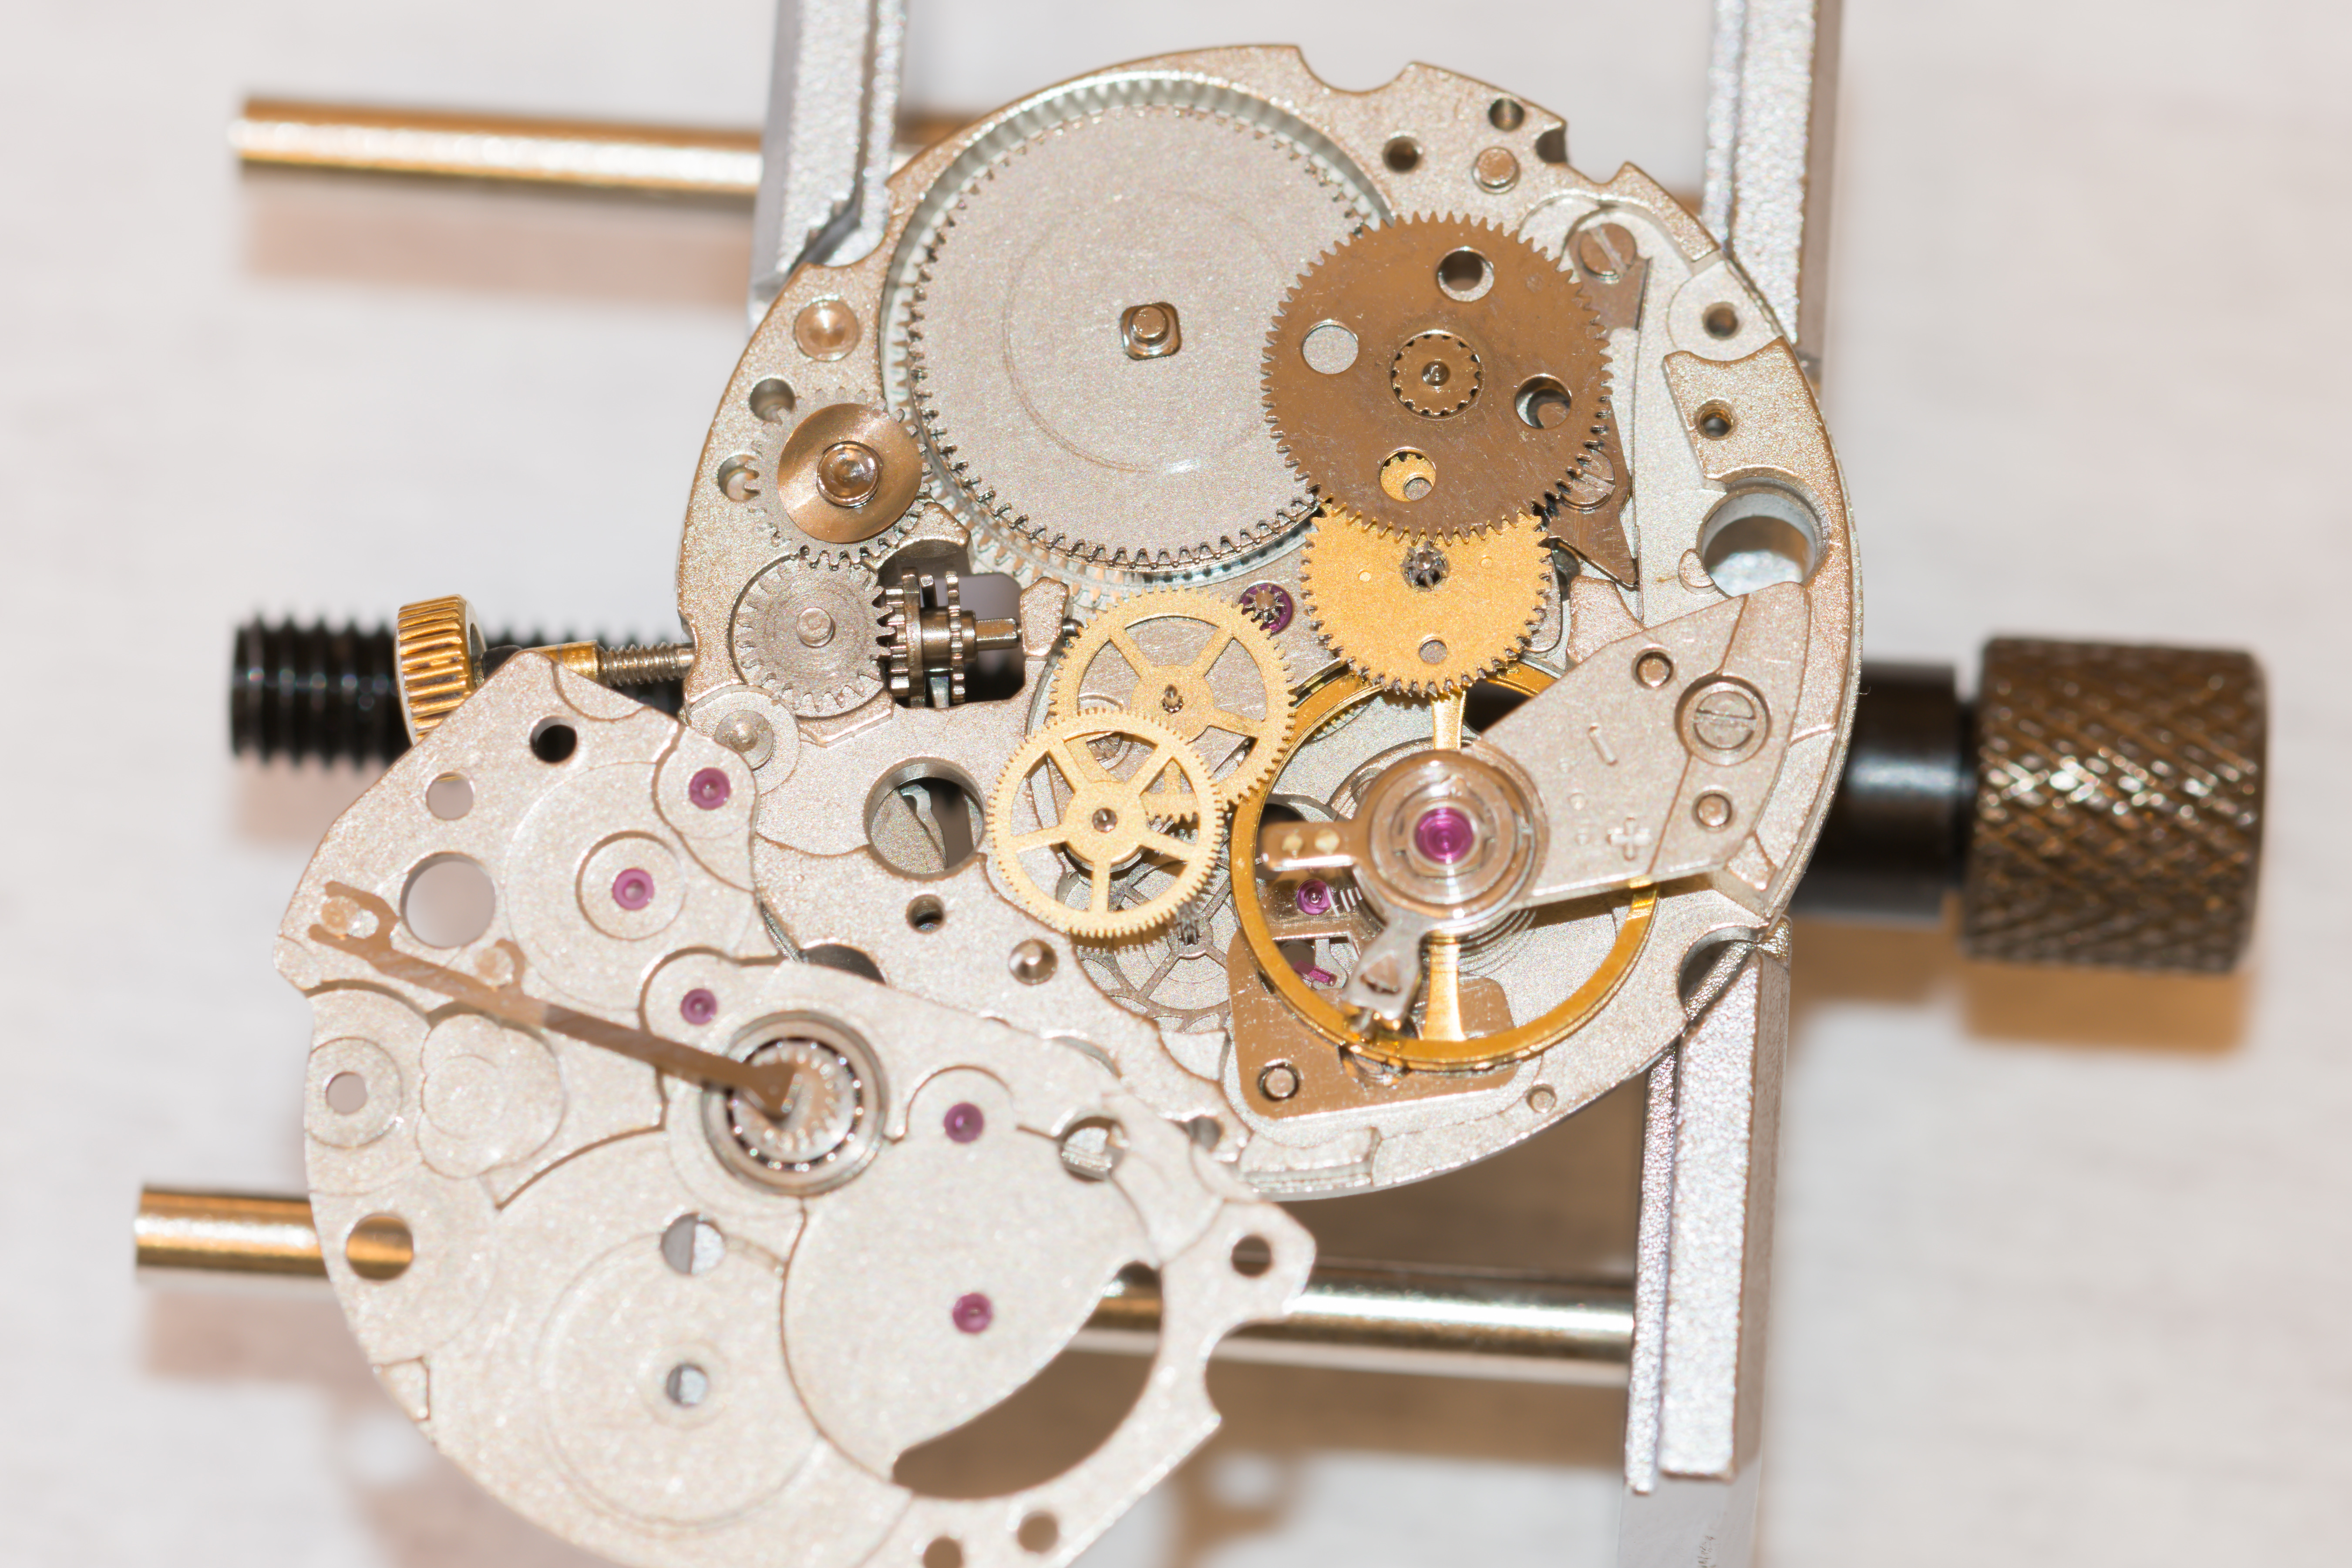
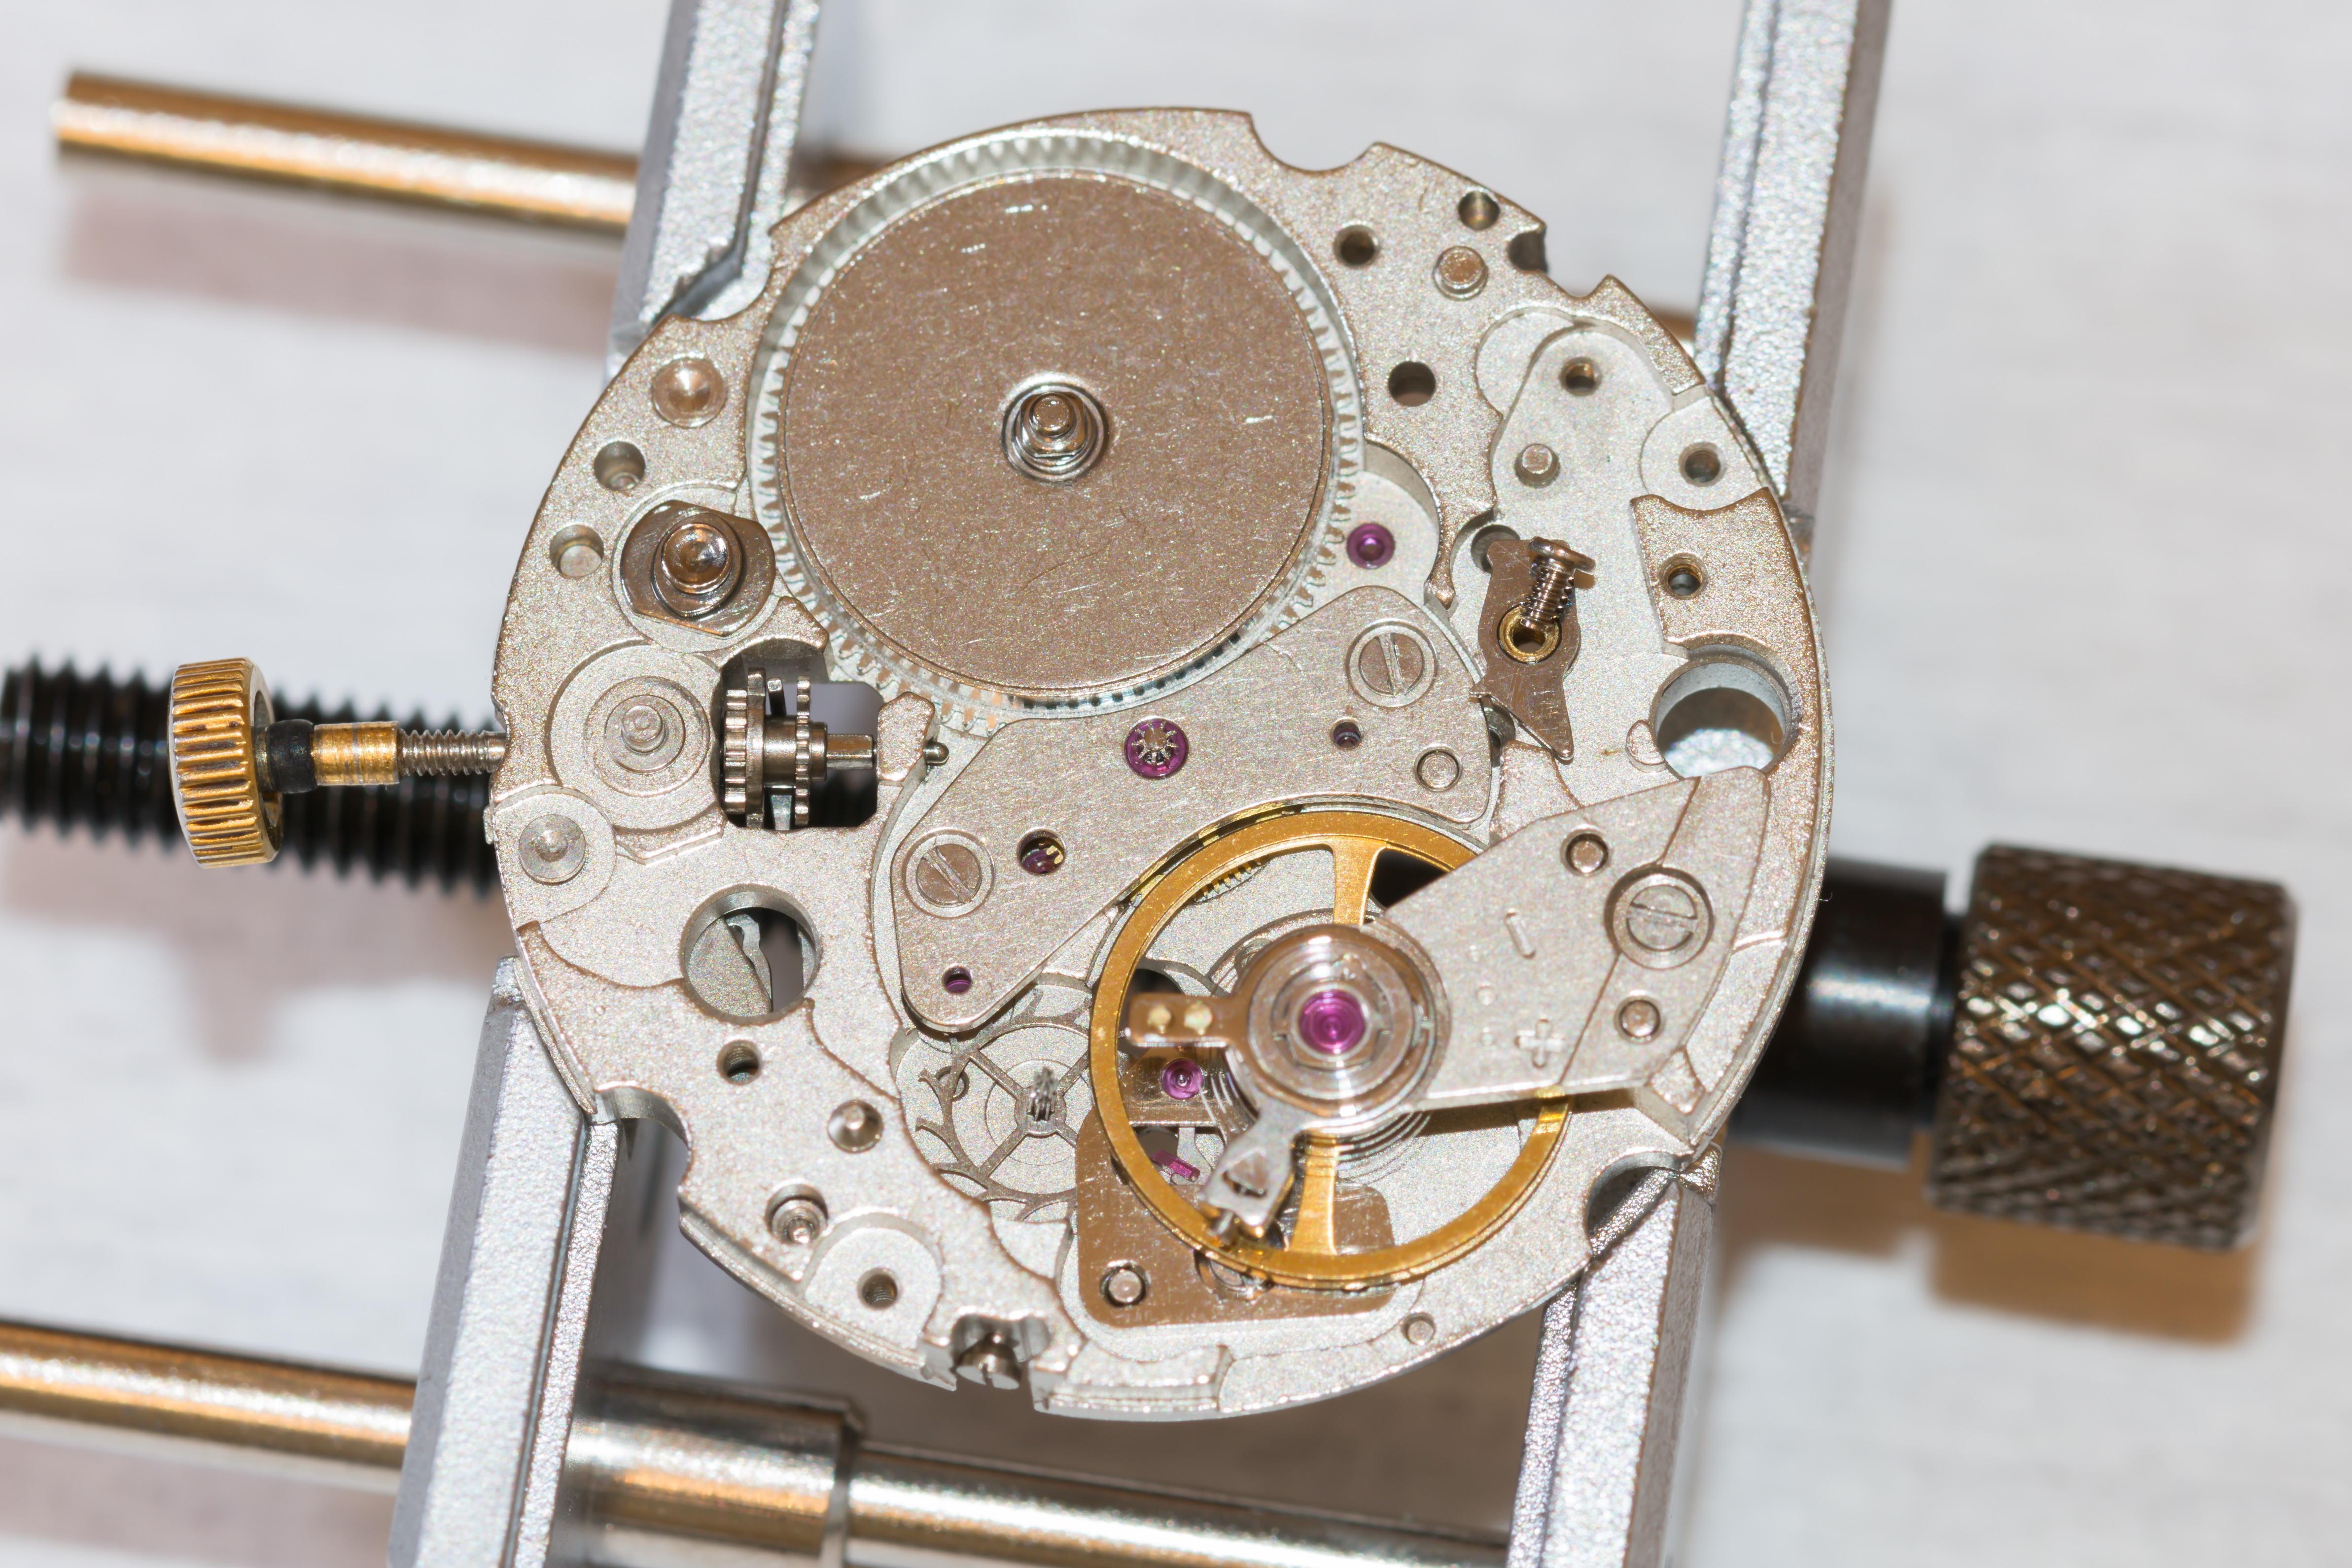
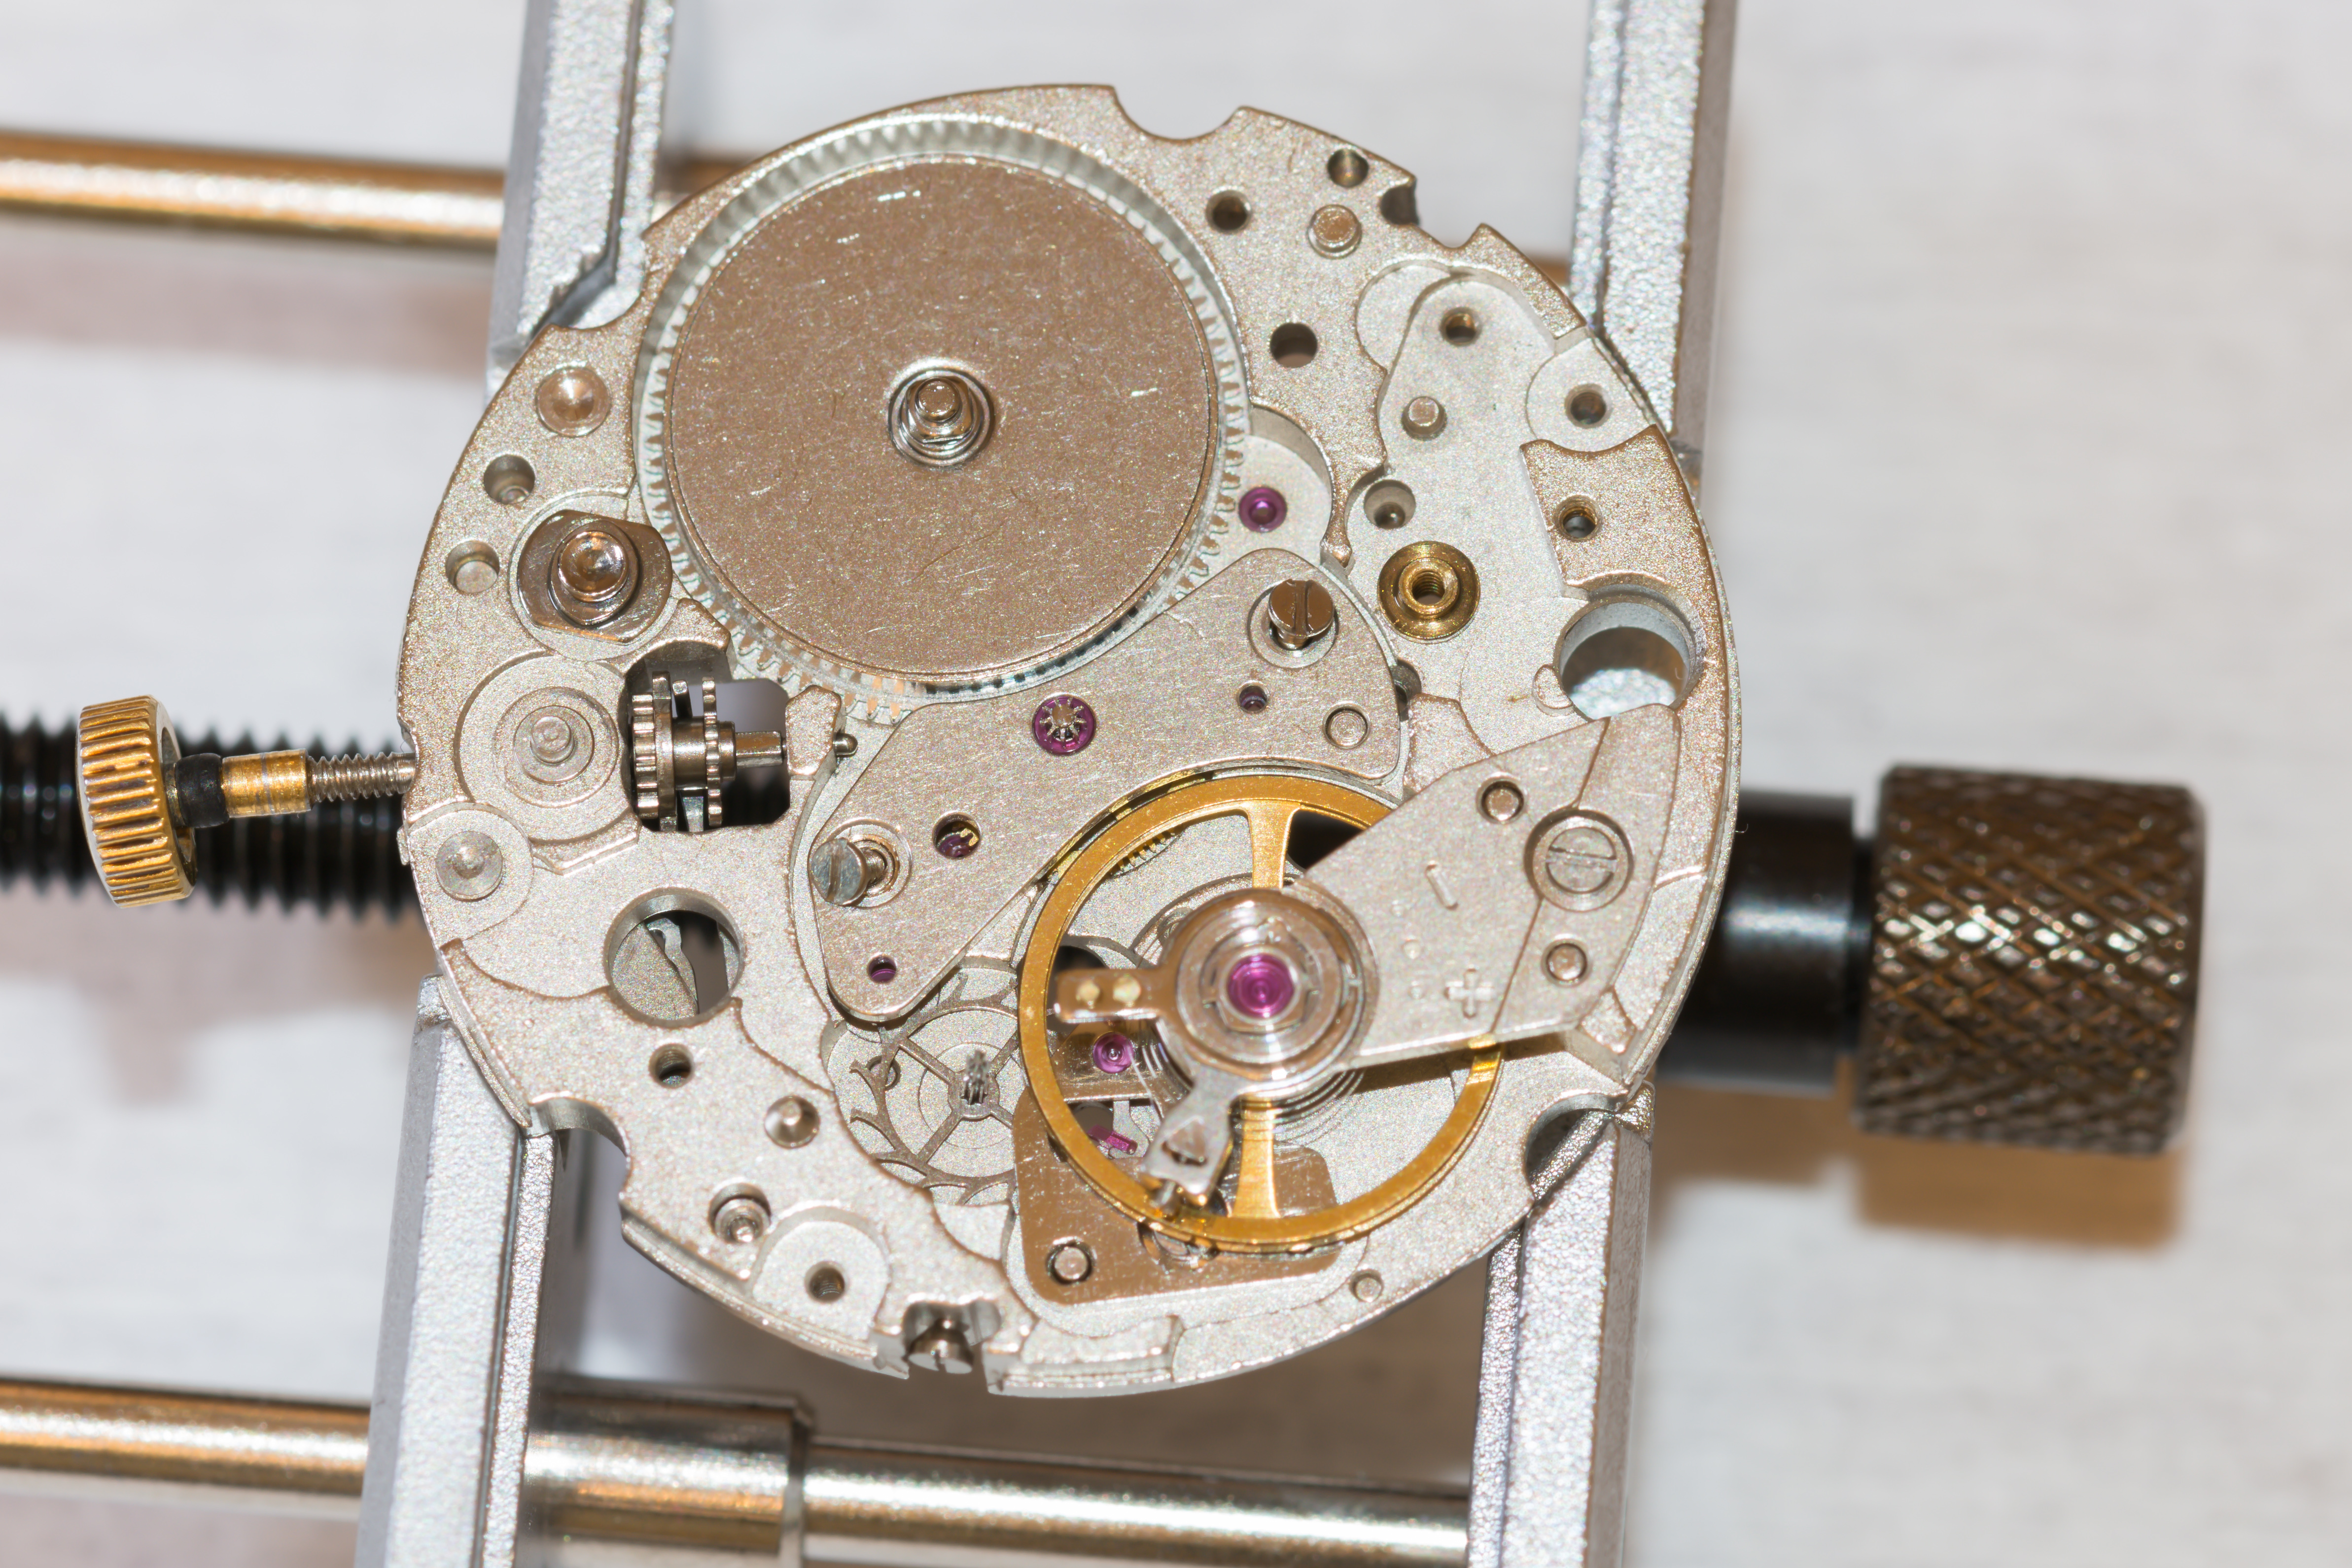
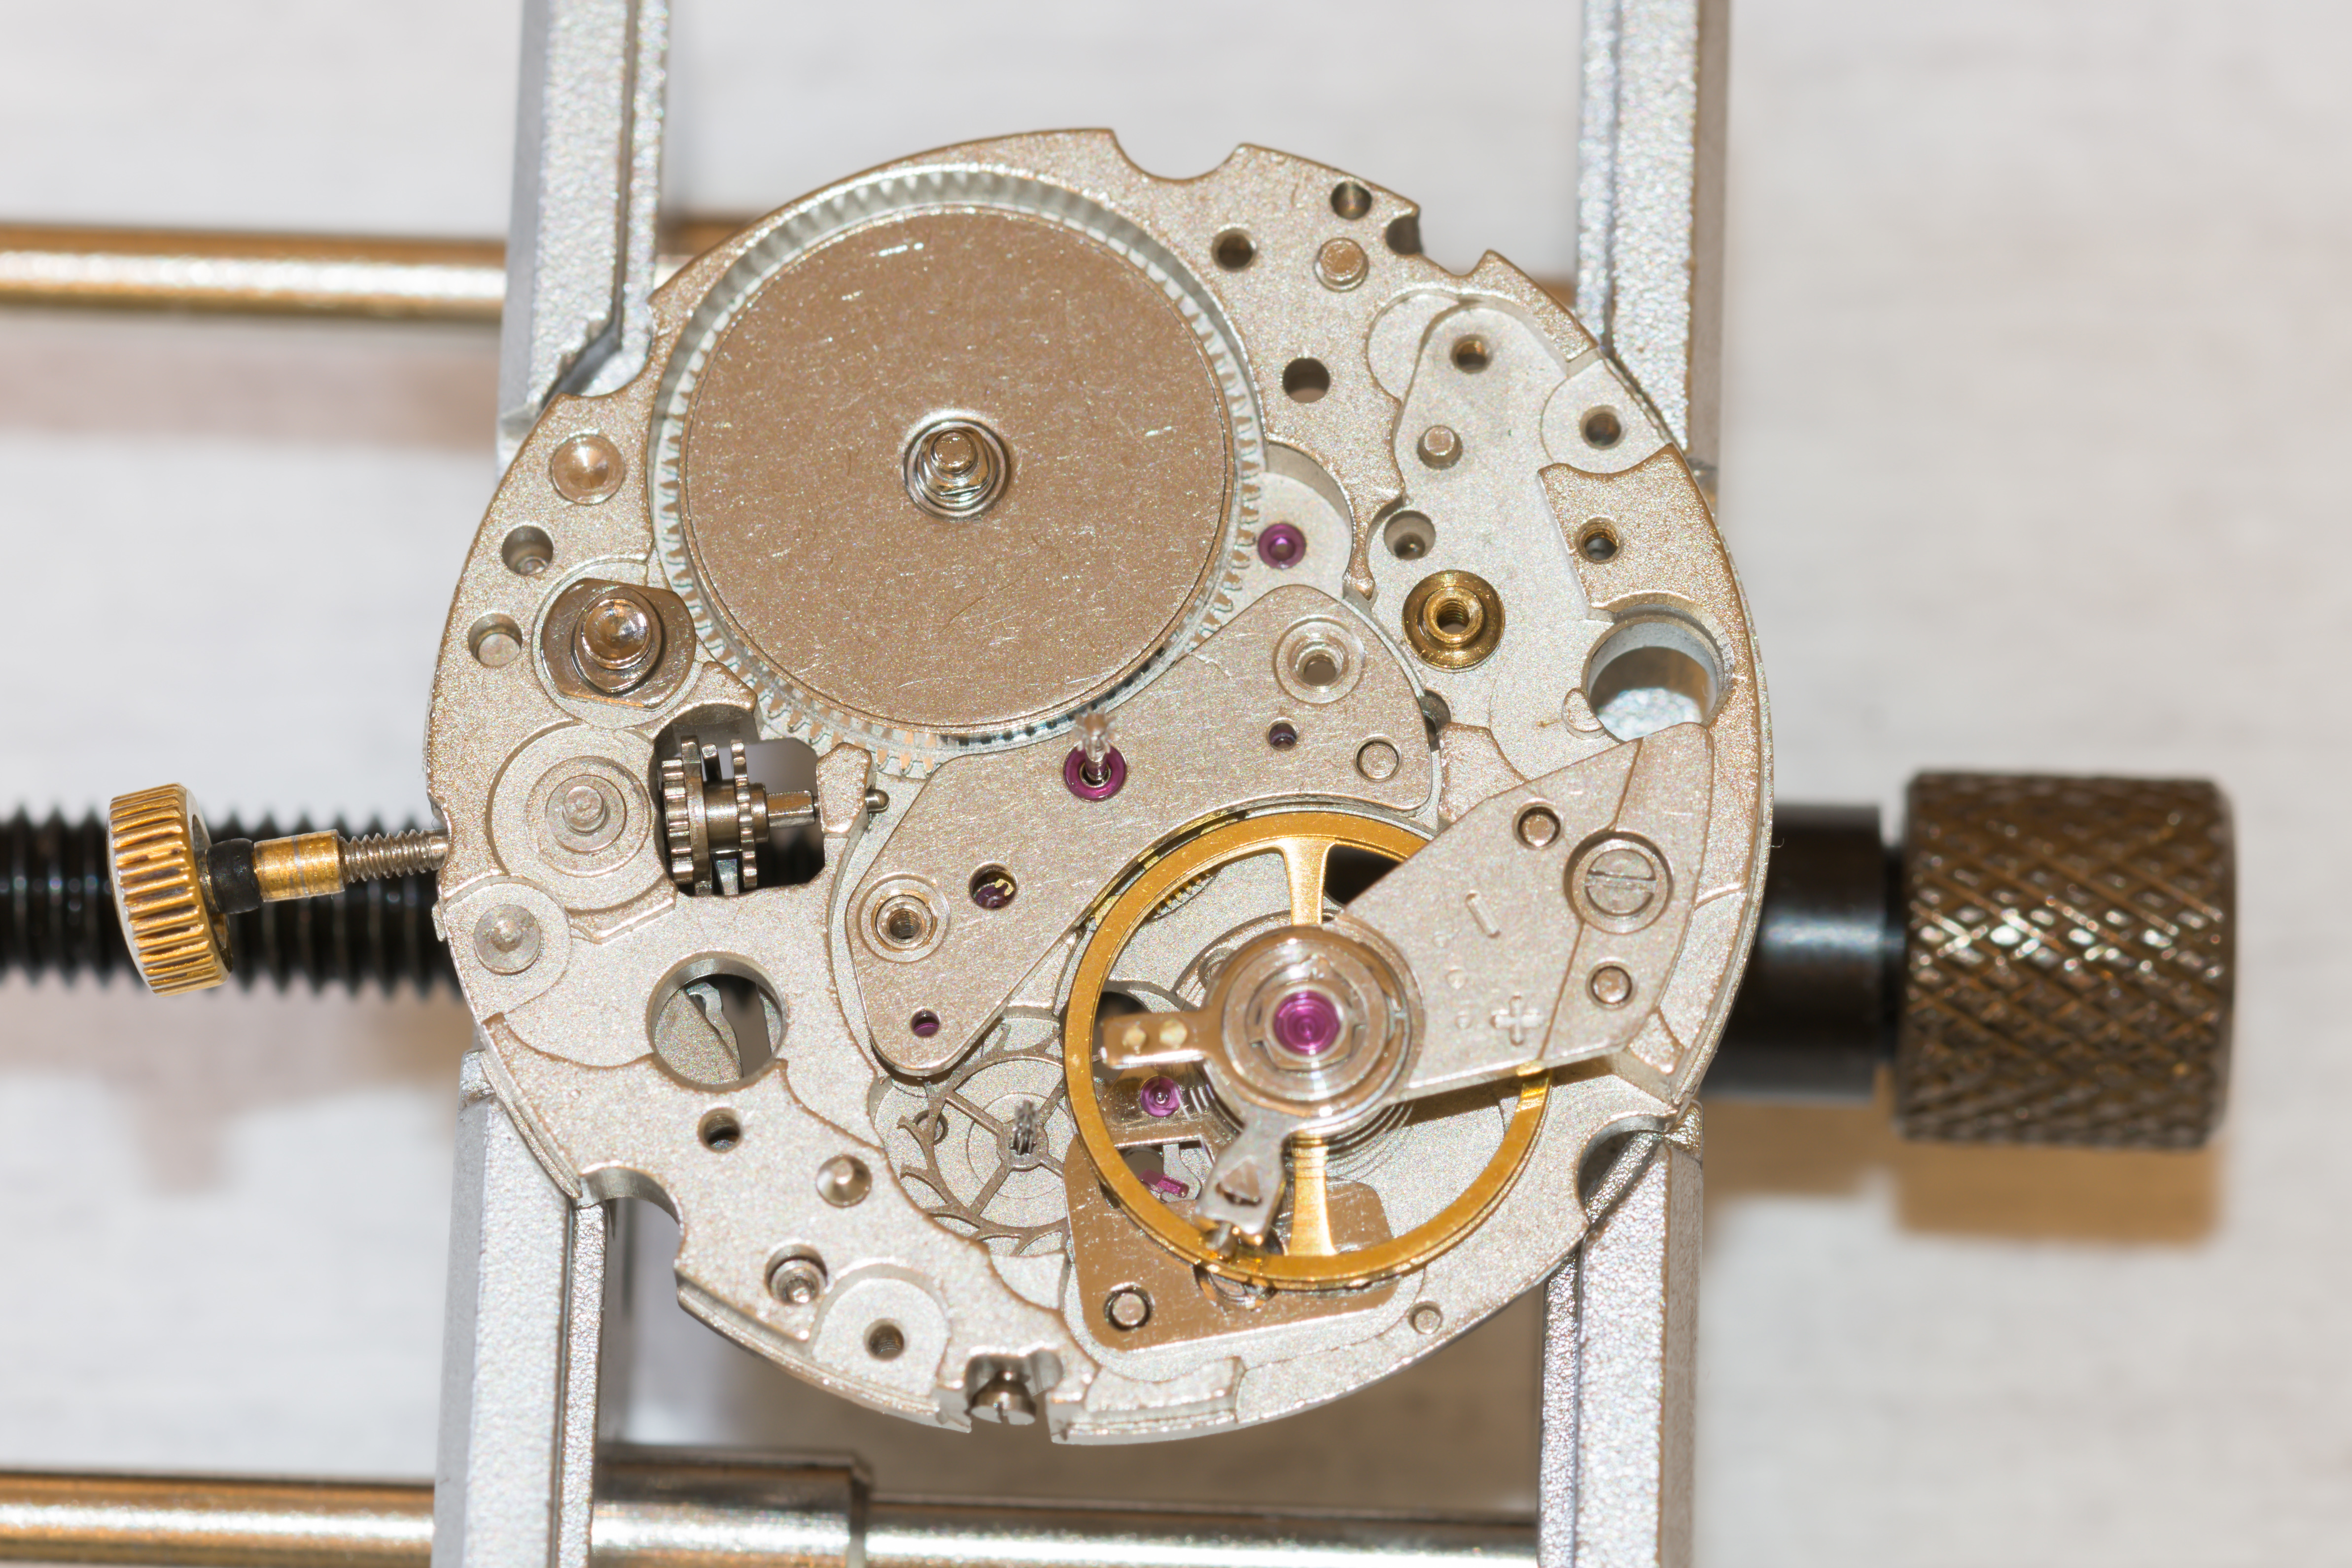
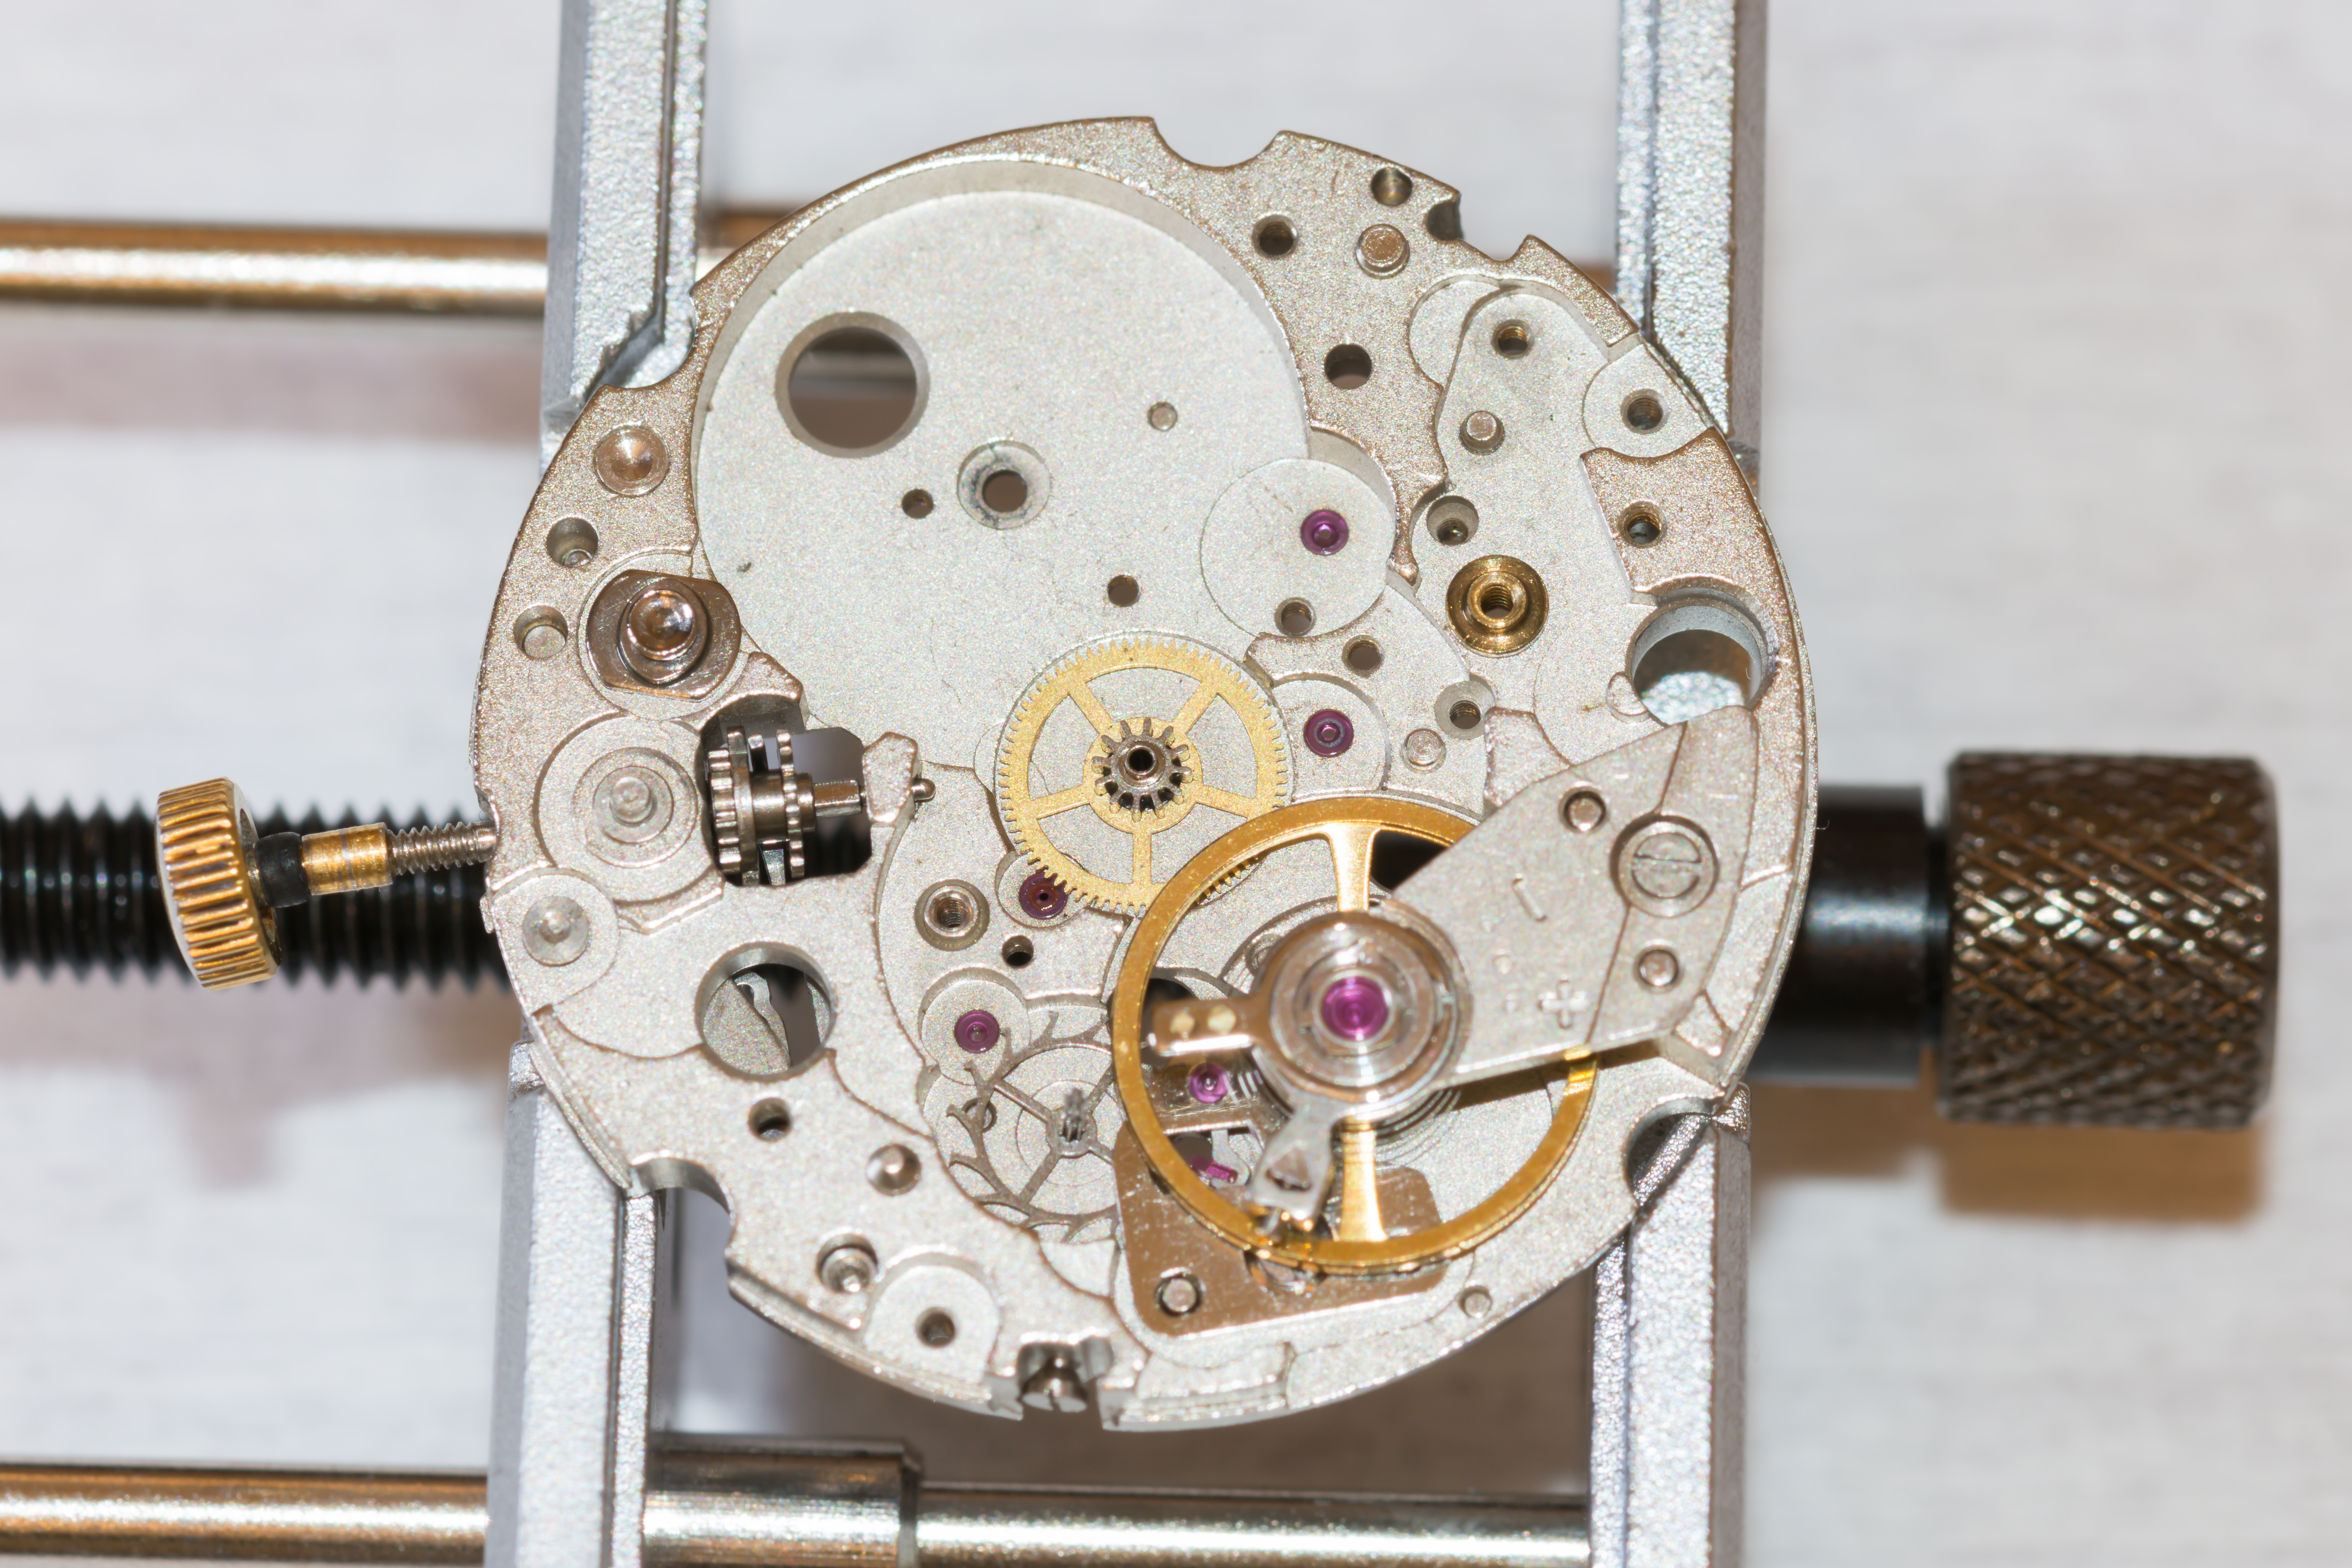
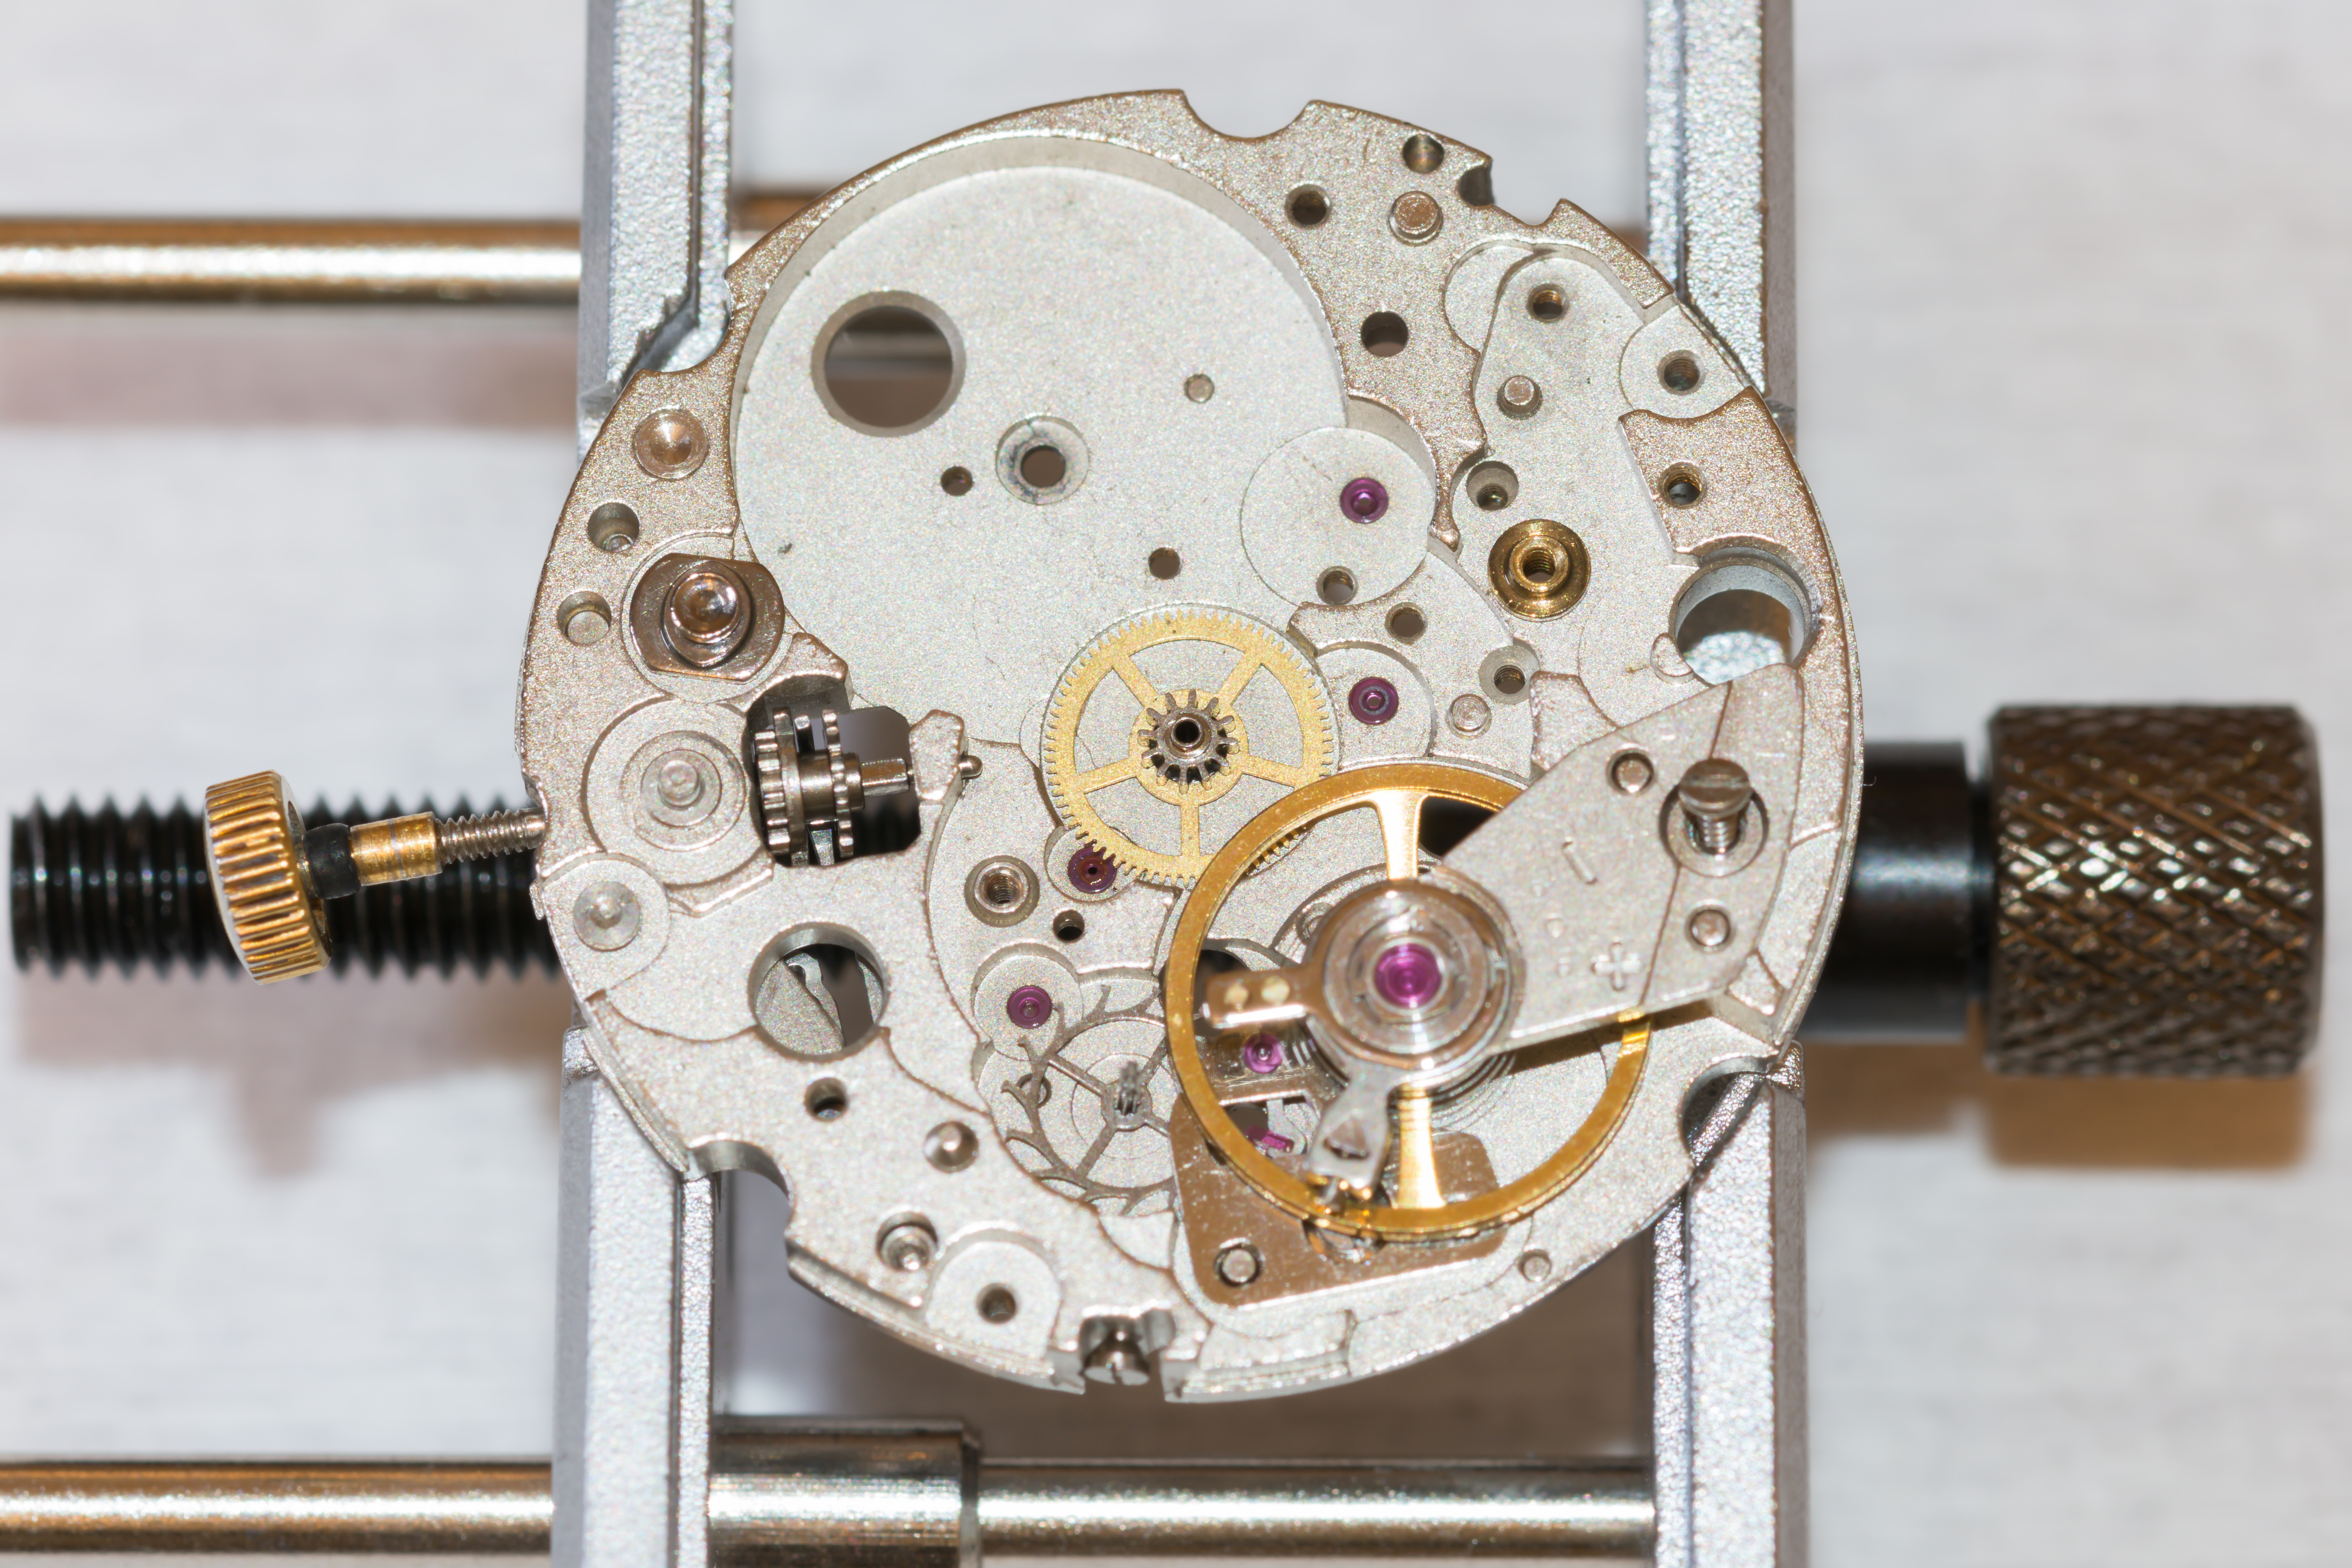
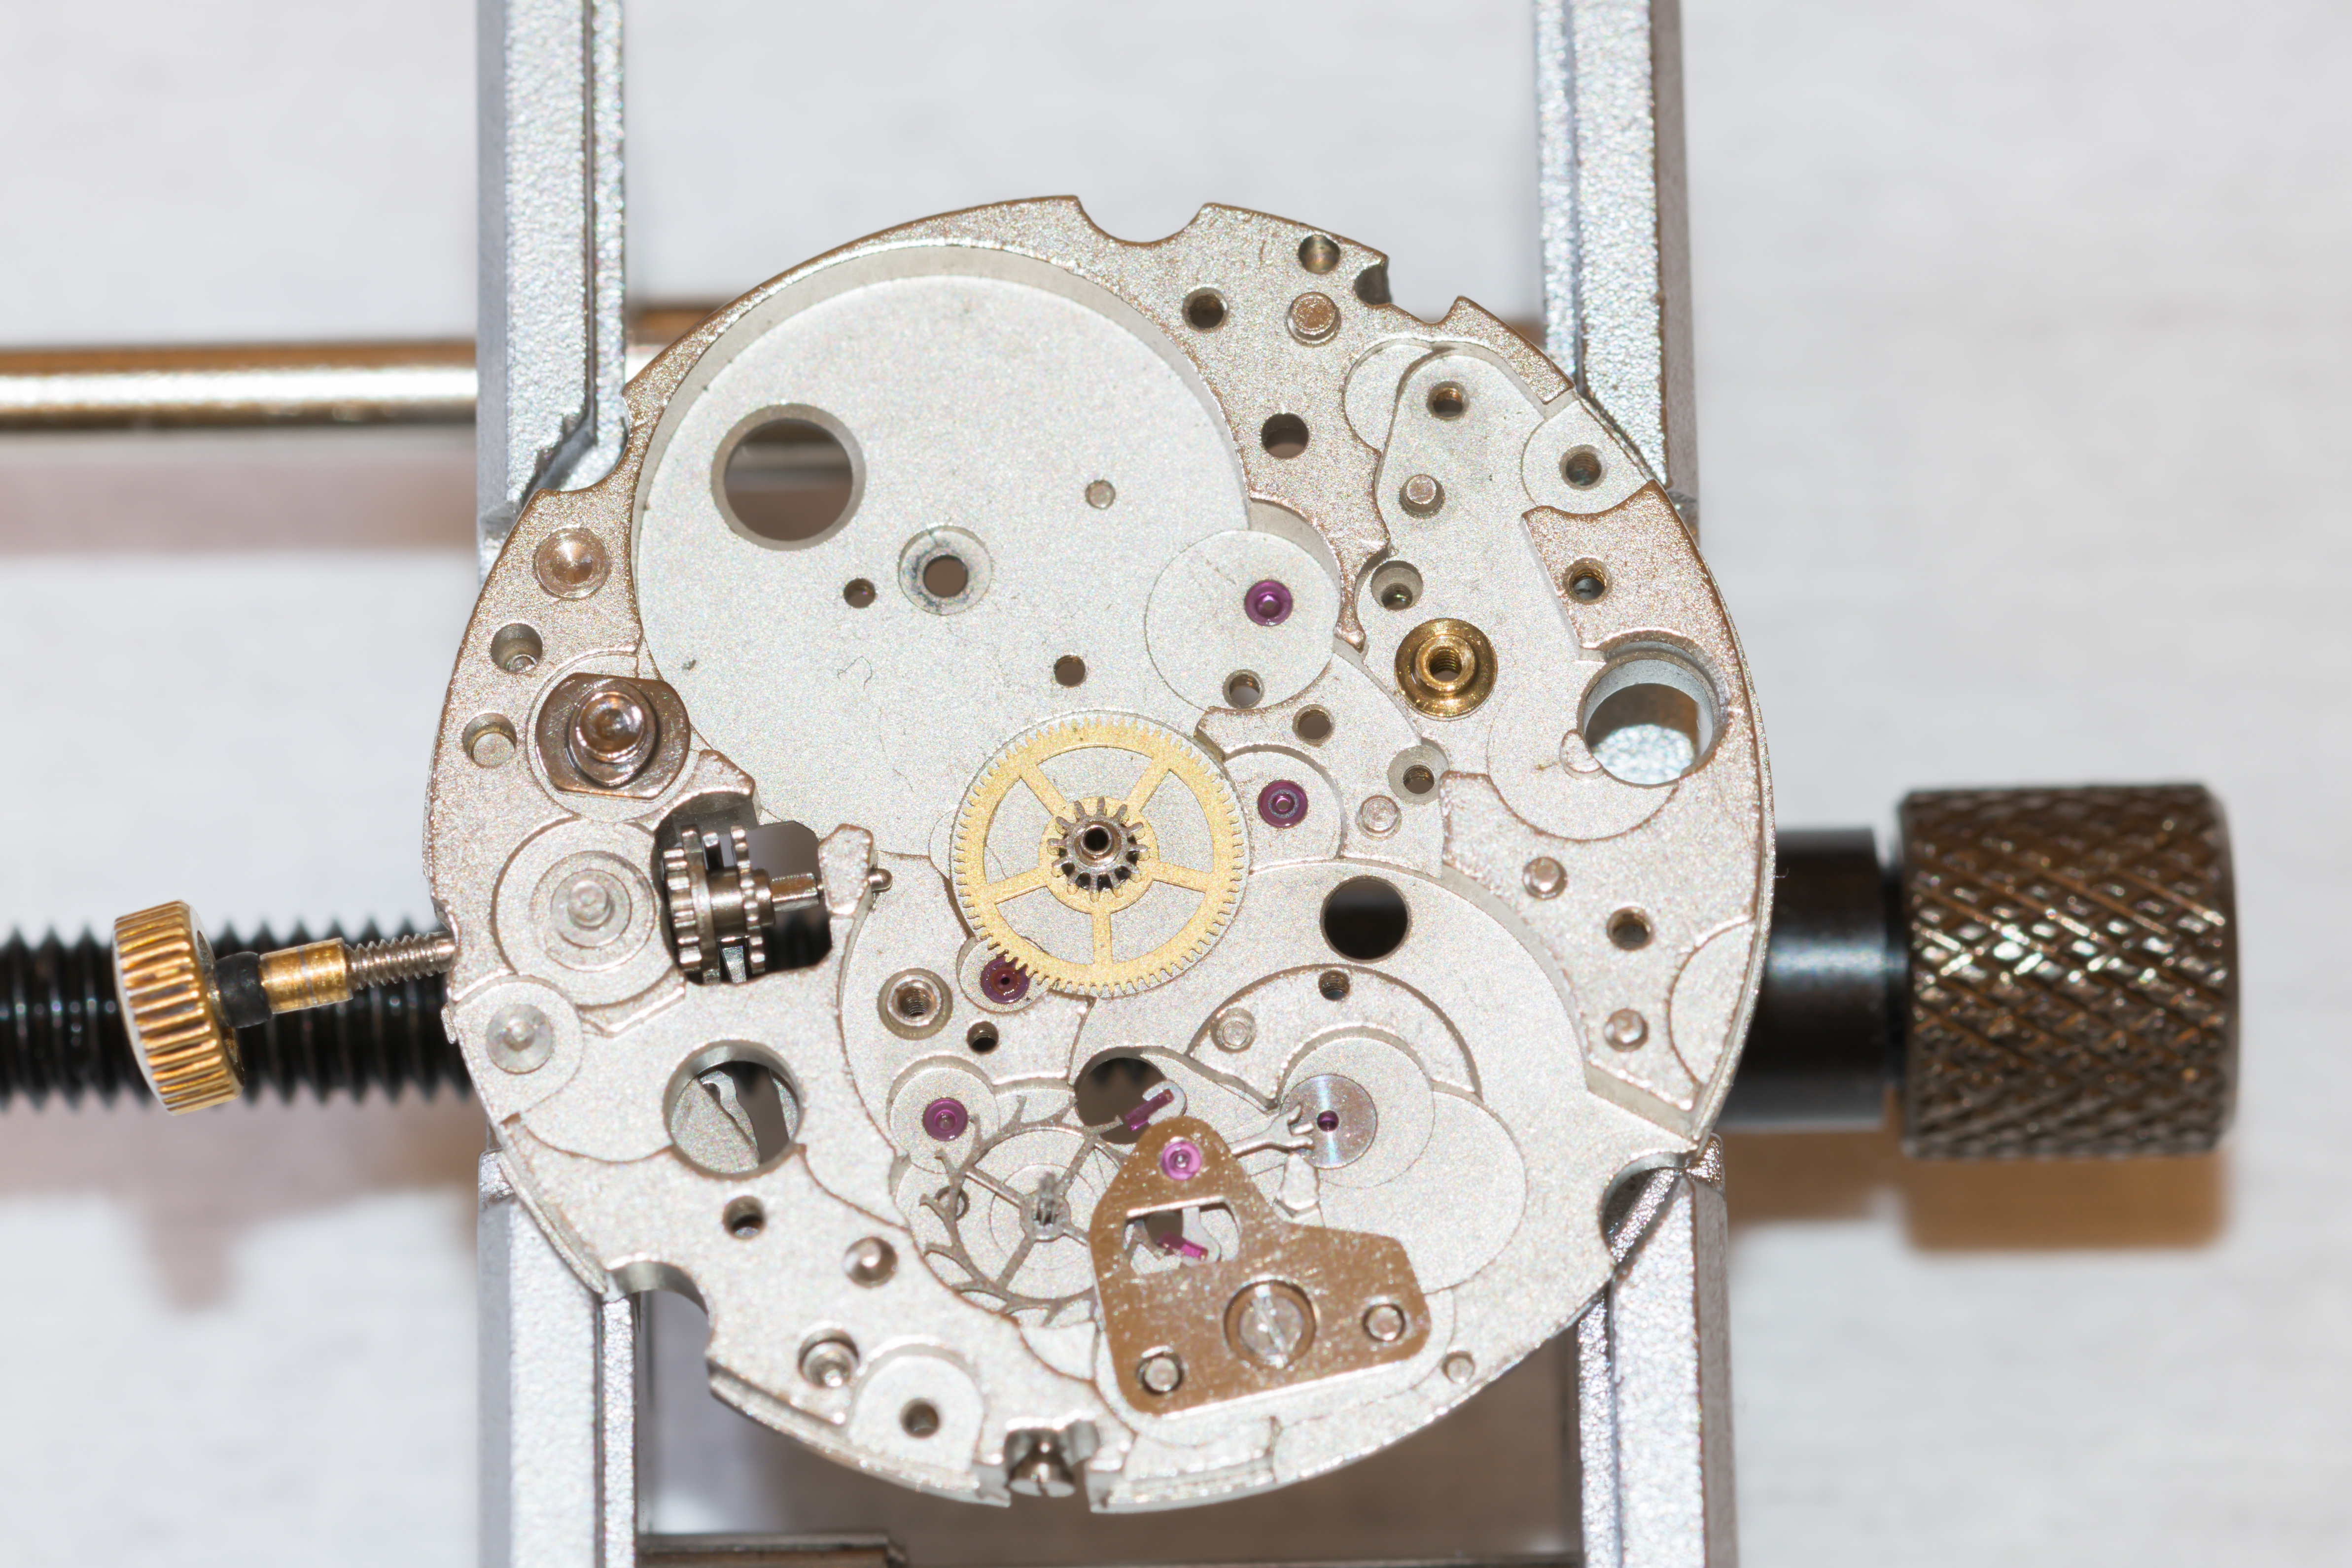
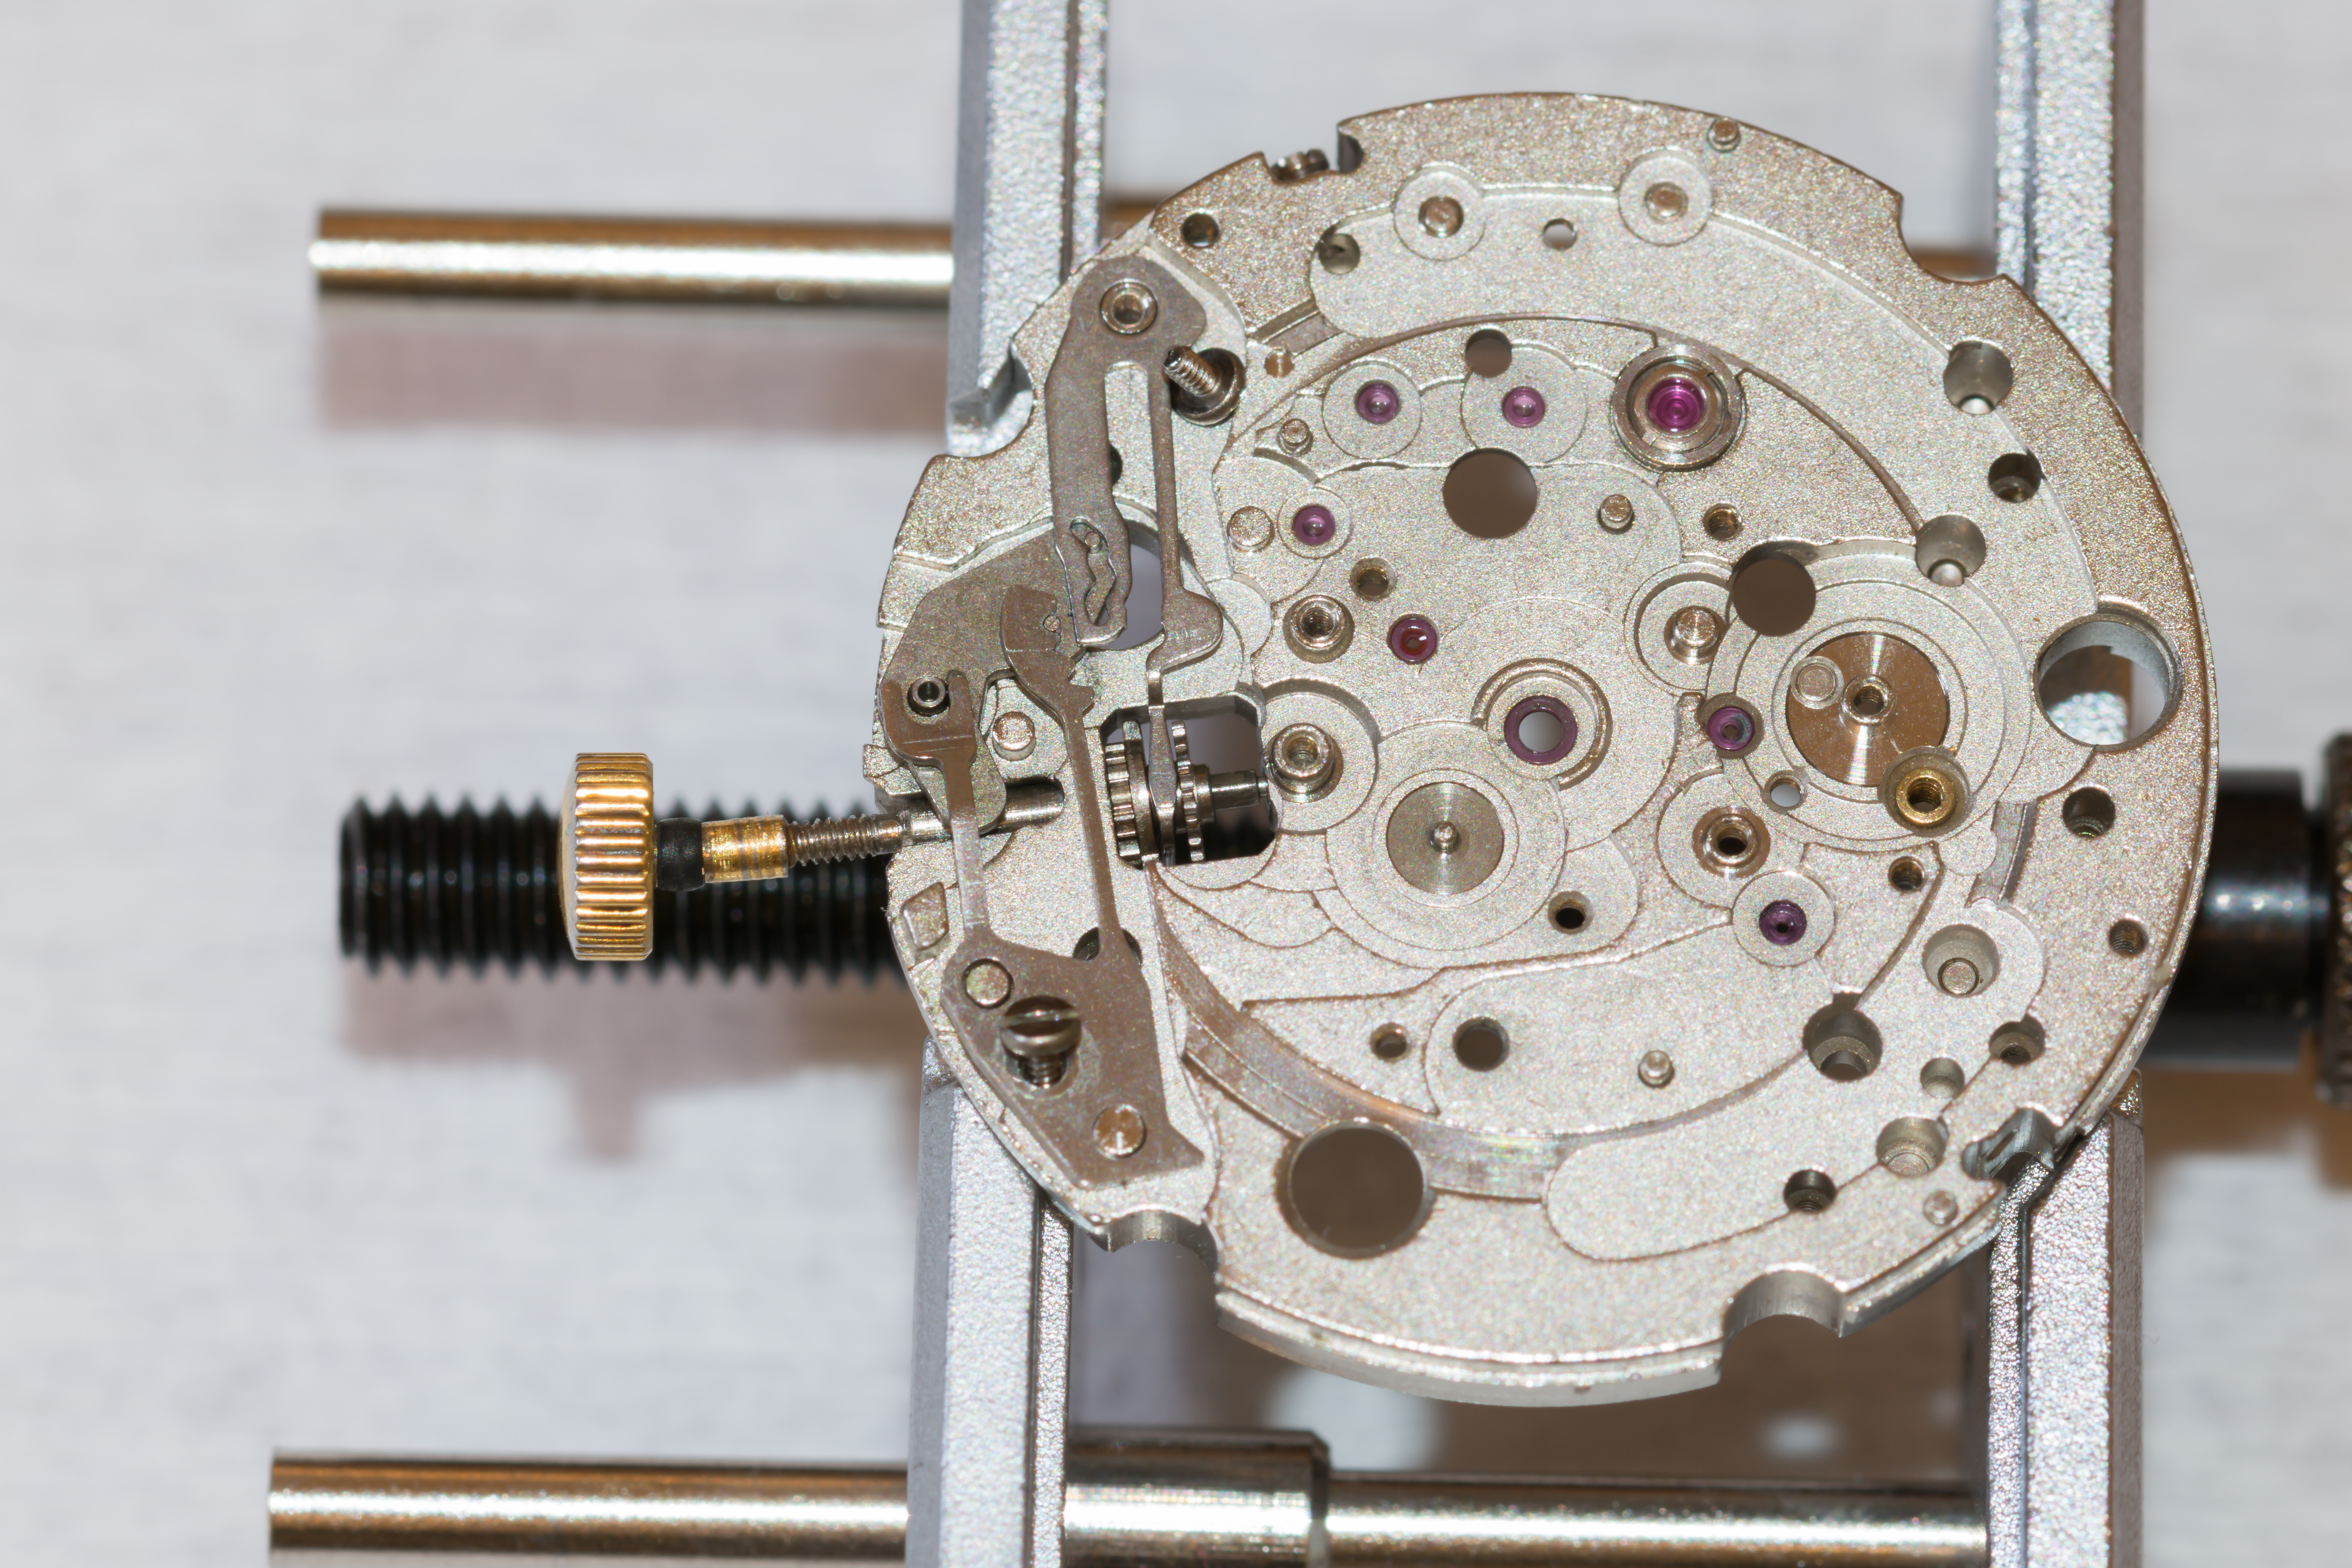
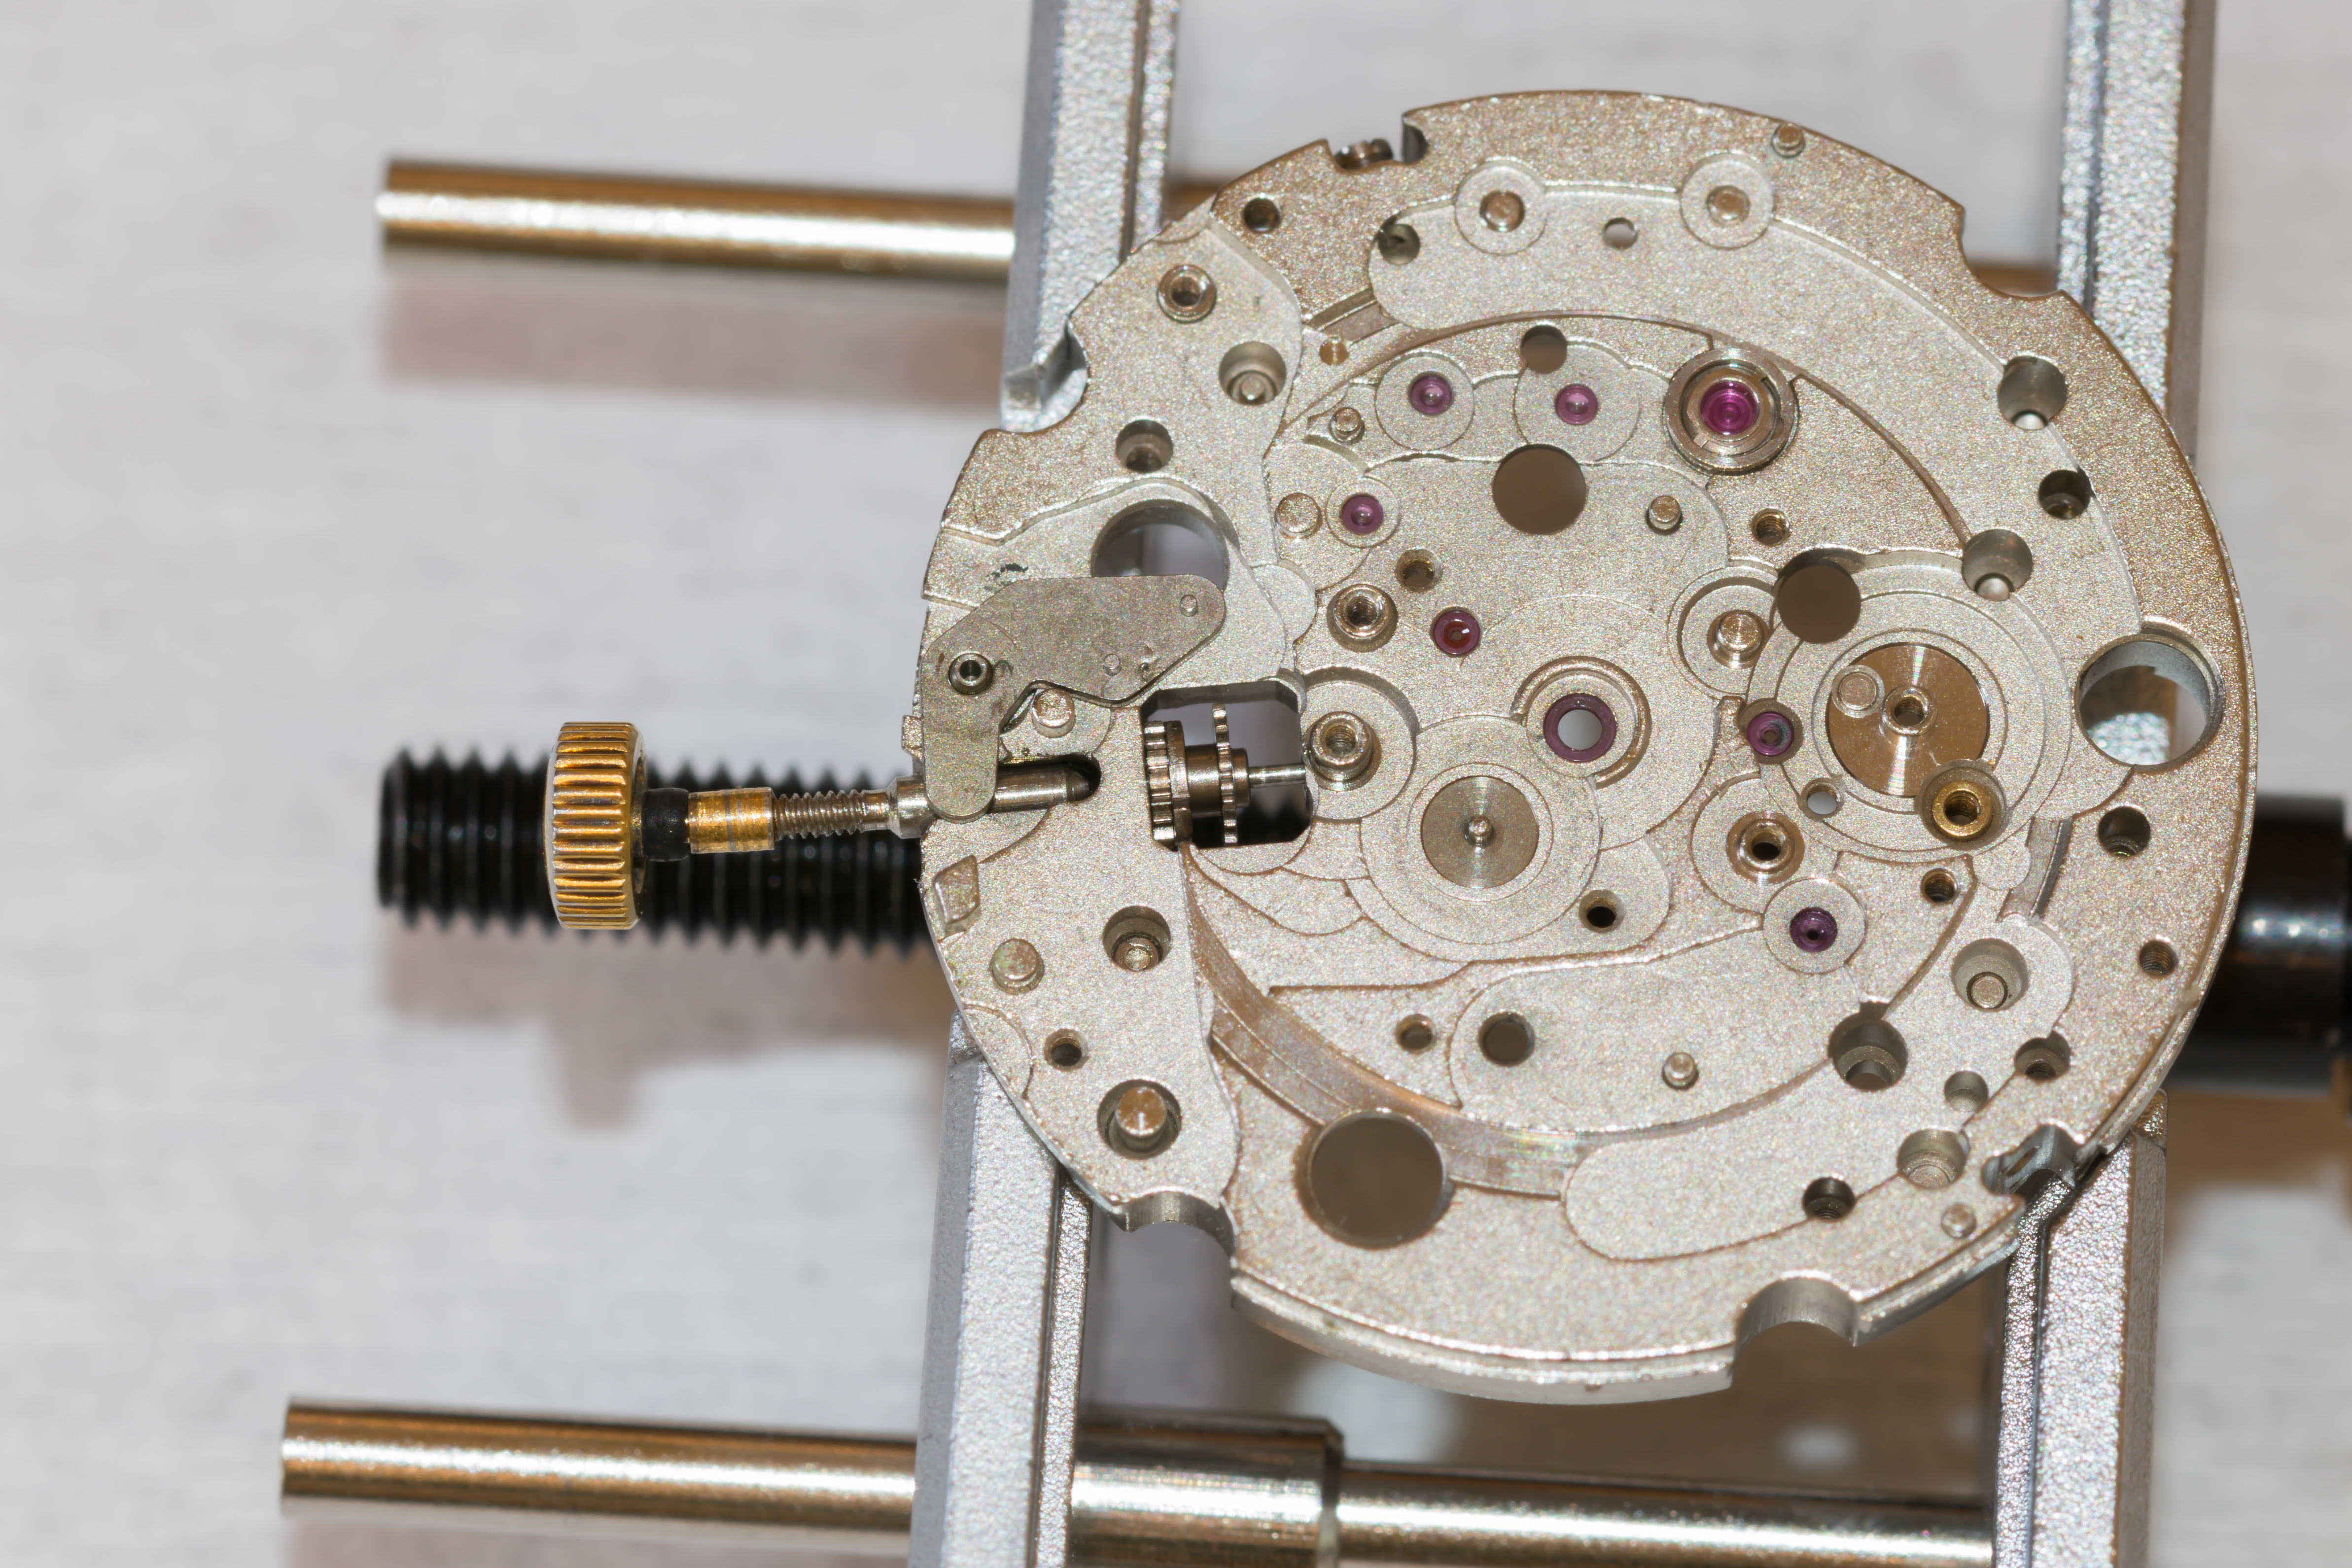
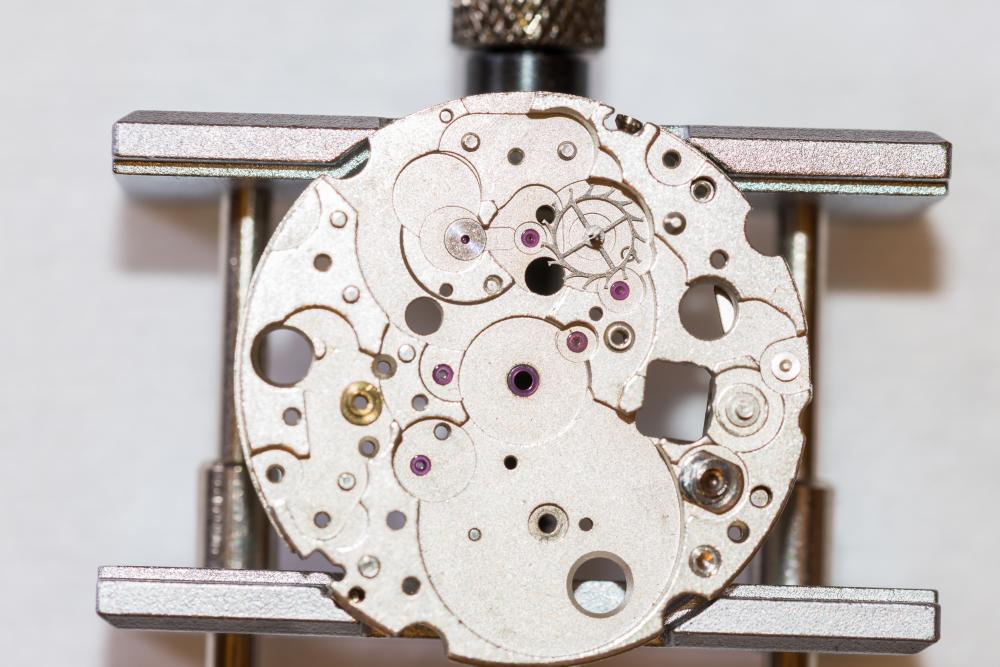
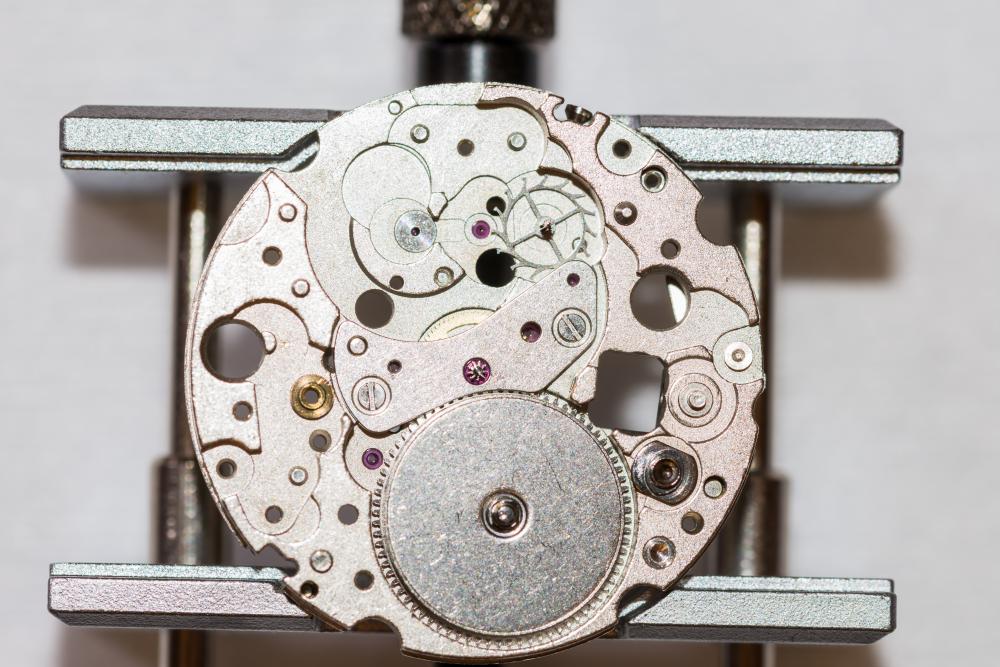
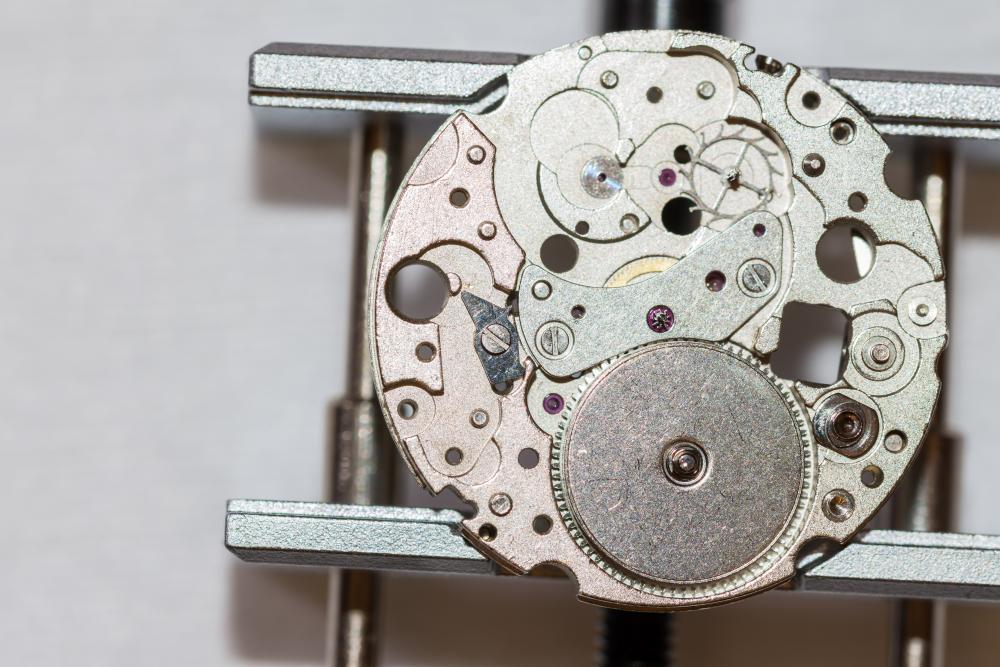
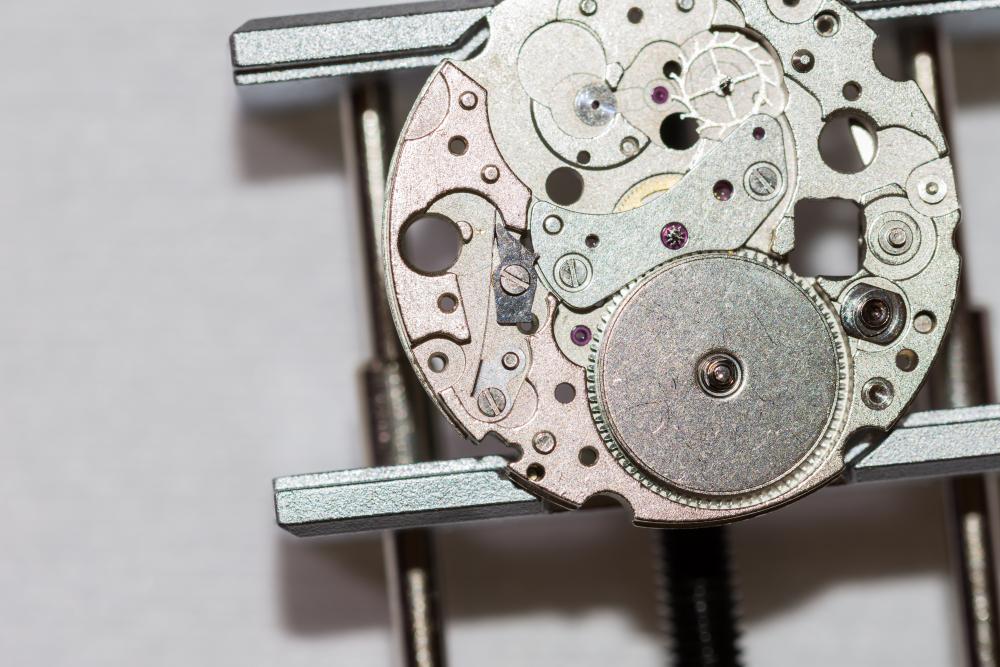
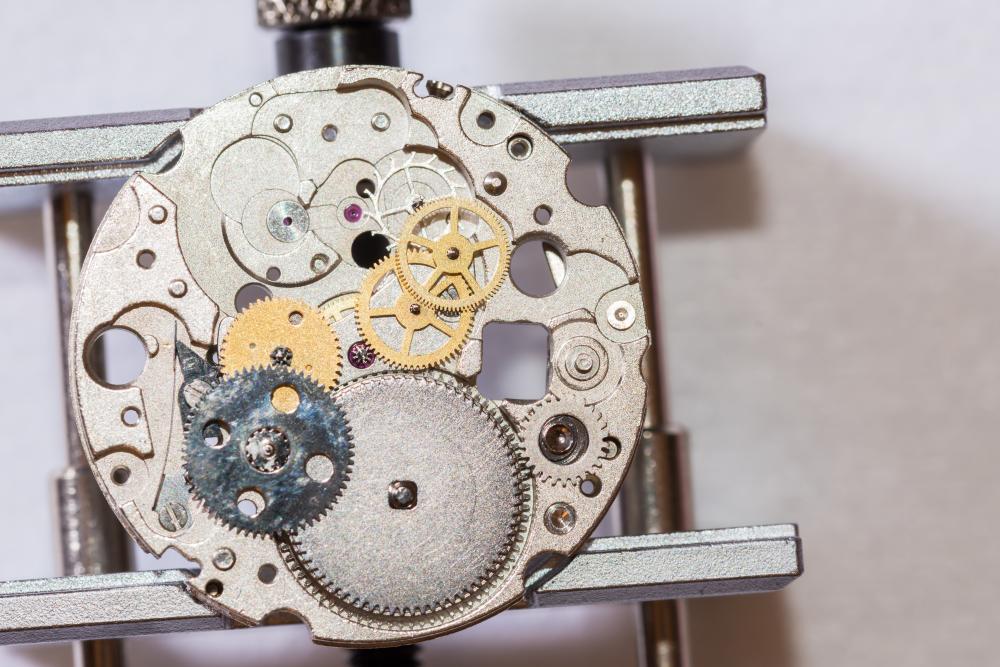
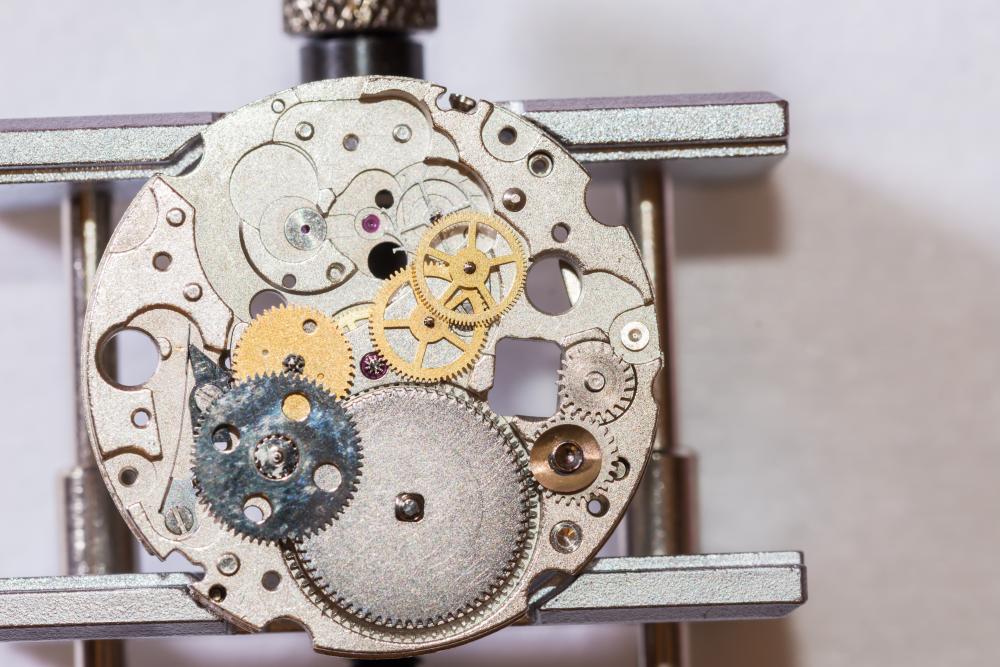
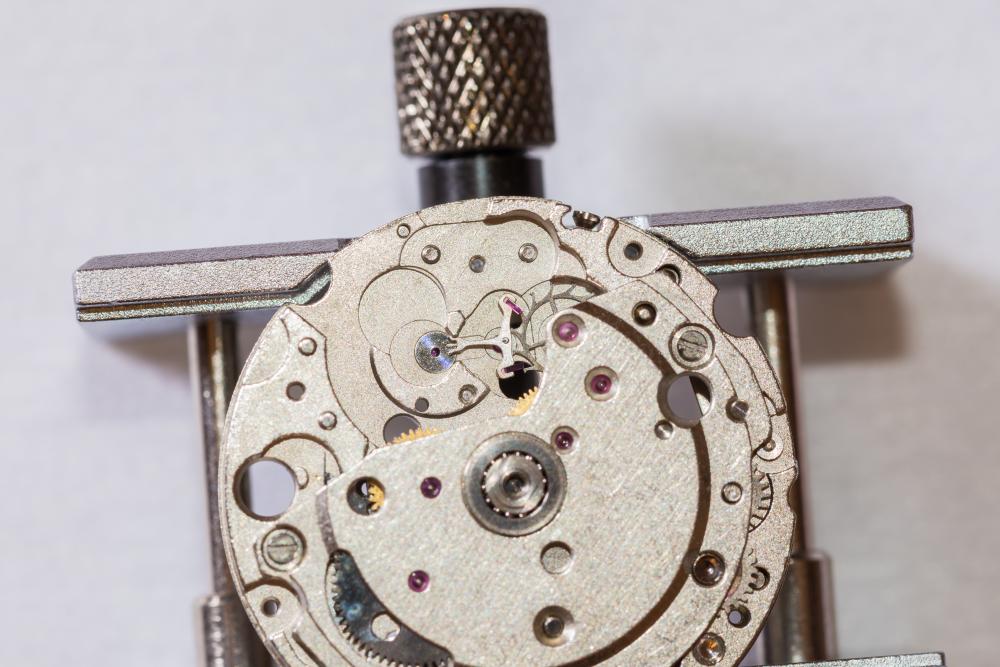
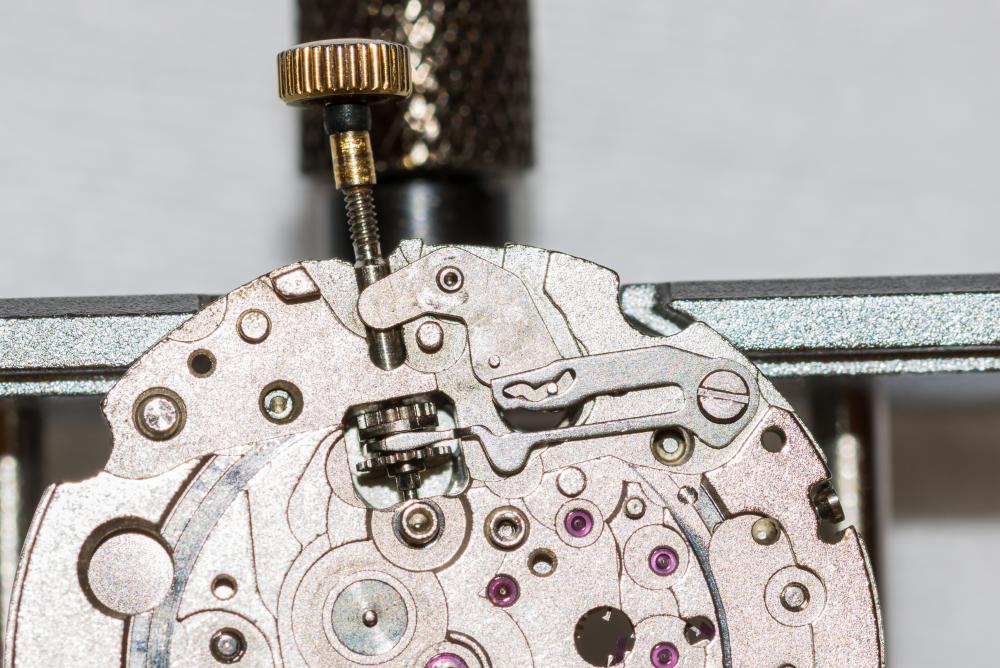
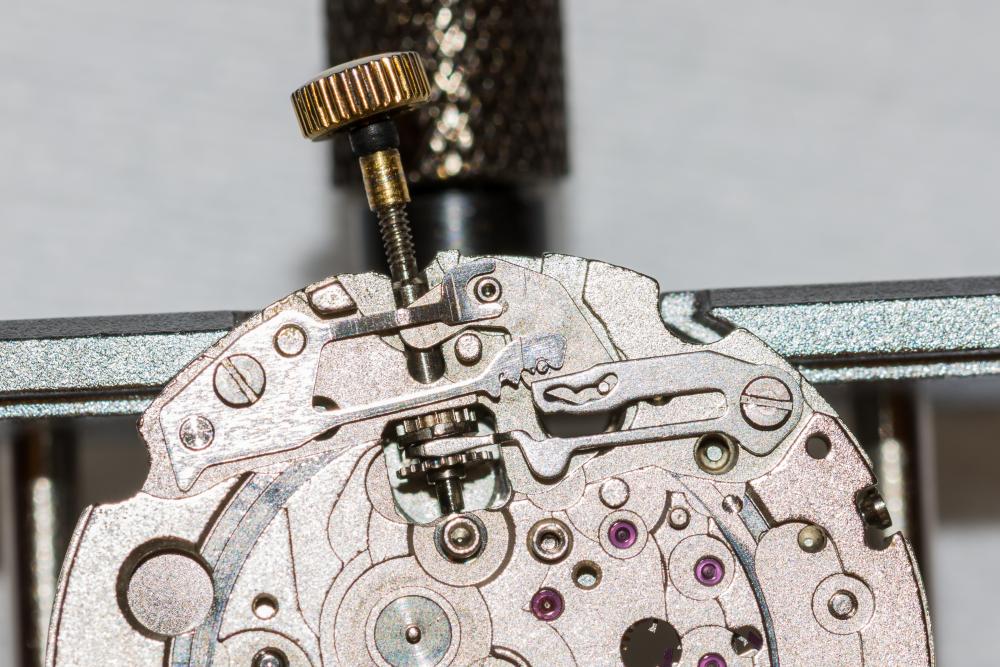
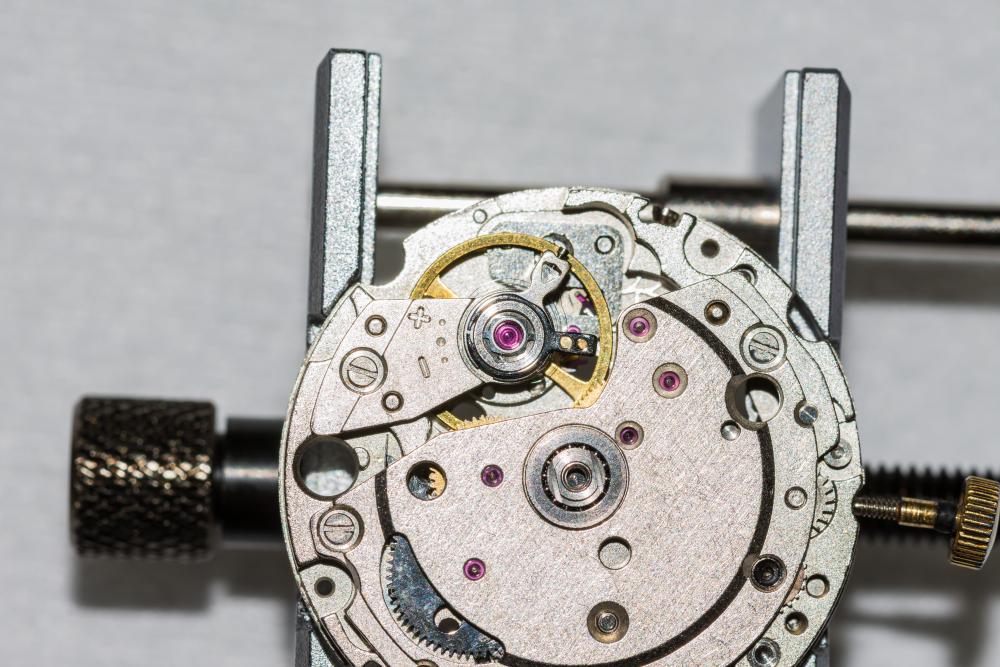
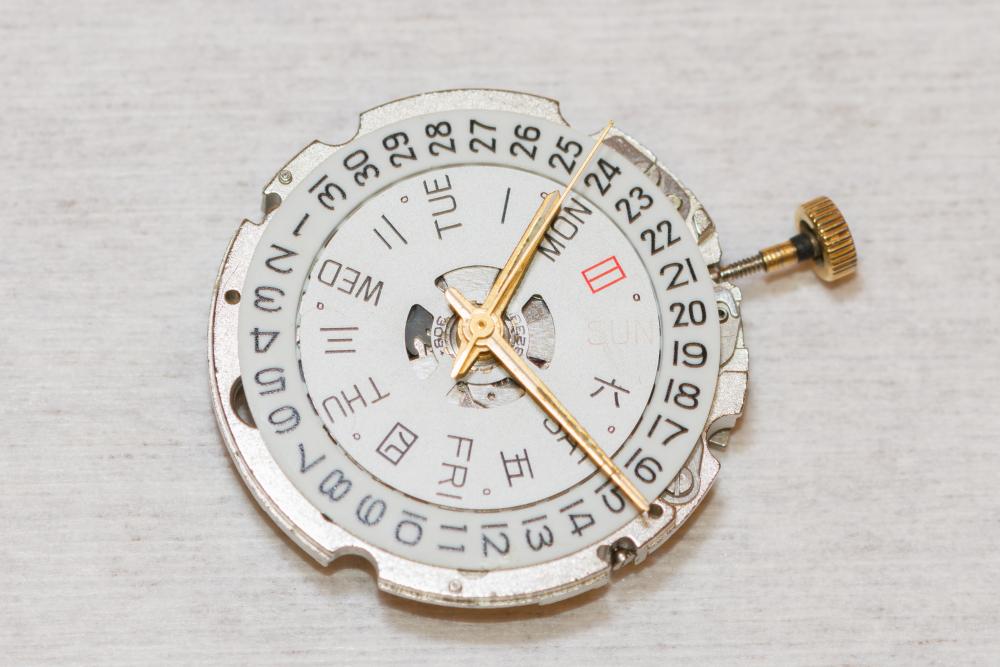
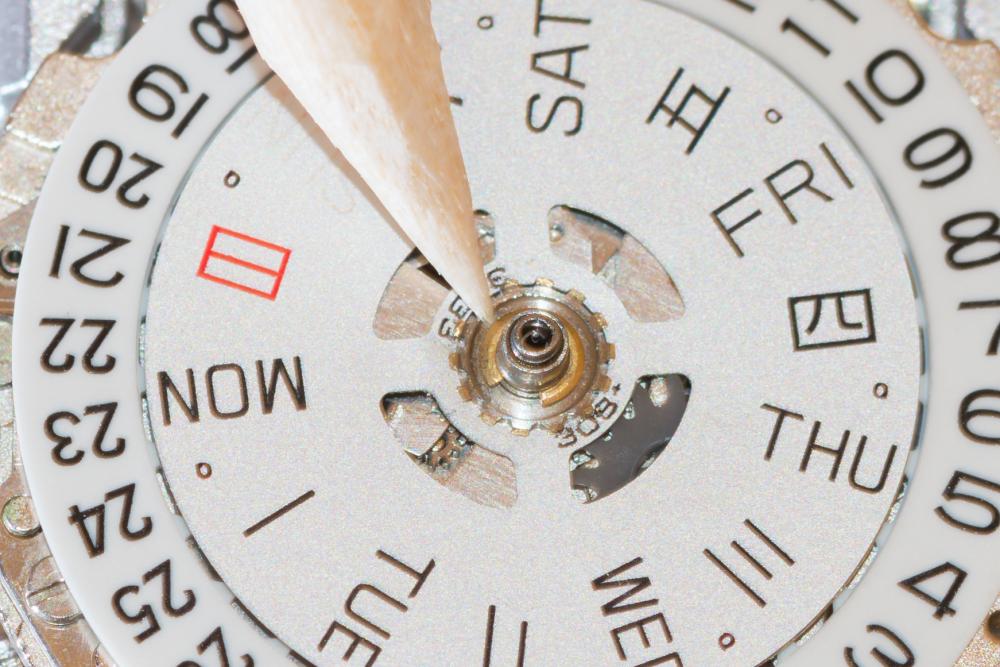
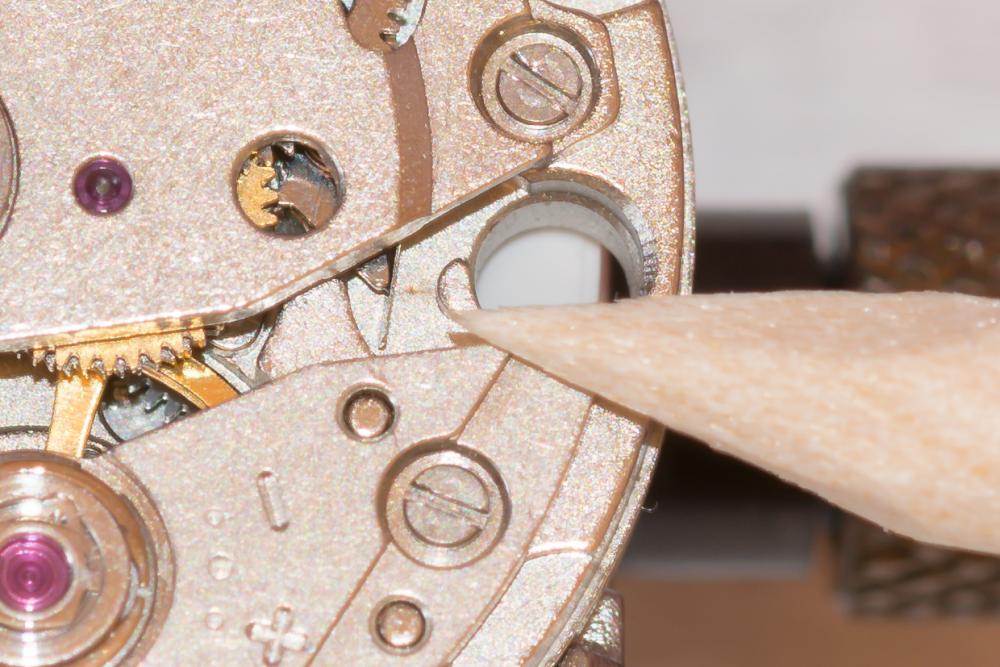
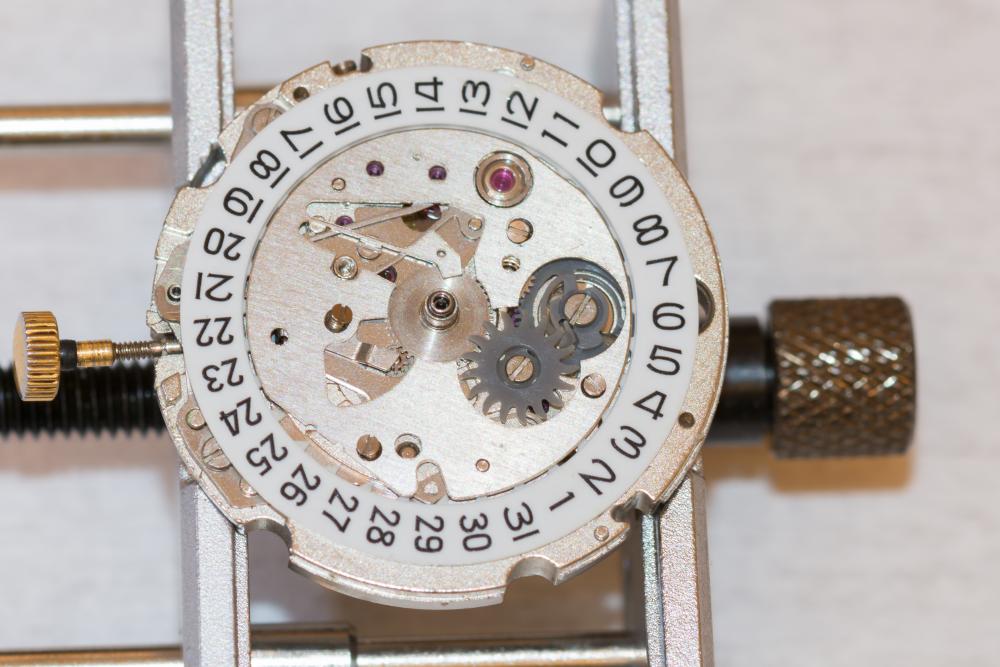
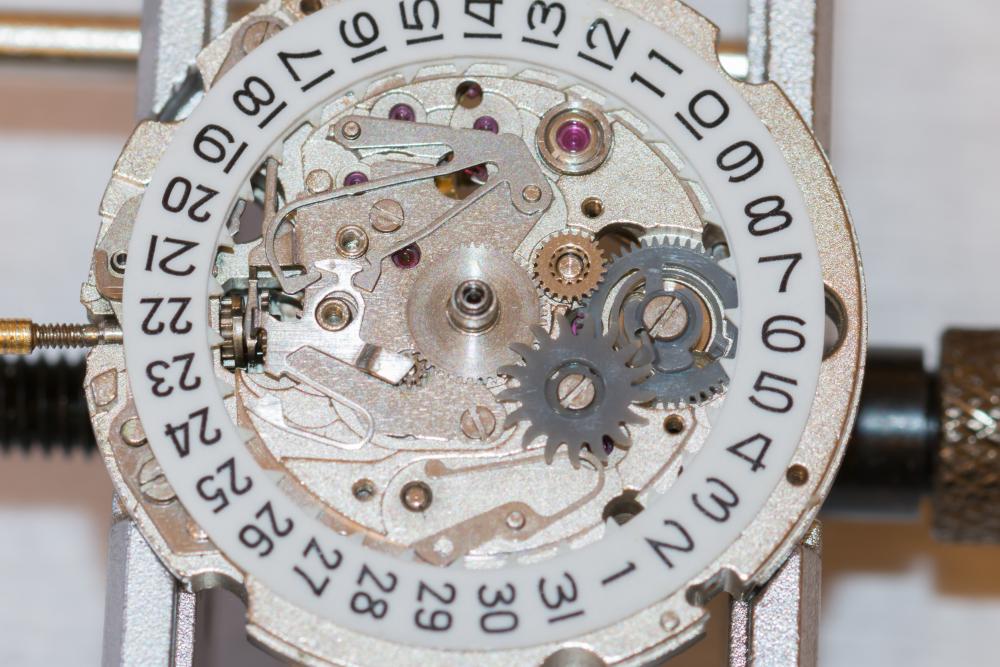
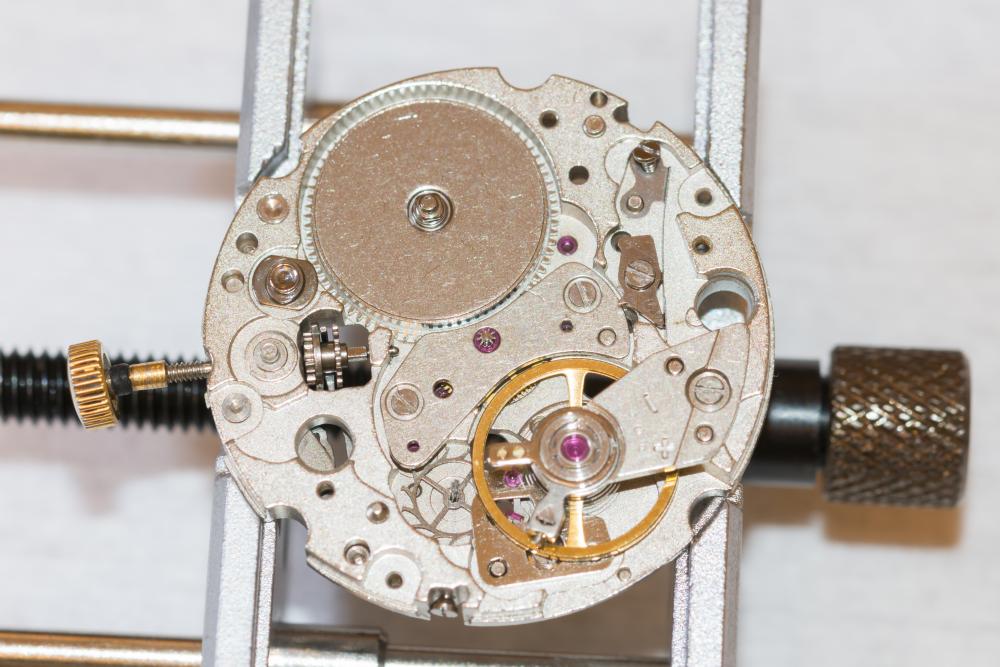
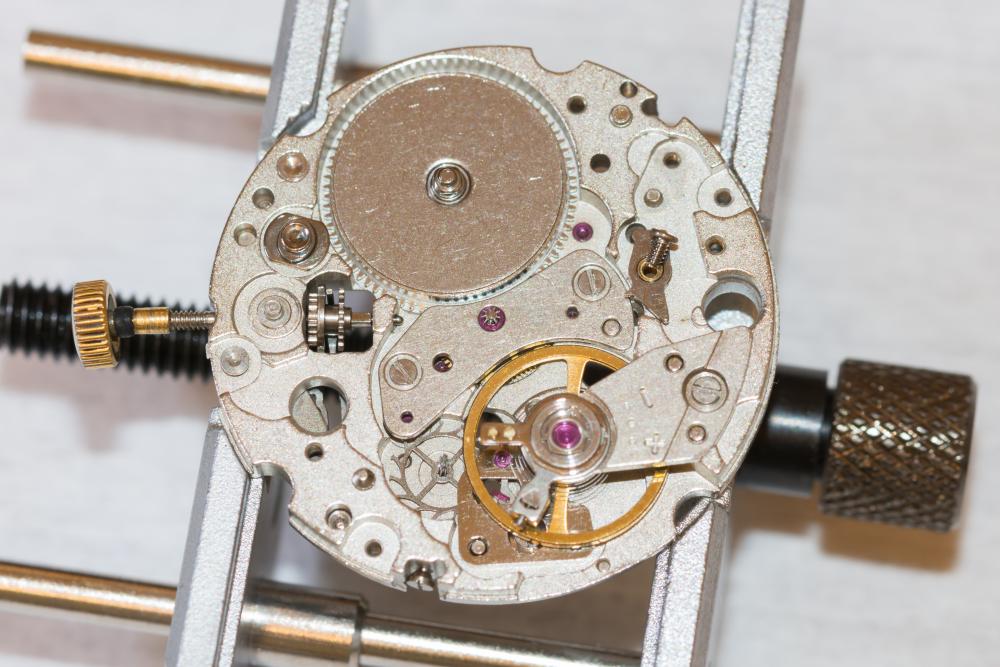
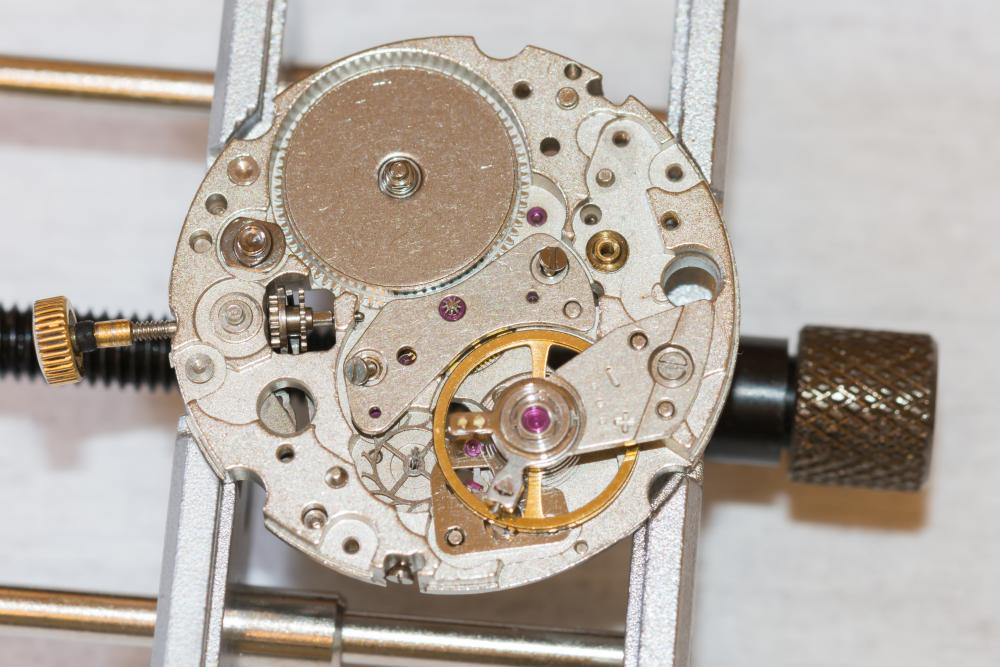
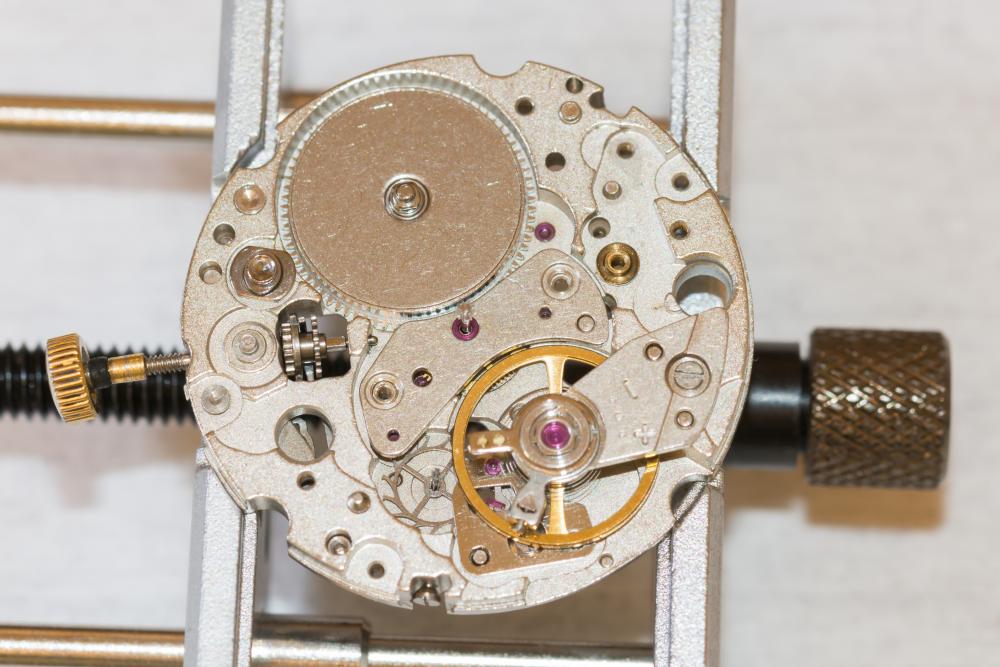
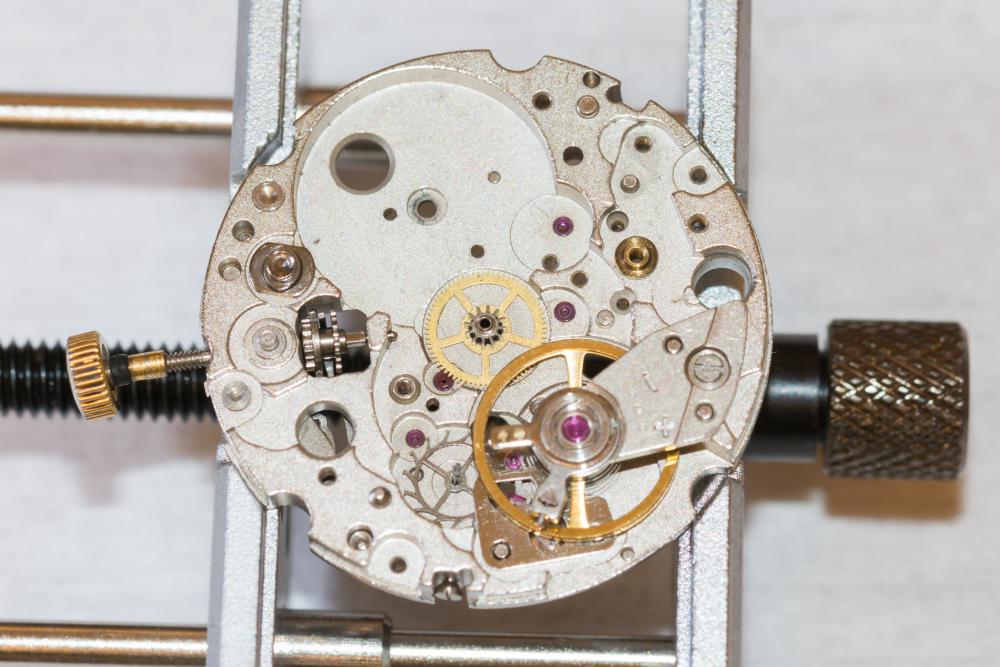
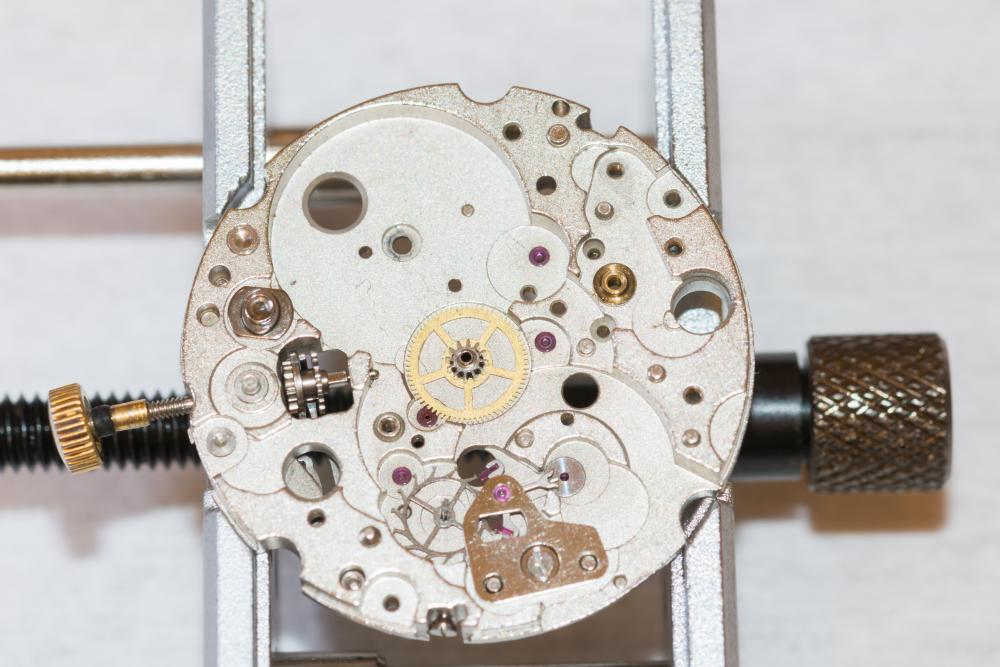
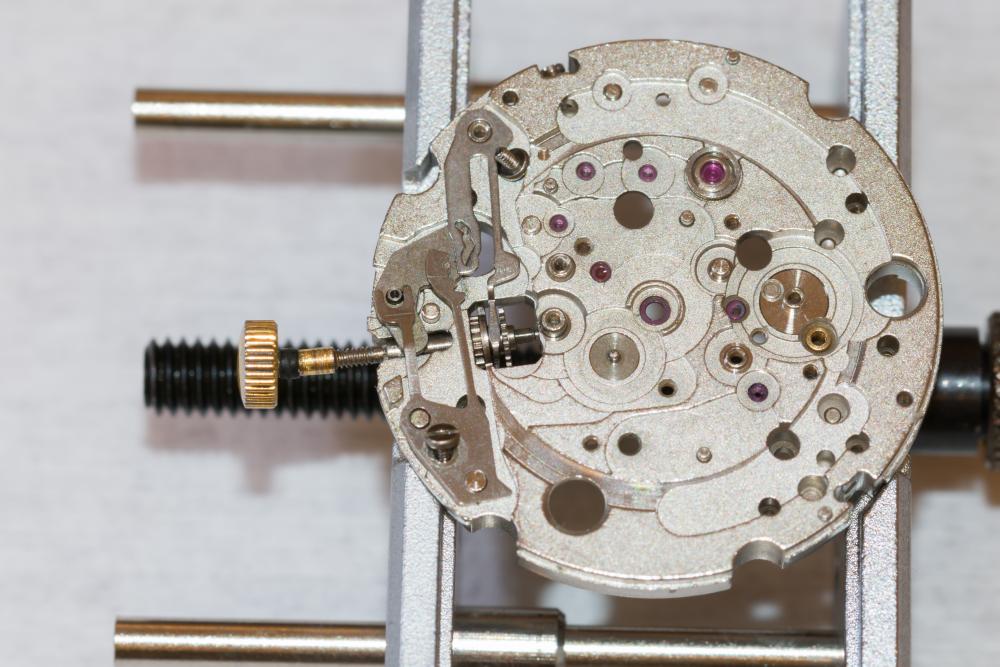
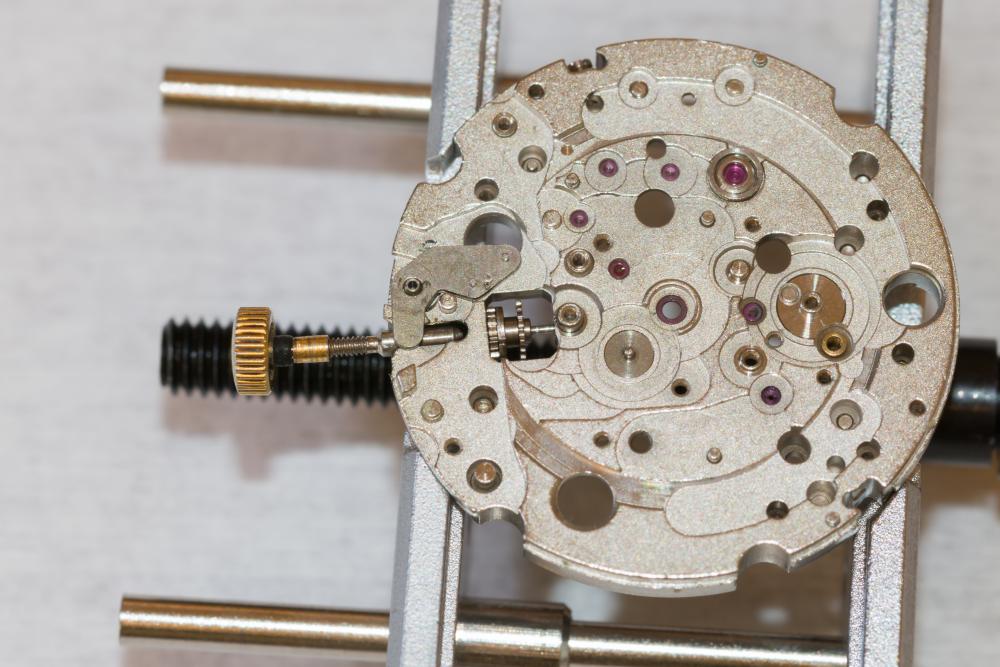
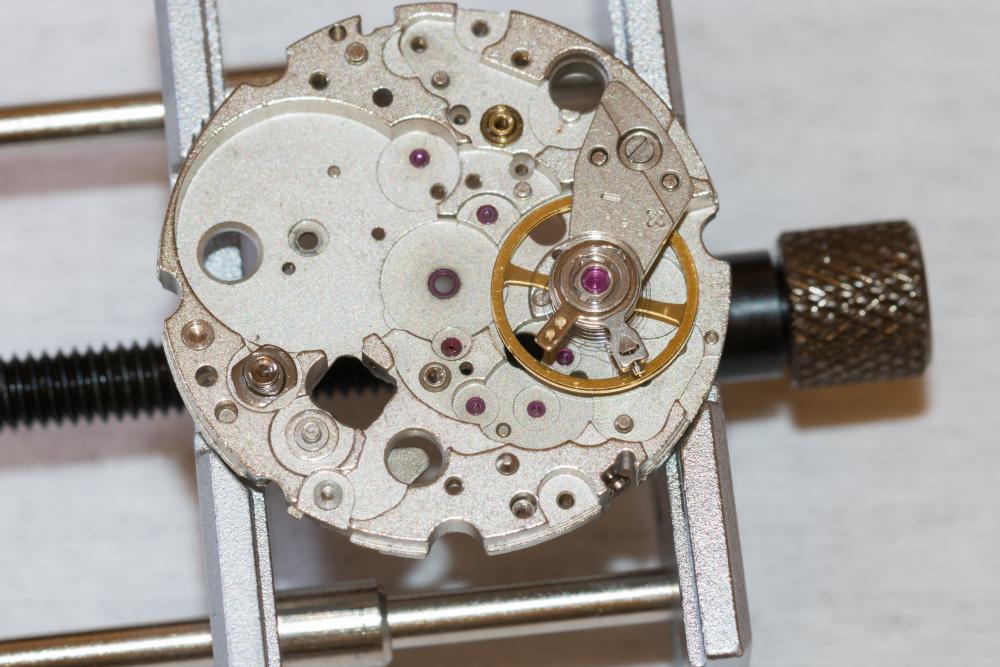
Hey all, Was bored this weekend and decided to take down an old Citizen (Miyota 8200A) movement I had laying around and to practice my Macro Photography on these small parts. That and I haven't seen any real complete walk throughs on these types of movements, but that is likely because they are cheap and people rather just replace the whole movement instead of bothering to CSL. Any ways without further delay here we go! First off come the hands, Nasty looking things. To remove the inner day wheel you need to pry up this C clip. I used a pair of hand levers and slowly worked it up the hour pinion. Do not try to pop it off sideways as it will break..... Pulling off the day wheel reveals the calendar works cover plate. Remove the 4 screws and lift off this plate. To reveal the calendar works. Remove the calendar wheel that was held down by the plate and the tension of the swan neck shaped jumper spring at the bottom. Next remove the screws and plastic day & date changer wheels and the small metal gear. The hour pinion is loose and lifts off, the minute pinion is press fit on so you will need to lift it off with some hand levers or removal tool I like to use a presto hand lifter for this. Remove the 2 screws covering the day/date quick adjustment gears. Gears exposed to show their orientation for re-installation later. Go ahead and remove these both. Then we flip the movement over to release any tension in the mainspring and start to remove the motion works. Oscillating weight and then oscillating weight removed. Here is the click spring and you can see the click hidden under the train bridge. Gently slide the spring to the right while holding the crown in your other fingers and allow the tension out of the MS slowly. Remove the 3 screws after the MS tension is all let out. Under side of the bridge is a spring. I just left this on during cleaning process. Remove the gears that link the keyless works to the mainspring barrel. Time to remove the train of wheels. Here is an attempt to photograph the bottoms of them to help tell the difference. All the train removed. Click spring and click up next for removal. Time to remove the small bridge. Be careful the seconds pinion is just loose in here lift this up and out prior to removing the bridge. Bridge removed to reveal the last wheel. Balance [censored] screw and balance [censored] removed. Lastly on this side remove the pallet bridge then the pallet, escape wheel and the last wheel. Flip back over to tackle the keyless works. Setting levers removed, finally the stem recension lever/jumper is permanently attached to the main plate but at this point is free floating so lift it up slightly and the stem and pinion can be removed. Balance back on the plate and its cleaning time for all parts. The cleaning sadly won't do much to beautify these parts as they are pretty cheaply made... Ill follow up with the reassembly in a separate post just to break it up a bit :).


-
Yep my thought exactly a $120 tool to change a stupid $10 bearing...
-
I was hoping otherwise myself but as much as I tried there really is no way without the tool. I was able to remove it with a tweezers but to get it back on you have to push the entire spring lock down and twist which you can't do with a tweezers.
-
Hello from Texas as well! I'm not sure what the top reps are for the Omega's try browsing that specific brand forum. By-tor has a great write up on the top reps out there. Welcome!
-
-
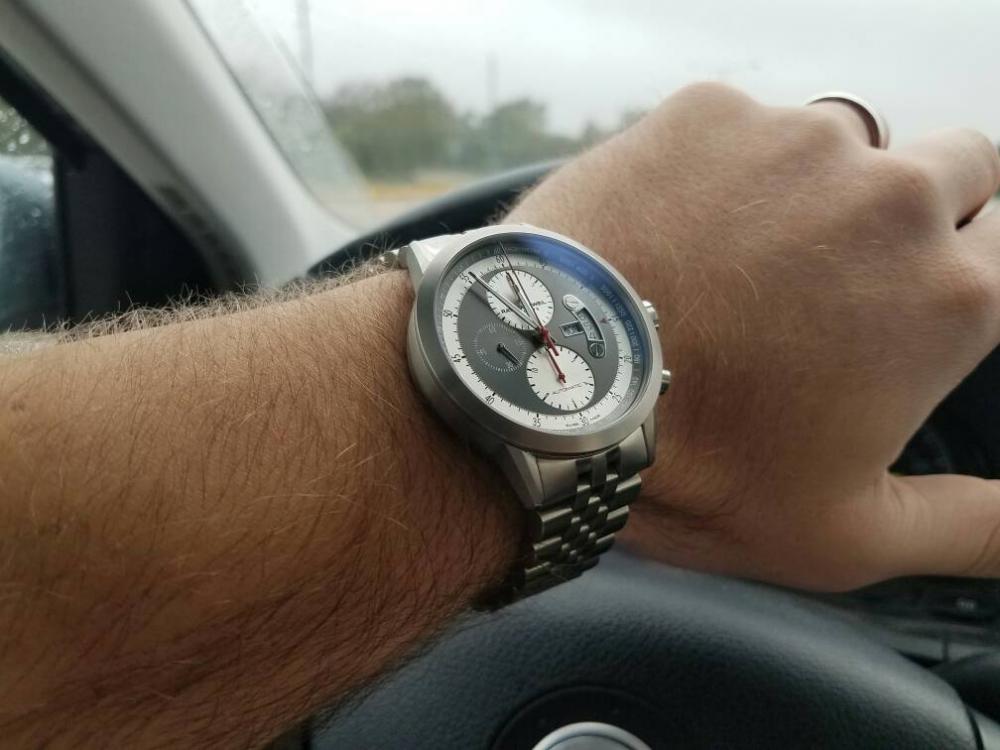
Rainy Monday RW
-
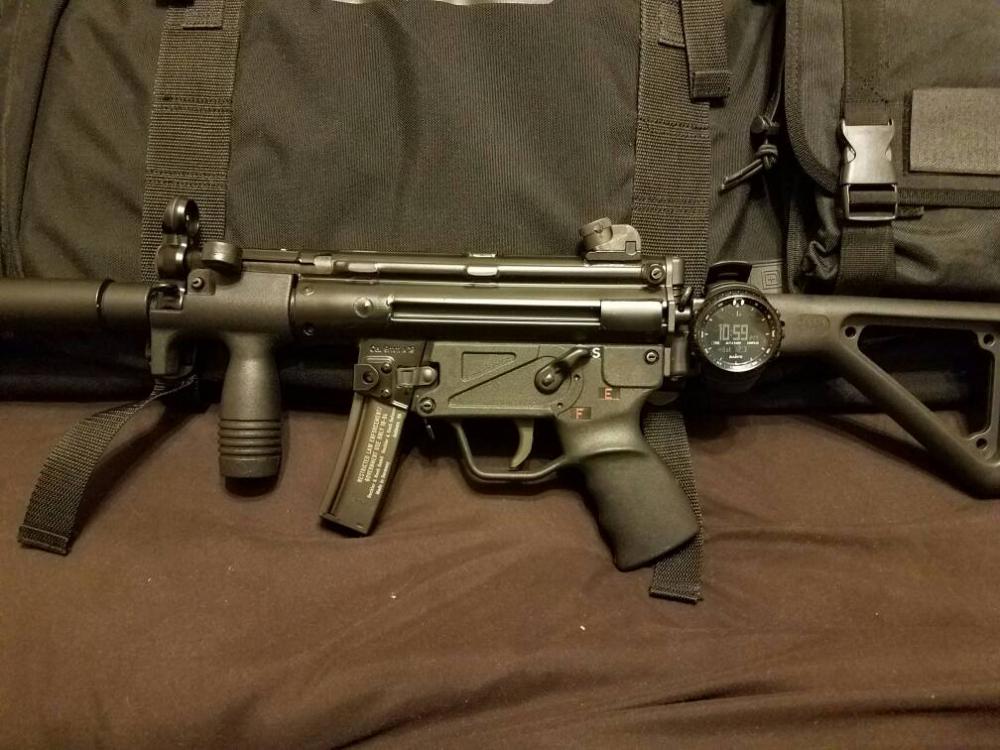
More HK classic 9mm
-
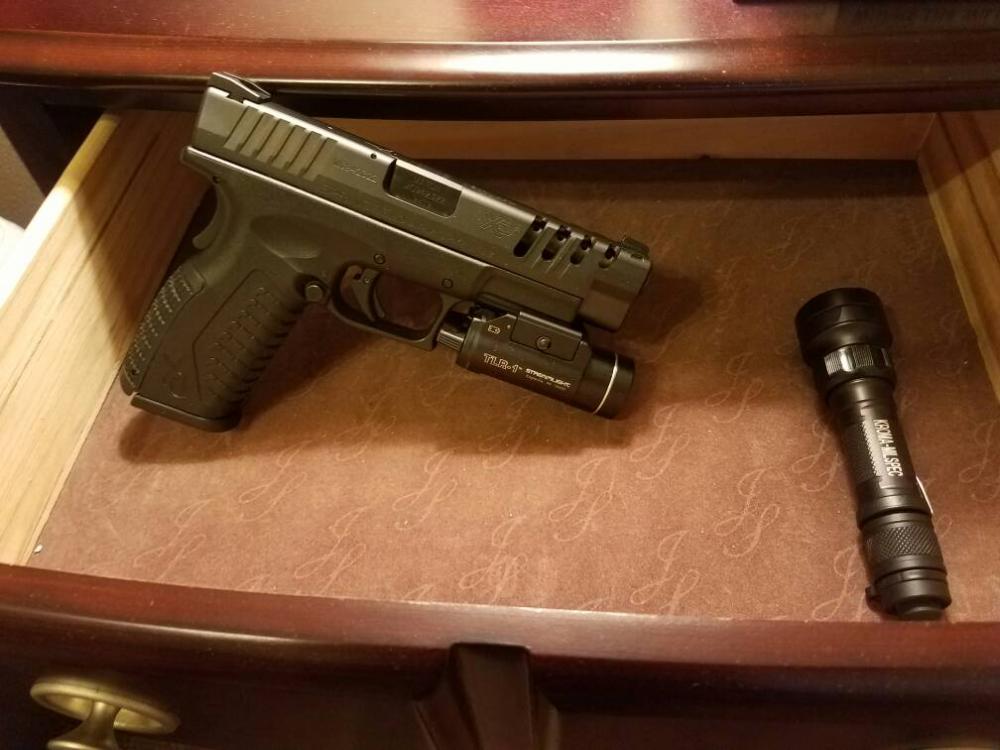
My xdm with V-8 porting.
-
Rocking one of my RWG raffle winnings today! Thanks again RWG and MOAB!