When you buy through links on our site, we may earn an affiliate commission.
Leaderboard


Popular Content
Showing content with the highest reputation on 10/09/2013 in Posts
-
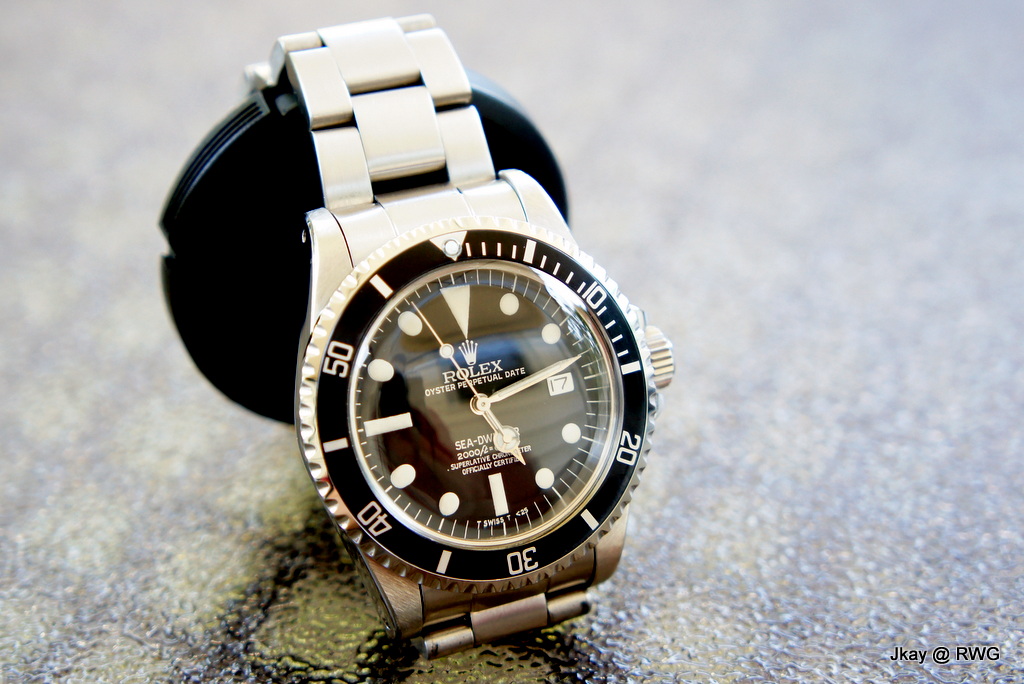
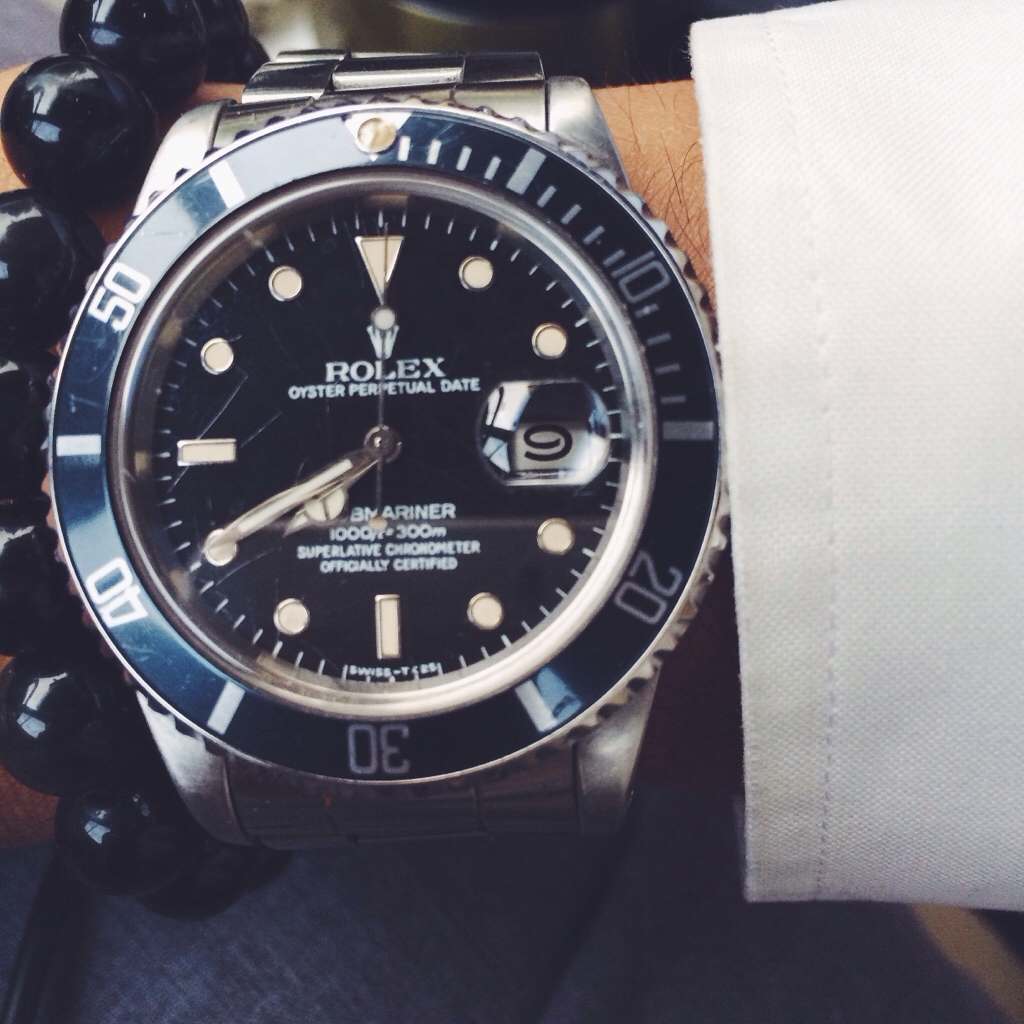
Dear Diary, Today I was with a marvelous Sea-Dweller
 3 points
 -
The team here at RWG has noticed over an extended time now that many new members are struggling to have either good dealings with sellers or a reasonable understanding of a fair process should something go wrong. We have therefore decided to lay down some guidelines based on the many years of buying and selling experience that can be found in the RWG Admin team. These guidelines are intended to be broad enough to cover both buying from a trusted dealer and member to member trades. Therefore this guide will be broken into sections looking at all aspects of buying. Buying It is extremely unlikely that a senior member or trusted dealer will set out to scam you. Yes it can happen, but not by anyone who wants to stay a part of our community. For this reason you should enter into transactions with these sellers with the mindset that you are going to get what you paid for. The number one cause of grief usually comes from the buyer entering into the deal with a suspicious mind. If you look hard enough, dig deep enough you will eventually find something to complain about in any trade. If, on the other hand, a genuine issue does arise and you are both on good terms then sorting that issue will not only be easier but a great deal quicker and more pleasant. It is the buyer’s responsibility to make sure that they know what they are buying. The seller will list the item with pic’s, price and full disclosure but the buyer should not assume that the item has some feature or function unless they ask the seller directly. Once the item has been paid for and shipping confirmed the seller’s responsibility ceases until the goods arrive. We often hear complaints how a seller has gone silent once the item has been bought. As long as the item is not long overdue then the seller does not have to keep a running commentary going with you. He sold you goods, not added you to his Christmas card list. Buyers need to check with the shipper &/or their local post office to see how long shipments take & what each of the entries in their tracking form means. Buyers need to realize that sellers have lives (outside of RWG), too & may not always be able to respond immediately to every email, PM or phone call made by an over-anxious newbie. Buyers should learn to be patient & limit communications to no more than 1/week. Buyers should never inundate a seller with repeated, threatening &/or lengthy diatribes. These rarely produce a positive result. Selling Prices are mandatory for all sales by members or dealers! RWG is a global community and as such hosts many different languages and customs. Just because the seller knows what he has stated he should not simply assume the buyer understands. For this reason it is crucial for the seller to include as much information as possible, but in clear concise terms, into their sales thread. Dealers should have pinned instructions on how to buy in their sales area, stating any special terms or conditions. Remember it does not matter how long you have done this for, the noob still will not know. A seller, both dealers and members, must always remember that things can go wrong and when they do they need to have a policy on how this can be fixed. Yes a private seller may add a clause stating all risks are the buyers but it must be written not simply expected. RWG hosts a member policed sales area. This means that members do have the right to point out issues that they may see with a sale. A seller has the right to ask any price he wants for his merchandise but he has to expect the members to question that price if they feel it is unrealistic. When problems arise [*]The very best offer you can get is to repair or replace. Once this offer is on the table the buyer should have no further qualms. [*]Shipping will always be a contentious issue as the buyer feels he has already paid the price on purchase, however issues are rarely the sellers fault, most in fact come from shipping. The buyer must always be aware of the sellers shipping policy or be willing to negotiate if an item needs to be returned. [*]Again senior members and trusted dealers will want to work with you when issues arise as it is their reputation on the line, however it is often the buyer attitude when dealing with issues that can turn the whole thing acrimonious. [*]Paypal disputes, often end poorly for both parties, so they should be used only as a last resort ie: when there is a serious problem with the sale and the seller has ceased communications or the seller is conducting a scam (a watch or other item that arrives damaged is NOT a scam!). [*]Buyers should only contact Admins in the following situations: 1. After receiving their item and there's a problem & the seller refuses to make it right, 2. If it has been more than 1 week since the last communication with the seller afterf the buyer reported a problem with the item, or 3. To report their being included in a global scam. Buyer beware One final note: when buying from a member who has very few posts or has just joined, it is advisable to be a little cautious before proceeding. Begin with a PM and ask some simple questions. Ask for a picture of the item with a tag showing the date and members name. Ask the seller if they are a member of any other forum so you can at least get to know them and check their reputation before proceeding with the transaction. If a seller gets defensive about the inquiries then there is every chance you are facing a scam and it is advisable to just walk away. The above can be just as true for a buyer so the same precautions should be taken. RWG provides you, the member, the safest possible platform for a happy buying/selling experience. However it is not always foolproof and members must always remember caveat emptor...’Let the buyer beware’. RWG Admin Team.1 point
-
Tshoot sent me his 5th gen 42mm PO to take care of the common ETA keyless issue. I'll confess that I had a few different motives: one, I wanted to help out of course, but also I wanted to see one of these 5th gen PO's with my own eyes, I wanted to put together a new tutorial on how to fix this issue since it's so common, and I was curious if the watch had indeed been serviced in China like the dealer said that it was. It's been a while since one of these tutorials was posted and when I looked at one of the old ones, some of the links for the pics were broken. So here it is, out of the box: I opened up the caseback to find what looks like a nice, nickel plated Swiss ETA 2824 You can tell it's Swiss by looking at the shock absorber. There are three notches there Three tabs hold the movement in. I pulled them out and put them, the screws and the movement holder itself in the caseback. I've learned from painful experience that one of the most critical things you can do while working on these things is to keep organized; the screws mostly look like they're the same size but some will not interchange. I get ready to pull off the hands, using a dial protector (actually a cut-up business card--Bergeron dial protectors are the world's biggest rip off) Hands off I put the dial underneath the case so that it can't get scratched/something dropped on it, and put all of the parts I don't need for the moment aside. Next the datewheel must come off, but I'll note that it looks like a gen ETA white-on-black date disc, or if it's a rep the printing is very nice, bright and crisp There are a few ways to take the datewheel off, but if you're going to do the keyless anyway the easiest way is to just remove this cover Next will come the keyless works cover. In this pic the screw that holds it on is already out, but the keyless works cover is still installed. If you've done this a few times you can already see the source of the keyless works problem. Also, you can see the "proof" that some Chinese watchmaker serviced this movement--he left a piece of blue lint in it (next to the dial feet hole at 2 o'clock) Keyless works cover off. You can see that the yoke, which is supposed to be riding in the groove of the castle wheel, has been dislodged. This comes about because theyoke sits on top of the stem release plate, and if you push the stem release in too far, it will pop the yoke out and over the groove. The castle wheel will then get pushed all the way to the time-setting position and the yoke will get trapped behind it. Another angle and with some labels So you just lift it gently with a tweezers or a pin and set it down where it should go. If you're lucky, this is the only thing that's messed up. However, the hack lever also rides in the castle wheel groove, so if your watch won't hack it's worth taking the castle wheel out and making sure the tab of the hack lever is in the right place. This is what it should look like and with the keyless works cover reinstalled. I don't know the name for this part, but this thing needs to be pushed over until the little nubbin can catch the three grooves in it. This is the thing that gives you three clicks when you pull the stem out. It should go like this As an aside, this movement is not quite the same as the 2836 that seems to be used it a lot more reps. The 2824 doesn't have a day function, so the date discs and some other things won't be the same, but the keyless works is exactly the same for the two movements. Here it is next to a 2836 Now I reinstall the date disc and I find that the date flips correctly and the time will set, but the movement won't hack. Oops, I forgot to do one little thing. Date disc comes back off You have to set the little finger-like spring at the top of the keyless works cover to push on the side of the yoke. Set properly (I know it's hard to see, but what you do is take a pin and push it gently to the outside until it clicks) OK, now the date disc goes back on and everything works. Time to reinstall the dial. You put it in the holes and close the dial feet (this pic has the dial feet open, just swing them inward) I noticed that the cool-looking Omega rotor is actually just a regular rotor with a stamped metal sticker on it, you can see it peeling slightly here If you want to keep it (I would, it looks cool) it might be a good idea to remove it and make it more secure. What I would do is remove the rotor from the watch entirely, remove the sticker and re-glue it, then reinstall the rotor. All you have to do to remove the rotor is take out the one screw, it's easy. Probably not a good idea to try and do it while the rotor is installed, glue near movements is always a bad idea! Anyway. Dial is back on turn the crown until the date flips, then install the hands. This is midnight, and it can be tricky to get right. Even though I was careful, the date flips at 11:54 after a couple of tries I get it to flip exactly at midnight There are the tools I use, btw: a Presto hands-puller, a set of grocery store tweezers, a set of Delrin tweezers (so as to not scratch the dial/hands) and a hand setter. That's less than $30 or so worth of tools, you don't need to invest in an entire workshop to do this. The other tools I used were a screwdriver and a pin I got out of a shirt. I check to make sure the hands are parallel and not touching, and that the hour hand isn't touching the dial Then I install the second hand (it doesn't have to go on any particular way) and move the hour hand underneath it to make sure it has clearance Now it's time to put everything back together. The case has been upside down the whole time and I've been careful not to touch the inside, but I'll blow it out anyway to make sure there's no lint then I drop the movement in and line it up roughly. The hole for the stem needs to face the tube, of course, and usually the movement holder has a certain way it needs to go as well. I like to install the stem before I screw the movement down, for a few reasons. If there's any play at all, it helps to move the movement as far as it will go to the tube side to make installing the stem easier. Also, this is the place where you'll mess up the keyless again if you're not careful. and now you'll want to install movement tabs. This should be easy, but you still need to be careful! I've broken hairsprings before, when I was putting in the one by the balance wheel and my screwdriver slipped. Movement tabs in, put some grease on the seals, reinstall the caseback and here is the repaired watch next to my UPO.1 point
-
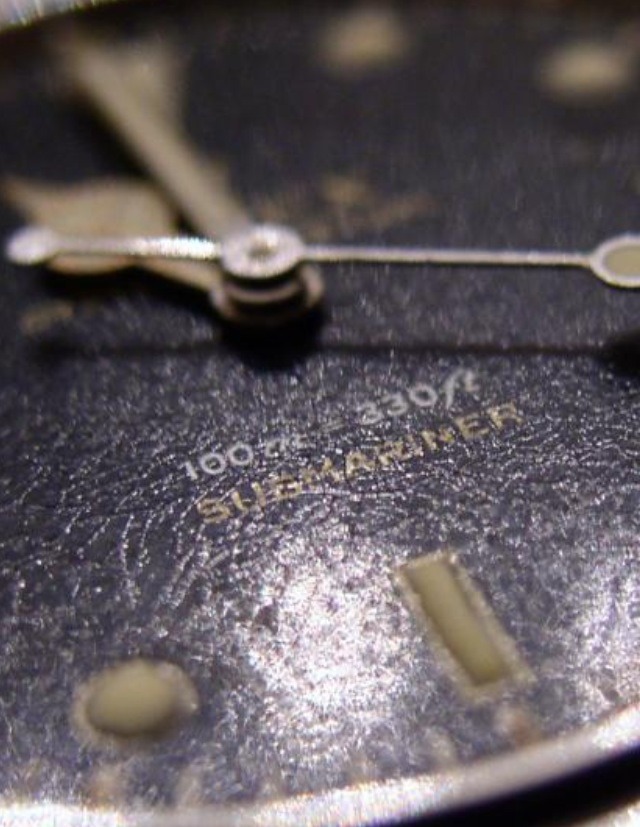
I found this piece of great information while browsing through the old tip section of thereplicacollector.com Originally posted by alfa1 in 2006. link to original post I found this post very helpful completing my old 1665 project (pics coming soon), and decided to post it here for your DIY pleasure. Here it goes: This is in two parts, the first was originally posted by JimmyThree. It was this, which prompted me to do some further critical analysis, so the second part is mine. It covers what has been discussed before, however, these random discussions were to me, lacking the necessary absolutes needed to allow completion of the proceedure with any degree of success. Onward Part I A genuine or aftermarket submariner 7.0mm case tube can be installed in the case in order for a genuine crown to be used. The 7.0mm submariner case tube has the same thread size where it screws into the case as the standard 6.0mm case tube used in older DJ, Exp I etc...3.0mm X .35mm and a standard thread tap for the Rolex case can be used to tap it out to the correct size if necessary. The 3.0mm X .35mm taps are available from most watch parts supply houses. Many replicas have the case threaded for the smaller case tube thread size same as the 5.3mm crown and modern 6.0mm crowns...2.5mm X .25mm and if this is the size in your submariner watch case, the hole will have to be drilled out first with a number 36 (2.7mm) drill bit before threading the hole with the 3.0mm X .35mm tap. Be sure to drill the hole straight through the case and lubricate the bit with cutting oil or WD 40 etc. After the hole has been bored, line the tap up straight and very carefully start cutting the threads in the case. Turn the tap about 1/2 turn at a time and back it up to dislodge the metal chips and lubricate the tap with thread cutting oil or WD 40 etc to help prevent galling and to carry the chips away from the threads. After the hole has been tapped, clean the case in warm soapy water with an old toothbrush being sure to get all the metal chips out of the newly threaded hole (I hope you removed the movement before starting this project!!) and try the case tube for proper fit. Pipe cleaners are another way to clean the threads out. Be advised that the 7.0mm submariner case tube does not fit up against the case same as the standard 6.0mm case tube. The standard genuine 6.0 case tube uses a silver sealing washer between the slightly tapered case tube and case for a gasket (I have never seen one of these gaskets on a replica) and the 7.0mm case tube uses a rubber O ring gasket that fits against a flat machined surface on the case. Machining the case is a bit more involved so I will leave it out and simply recommend anyone to seal the case tube O ring to the case with waterproof silicone grease. I have a miniature milling machine and cutter for cutting a flat on cases but if the case has enough area for the O ring to seal, I let it go as is. Tips: On cases with the correct 3.0mm X .35mm hole size...be sure to run the tap through it first (if you have one) or very carefully try the case tube for proper fit because sometimes the threads are not very good and they can ruin the case tube. You can find good used genuine submariner crowns on eBay. Practice cutting threads on a junk case or bore a few holes in a piece of stainless steel sheet and tap them for practice. When cutting practice holes, it is easier to start out with a smaller bit first and work up to the # 36 bit. Stainless steel is not easy to work with so a few practice runs are in order. The #36 (.2.7mm) drill bit is a tiny bit larger that usual so the tap will not bind up when cutting threads in the hard steel case. It is better to have the threads a bit shallow than take a chance on breaking the tap off in the case. When you buy a 7.0mm case tube, be sure to get all the rubber O ring gaskets including the one inside the crown cap and on the outside of the case tube. You can use plastic based gasket sealer on the case tube threads to help seal the tube and hold the tube in place and keep it from backing out. Case tube spline wrenches are available to make the job of inserting the case tube easier but you can usually get the tube screwed in by using the crown for a tube driver if you are careful. Sometimes the crown will tighten down and unscrew the case tube after insertion so if you can get a case tube wrench it is money well spent. There are old type and new type case tubes and wrenches so ask for new type replacement case tubes and wrenches so everything will work together. Do not count on the tube to be water resistant without testing the empty case first. Part II Establishing dimensions and how minute they really are. 1 mm = .039370082" 2.60mm = .102362" 2.65mm = .104330" 2.70mm = .106299" The following directly relates to the Installation of a Genuine or Very Good replica 7mm Trip-Loc Crown. This is for edification and discussion only. Rolex Trip-Loc 7mm Crown - Part No.24-703 Rolex Case Tube 7mm - Part No.24-7030 Generic - are generally refered to as 7mm crown or tube. TAPS: Tap size for the 7mm case tubes(specifically 24-7030) is 3.0mm x .35mm proper drill size is 3.00mm (- .35mm) = '2.65mm' (a little formula my industrial tool supplier showed me) On minature threads such as these, it is imperative that major and minor diameters are correct for desired lock up. You will surely strip the case tube (or more catastrophically) the case, when applying proper setting torque to improperly cut threads. When working with 316, 440 or 904 stainless steel, either facing, cutting or tapping, it is imperative that you use a cutting fluid that is compatible with the parent metal, in this case I prefer 'Tool Cool' or 'Tapmatic-plus1' comment: I got mine from merlintools on ebay. great! CASE TUBES: The 6mm case tube wrench works on both 6mm and 7mm case tubes, why they don't advertise them as such, really baffles me. Keep in mind, all new case tubes in current Rolex' have the new style case tubes (splines at the top) and, so will all of the new generic case tubes. If you see an advertisement for case tubes showing 'old and new' make sure you get the new tube and tool. That is of course, unless you have an endless supply of early genuine case tubes. Then the early tool with splines in the lower body of the tube would be correct. CASE TUBE 'O' RING OPENING: A stepped Spot face cutter is required to duplicate the cavity in the tube bore of the case to capture the outer 'o' ring that resides above the case tube threads. First stage cuts the proper diameter for the 'o' ring, (in some earlier Rolex' models a flat fabric seal was used) the second, cuts the stop shoulder, which in turn determines the desired amount of crush to the 'o' ring. This operation is one more of the critical operations that help achieve its resistance to water and pressure. Because this machining operation is done to the case while on a CNC machining center, You 'WILL NOT' be able to acquire this cutting tool, it will have to be made by an industrial tool supply house. Calculating its correct dimensions, is a story, all by itself. 2mm SPRINGS BARS: Geniune or very good aftermarket Spring Bars for the models we most covet, 1665,1680,1675,16800,16610 will measure: center section: 2mm x 19.7mm* depressable ends: 1.2mm in dia.* extended overall length: 25.25/25.57mm (.994/1.006")* You will, no doubt, see them advertised in all sizes and dimensions, claiming to be what they are not. Use good judgement before making your purchase and avoid dissapointment. There is plenty of good information to be gleaned on this board as to where to acquire them from the many capable and talented members. Please keep in mind, the advertised dimensions are meant to show relationship to an application. These dimensions may seem cut and dry. In reality the spring bars do not have a true 2mm diameter main body, nor do the ends measure 1.2mm. These measurements indicate the bore diameter in which they are to be inserted, therefore, the true diameter of the respective part of the spring bar will (should) measure: ENDS-Diameter: 1.187/1.190mm (.0467/.0468")* MAIN BODY-Diameter: 1.978/1.980mm (.0778/.0780")* NOTE: *These dimensions acquired from 20 sample spring bars* This differential allows for compliance in the bore, just .0005" will make the difference between go and no-go.1 point
-
Having the privilege of owning both the gen and rep of this watch, this will be my first comparative review for 2012..I know that this comparison has been done to death by previous members but this is my take on the Rolex Explorer II 16570.. The white dial (aka “Polar”) is the gen whilst the black dial is the rep.. Before I start on the comparison, here are some measurements on this timepiece: Case Size: Sports Model: Explorer II Reference: 16570 Movement: Rolex Caliber 3185 Date: Yes Material: 903L grade Stainless Steel Case (mm): 39.5 Thickness (mm): 12.2 Bezel (mm): 39 Crystal (mm): 30.5 Synthetic Sapphire Bracelet Width (mm): 20 Clasp Width (mm): 16.5 Water Resistance: 330ft. / 100m. Note: I am waiting on a digital caliper and will include the measurements of the rep soon. Official Adverts from Rolex: Some background info: The Explorer II (1655 “Orange-Hand) was introduced in 1971 as a supplement to the original Rolex Explorer, and with the current model 165 The Explorer II was designed for cave exploration, or any other sort of extended expeditions and the GMT hand was originally used to give the wearer an indication of day and night. The red “GMT” hand used in conjunction with the 24 hr. markings on the bezel serve this purpose and indicating a second time-zone. My Explorer II was purchased pre-owned from a gen forum in mid-2011, and mine is from the K Series that has drilled through lug holes (in the later Y series production run, Rolex switched to solid lugs without the hole visible from the outside of the lug). This dial is also equipped with Superluminova on its hour markers, which allows for better visibility in the dark. This was my first modern Rolex I purchased and will always be treasured and a keeper in my watchbox. Having owned many other watches (gen & rep) with black dials, the white dial and understated bezel makes this watch an excellent choice to wear casually as well as with a suit. Having the Rolex caliber 3185 within the Explorer II help make the decision to purchase a lot simpler for me. Here’s my complete Explorer family. From Left to Right: Explorer I 39mm 214270, Explorer I 36mm 14270, Explorer II 1655, Explorer II 16570 (White & Black) Base watch (rep) was purchased from Stan (WBK) with a Swiss 2836-2 with modified GMT function. It had the ‘stick dial’ which was never produced for the Explorer II but have been documented for the GMT Master II 16710. Upon receipt of the base watch, I noticed that the GMT hand was slipping so off it went to Spinmaster for service and resetting of the hands. To get a more accurate dial, I PM-ed Angus (PureTime) to help me source the latest rep dial. He had been most helpful in tracking this for me and I am more grateful for that assistance. Spin also helped me fit in the sourced dial and trimmed the Crown Guards to a more accurate look. Total cost of the Rep (as of now): US$350 Cost of the Gen: US$3,350 Let’s start off the review with a frontal shot of the watches: Gen: Rep: Visually it looks ok. Definitely passes the 6inch test (IMO) but on further inspection, date font seems alil thicker and cyclops magnification looks more than 2.5x. Rehaut also looks alright..no wokky-ness here and also no engraving to worry about.. Lumeshot: In Semi-dark room: In Dark room: Gen is on the left, Rep on the right. Both were exposed to the same amount of sunlight (abt 10 seconds) and taken in a semi-dark room. I was quite pleasantly surprised by the lume on the rep dial. Lume on the hands definitely need to be redone. Dial Font: Gen: Rep: Font looks accurate and crisp. Coronot also looks spot-on. Spacing and Font of “Swiss Made”: Gen: Rep: Printing is crisp but font type is different from gen. Minute markers on the rep are also further away from the rehaut as compared to the gen. Hour / Minute Hand: Gen: Rep: Obvious difference in the size of the “Y” on the hour hand and lume width on both hands. GMT Hand: Gen: Rep: Color of the Red GMT hand seems to be the right shade but triangle on the rep hand looks alil smaller than the gen. Stacking of Hands on Gen: Seconds, Minute, GMT, Hand Stacking of Hands on Rep: Seconds, Minute, Hour, GMT Crown / Crown Guard: Gen: Rep: Crown is lower on the rep, due to the thickness of the movement. Rep is running on a Swiss 2836-2 modified GMT movement. Coronet is passable if you are not too fussy. Gen: Rep: Thickness of the rep Crown is an obvious flaw and threading on the tube is definitely better machined on the gen. Luckily both gen crowns/tubes can be quite easily sourced. CGs on the rep has already been trimmed but due to lack of material, it looks more like Pointed CGs rather than the Flat top CGs. This is not so obvious when worn on the wrist. Bezel Marker Font (Used "14" as example): Gen: Rep: Font type again is slightly different. Application of black enamel paint on the gen bezel looks more refined whilst the rep looks crudely painted on. Bezel Marker Placement (Used "12" as example) / Crystal Height & Bevel: Gen: Rep: Placement of bezel marker is slightly closer to the ‘lip’ on the rep. As seen from the pics, this difference is very minute. Height and Bevel looks quite spot-on. Cyclops , Date Wheel (DW): Gen: Rep: Cyclops is inaccurate and is most probably the culprit in the slightly larger magnification. DW on the rep is shifted towards the right whilst the DW on the gen is more centered. As mentioned earlier, date font is slightly thicker on the rep. Caseback: Gen: Rep: ‘Teeth’ on the rep is not as refined as the gen and seems to be slightly thicker than the gen. SEL Fitment / Case Lugs: Gen: Rep: Gen wins hands-down in this department. However this can be easily resolved. Good news is the gen SEL bracelet can be fitted onto the rep. Direction of brushings on the case lugs and SEL bracelet looks more prominent on the gen. Brushing with a green Scrub pad would help out the rep in this aspect. Bracelet & Foldover Clasp: Gen: Rep: Clasp looks visually 100% identical. However, you can see from the next few pics, the side profile that the rep is slightly thicker and longer than the gen. This is also the case when comparing the small foldover clasp. Rep is slightly larger than the gen. Rep on the left, Gen on the right Clasp Inner Stamping - Engraving : Gen: Rep: Gen is 78790A whilst rep is 93250. Stamping is not as crisp on the rep. Laser engraving on the rep is too deep. Final Thoughts: For a tenth of the price of the gen, the rep is definitely a watch that is a must in the watchbox. This model is also understated and not as widely recognizable as the Rolex Submariner. I hope you enjoyed this as much as I enjoyed publishing this.1 point
-
I think your answer is: Why bother replacing a billet when you can just gold plate.... They can't find CuSn8 in China in the right thickness and importing material into china is a hassle. Note that Adrian's 'bronze' cases are red brass, not actual Bronze.1 point
-
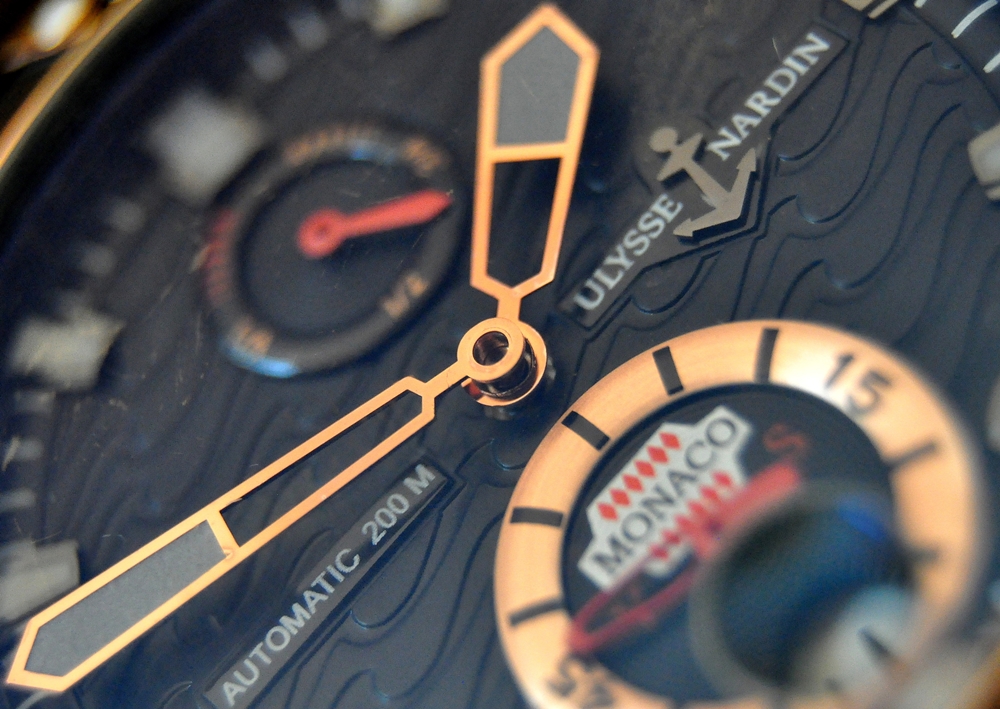
MY 2009 UN:
 1 point
 -
1 point
-
My Aquanaut "ticking"......1 point
-
1 point
-
Love open 6's and 9's
 1 point
 -
1 point
-
1 point
-
1) There is no such thing as AAA++++ or that 1:1 rubbish 2) In buying a rep, you're not looking on websites for information about reps. The information is right here on the forums 3) All dealers source the rep watches from the same place (ie. they don't make watches) 4) WatchEden is a trusted seller and have been around for a long time, being a dealer means they're trusted to not run away with your money and will ultimately try to make your happy ... how long and how well that they do that is another story. Read reviews and make your own informed decision. Buy the dealer. NOT the rep1 point
-
There is a decently priced pair of p302-pushers on VRF atm for anybody who's interested. I'm not affiliated with the seller in any way, but these don't come up very often, so be quick. Imo these are the icing on the cake on any high-end build. http://www.network54.com/Forum/207673/thread/1381314549/FS-%2A%2A+NOS+Daytona+Chrono+Pusher-+P302+for+6263+-+6265+NEW+and+sealed+%2A%2A1 point
-
herer gud for noen gode bilder du tar Du må hjelpe meg med å ta klokkebilder altså!!! Si ifra til meg når du skal på "harry tur" så kan du stoppe innom hos meg for en kopp kaffe og wienerbrød + kikke på replika!!1 point
-
Monaco GP1 point
-
Shower???!!!!....... each day!!??? My god man are you OCD or something !!!???? Once a year on my birthday...never done me no harm...... now I must away to the chemists for some derma cream !!.... always walk as I cant take a taxi they wont let me get in it !! Once a day !!?? Mad!! Mad!!... I tell you !!!1 point
-
Happy Birthday mate... I hope it aint a travelodge..... or you will be sitting by a vending machine !! And watch out for the male prostitutes..... they always overcharge AND expect a tip !!1 point
-
This new beauty1 point
-
Retired they say!!! The Zigmeister is a legend. It is his style to go missing for a year or two to arise once again. We may still be graced by his company one sunny day. Gunnar1 point
-
+1 to Freddy's suggestion. If it's been a few years since the last service, it could probably use a movement service. Where are you located? That might determine where you can get it repaired. Their are several very good Rolex watch smiths around, they could easily do that as well as a service. The only problem with a RSC, is they tend to want to do too much. If his watch us well aged, they will suggest a new crown/tube, crystal and gaskets, possibly even a luminova service dial and hands. Big bill for all that, and he might not want the watch to look like brand new.1 point
-
The 1680, 5513 & 5512 all share the same bezel components & Rolex still has them. So the easiest option is to take the watch to your nearest Rolex service center or Authorized Dealer & have them replace them (they will probably recommend an overhaul if it has been several years since the last 1). Search the for sale section or post a WantToBuy on VRF or TZ. Alternatively, search ebay. Although you can probably find some to fit, unless your father is financially destitute, I would not install aftermarket bezel parts on a gen watch.1 point
-
TT88 - This 1's for you & a few more1 point
-
Resistance is futile.
 1 point
 -
Any of Ubi's. Of mine, these are the most recent, so also favs1 point
-
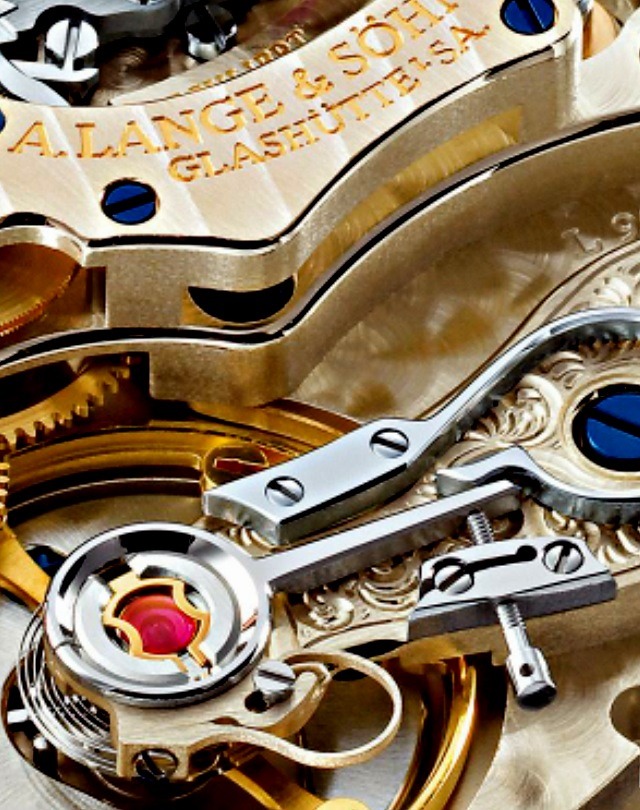
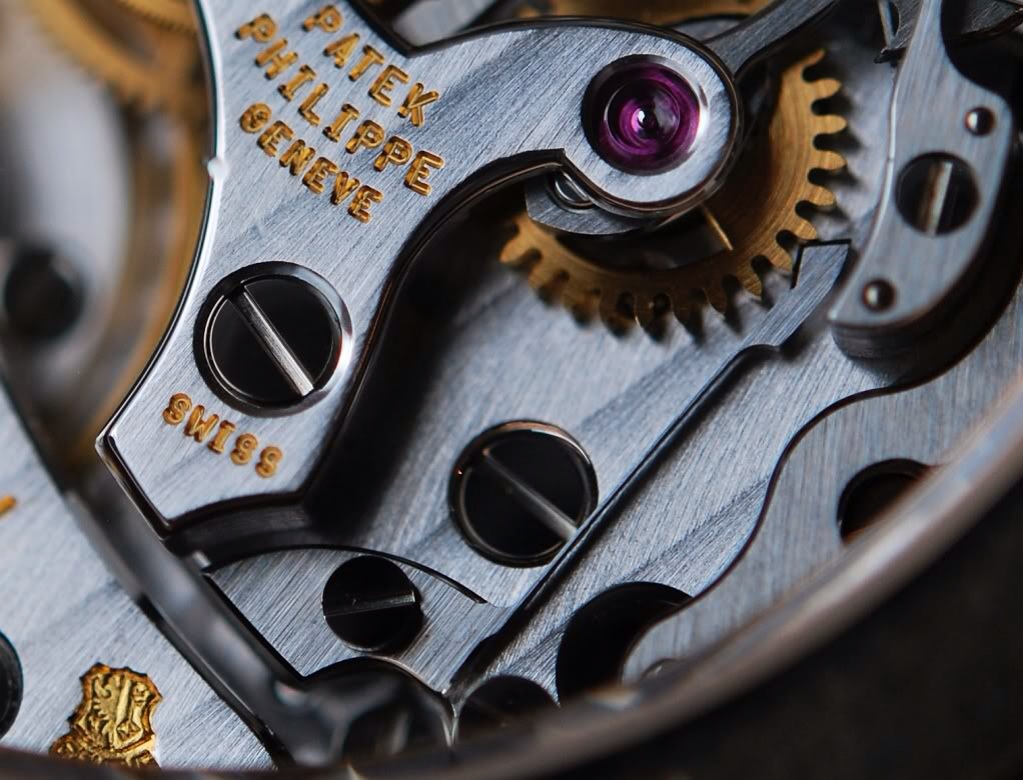
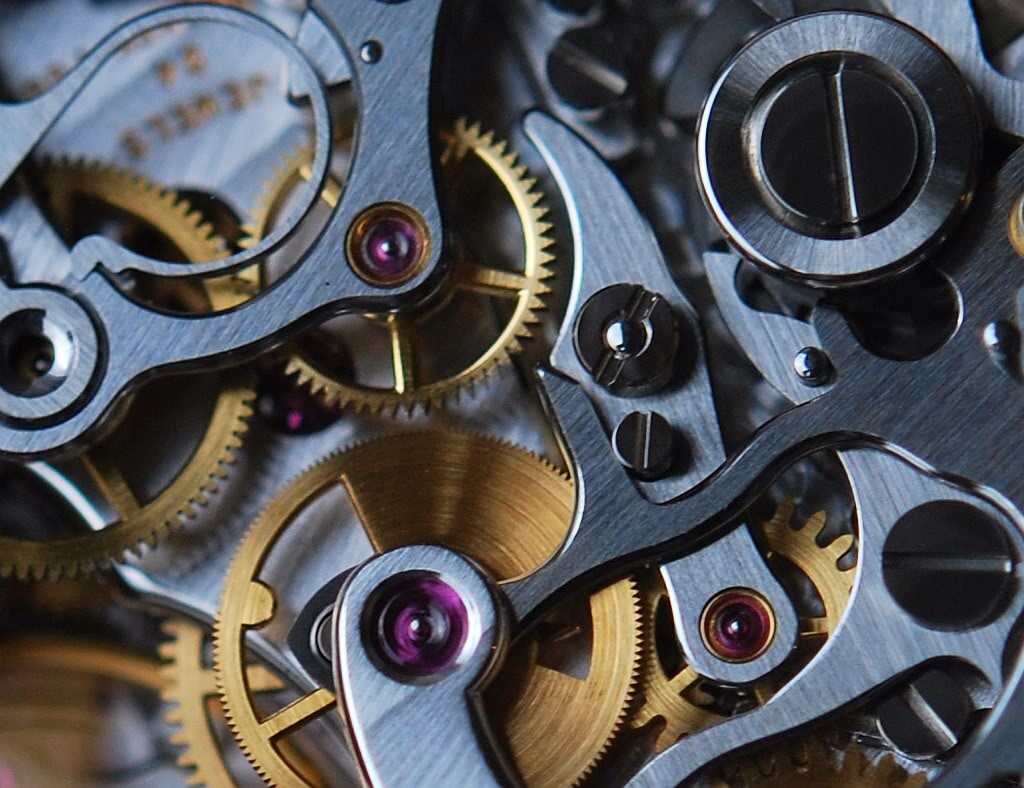
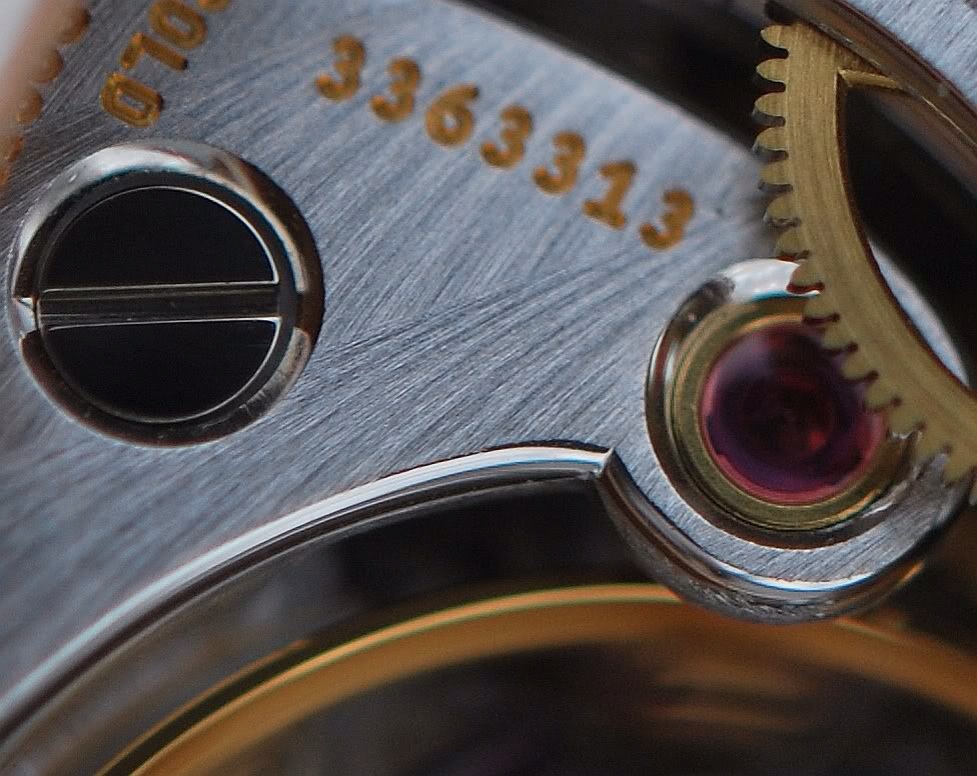
Great pics, I love a good movement macro shot myself. Here's a few
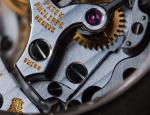


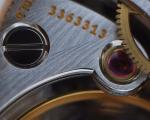


 1 point
 -
Happy birthday mate!1 point
-
Lucky bastard 24 bloody hell that seems a looong time ago ! Really nice prezzies there mate, love that winder too! Have a fantastic day mate and enjoy it1 point
-
Happy Birthday mate Present from Mum and Dad or from yourself ? Its a great way to keep your watches...but means you ahve to keep a good stock... Have a great day mate.... http://smileys.smileycentral.com/cat/F/transport.swf?code=F/0/152&partner=ZSzeb110_ZSYYYYYY5UUS1 point
-
Happy Birthday! I wish you a great day and an exciting year to come!1 point
-
Quite a collection for a young gun. Happy Birthday!1 point
-
Just peed my pants! Guess I'll wait for V7.2 which comes with gen parts+movement1 point