When you buy through links on our site, we may earn an affiliate commission.


freddy333
-
Posts
15,787 -
Joined
-
Last visited
-
Days Won
194
Everything posted by freddy333
-
what size drill bit for countersinking 24-703 case tube?
freddy333 replied to cableguy's topic in The Rolex Area
Sorry, I was going to add that the exact size for this bit is not that important since you are only countersinking and NOT drilling all the way through. The countersink is like a circular indentation around the actual hole where the tube sits so the crown can screw all the way down on the tube and fit to the case properly. -
what size drill bit for countersinking 24-703 case tube?
freddy333 replied to cableguy's topic in The Rolex Area
4.33mm -
Nanuq -- For perspective, I paid just under $100 for a NOS, round 3s white 3035 datewheel for my 16014, so a silver wheel for only a bit more seems like a steal. Sorry to hear you were not the lucky one who ended up with it.
-
Laz -- If you are unable to source a replacement dial, you might check with Ziggy to see what he can do. In addition to being a great watchmaker, he is also an artist and he may have another option for you. I believe he is on holiday until next month though.
-
100% gen 16014 franken-just
-
what size drill bit for countersinking 24-703 case tube?
freddy333 replied to cableguy's topic in The Rolex Area
Ditto - 11/64" -
I usually reserve this comment for women, but I have to say 'Nice pair you have there!'
-
dvn - I prefer stainless steel, but that is definitely a beautiful watch. And the pictures are not bad either.
-
I think the 703 crown is deeper than the earlier 701 and someone said they had to file down the 703 tube to get the earlier crown to completely screw down. You might use the search feature to try to find that thread.
-
Thanks. Reshaping a few of the bent parts was a bit difficult (it takes a bit of ingenuity & alot of patience), but most of the work just takes tape & time. Even without tightening the loose parts, you can achieve 90% of the final appearance by polishing the polished parts with green rouge & a dremel and brushing the brushed parts with the Bergeon pad. Those two things produced the most noticeable improvements.
-
I am not worried about damaging the existing tube (if I am replacing it), but I am worried that the old tube may break off in the hole or that I may damage the case threads when removing the epoxied in tube. When I have used epoxy to glue in screws before (I used to rebuild motorcar engines), it was only used as a last resort, because the screw would often not be removable after that. At least not without damaging the threads or risking breaking the screw off in the hole. That is what I am worried about.
-
I thought of using epoxy, but what do you do when you need to replace the tube the next time? I still have to wonder what Rolex uses when they fit one of these splineless tubes? There must be a tool for that.
-
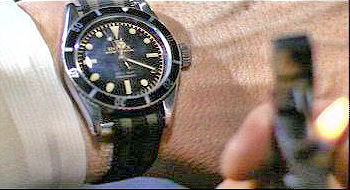
Probably not. Here is Connery's Sub from Goldfinger

-
You just gave me an idea -- A small tool like a micrometer that has expanding jaws used to measure the inside diameter of a cylinder or tube would do the trick. You would slide the jaws inside the tube, expand them until they press firmly against the inside walls of the tube and then screw the tube into the case. Once installed, you just collapse the jaws and remove the tool. If such a tool exists, that would do the trick perfectly. Now does anyone know of a source for such a device?
-
You may have enough parts to decorate a Christmas tree.
-
Trib -- I am not sure what to think about that stack, but it sure makes for an interesting picture.
-
TWS -- I agree with you about the problems with using a crown to install the tube. You cannot really screw the tube down properly with a crown, because either the crown will bottom on the case before the tube is fully tightened, or the tube will partly (or fully) unscrew when you unscrew the crown. And although I have been able to install a couple of Twinlocks with a rat tail file, the file has gouged (damaged) the inside of both tubes. So there has got to be a better way to install these splineless tubes since Rolex QC would never allow a watch to leave their premises with a damaged tube. Anyone else have any info on this?
-
Just wondering if there was a special tool or procedure Rolex used to remove & install these splineless tubes? I have both of the standard Rolex tube tools--1 for spines around the opening of the tube (new style) and 1 for splines around the inside of the tube (old style), but neither tool works with these splineless tubes (either the tool just spins freely inside the tube or it does not fit into the hole in the tube). I have to fit a couple of splineless 6mm Twinlocks and I would rather not have to choose between scratching/damaging the inside of the tube or relying on glue as the only options for keeping the tube in the case. I know we have all come up with different methods for R&Ring tubes (rat tail file, hex driver, etc.), but all of these run the risk of damaging the inside of the tube. I am sure RSC did not remove & install these tubes this way. They must have had a better way to do it. Is there any reference to the required tool or procedure in your documentation?
-
I do not consider a watch to be working unless it keeps proper time on my wrist. And, yes, the watch is working. The winder, on the other hand (no pun intended), although I have not tested it on my wrist, is definitely not working.
-
Hahaha, sorry.
-
Not so fast, my little timekeeping Grasshopper. The watch is fine, it is your winder that died (Sorry for poor picture quality - this is an enlargement from another picture) After 40 turns of the stem (by hand), the Daytona springs to life & the beat goes on
-
If you really like the Datejust, then the movement is not too expensive (if you are patient, you can occasionally pick them up for as little as $900). The first 'Swiss' rep I ever bought (in the early 80's) was a two tone Datejust with a gold linen dial powered by an ETA I always loved the Datejust design (especially the linen dial), but I was never really comfortable wearing yellow gold. And it sure is nice not to have to worry about fitting datewheel overlays or drilling lugs or modifying clickstops or matching crystals, etc. So this one is alot more comfortable (since the only gold on it is the bezel and it is white gold) and it should last for a few years
-
Thank you Manuel. It is a very comfortable watch and it has been getting alot of wrist time since I completed it. Surprisingly, for such a simple & classic model, I have gotten more compliments on this watch than any other watch I own (except for the Flytimer). Not sure why, but definitely a keeper.
-
Date overlay from Cubics-Work... Help?
freddy333 replied to the playful eyes's topic in The Rolex Area
Getting an overlay to fit below the dial has nothing to do with luck. You must first remove all of the paint on the original datewheel before you apply the overlay to it. Some people sand the paint off, I just used my trusty can of paint remover -- it took all of 15 minutes for the stripper to remove all of the paint down to bare metal. Then I applied the overlay and reinstalled the datewheel. It fit below the dial without any problem. However, keeping the overlay stuck to the datewheel & getting all of the dates on the overlay into the correct position (and keeping them there!!!!!) so all of the dates appear correctly placed in the center of the dial window is another story. In the end, I removed my overlay and reinstalled the original MBW datewheel. I got tired of spending so much time opening the watch and re-tweaking the overlay and decided to just wait until someone comes up with a proper metal datewheel that replaces the original metal datewheel instead of gluing an overlay on top of it. -
This one's been simmering on the back burner for a while...
freddy333 replied to a topic in The Rolex Area
Pug -- Why would you want one of these old things when you could have one of these new things